Summary
In this module, you learned the basics of Git. Git is originally (and largely still is) a command-based application, so it is important to know the basic commands, certainly if you ever need them in a PowerShell script. Visual Studio Code has a GUI built for some of the commands, and this makes it easy to use them.
You learned how to install and configure Git. It's important you set your username and email before you start working with Git. Do this on every machine where you use Git. Settings in Git are stored in three levels: system, global, and local.
You learned about the differences between a local and a remote Git repository. To start a local repository, you can use the init command where you later use the remote command to link it to a remote repository, or you use the clone command to create a local repository based on a remote repository.
An AL project is typically created using these basic steps:
Someone creates a new Azure DevOps project. This automatically generates a remote Git repository.
Someone creates a new AL Extension project on their local machine. This person also uses the init command to initialize that AL Extension project as a local Git repository.
The remote command is used to link the local repository to the remote repository.
All files are pushed to the remote repo. A .gitignore file is used to filter out .app files and some other .json files.
Once pushed, all the other developers can go out and use the clone command to download the files on their local machine.
New changes can be developed and always be synchronized with the pull and push commands.
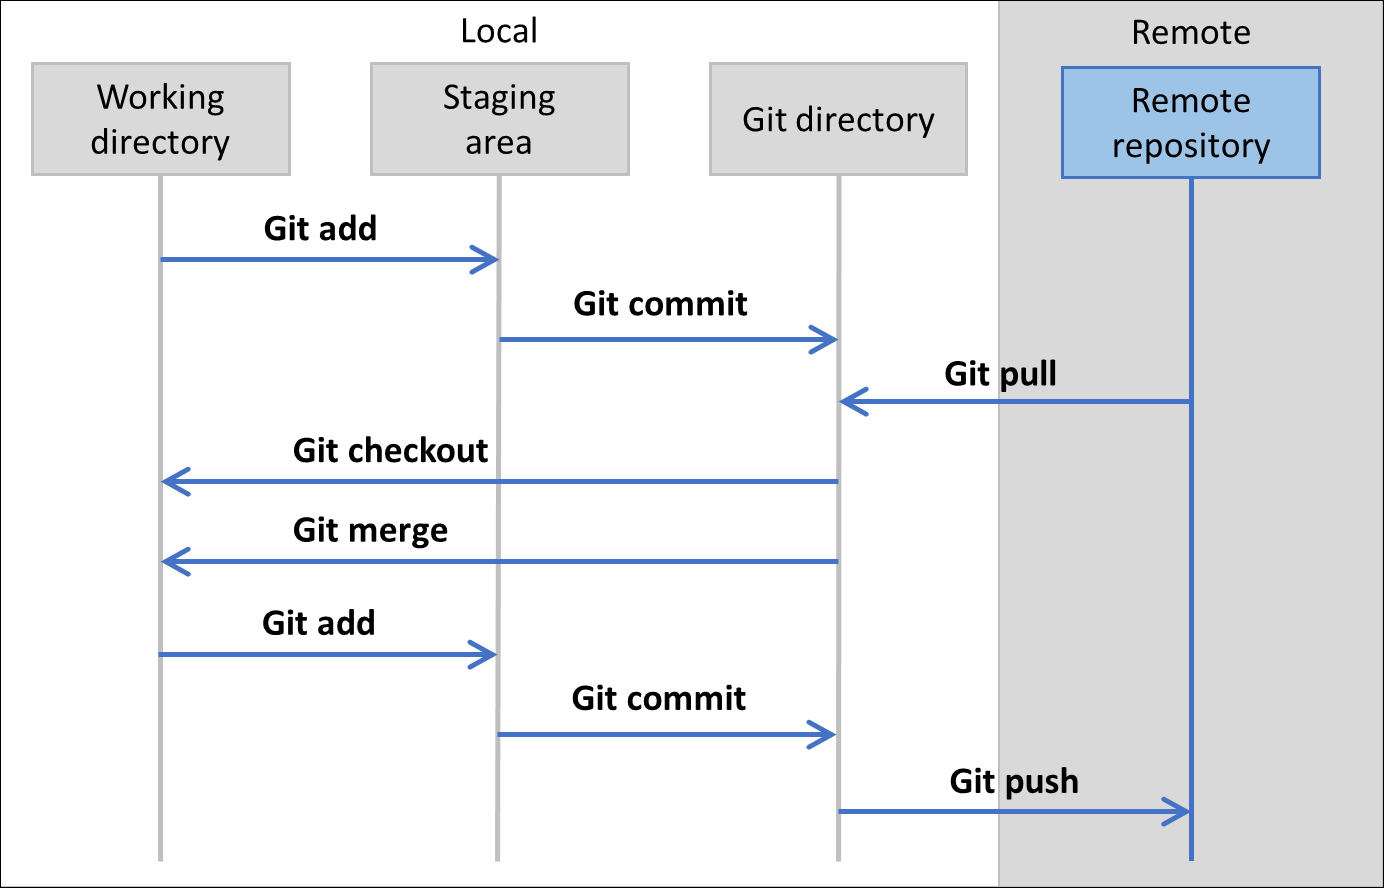
Remember to use the staging area before you can commit your changes to the Git directory. With the fetch command, you can check if there are incoming changes from the remote repository before you actually need to download them.
