Note
Access to this page requires authorization. You can try signing in or changing directories.
Access to this page requires authorization. You can try changing directories.
Important
Restricted SharePoint Search is retiring. Starting July 31, 2026, new enablement is blocked. Use comprehensive data controls such as Restricted Content Discovery (RCD) for content discoverability.
Restricted SharePoint Search is designed for customers of Microsoft Copilot Chat and agentic experiences. It's designed as a short-term solution to allow time for your organization's administrators to thoroughly review and audit site and file permissions, but it's not intended or scalable for long-term use. Comprehensive data security solutions are available, including SharePoint Advanced Management and Microsoft Purview.
As a SharePoint Administrator or other administrator in Microsoft 365, you can set up an allow list of Restricted SharePoint Search with a maximum of 100 selected SharePoint sites. For Copilot and organization-wide search, besides the contents that users already have access to, either by direct sharing, visiting, or owning, your organization's users can only reach the sites on the allow list, honoring these sites' current permissions.
Setting up the allow list in Restricted SharePoint Search gives you time to review and audit site permissions. But which sites should you include in the allow list? This article introduces strategies and techniques for curating the allow list.
Steps to create the curated allow list
To create a curated allow list for Restricted SharePoint Search, start by creating an initial list of sites. Then work with your site admins and stakeholders to assess permissions and review the sites. Finally, apply the list with PowerShell scripts as a SharePoint Administrator or above in Microsoft 365.
Step 1: Get an initial list of sites
Every organization might have different criteria on what sites you choose to be searched across your organization and discoverable by Copilot. You can use SharePoint Admin Center (SPAC) features to identify sites that can be part of the allow list based on your own criteria. To keep the list manageable, start with the following two types of sites for the allow list:
The "Known" sites: You and your SharePoint site admins already know a set of sites from your organization that are safe to participate in organization wide search and the Copilot experience. Include these sites in the allow list.
The top active and shared sites: The allow list affects what users can see in their organization-wide search results and their Copilot experience. To optimize users' search and Copilot experience, include the top active and shared sites in the allow list. Depending on your license, you can use either the SharePoint Admin Center (SPAC) or the SharePoint Admin Center Data access governance (DAG) Activity(sharing) report to identify the most active and shared sites.
Step 2: Review site permissions
Once you have the list of sites (up to 100), make sure the site permissions and content controls are implemented well enough to make them visible for search and Copilot experience. Work with your site admins and stakeholders to assess permissions and review the sites.
Note
The limit of up to 100 SharePoint sites includes Hub sites, but not their sub-sites. When you enable Hub sites, the sub-sites under a Hub site are included in the allow list but don't count towards the 100-site limit. So if you're picking Hub sites, make sure all the child sites have proper permissions.
Step 3: Use PowerShell scripts to apply the allow list
After you review permissions in your curated sites, use PowerShell scripts to turn on Restricted SharePoint Search, add sites, and remove sites. You can also use PowerShell scripts to get the list of all sites in your allow list.
Find the most active and shared sites
You can find the most active sites by using the SharePoint Admin Center (SPAC). If you have either Microsoft 365 E5 licensing or Microsoft - SharePoint Advanced Management, you can also use SPAC DAG to find the most shared sites.
Using the SharePoint admin center: If your organization has SharePoint, you have access to SharePoint admin center. Use the Active sites feature in the SharePoint admin center to get the list of sites that had the most page views and files in the last 30 days. This activity can indicate the list of sites that interest the broadest possible audience in the organization.
Using the data access governance activity (sharing) report to identify sites that are shared most in the last 28 days.
Use the SharePoint admin center to find the most active sites
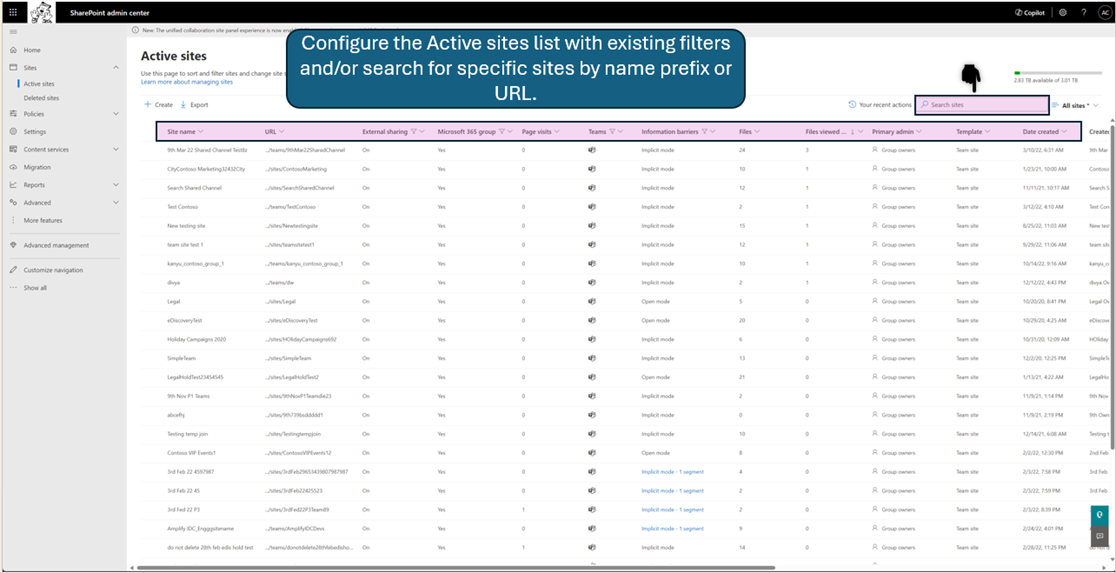
Admins can use the SharePoint admin center features to identify sites that can be part of the allow list based on their criteria. The Active sites page in the SharePoint admin center lets you view the SharePoint sites in your organization. Based on your organization's needs, you can sort and filter sites based on columns such as Last activity, Page views, and Page visits. You can search for sites, and customize the columns and views.
In the SharePoint admin center, in the navigation pane, select Active Sites.
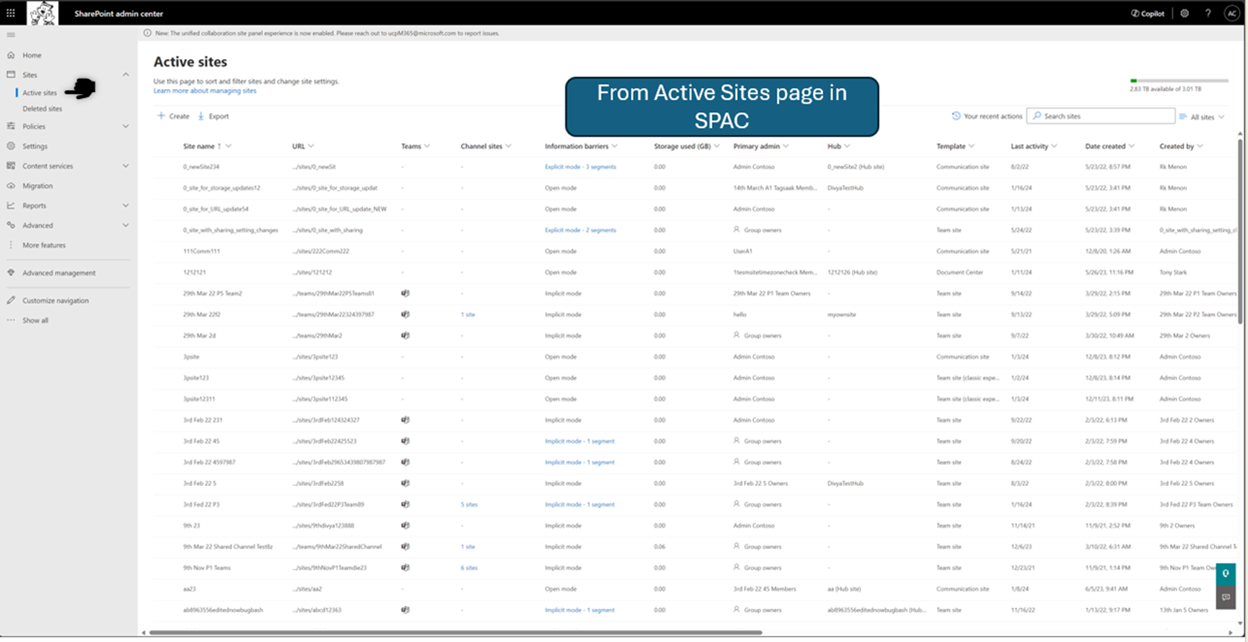
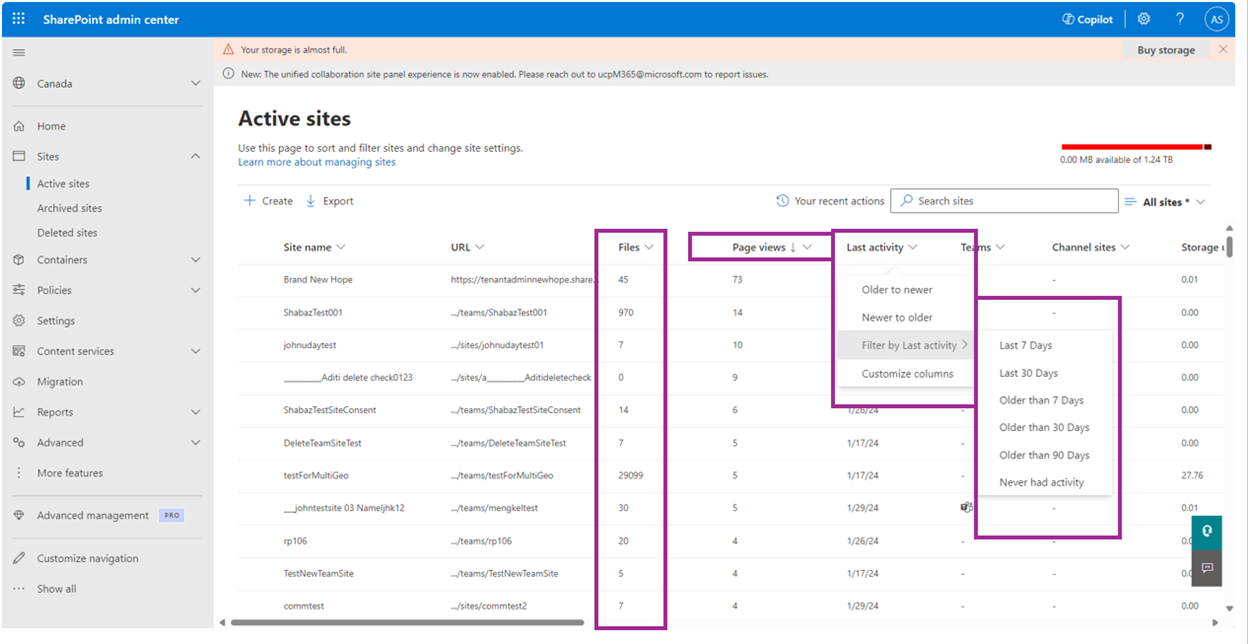
Using the sorting and filtering functionality of the Active sites you can curate top 100 sites based on your organization needs and create a custom view.
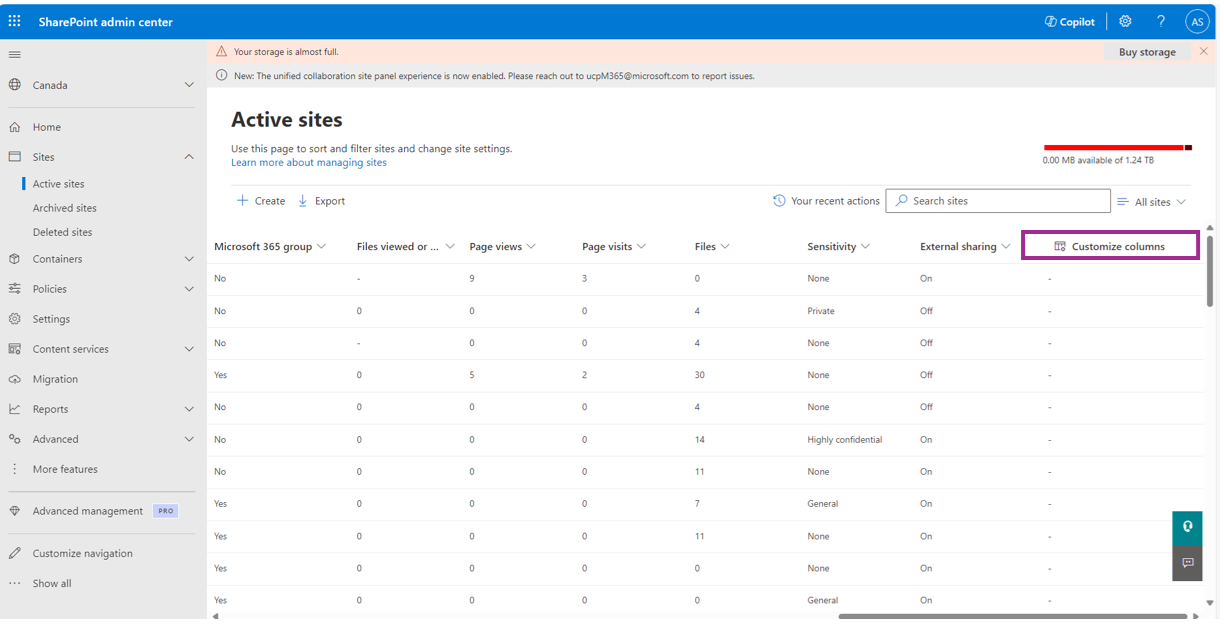
Move the columns by scrolling to right and selecting Customize columns.
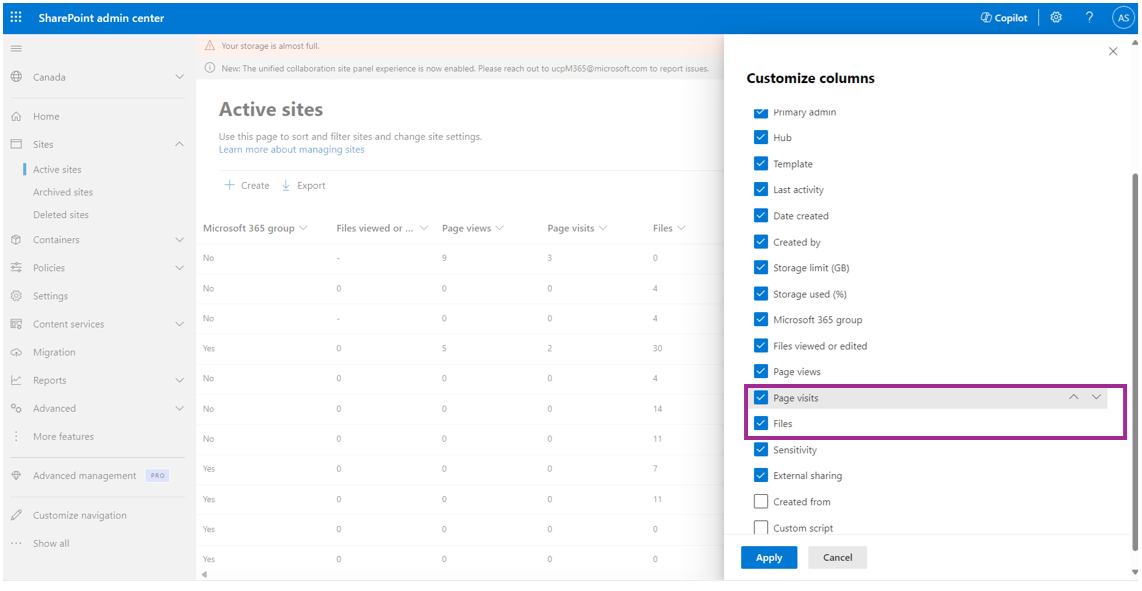
Use the up and down arrows next to each column's name to move up the Page Views and Files columns next to the URL, so it's easy for you to see the important columns together for analysis.
To create custom view of the top 100 sites sorted by page views for last 30 days, follow these steps:
Select the arrow next to the column header of Page views and select Large to Small.
Select the arrow next to the column header of Last activity select on the Filter by last activity > Last 30 days.
Use the other columns to sort, or filter based on your needs.
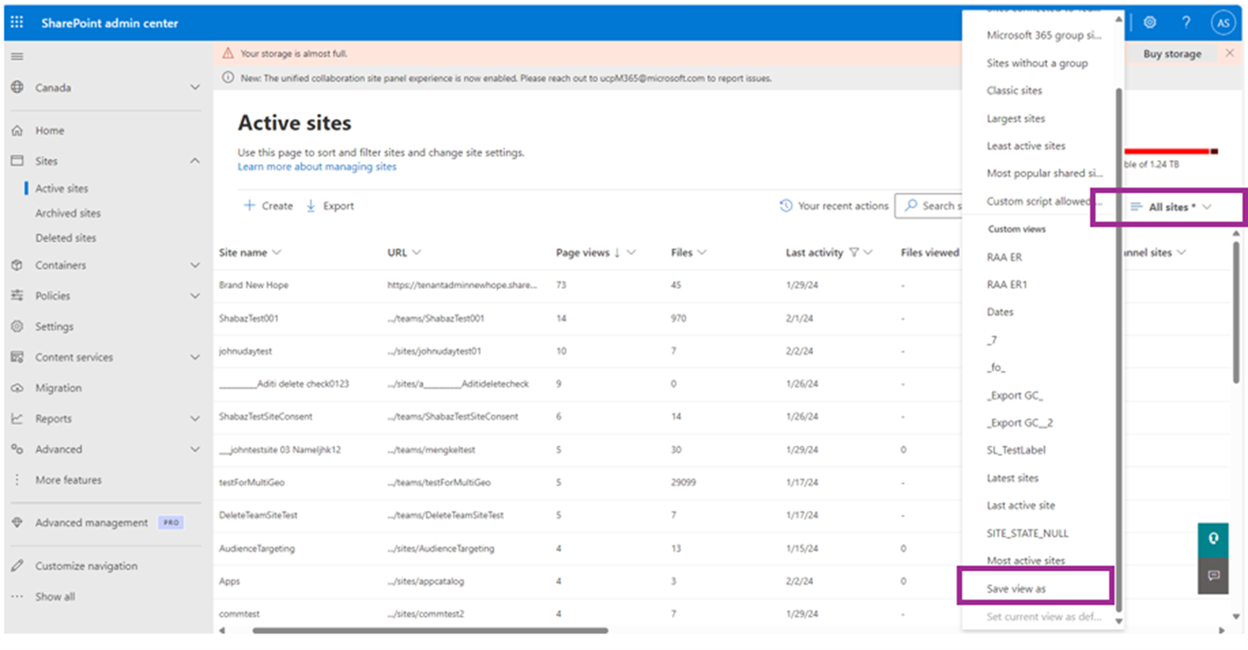
Create a custom view based on your current setting, and save it for future use. To create a custom view, select All sites > Save view as.
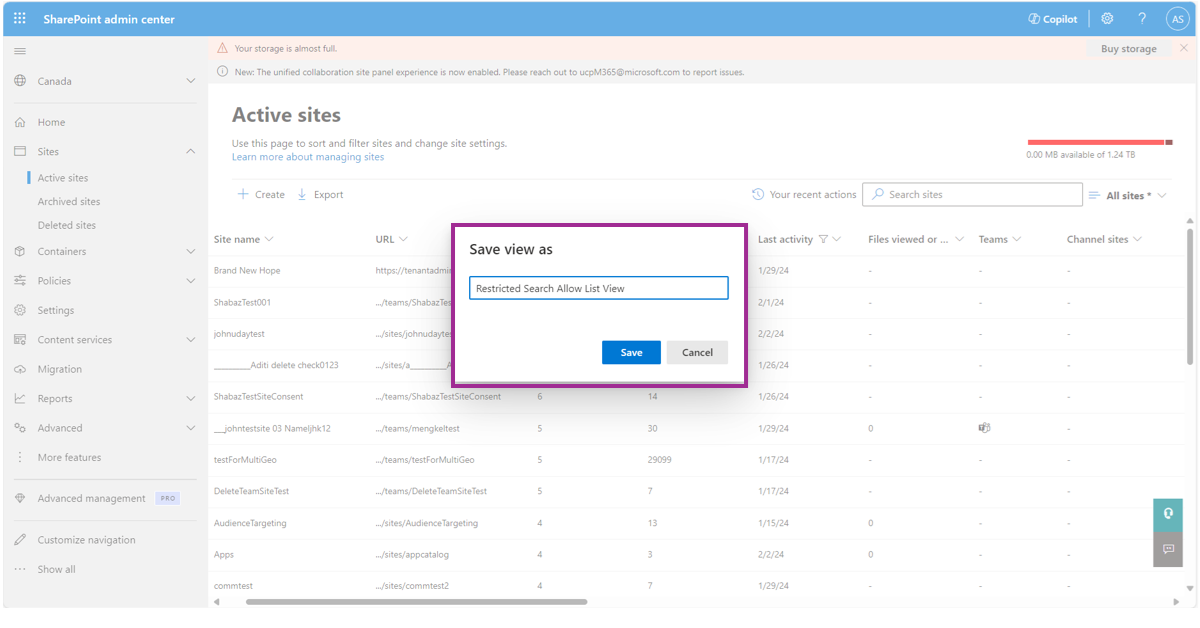
Specify a name for your custom view:
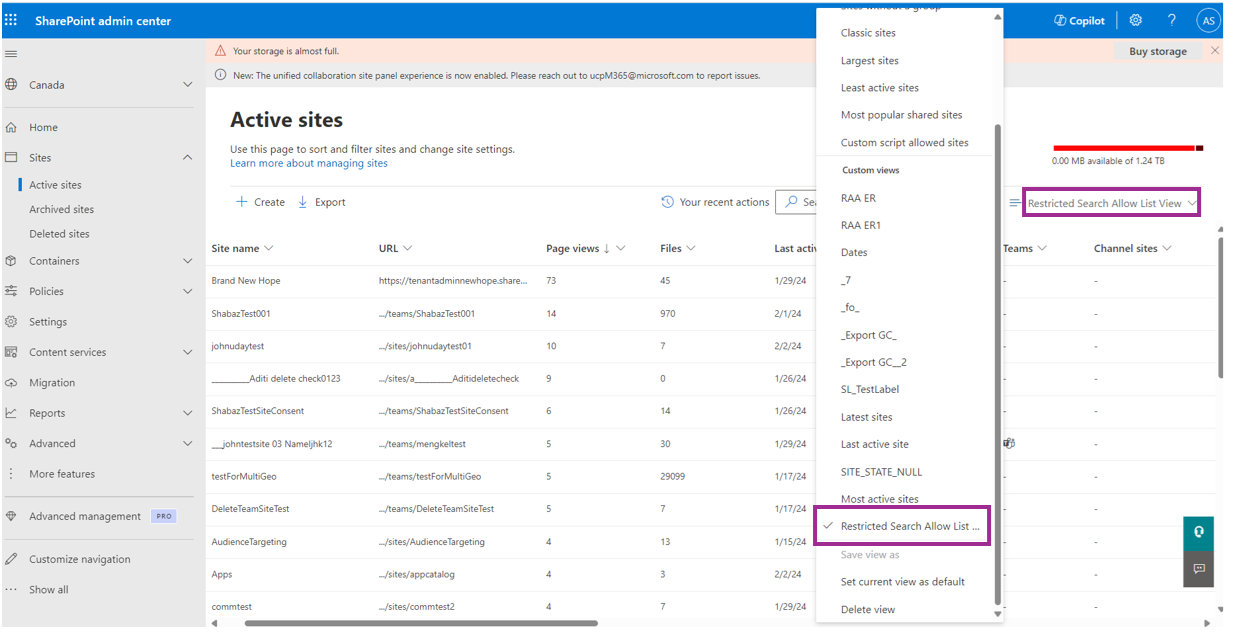
Your saved custom view is now available for you to choose from the drop-down menu next time.
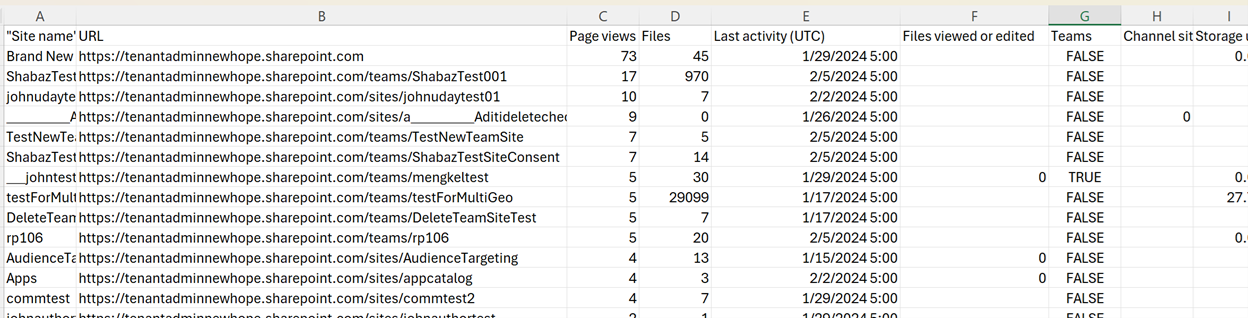
Export the sites and manage the list in CSV file that you can use to add to the list by selecting the Export tab.
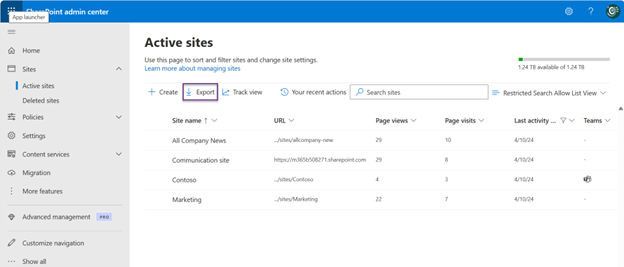
Your exported CSV file looks similar to the following CSV file:
Use the data access governance activity (sharing) report to find most shared sites
SharePoint Advanced Management includes data access governance reports for SharePoint sites. This report helps you identify potential sites that are active and shared in the last 28 days.
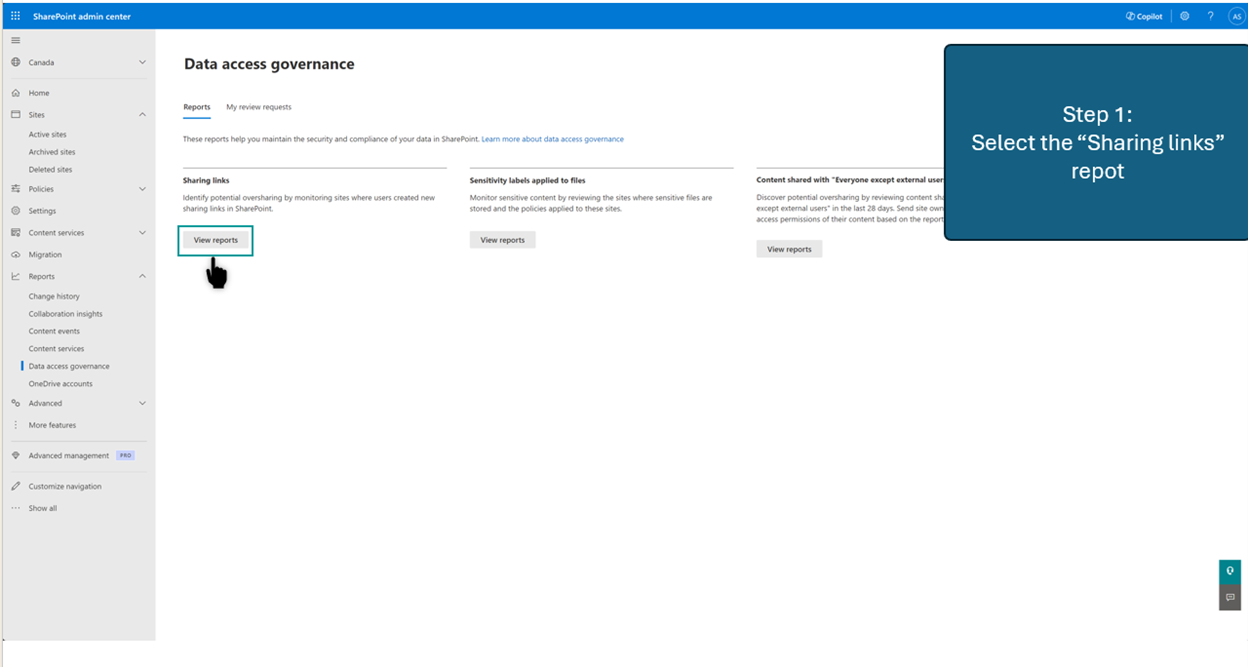
In the SharePoint admin center, select Reports > Data access governance. Select the Sharing links report.
In the pane of the Sharing Links page, select the Anyone links report.
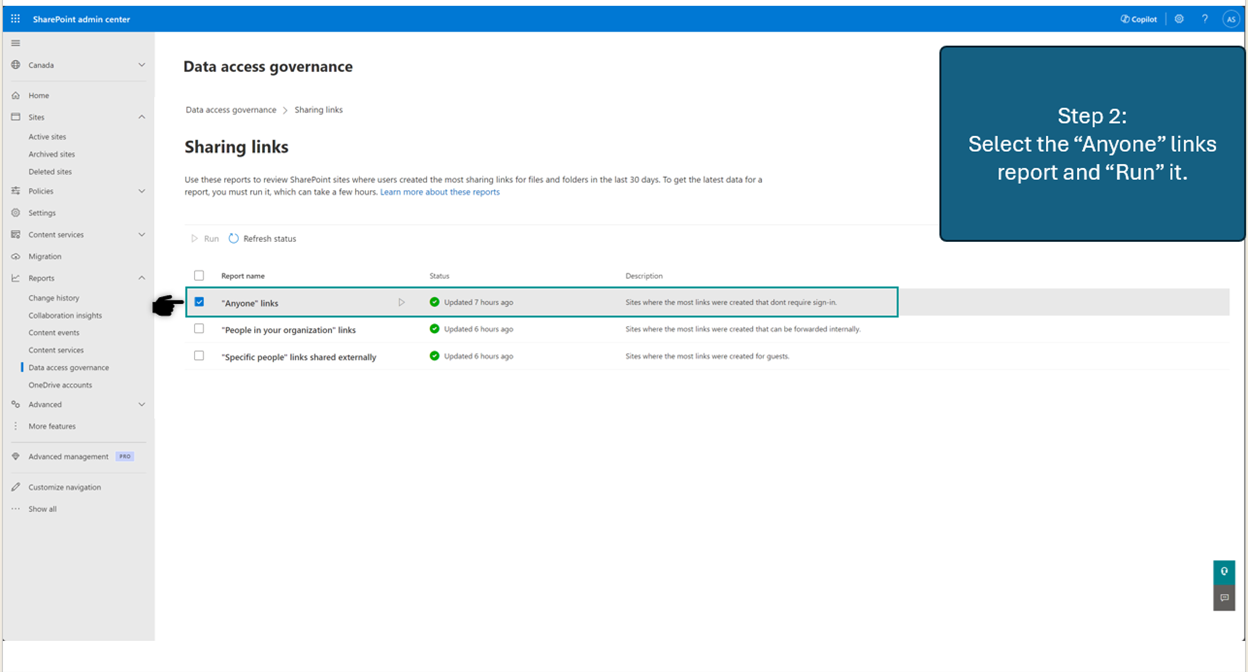
The "Anyone" links report gives you a list of sites in which the highest number of Anyone links were created. These links let anyone access files and folders without signing in. These sites might be great candidates to allow in tenant/org wide search.
Resources
Get ready for Microsoft Copilot with SharePoint Advanced Management