Note
Access to this page requires authorization. You can try signing in or changing directories.
Access to this page requires authorization. You can try changing directories.
Important
Due to recent program changes, your program experience will differ depending on when you joined Microsoft for Startups. The Azure Portal, documented below, is the primary experience if you joined Microsoft for Startups after May 29, 2026.
Overview
The Azure Portal is your gateway to managing your Microsoft for Startups subscription, startup credits, and program benefits. From the portal you can:
- Activate and manage your Azure credits and subscriptions
- Track your application status and credit milestones
- Access program benefits and resources
- Manage your team and account settings
- Submit support requests for Azure technical issues
Your Visits to the Azure Portal
Your Azure Portal experience varies based on your application status and whether it is your first visit. Below are the scenarios you may encounter.
While Your Application Is Under Review
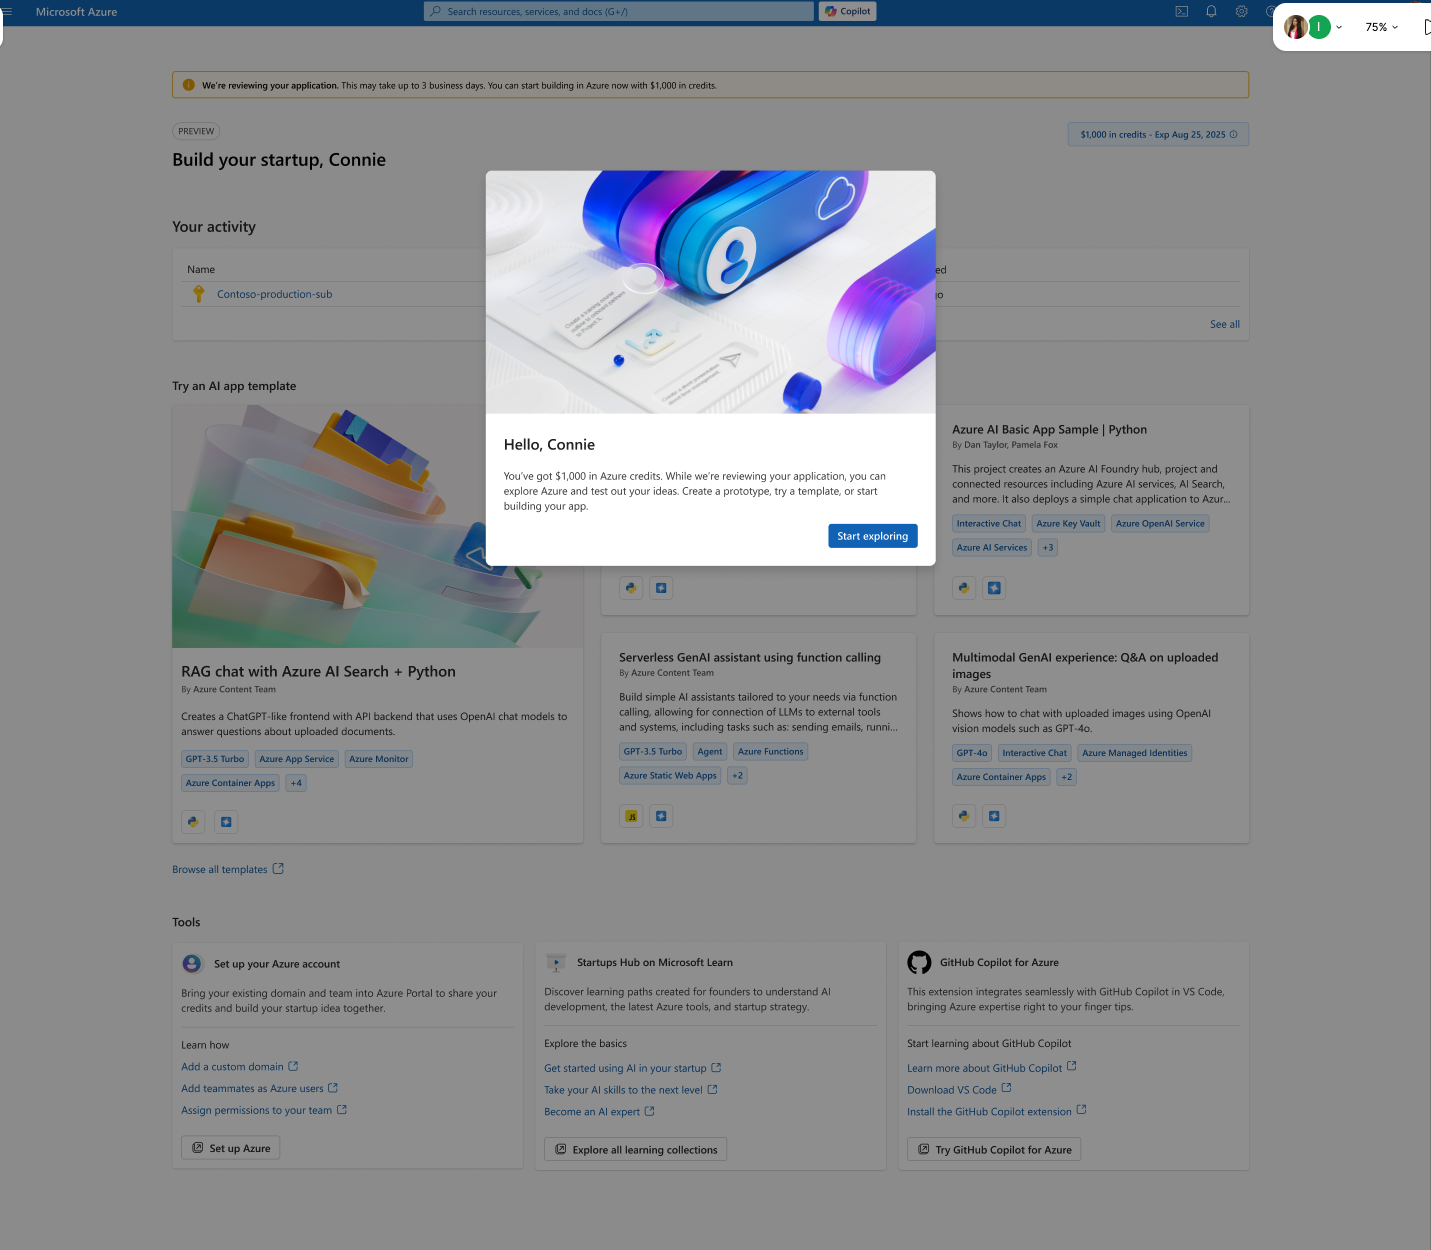
After submitting your Microsoft for Startups application, you can begin exploring the Azure Portal with $1,000 in starter credits while your application is being reviewed.
First Visit: When you first sign in, you will be greeted with a "Hello" welcome modal showing your starter credit balance, along with a yellow banner at the top indicating that your application is under review.
Returning Visits (Pending): Once you have dismissed the welcome modal — whether on your first visit or returning later — your dashboard appears clean with the yellow "We're reviewing your application" banner remaining visible until your application status changes.
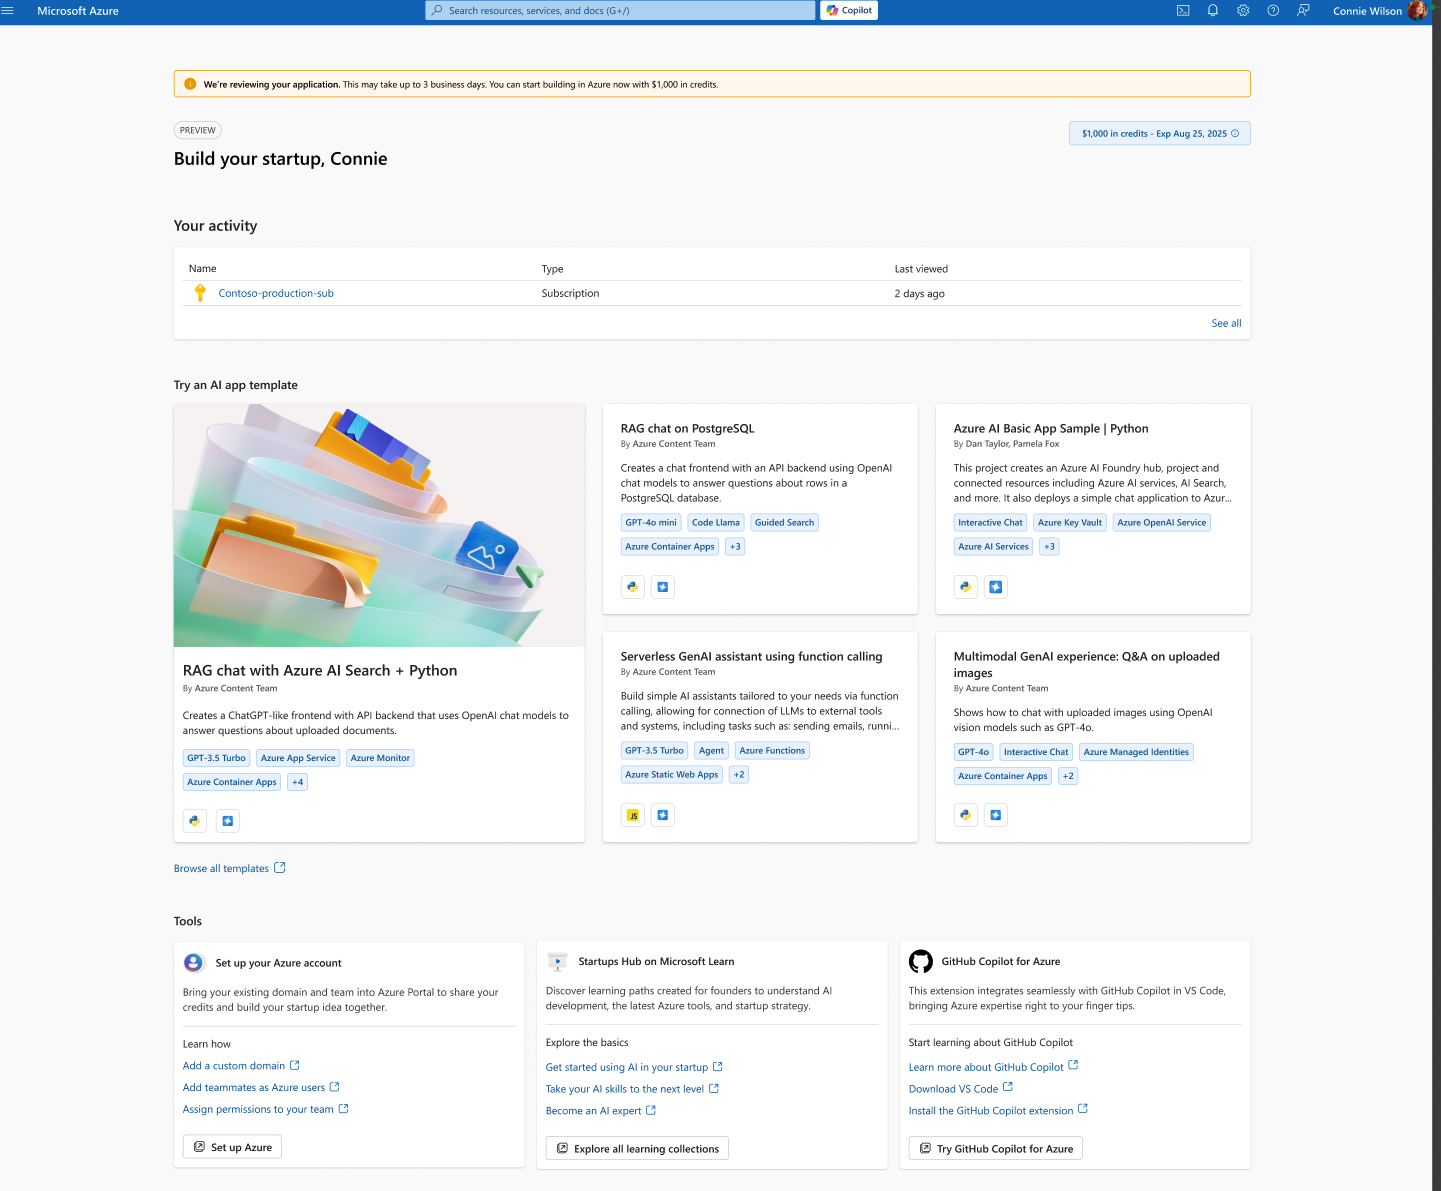
Note: During the review period, you can use your $1,000 in starter credits to begin building and testing in Azure. The review typically takes up to 3 business days.
Once Your Application Is Approved
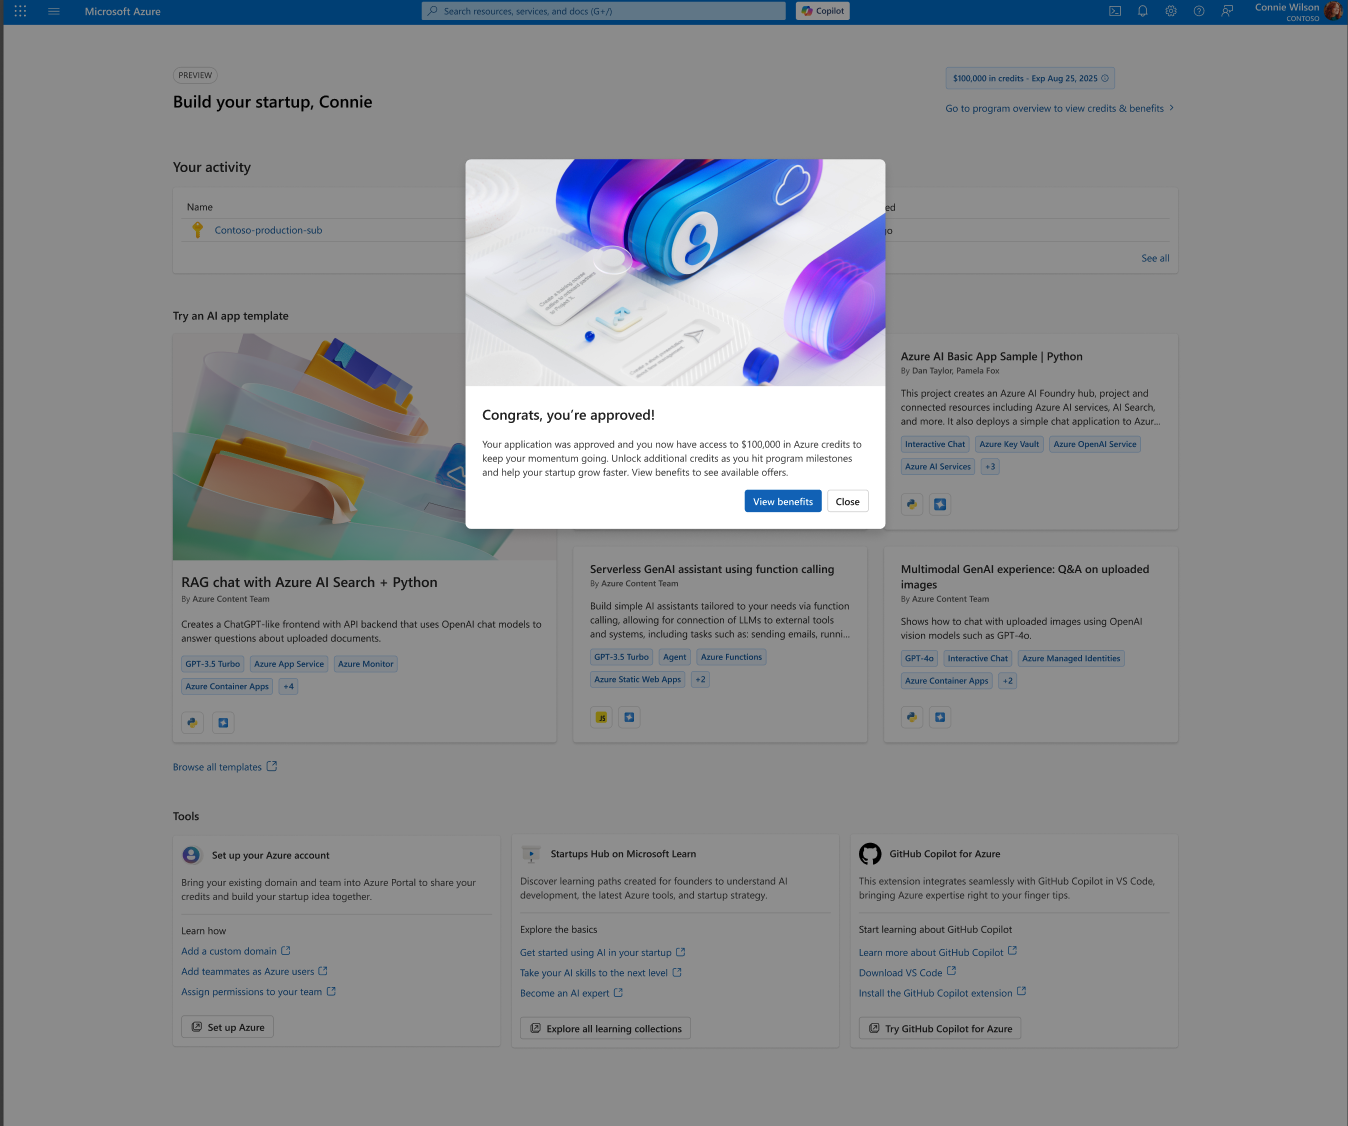
When your application is approved, you will receive expanded credits and access to the full Microsoft for Startups program benefits. Your first visit after approval includes a guided onboarding tour.
First Visit After Approval — Approval Modal: You will see a "Congrats, you're approved!" modal confirming your access to $100,000 in Azure credits.
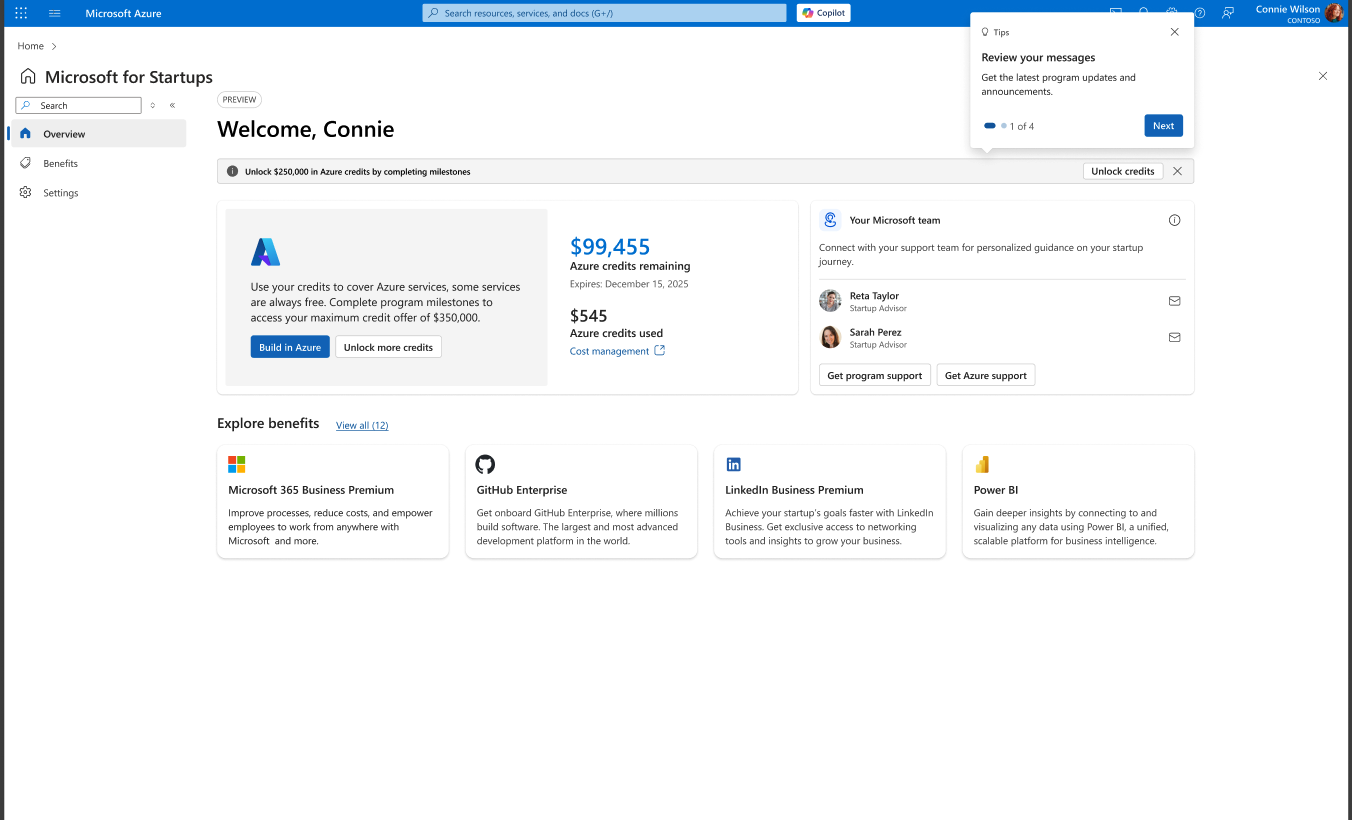
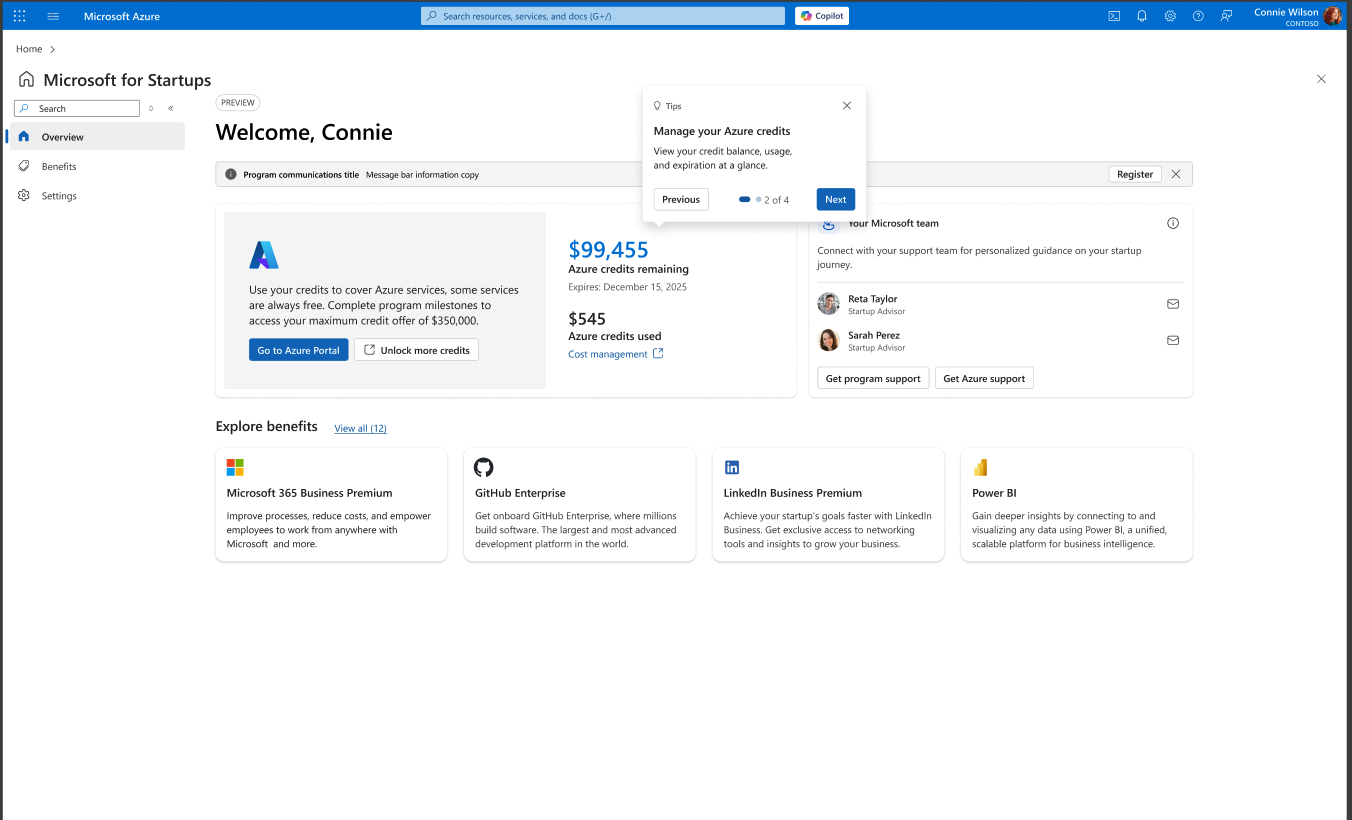
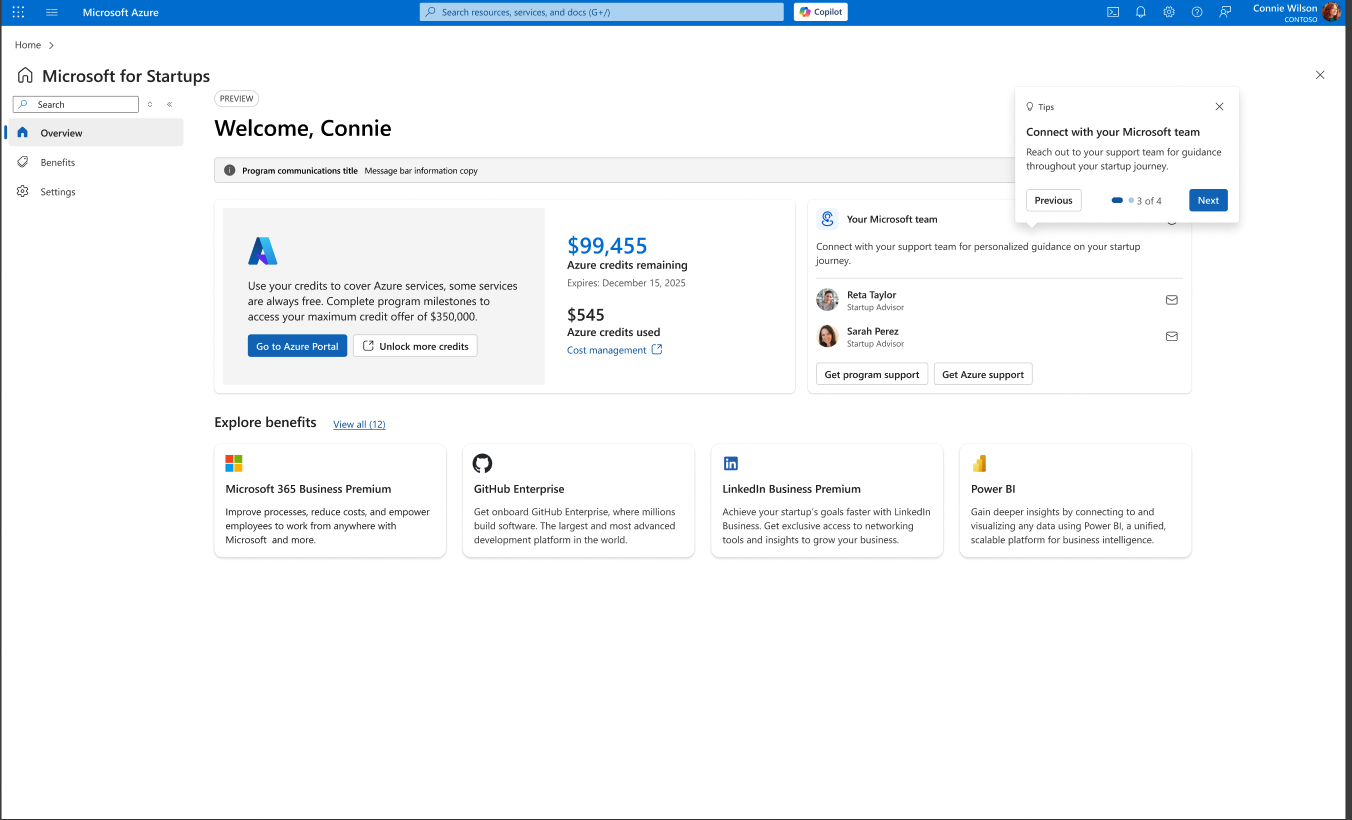
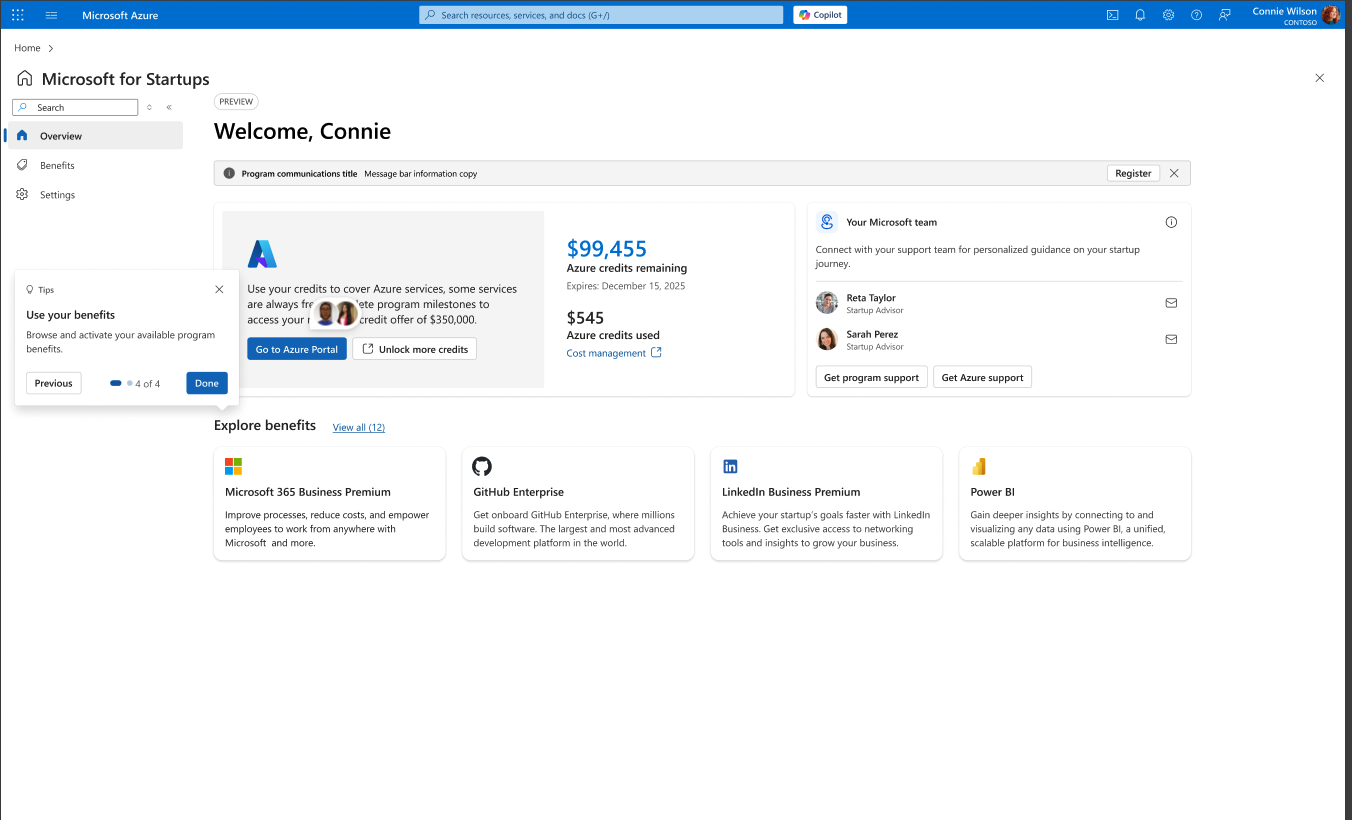
After dismissing the modal, you will be guided through a 4-step Tips walkthrough on the Microsoft for Startups Welcome page.
Tip 1 of 4 — Review your messages: Stay informed about the latest program updates and announcements.
Tip 2 of 4 — Manage your Azure credits: View your credit balance, usage, and expiration at a glance.
Tip 3 of 4 — Connect with your Microsoft team: Reach out to your support team for guidance throughout your startup journey.
Tip 4 of 4 — Use your benefits: Browse and activate your available program benefits. Click "Done" to complete the tour.
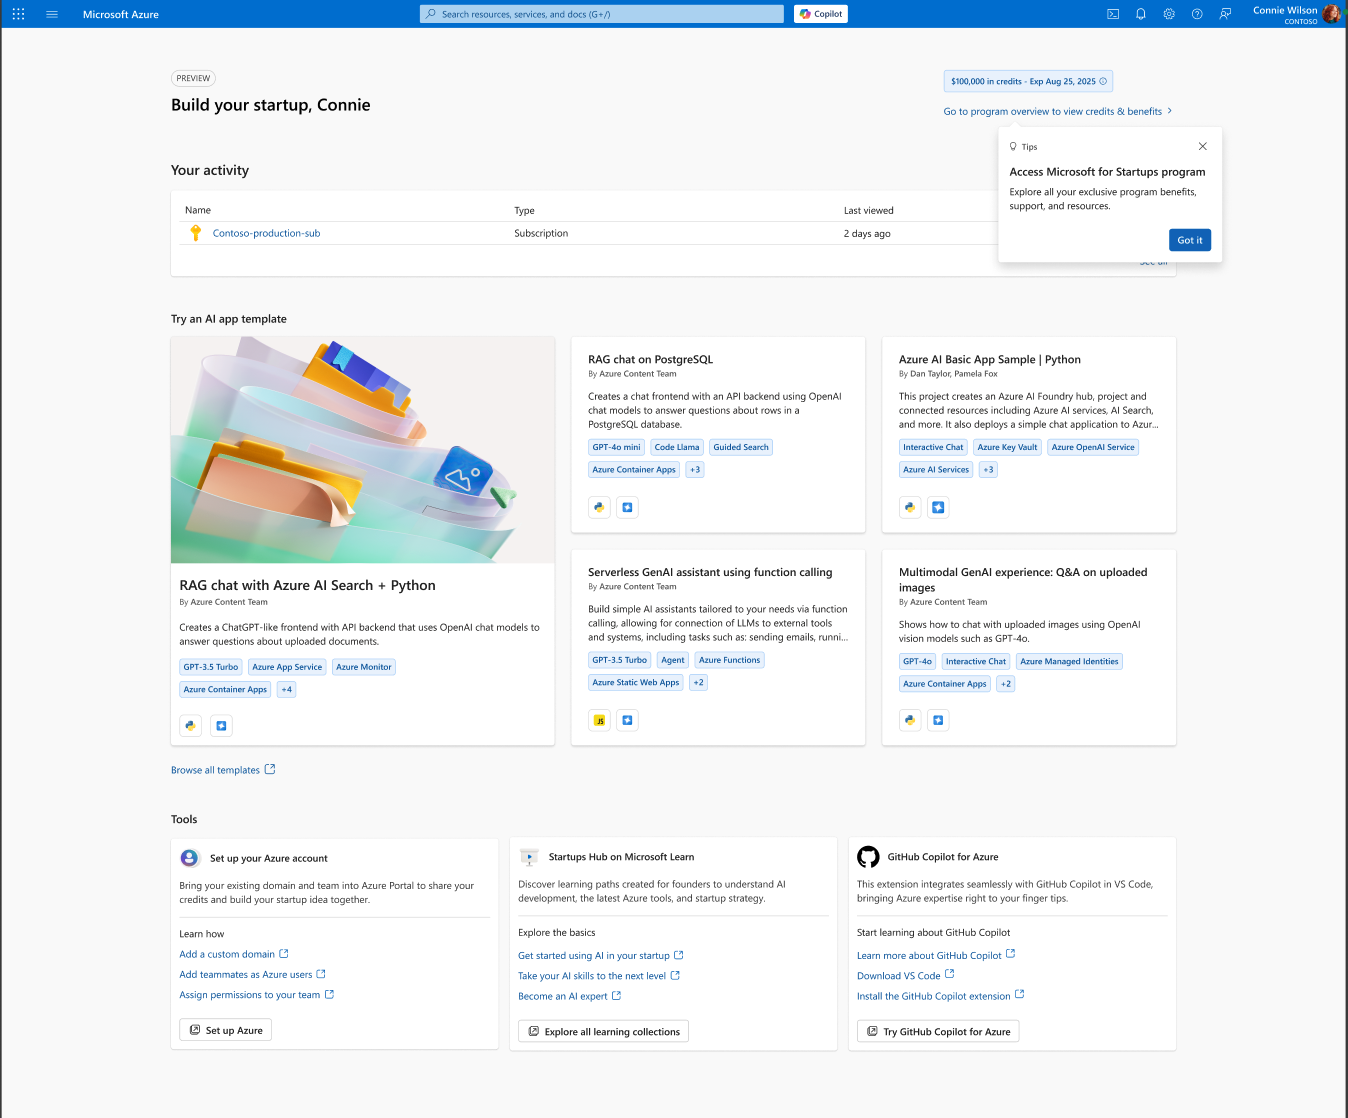
Build Your Startup Page — Tips Tour: Navigating to the "Build your startup" page reveals one additional tip: "Access Microsoft for Startups program," which highlights how to access all of your exclusive program benefits, support, and resources.
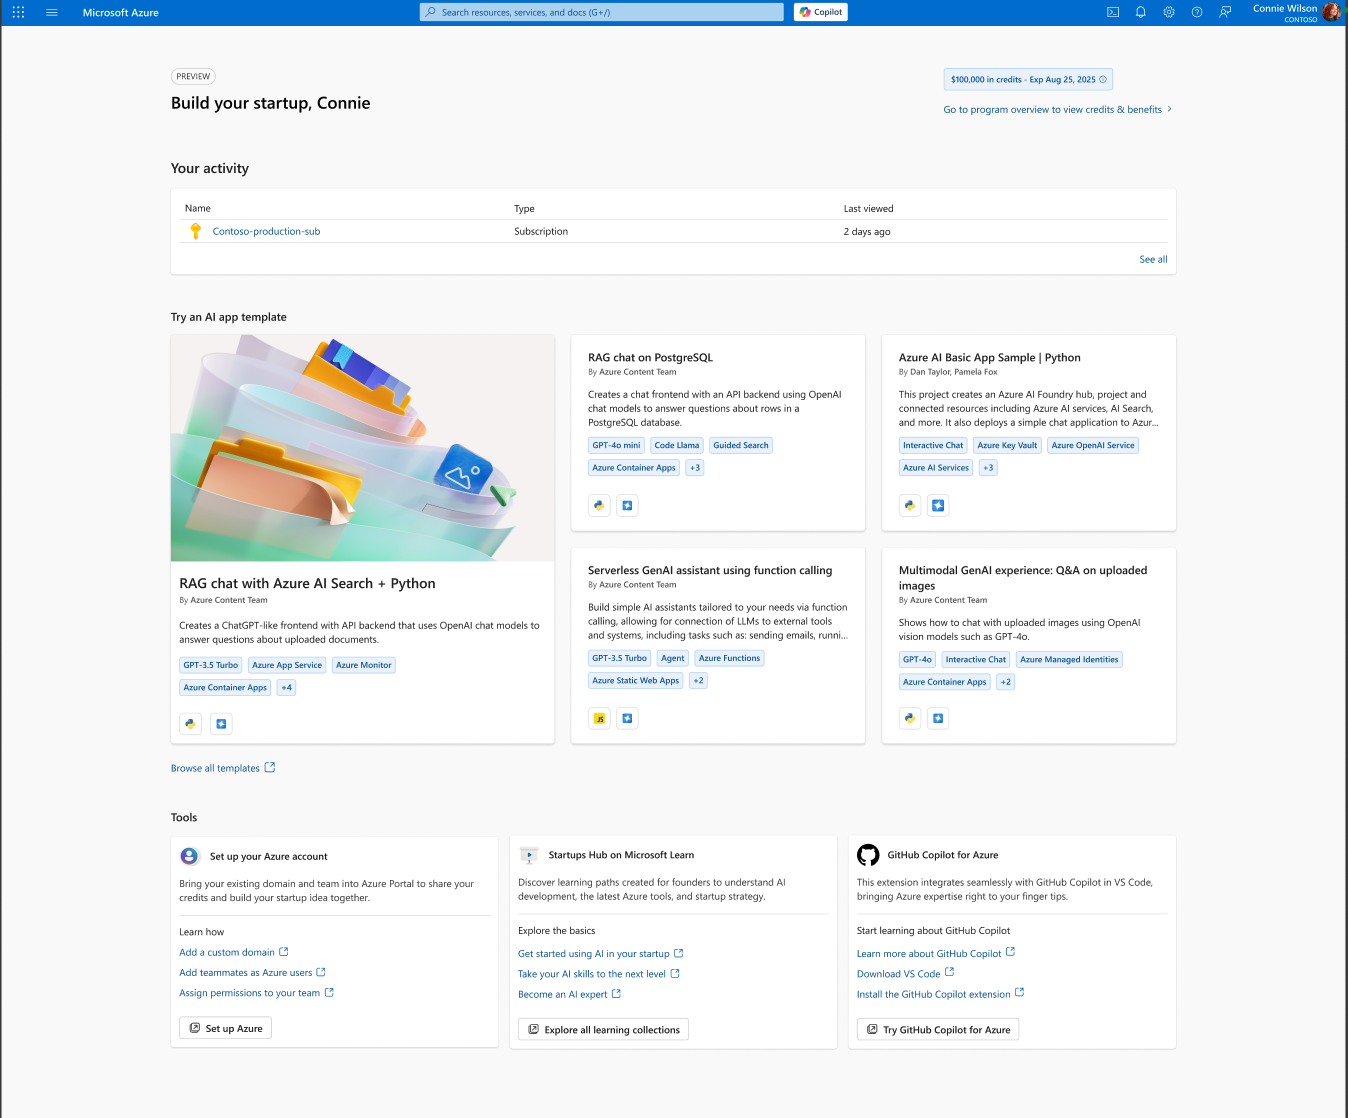
Returning Visits (Approved): On subsequent visits after onboarding is complete, your Microsoft for Startups Welcome page appears clean with no overlays — showing your remaining credits, Microsoft team, and benefits at a glance.

Similarly, the "Build your startup" page on returning visits shows a clean layout with your full credit balance visible at the top.
Submit a Support Request
To submit a support request for Azure technical issues directly through the Azure Portal:
- Sign in to the Azure Portal.
- Select the "?" icon in the top-right corner of the screen.
- Select "Help + support" from the dropdown menu.
- Click "Create a support request" and complete the form. Attach relevant documents or screenshots of errors as needed.
Note: For Microsoft for Startups program-specific support (not Azure technical issues), visit aka.ms/startuphelp-mfs-portal instead.
Update Your Information
To update your profile information such as your name, contact details, or time zone within the Microsoft for Startups portal accessed through Azure:
- Sign in to the Azure Portal and navigate to Microsoft for Startups.
- Select the gear icon in the top-right corner of the screen (next to your profile picture).
- Choose "Edit" on the "My Profile" tab for the field you would like to change.
- Select "Save changes" to update.
Note: If you updated an email address, check your mailbox for a verification email before the change takes effect.
Changing Team Members
How do I add a team member?
To invite a new team member to your startup's Microsoft for Startups account:
- Sign in to the Azure Portal and navigate to Microsoft for Startups.
- Select the gear icon in the top-right corner.
- Go to the "Team Members" tab and click "Invite a team member".
- Enter your team member's email address and click "Send invitation".
Learn more: For a detailed walkthrough of the full invitation and onboarding process from both the admin and new member perspective, see our dedicated guide: "How to Add a Team Member — Step-by-Step Guide."
How do I remove someone from our account?
Only an account administrator can remove team members.
- Sign in to the Azure Portal and navigate to Microsoft for Startups.
- Select the gear icon in the top-right corner.
- On the "Team Members" tab, click the trash can icon next to the user you want to remove.
- Confirm the removal when prompted.
Note: Teammates cannot delete a portal administrator. To remove an administrator, the admin role must first be transferred to another team member.
How do I delete my account?
If you wish to permanently delete your Microsoft for Startups account:
- Sign in to the Azure Portal and navigate to Microsoft for Startups.
- Select the gear icon in the top-right corner.
- On the "My Profile" tab, scroll to "Additional information" and click "Delete account".
Important: Deleting your account will also close out any associated Visual Studio and Azure licenses. This action cannot be undone. Contact support before proceeding if you are unsure.
For additional help, visit aka.ms/startuphelp-mfs-portal.