Not
Bu sayfaya erişim yetkilendirme gerektiriyor. Oturum açmayı veya dizinleri değiştirmeyi deneyebilirsiniz.
Bu sayfaya erişim yetkilendirme gerektiriyor. Dizinleri değiştirmeyi deneyebilirsiniz.
This article shows you how to steer traffic from a branch (on-premises site) connected to the Virtual WAN hub to a Spoke virtual network (VNet) via a Network Virtual Appliance (NVA).

Başlamadan önce
Verify that you have met the following criteria:
You have a Network Virtual Appliance (NVA). A Network Virtual Appliance is a third-party software of your choice that is typically provisioned from Azure Marketplace in a virtual network.
A private IP address must be assigned to the NVA network interface.
The NVA isn't deployed in the virtual hub. It must be deployed in a separate virtual network.
The NVA virtual network can have one or many virtual networks connected to it. In this article, we refer to the NVA virtual network as an 'indirect spoke VNet'. These virtual networks can be connected to the NVA VNet by using VNet peering. The VNet Peering links are depicted by black arrows in the previous figure between VNet 1, VNet 2, and NVA VNet.
You have created two virtual networks. They'll be used as spoke VNets.
The VNet spoke address spaces are: VNet1: 10.0.2.0/24 and VNet2: 10.0.3.0/24. If you need information on how to create a virtual network, see Create a virtual network.
Ensure there are no virtual network gateways in any of the VNets.
The VNets don't require a gateway subnet.
1. Sign in
Bir tarayıcıdan Azure portalına gidin ve Azure hesabınızla oturum açın.
2. Create a virtual WAN
Create a virtual WAN. You can use the following example values, or replace with your own.
- Virtual WAN name: myVirtualWAN
- Resource group: testRG
- Location: West US
Portalda, Kaynak ara çubuğuna arama kutusuna Sanal WAN yazın ve Enter tuşuna basın.
Sonuçlardan Sanal WAN seçin. Sanal WAN sayfasında + Oluştur'u seçerek WAN Oluştur sayfasını açın.
WAN Oluştur sayfasının Temel Bilgiler sekmesinde alanları doldurun. Örnek değerleri ortamınıza uygulanacak şekilde değiştirin.
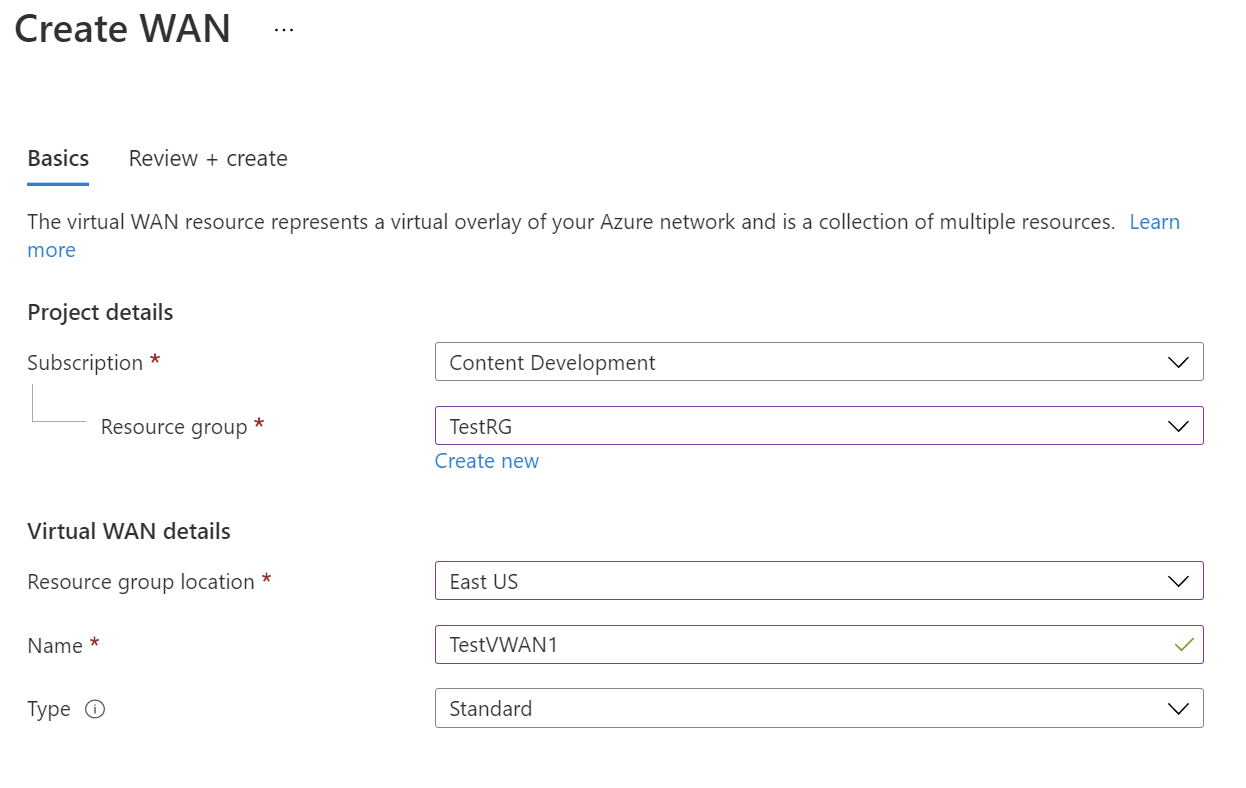
- Abonelik: Kullanmak istediğiniz aboneliği seçin.
- Kaynak grubu: Yeni oluşturun veya var olanı kullanın.
- Kaynak grubu konumu: Açılan listeden bir kaynak konumu seçin. WAN genel bir kaynaktır ve belirli bir bölgede yaşamıyor. Ancak, oluşturduğunuz WAN kaynağını yönetmek ve bulmak için bir bölge seçmeniz gerekir.
- Ad: Sanal WAN'ınızı çağırmak istediğiniz Adı yazın.
- Tür: Temel veya Standart. Standart'ı seçin. Temel'i seçerseniz, Temel sanal WAN'lerin yalnızca Temel hub'lar içerebileceğini anlayın. Temel hub'lar yalnızca siteden siteye bağlantılar için kullanılabilir.
Alanları doldurmayı bitirdikten sonra, sayfanın en altında Gözden Geçir +Oluştur'u seçin.
Doğrulama geçtikten sonra Sanal WAN'ı oluşturmak için Oluştur'a tıklayın.
3. Create a hub
Create the hub. You can use the following example values, or replace with your own.
- Location: West US
- Name: westushub
- Hub private address space: 10.0.1.0/24
Oluşturduğunuz sanal WAN'a gidin. Sanal WAN sayfasının sol bölmesindeki Bağlantı'nın altında Hub'lar'ı seçin.
Hubs sayfasında +Yeni Hub'ı seçerek Sanal hub oluştur sayfasını açın.
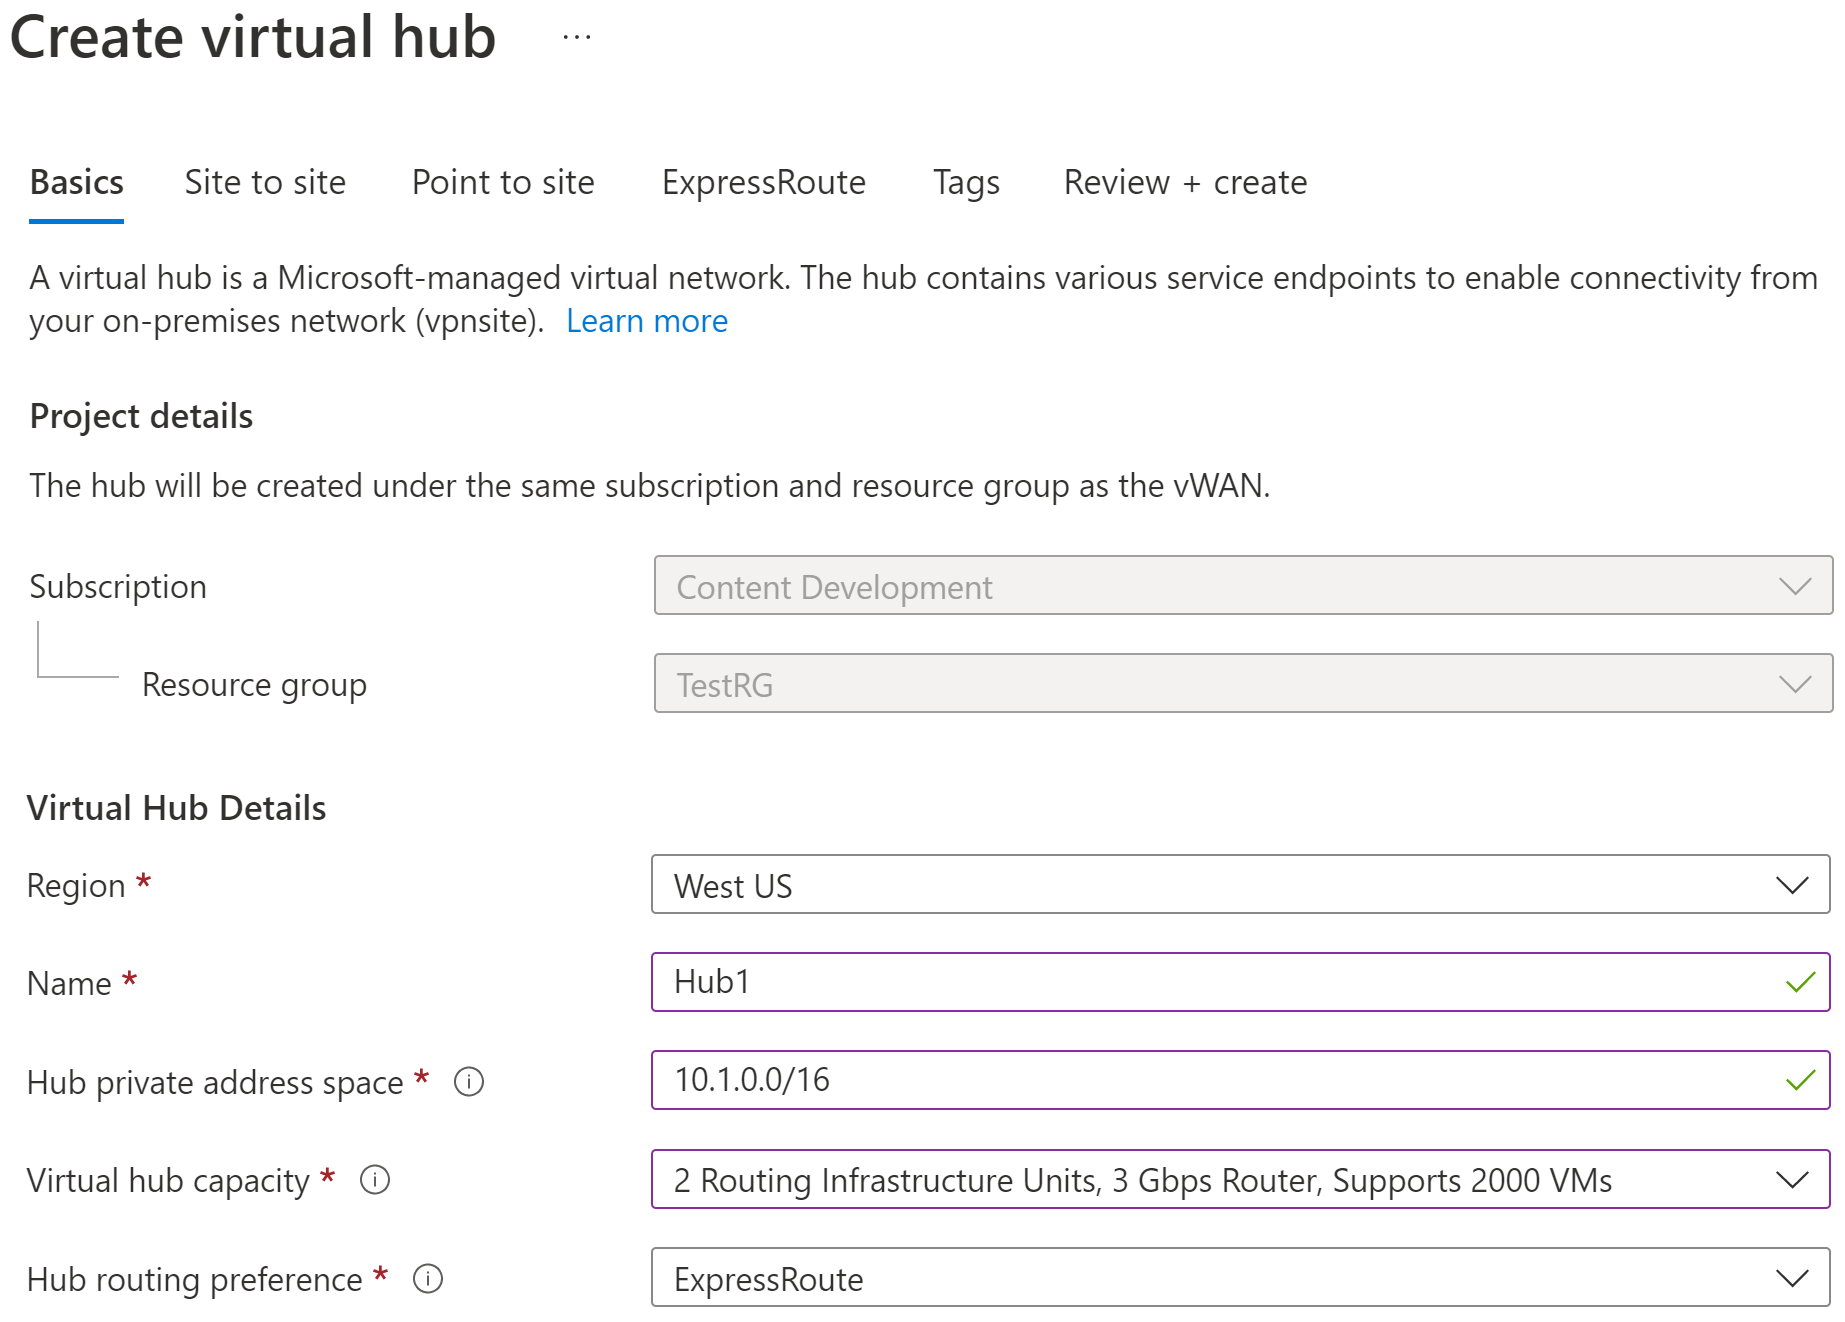
Sanal hub oluştur sayfasında Temel Bilgiler sekmesinde aşağıdaki alanları doldurun:
- Bölge: Sanal hub'ı dağıtmak istediğiniz bölgeyi seçin.
- Ad: Sanal hub'ın bilinmesini istediğiniz ad.
- Hub özel adres alanı: Hub'ın CIDR gösterimindeki adres aralığı. Hub oluşturmak için en düşük adres alanı /24'dür.
- Sanal hub kapasitesi: Açılan listeden seçin. Daha fazla bilgi için bkz . Sanal hub ayarları.
- Hub yönlendirme tercihi: Bu alanı değiştirmeniz gerekmediği sürece ayarı varsayılan expressroute olarak bırakın. Daha fazla bilgi için bkz . Sanal hub yönlendirme tercihi.

4. Create and apply a hub route table
Update the hub with a hub route table. Use the following example values:
- Spoke VNet address spaces: (VNet1 and VNet2) 10.0.2.0/24 and 10.0.3.0/24
- DMZ NVA network interface private IP address: 10.0.4.5
Navigate to your virtual WAN.
Click the hub for which you want to create a route table.
Click the ..., and then click Edit virtual hub.
On the Edit virtual hub page, scroll down and select the checkbox Use table for routing.
In the If destination prefix is column, add the address spaces. In the Send to next hop column, add the DMZ NVA network interface private IP address.
Uyarı
The DMZ NVA network is applicable to the local hub.
Click Confirm to update the hub resource with the route table settings.
5. Create the VNet connections
Create a virtual network connection from each indirect spoke VNet (VNet1 and VNet2) to the hub. These virtual network connections are depicted by the blue arrows in the previous figure. Then, create a VNet connection from the NVA VNet to the hub (black arrow in the figure).
For this step, you can use the following values:
| Sanal ağ adı | Bağlantı adı |
|---|---|
| VNet1 | testconnection1 |
| VNet2 | testconnection2 |
| NVAVNet | testconnection3 |
Repeat the following procedure for each virtual network that you want to connect.
On the page for your virtual WAN, click Virtual network connections.
On the virtual network connection page, click +Add connection.
Bağlantı ekle sayfasında aşağıdaki alanları doldurun:
- Bağlantı adı: Bağlantınıza bir ad verin.
- Hub'lar: Bu bağlantıyla ilişkilendirmek istediğiniz hub'ı seçin.
- Abonelik: Aboneliği doğrulayın.
- Sanal ağ: Bu hub'a bağlamak istediğiniz sanal ağı seçin. Sanal ağda zaten var olan bir sanal ağ geçidi olamaz.
Bağlantıyı oluşturmak için Tamam'a tıklayın.
Sonraki adımlar
To learn more about Virtual WAN, see the Virtual WAN Overview page.