Not
Bu sayfaya erişim yetkilendirme gerektiriyor. Oturum açmayı veya dizinleri değiştirmeyi deneyebilirsiniz.
Bu sayfaya erişim yetkilendirme gerektiriyor. Dizinleri değiştirmeyi deneyebilirsiniz.
Bu öğreticide, PKCE ile yetkilendirme kodu akışını kullanarak kullanıcılarda oturum açıp Microsoft Graph'ı çağıran bir Electron masaüstü uygulaması oluşturacaksınız. Oluşturduğunuz masaüstü uygulaması, Node.js için Microsoft Kimlik Doğrulama Kitaplığı'nı (MSAL) kullanır.
Şunlar için geçerlidir:  İş gücü kiracıları (daha fazla bilgi edinin)
Bu eğitimde, siz:
- Uygulamayı Azure portalına kaydetme
- Electron masaüstü uygulaması projesi oluşturma
- Uygulamanıza kimlik doğrulama mantığı ekleme
- Web API'sini çağırmak için yöntem ekleme
- Uygulama kaydı ayrıntıları ekleme
- Uygulamayı test etme
Önkoşullar
- Çalışma amaçlı kiracı. Varsayılan Dizininizi kullanabilir veya yeni bir kiracı ayarlayabilirsiniz.
-
Microsoft Entra yönetim merkezine, yalnızca bu kuruluş dizinindeki Hesaplar için yapılandırılmış yeni bir uygulama kaydedin. Daha fazla bilgi için Bir uygulamayı kaydetme bölümüne bakın. Daha sonra kullanmak üzere uygulamaya Genel Bakış sayfasından aşağıdaki değerleri kaydedin:
- Uygulama (istemci) kimliği
- Dizin (kullanıcı) kimliği
-
Mobil ve masaüstü uygulamaları platform yapılandırmasını kullanarak aşağıdaki yeniden yönlendirme URI'lerini ekleyin. Diğer ayrıntılar için bkz. Uygulamanıza yeniden yönlendirme URI'sini ekleme .
-
Yönlendirme URI'si:
http://localhost
-
Yönlendirme URI'si:
- Node.js
- Elektron
- Visual Studio Code veya başka bir kod düzenleyicisi
Proje oluşturma
Uyarı
Bu öğreticide sunulan Electron örneği, özellikle MSAL-node ile çalışması için tasarlanmıştır. MSAL-browser, Elektron uygulamalarında desteklenmez. Projenizi doğru ayarlamak için aşağıdaki adımları tamamladığınızdan emin olun.
Uygulamanızı barındırmak için bir klasör oluşturun, örneğin ElectronDesktopApp.
İlk olarak, terminalinizde proje dizininize geçin ve aşağıdaki
npmkomutları çalıştırın:npm init -y npm install --save @azure/msal-node @microsoft/microsoft-graph-client isomorphic-fetch bootstrap jquery popper.js npm install --save-dev electron@20.0.0Ardından Uygulama adlı bir klasör oluşturun. Bu klasörün içinde kullanıcı arabirimi olarak görev yapacak index.html adlı bir dosya oluşturun. Aşağıdaki kodu buraya ekleyin:
<!DOCTYPE html>
<html lang="en">

<head>
    <meta charset="UTF-8">
    <meta name="viewport" content="width=device-width, initial-scale=1.0, shrink-to-fit=no">
    <meta http-equiv="Content-Security-Policy" content="script-src 'self'" />
    <title>MSAL Node Electron Sample App</title>

    <!-- adding Bootstrap 4 for UI components  -->
    <link rel="stylesheet" href="../node_modules/bootstrap/dist/css/bootstrap.min.css">
</head>

<body>
    <nav class="navbar navbar-expand-lg navbar-dark bg-primary">
        <a class="navbar-brand">Microsoft identity platform</a>
        <div class="btn-group ml-auto dropleft">
            <button type="button" id="signIn" class="btn btn-secondary" aria-expanded="false">
                Sign in
            </button>
            <button type="button" id="signOut" class="btn btn-success" hidden aria-expanded="false">
                Sign out
            </button>
        </div>
    </nav>
    <br>
    <h5 class="card-header text-center">Electron sample app calling MS Graph API using MSAL Node</h5>
    <br>
    <div class="row" style="margin:auto">
        <div id="cardDiv" class="col-md-6" style="display:none; margin:auto">
            <div class="card text-center">
                <div class="card-body">
                    <h5 class="card-title" id="WelcomeMessage">Please sign-in to see your profile and read your mails
                    </h5>
                    <div id="profileDiv"></div>
                    <br>
                    <br>
                    <button class="btn btn-primary" id="seeProfile">See Profile</button>
                </div>
            </div>
        </div>
    </div>

    <!-- importing bootstrap.js and supporting js libraries -->
    <script src="../node_modules/jquery/dist/jquery.js"></script>
    <script src="../node_modules/popper.js/dist/umd/popper.js"></script>
    <script src="../node_modules/bootstrap/dist/js/bootstrap.js"></script>

    <!-- importing app scripts | load order is important -->
    <script src="./renderer.js"></script>

</body>

</html>
Ardından, main.js adlı bir dosya oluşturun ve aşağıdaki kodu ekleyin:
/*
 * Copyright (c) Microsoft Corporation. All rights reserved.
 * Licensed under the MIT License.
 */

const path = require("path");
const { app, ipcMain, BrowserWindow } = require("electron");

const AuthProvider = require("./AuthProvider");
const { IPC_MESSAGES } = require("./constants");
const { protectedResources, msalConfig } = require("./authConfig");
const getGraphClient = require("./graph");

let authProvider;
let mainWindow;

function createWindow() {
    mainWindow = new BrowserWindow({
        width: 800,
        height: 600,
        webPreferences: { preload: path.join(__dirname, "preload.js") },
    });

    authProvider = new AuthProvider(msalConfig);
}

app.on("ready", () => {
    createWindow();
    mainWindow.loadFile(path.join(__dirname, "./index.html"));
});

app.on("window-all-closed", () => {
    app.quit();
});

app.on('activate', () => {
    // On OS X it's common to re-create a window in the app when the
    // dock icon is clicked and there are no other windows open.
    if (BrowserWindow.getAllWindows().length === 0) {
        createWindow();
    }
});


// Event handlers
ipcMain.on(IPC_MESSAGES.LOGIN, async () => {
    const account = await authProvider.login();

    await mainWindow.loadFile(path.join(__dirname, "./index.html"));

    mainWindow.webContents.send(IPC_MESSAGES.SHOW_WELCOME_MESSAGE, account);
});

ipcMain.on(IPC_MESSAGES.LOGOUT, async () => {
    await authProvider.logout();

    await mainWindow.loadFile(path.join(__dirname, "./index.html"));
});

ipcMain.on(IPC_MESSAGES.GET_PROFILE, async () => {
    const tokenRequest = {
        scopes: protectedResources.graphMe.scopes
    };

    const tokenResponse = await authProvider.getToken(tokenRequest);
    const account = authProvider.account;

    await mainWindow.loadFile(path.join(__dirname, "./index.html"));

    const graphResponse = await getGraphClient(tokenResponse.accessToken)
        .api(protectedResources.graphMe.endpoint).get();

    mainWindow.webContents.send(IPC_MESSAGES.SHOW_WELCOME_MESSAGE, account);
    mainWindow.webContents.send(IPC_MESSAGES.SET_PROFILE, graphResponse);
});
Yukarıdaki kod parçacığında bir Electron ana pencere nesnesi başlatıyoruz ve Electron penceresiyle etkileşimler için bazı olay işleyicileri oluşturuyoruz. Ayrıca yapılandırma parametrelerini içeri aktarıyor, oturum açma, oturum kapatma ve belirteç alma işlemlerini işlemek için authProvider sınıfını başlatıyor ve Microsoft Graph API'sini çağırıyoruz.
Aynı klasörde (Uygulama) renderer.js adlı başka bir dosya oluşturun ve aşağıdaki kodu ekleyin:
// Copyright (c) Microsoft Corporation. All rights reserved.
// Licensed under the MIT License

/**
 * The renderer API is exposed by the preload script found in the preload.ts
 * file in order to give the renderer access to the Node API in a secure and
 * controlled way
 */
const welcomeDiv = document.getElementById('WelcomeMessage');
const signInButton = document.getElementById('signIn');
const signOutButton = document.getElementById('signOut');
const seeProfileButton = document.getElementById('seeProfile');
const cardDiv = document.getElementById('cardDiv');
const profileDiv = document.getElementById('profileDiv');

window.renderer.showWelcomeMessage((event, account) => {
    if (!account) return;

    cardDiv.style.display = 'initial';
    welcomeDiv.innerHTML = `Welcome ${account.name}`;
    signInButton.hidden = true;
    signOutButton.hidden = false;
});

window.renderer.handleProfileData((event, graphResponse) => {
    if (!graphResponse) return;

    console.log(`Graph API responded at: ${new Date().toString()}`);
    setProfile(graphResponse);
});

// UI event handlers
signInButton.addEventListener('click', () => {
    window.renderer.sendLoginMessage();
});

signOutButton.addEventListener('click', () => {
    window.renderer.sendSignoutMessage();
});

seeProfileButton.addEventListener('click', () => {
    window.renderer.sendSeeProfileMessage();
});

const setProfile = (data) => {
    if (!data) return;

    profileDiv.innerHTML = '';

    const title = document.createElement('p');
    const email = document.createElement('p');
    const phone = document.createElement('p');
    const address = document.createElement('p');

    title.innerHTML = '<strong>Title: </strong>' + data.jobTitle;
    email.innerHTML = '<strong>Mail: </strong>' + data.mail;
    phone.innerHTML = '<strong>Phone: </strong>' + data.businessPhones[0];
    address.innerHTML = '<strong>Location: </strong>' + data.officeLocation;

    profileDiv.appendChild(title);
    profileDiv.appendChild(email);
    profileDiv.appendChild(phone);
    profileDiv.appendChild(address);
}
İşleyiciye güvenli ve kontrollü bir şekilde erişim sağlamak için preload.js dosyasında bulunan ön yükleme betiği tarafından çizici yöntemleri kullanıma sunulur.
Ardından yeni bir dosya preload.js oluşturun ve aşağıdaki kodu ekleyin:
// Copyright (c) Microsoft Corporation. All rights reserved.
// Licensed under the MIT License

const { contextBridge, ipcRenderer } = require('electron');

/**
 * This preload script exposes a "renderer" API to give
 * the Renderer process controlled access to some Node APIs
 * by leveraging IPC channels that have been configured for
 * communication between the Main and Renderer processes.
 */
contextBridge.exposeInMainWorld('renderer', {
    sendLoginMessage: () => {
        ipcRenderer.send('LOGIN');
    },
    sendSignoutMessage: () => {
        ipcRenderer.send('LOGOUT');
    },
    sendSeeProfileMessage: () => {
        ipcRenderer.send('GET_PROFILE');
    },
    handleProfileData: (func) => {
        ipcRenderer.on('SET_PROFILE', (event, ...args) => func(event, ...args));
    },
    showWelcomeMessage: (func) => {
        ipcRenderer.on('SHOW_WELCOME_MESSAGE', (event, ...args) => func(event, ...args));
    },
});
Bu ön yükleme betiği, ana ve işleyici işlemleri arasında iletişim kurulabilmesi için yapılandırılmış IPC kanallarını uygulayarak işleyici işlemine Node APIs'ye denetimli erişim sağlamak üzere bir işleyici API'sini sunmaktadır.
Son olarak, uygulama olaylarını açıklamaya yönelik dize sabitlerini depolayacak constants.js adlı bir dosya oluşturun:
/*
 * Copyright (c) Microsoft Corporation. All rights reserved.
 * Licensed under the MIT License.
 */

const IPC_MESSAGES = {
    SHOW_WELCOME_MESSAGE: 'SHOW_WELCOME_MESSAGE',
    LOGIN: 'LOGIN',
    LOGOUT: 'LOGOUT',
    GET_PROFILE: 'GET_PROFILE',
    SET_PROFILE: 'SET_PROFILE',
}

module.exports = {
    IPC_MESSAGES: IPC_MESSAGES,
}
Artık Elektron uygulamanız için basit bir GUI'ye ve etkileşimlere sahipsiniz. Eğitimin geri kalanını tamamladığınızda, projenizin dosya ve klasör yapısı aşağıdakine benzer olmalıdır:
ElectronDesktopApp/
├── App
│   ├── AuthProvider.js
│   ├── constants.js
│   ├── graph.js
│   ├── index.html
|   ├── main.js
|   ├── preload.js
|   ├── renderer.js
│   ├── authConfig.js
├── package.json
Uygulamanıza kimlik doğrulama mantığı ekleme
Uygulama klasöründe AuthProvider.js adlı bir dosya oluşturun. AuthProvider.js dosyası, MSAL Node kullanarak oturum açma, oturumu kapatma, belirteç alma, hesap seçimi ve ilgili kimlik doğrulama görevlerini işleyecek bir kimlik doğrulama sağlayıcısı sınıfı içerir. Aşağıdaki kodu buraya ekleyin:
/*
 * Copyright (c) Microsoft Corporation. All rights reserved.
 * Licensed under the MIT License.
 */

const { PublicClientApplication, InteractionRequiredAuthError } = require('@azure/msal-node');
const { shell } = require('electron');

class AuthProvider {
    msalConfig
    clientApplication;
    account;
    cache;

    constructor(msalConfig) {
        /**
         * Initialize a public client application. For more information, visit:
         * https://github.com/AzureAD/microsoft-authentication-library-for-js/blob/dev/lib/msal-node/docs/initialize-public-client-application.md
         */
        this.msalConfig = msalConfig;
        this.clientApplication = new PublicClientApplication(this.msalConfig);
        this.cache = this.clientApplication.getTokenCache();
        this.account = null;
    }

    async login() {
        const authResponse = await this.getToken({
            // If there are scopes that you would like users to consent up front, add them below
            // by default, MSAL will add the OIDC scopes to every token request, so we omit those here
            scopes: [],
        });

        return this.handleResponse(authResponse);
    }

    async logout() {
        if (!this.account) return;

        try {
            /**
             * If you would like to end the session with AAD, use the logout endpoint. You'll need to enable
             * the optional token claim 'login_hint' for this to work as expected. For more information, visit:
             * https://learn.microsoft.com/azure/active-directory/develop/v2-protocols-oidc#send-a-sign-out-request
             */
            if (this.account.idTokenClaims.hasOwnProperty('login_hint')) {
                await shell.openExternal(`${this.msalConfig.auth.authority}/oauth2/v2.0/logout?logout_hint=${encodeURIComponent(this.account.idTokenClaims.login_hint)}`);
            }

            await this.cache.removeAccount(this.account);
            this.account = null;
        } catch (error) {
            console.log(error);
        }
    }

    async getToken(tokenRequest) {
        let authResponse;
        const account = this.account || (await this.getAccount());

        if (account) {
            tokenRequest.account = account;
            authResponse = await this.getTokenSilent(tokenRequest);
        } else {
            authResponse = await this.getTokenInteractive(tokenRequest);
        }

        return authResponse || null;
    }

    async getTokenSilent(tokenRequest) {
        try {
            return await this.clientApplication.acquireTokenSilent(tokenRequest);
        } catch (error) {
            if (error instanceof InteractionRequiredAuthError) {
                console.log('Silent token acquisition failed, acquiring token interactive');
                return await this.getTokenInteractive(tokenRequest);
            }

            console.log(error);
        }
    }

    async getTokenInteractive(tokenRequest) {
        try {
            const openBrowser = async (url) => {
                await shell.openExternal(url);
            };

            const authResponse = await this.clientApplication.acquireTokenInteractive({
                ...tokenRequest,
                openBrowser,
                successTemplate: '<h1>Successfully signed in!</h1> <p>You can close this window now.</p>',
                errorTemplate: '<h1>Oops! Something went wrong</h1> <p>Check the console for more information.</p>',
            });

            return authResponse;
        } catch (error) {
            throw error;
        }
    }

    /**
     * Handles the response from a popup or redirect. If response is null, will check if we have any accounts and attempt to sign in.
     * @param response
     */
    async handleResponse(response) {
        if (response !== null) {
            this.account = response.account;
        } else {
            this.account = await this.getAccount();
        }

        return this.account;
    }

    /**
     * Calls getAllAccounts and determines the correct account to sign into, currently defaults to first account found in cache.
     * https://github.com/AzureAD/microsoft-authentication-library-for-js/blob/dev/lib/msal-common/docs/Accounts.md
     */
    async getAccount() {
        const currentAccounts = await this.cache.getAllAccounts();

        if (!currentAccounts) {
            console.log('No accounts detected');
            return null;
        }

        if (currentAccounts.length > 1) {
            // Add choose account code here
            console.log('Multiple accounts detected, need to add choose account code.');
            return currentAccounts[0];
        } else if (currentAccounts.length === 1) {
            return currentAccounts[0];
        } else {
            return null;
        }
    }
}

module.exports = AuthProvider;
Yukarıdaki kod parçacığında, bir yapılandırma nesnesi (PublicClientApplication) geçirerek önce MSAL Node'u msalConfig başlattık. Ardından, login, logout ve getToken yöntemlerini ana modül (main.js) tarafından çağrılmak üzere kullanıma açtık.
login ve getToken'de, MSAL Node acquireTokenInteractive genel API'sini kullanarak kimlik ve erişim jetonları ediniyoruz.
Microsoft Graph SDK'sı ekleme
graph.js adlı bir dosya oluşturun. graph.js dosyası, MSAL Düğümü tarafından elde edilen erişim belirtecini kullanarak Microsoft Graph API'sinde verilere erişimi kolaylaştırmak için Microsoft Graph SDK İstemcisi'nin bir örneğini içerir:
const { Client } = require('@microsoft/microsoft-graph-client');
require('isomorphic-fetch');

/**
 * Creating a Graph client instance via options method. For more information, visit:
 * https://github.com/microsoftgraph/msgraph-sdk-javascript/blob/dev/docs/CreatingClientInstance.md#2-create-with-options
 * @param {String} accessToken
 * @returns
 */
const getGraphClient = (accessToken) => {
    // Initialize Graph client
    const graphClient = Client.init({
        // Use the provided access token to authenticate requests
        authProvider: (done) => {
            done(null, accessToken);
        },
    });

    return graphClient;
};

module.exports = getGraphClient;
Uygulama kaydı ayrıntıları ekleme
Belirteçleri alırken kullanılacak uygulama kaydı ayrıntılarını depolamak için bir ortam dosyası oluşturun. Bunu yapmak için, örneğin kök klasöründe (ElectronDesktopApp) authConfig.js adlı bir dosya oluşturun ve aşağıdaki kodu ekleyin:
/*
 * Copyright (c) Microsoft Corporation. All rights reserved.
 * Licensed under the MIT License.
 */

const { LogLevel } = require("@azure/msal-node");

/**
 * Configuration object to be passed to MSAL instance on creation.
 * For a full list of MSAL.js configuration parameters, visit:
 * https://github.com/AzureAD/microsoft-authentication-library-for-js/blob/dev/lib/msal-node/docs/configuration.md
 */
const AAD_ENDPOINT_HOST = "Enter_the_Cloud_Instance_Id_Here"; // include the trailing slash

const msalConfig = {
    auth: {
        clientId: "Enter_the_Application_Id_Here",
        authority: `${AAD_ENDPOINT_HOST}Enter_the_Tenant_Info_Here`,
    },
    system: {
        loggerOptions: {
            loggerCallback(loglevel, message, containsPii) {
                console.log(message);
            },
            piiLoggingEnabled: false,
            logLevel: LogLevel.Verbose,
        },
    },
};

/**
 * Add here the endpoints and scopes when obtaining an access token for protected web APIs. For more information, see:
 * https://github.com/AzureAD/microsoft-authentication-library-for-js/blob/dev/lib/msal-browser/docs/resources-and-scopes.md
 */
const GRAPH_ENDPOINT_HOST = "Enter_the_Graph_Endpoint_Here"; // include the trailing slash

const protectedResources = {
    graphMe: {
        endpoint: `${GRAPH_ENDPOINT_HOST}v1.0/me`,
        scopes: ["User.Read"],
    }
};


module.exports = {
    msalConfig: msalConfig,
    protectedResources: protectedResources,
};
Bu ayrıntıları Azure uygulama kayıt portalından aldığınız değerlerle doldurun:
-
Enter_the_Tenant_Id_hereaşağıdakilerden biri olmalıdır:- Uygulamanız bu kuruluş dizinindeki hesapları destekliyorsa, bu değeri Kiracı Kimliği veya Kiracı adı ile değiştirin. Örneğin,
contoso.microsoft.com. - Uygulamanız herhangi bir kuruluş dizinindeki hesapları destekliyorsa, bu değeri ile
organizationsdeğiştirin. - Uygulamanız herhangi bir kuruluş dizinindeki hesapları ve kişisel Microsoft hesaplarını destekliyorsa, bu değeri ile
commondeğiştirin. - Desteği yalnızca kişisel Microsoft hesaplarıyla kısıtlamak için, bu değeri
consumersile değiştirin.
- Uygulamanız bu kuruluş dizinindeki hesapları destekliyorsa, bu değeri Kiracı Kimliği veya Kiracı adı ile değiştirin. Örneğin,
-
Enter_the_Application_Id_Here: Kaydettiğiniz uygulamanın Uygulama (istemci) kimliği. -
Enter_the_Cloud_Instance_Id_Here: Uygulamanızın kayıtlı olduğu Azure bulut örneği. -
Enter_the_Graph_Endpoint_Here, uygulamanın iletişim kurması gereken Microsoft Graph API örneğidir.-
Genel Microsoft Graph API uç noktası için bu dizenin her iki örneğini de ile
https://graph.microsoft.com/değiştirin. - Ulusal bulut dağıtımlarındaki uç noktalar için Microsoft Graph belgelerindeki Ulusal bulut dağıtımları bölümüne bakın.
-
Genel Microsoft Graph API uç noktası için bu dizenin her iki örneğini de ile
Uygulamayı test etme
Uygulamanın oluşturulmasını tamamladınız ve artık Electron masaüstü uygulamasını başlatmaya ve uygulamanın işlevselliğini test etmeye hazırsınız.
- Proje klasörünüzün kökünden aşağıdaki komutu çalıştırarak uygulamayı başlatın:
electron App/main.js
- Uygulama ana penceresinde, index.html dosyanızın içeriğini ve Oturum Aç düğmesini görmeniz gerekir.
Test oturumu açma ve oturumu kapatma
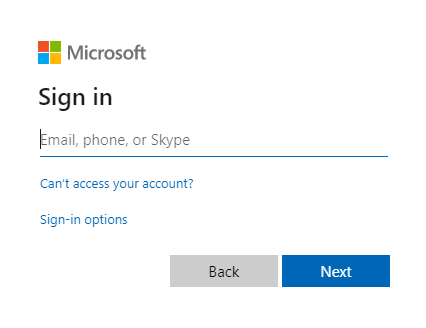
index.html dosyası yüklendikten sonra Oturum Aç'ı seçin. Microsoft kimlik platformu ile oturum açmanız istenir:
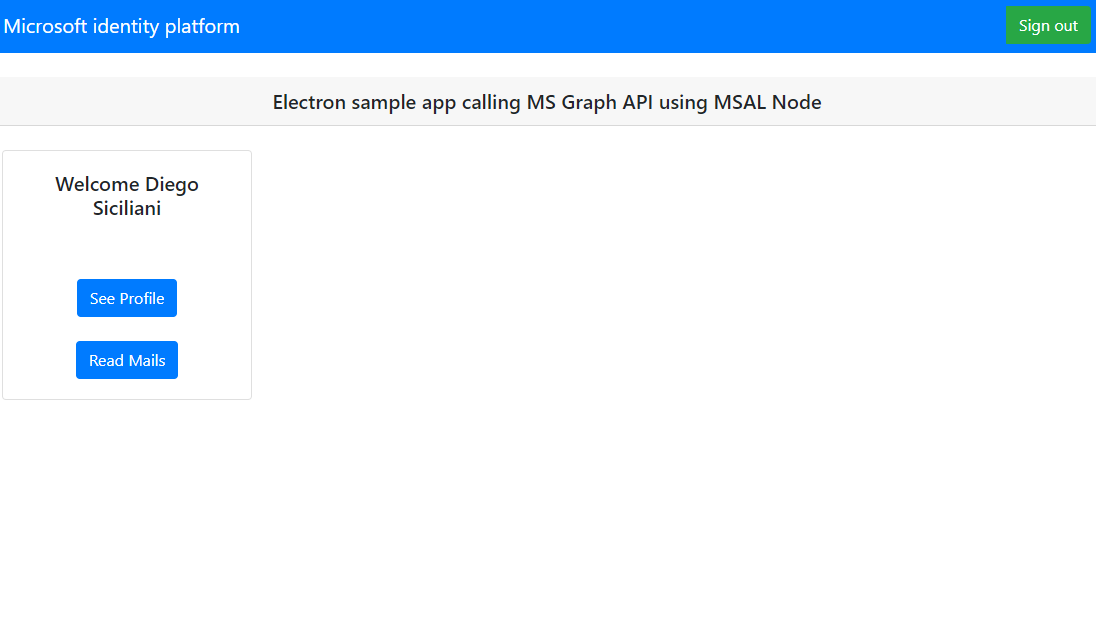
İstenen izinlere onay verirseniz, web uygulamaları kullanıcı adınızı görüntüler ve başarılı bir oturum açmayı gösterir:
Web API çağrısını test edin
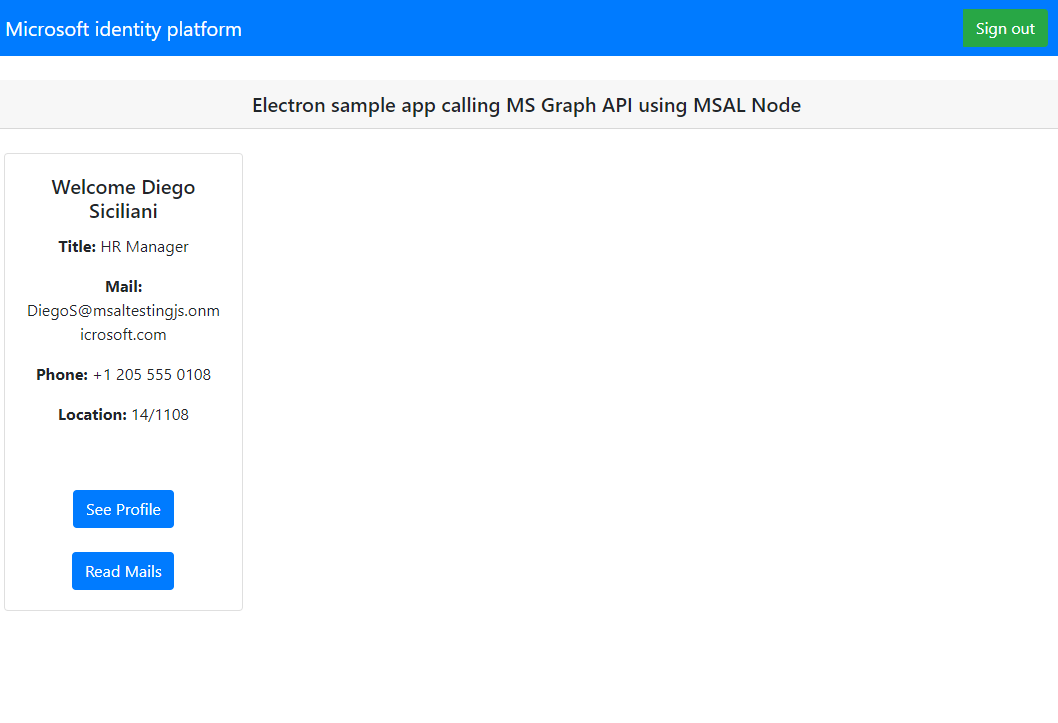
Oturum açtığınızda, Microsoft Graph API'sine yapılan çağrıdan yanıtta döndürülen kullanıcı profili bilgilerini görüntülemek için Profili Görüntüle'yi seçin. Onaydan sonra, yanıtta döndürülen profil bilgilerini görüntülersiniz:
Uygulama nasıl çalışır?
Kullanıcı ilk kez Oturum Aç düğmesini seçtiğinde, MSAL Node'un acquireTokenInteractive yöntemi çalıştırılır. Bu yöntem kullanıcıyı Microsoft kimlik platformu uç noktasıyla oturum açmaya yönlendirir ve kullanıcının kimlik bilgilerini doğrular, bir yetkilendirme kodu alır ve bu kodu kimlik belirteci, erişim belirteci ve yenileme belirteci için değiştirir. MSAL Düğümü, gelecekte kullanmak üzere bu belirteçleri de önbelleğe alır.
Kimlik belirteci, kullanıcı hakkında görünen adı gibi temel bilgileri içerir. Erişim belirtecinin kullanım ömrü sınırlıdır ve süresi 24 saat sonra dolar. Korumalı kaynağa erişmek için bu belirteçleri kullanmayı planlıyorsanız, belirtecin uygulamanız için geçerli bir kullanıcıya verildiğini garanti etmek için arka uç sunucunuzun bunu doğrulaması gerekir .
Bu öğreticide oluşturduğunuz masaüstü uygulaması, istek üst bilgisinde taşıyıcı belirteç olarak erişim belirteci kullanarak Microsoft Graph API'sine REST çağrısı yapar (RFC 6750).
Microsoft Graph API'sinde kullanıcının profilini okumak için user.read kapsamı gerekir. Varsayılan olarak, bu kapsam Azure portalında kayıtlı olan her uygulamaya otomatik olarak eklenir. Microsoft Graph için diğer API'ler ve arka uç sunucunuz için özel API'ler ek kapsamlar gerektirebilir. Örneğin, Microsoft Graph API'sinde kullanıcının e-postasını listelemek için Mail.Read kapsamı gerekir.
Kapsam eklediğinizde, kullanıcılarınızdan eklenen kapsamlar için başka bir onay vermesi istenebilir.
Yardım ve destek
Yardıma ihtiyacınız varsa, bir sorunu bildirmek veya destek seçenekleriniz hakkında bilgi edinmek istiyorsanız bkz . Geliştiriciler için yardım ve destek.
Sonraki adımlar
Microsoft kimlik platformu Node.js ve Electron masaüstü uygulaması geliştirme hakkında daha ayrıntılı bilgi edinmek isterseniz çok parçalı senaryo serimize bakın: