Not
Bu sayfaya erişim yetkilendirme gerektiriyor. Oturum açmayı veya dizinleri değiştirmeyi deneyebilirsiniz.
Bu sayfaya erişim yetkilendirme gerektiriyor. Dizinleri değiştirmeyi deneyebilirsiniz.
Bu öğreticide, kullanıcıların oturumunu açıp Microsoft Graph'ı çağırmak için erişim belirteçleri alan bir web uygulaması oluşturacaksınız. Oluşturduğunuz web uygulaması Node için Microsoft Kimlik Doğrulama Kitaplığı'nı (MSAL) kullanır.
Aşağıdakiler için bu öğreticideki adımları izleyin:
- Uygulamayı Azure portalına kaydetme
- Express web uygulaması projesi oluşturma
- Kimlik doğrulama kitaplığı paketlerini yükleme
- Uygulama kaydı ayrıntıları ekleme
- Kullanıcı oturum açma kodu ekleme
- Uygulamayı test edin. Daha fazla bilgi için, Microsoft Graph gibi korumalı bir kaynak için oturum açma, oturumu kapatma ve erişim belirteci alma işlemlerini MSAL Node kullanarak gösteren örnek koda bakın.
Önkoşullar
- Node.js
- Visual Studio Code veya başka bir kod düzenleyicisi
Uygulamayı kaydetme
İlk olarak, uygulamanızı kaydetmek için Microsoft kimlik platformuna uygulama kaydetme makalesindeki adımları tamamlayın.
Uygulama kaydınız için aşağıdaki ayarları kullanın:
- Ad:
ExpressWebApp(önerilen) - Desteklenen hesap türleri: Yalnızca bu kuruluş dizinindeki hesaplar
- Platform türü: Web
- Yeniden yönlendirme URI'si:
http://localhost:3000/auth/redirect - İstemci sırrı:
*********(bu değeri daha sonraki bir adımda kullanmak üzere kaydedin - yalnızca bir kez gösterilir)
Projeyi oluşturma
Bir uygulama iskeleti oluşturmak için Express uygulama oluşturucu aracını kullanın.
- İlk olarak express-generator paketini yükleyin:
npm install -g express-generator
- Ardından aşağıdaki gibi bir uygulama iskeleti oluşturun:
    express --view=hbs /ExpressWebApp && cd /ExpressWebApp
    npm install
Artık basit bir Express web uygulamanız var. Projenizin dosya ve klasör yapısı aşağıdaki klasör yapısına benzer olmalıdır:
ExpressWebApp/
├── bin/
|    └── wwww
├── public/
|    ├── images/
|    ├── javascript/
|    └── stylesheets/
|        └── style.css
├── routes/
|    ├── index.js
|    └── users.js
├── views/
|    ├── error.hbs
|    ├── index.hbs
|    └── layout.hbs
├── app.js
└── package.json
Kimlik doğrulama kitaplığını yükleme
Proje dizininizin kökünü bir terminalde bulun ve npm aracılığıyla MSAL Node paketini yükleyin.
npm install --save @azure/msal-node
Diğer bağımlılıkları yükleme
Bu öğreticideki web uygulaması örneği, oturum yönetimi için hızlı oturum paketini, geliştirme sırasında ortam parametrelerini okumak için dotenv paketini ve Microsoft Graph API'sine ağ çağrıları yapmak için axios'u kullanır. Bunları npm aracılığıyla yükleyin:
npm install --save express-session dotenv axios
Uygulama kaydı ayrıntıları ekleme
- Proje klasörünüzün kökünde bir .env.dev dosyası oluşturun. Ardından aşağıdaki kodu ekleyin:
CLOUD_INSTANCE="Enter_the_Cloud_Instance_Id_Here" # cloud instance string should end with a trailing slash
TENANT_ID="Enter_the_Tenant_Info_Here"
CLIENT_ID="Enter_the_Application_Id_Here"
CLIENT_SECRET="Enter_the_Client_Secret_Here"

REDIRECT_URI="http://localhost:3000/auth/redirect"
POST_LOGOUT_REDIRECT_URI="http://localhost:3000"

GRAPH_API_ENDPOINT="Enter_the_Graph_Endpoint_Here" # graph api endpoint string should end with a trailing slash

EXPRESS_SESSION_SECRET="Enter_the_Express_Session_Secret_Here"
Bu ayrıntıları Azure uygulama kayıt portalından aldığınız değerlerle doldurun:
-
Enter_the_Cloud_Instance_Id_Here: Uygulamanızın kayıtlı olduğu Azure bulut örneği.- Ana (veya genel) Azure bulutu için "
https://login.microsoftonline.com/" ifadesini (sondaki eğik çizgi dahil) girin. - Ulusal bulutlar (örneğin, Çin) için Uygun değerleri Ulusal bulutlarda bulabilirsiniz.
- Ana (veya genel) Azure bulutu için "
-
Enter_the_Tenant_Info_hereaşağıdaki parametrelerden biri olmalıdır:- Uygulamanız bu kuruluş dizinindeki hesapları destekliyorsa, bu değeri Kiracı Kimliği veya Kiracı adı ile değiştirin. Örneğin,
contoso.microsoft.com. - Uygulamanız herhangi bir kuruluş dizinindeki hesapları destekliyorsa, bu değeri ile
organizationsdeğiştirin. - Uygulamanız herhangi bir kuruluş dizinindeki hesapları ve kişisel Microsoft hesaplarını destekliyorsa, bu değeri ile
commondeğiştirin. - Desteği yalnızca kişisel Microsoft hesaplarıyla kısıtlamak için bu değeri
consumersile değiştirin.
- Uygulamanız bu kuruluş dizinindeki hesapları destekliyorsa, bu değeri Kiracı Kimliği veya Kiracı adı ile değiştirin. Örneğin,
-
Enter_the_Application_Id_Here: Kaydettiğiniz uygulamanın Uygulama (istemci) kimliği . -
Enter_the_Client_secret: Bu değeri daha önce oluşturduğunuz istemci sırrıyla değiştirin. Yeni bir anahtar oluşturmak için Azure portalındaki uygulama kayıt ayarlarında Sertifikalar ve gizli diziler'i kullanın.
Uyarı
Kaynak kodundaki herhangi bir düz metin gizli dizisi daha fazla güvenlik riski oluşturur. Bu makalede yalnızca basitlik amacıyla düz yazı istemci anahtarı kullanılır. Gizli istemci uygulamalarınızda, özellikle üretim ortamına dağıtmak istediğiniz uygulamalar için, istemci sırları yerine sertifika kimlik bilgilerini kullanın.
-
Enter_the_Graph_Endpoint_Here: Uygulamanızın çağıracağı Microsoft Graph API bulut örneği. Ana (genel) Microsoft Graph API hizmeti için, sonundaki eğik çizgi dahilhttps://graph.microsoft.com/ifadesini girin. -
Enter_the_Express_Session_Secret_HereExpress oturum tanımlama bilgilerini imzalamak için kullanılan gizli anahtar. Bu dizenin yerini almak için, istemci gizli anahtarı gibi rastgele bir karakter dizisi seçin.
- Ardından, bu parametrelerde okumak için projenizin kökünde authConfig.js adlı bir dosya oluşturun. Oluşturulduktan sonra aşağıdaki kodu buraya ekleyin:
/*
 * Copyright (c) Microsoft Corporation. All rights reserved.
 * Licensed under the MIT License.
 */

require('dotenv').config({ path: '.env.dev' });

/**
 * Configuration object to be passed to MSAL instance on creation.
 * For a full list of MSAL Node configuration parameters, visit:
 * https://github.com/AzureAD/microsoft-authentication-library-for-js/blob/dev/lib/msal-node/docs/configuration.md
 */
const msalConfig = {
    auth: {
        clientId: process.env.CLIENT_ID, // 'Application (client) ID' of app registration in Azure portal - this value is a GUID
        authority: process.env.CLOUD_INSTANCE + process.env.TENANT_ID, // Full directory URL, in the form of https://login.microsoftonline.com/<tenant>
        clientSecret: process.env.CLIENT_SECRET // Client secret generated from the app registration in Azure portal
    },
    system: {
        loggerOptions: {
            loggerCallback(loglevel, message, containsPii) {
                console.log(message);
            },
            piiLoggingEnabled: false,
            logLevel: 3,
        }
    }
}

const REDIRECT_URI = process.env.REDIRECT_URI;
const POST_LOGOUT_REDIRECT_URI = process.env.POST_LOGOUT_REDIRECT_URI;
const GRAPH_ME_ENDPOINT = process.env.GRAPH_API_ENDPOINT + "v1.0/me";

module.exports = {
    msalConfig,
    REDIRECT_URI,
    POST_LOGOUT_REDIRECT_URI,
    GRAPH_ME_ENDPOINT
};
Kullanıcı oturum açma ve jeton alma işlemleri için kod ekle.
- auth adlı yeni bir klasör oluşturun ve altına AuthProvider.js adlı yeni bir dosya ekleyin. Bu, MSAL Düğümünü kullanarak gerekli kimlik doğrulama mantığını kapsülleyen AuthProvider sınıfını içerir. Aşağıdaki kodu buraya ekleyin:
const msal = require('@azure/msal-node');
const axios = require('axios');

const { msalConfig } = require('../authConfig');

class AuthProvider {
    msalConfig;
    cryptoProvider;

    constructor(msalConfig) {
        this.msalConfig = msalConfig
        this.cryptoProvider = new msal.CryptoProvider();
    };

    login(options = {}) {
        return async (req, res, next) => {

            /**
             * MSAL Node library allows you to pass your custom state as state parameter in the Request object.
             * The state parameter can also be used to encode information of the app's state before redirect.
             * You can pass the user's state in the app, such as the page or view they were on, as input to this parameter.
             */
            const state = this.cryptoProvider.base64Encode(
                JSON.stringify({
                    successRedirect: options.successRedirect || '/',
                })
            );

            const authCodeUrlRequestParams = {
                state: state,

                /**
                 * By default, MSAL Node will add OIDC scopes to the auth code url request. For more information, visit:
                 * https://docs.microsoft.com/azure/active-directory/develop/v2-permissions-and-consent#openid-connect-scopes
                 */
                scopes: options.scopes || [],
                redirectUri: options.redirectUri,
            };

            const authCodeRequestParams = {
                state: state,

                /**
                 * By default, MSAL Node will add OIDC scopes to the auth code request. For more information, visit:
                 * https://docs.microsoft.com/azure/active-directory/develop/v2-permissions-and-consent#openid-connect-scopes
                 */
                scopes: options.scopes || [],
                redirectUri: options.redirectUri,
            };

            /**
             * If the current msal configuration does not have cloudDiscoveryMetadata or authorityMetadata, we will
             * make a request to the relevant endpoints to retrieve the metadata. This allows MSAL to avoid making
             * metadata discovery calls, thereby improving performance of token acquisition process. For more, see:
             * https://github.com/AzureAD/microsoft-authentication-library-for-js/blob/dev/lib/msal-node/docs/performance.md
             */
            if (!this.msalConfig.auth.cloudDiscoveryMetadata || !this.msalConfig.auth.authorityMetadata) {

                const [cloudDiscoveryMetadata, authorityMetadata] = await Promise.all([
                    this.getCloudDiscoveryMetadata(this.msalConfig.auth.authority),
                    this.getAuthorityMetadata(this.msalConfig.auth.authority)
                ]);

                this.msalConfig.auth.cloudDiscoveryMetadata = JSON.stringify(cloudDiscoveryMetadata);
                this.msalConfig.auth.authorityMetadata = JSON.stringify(authorityMetadata);
            }

            const msalInstance = this.getMsalInstance(this.msalConfig);

            // trigger the first leg of auth code flow
            return this.redirectToAuthCodeUrl(
                authCodeUrlRequestParams,
                authCodeRequestParams,
                msalInstance
            )(req, res, next);
        };
    }

    acquireToken(options = {}) {
        return async (req, res, next) => {
            try {
                const msalInstance = this.getMsalInstance(this.msalConfig);

                /**
                 * If a token cache exists in the session, deserialize it and set it as the
                 * cache for the new MSAL CCA instance. For more, see:
                 * https://github.com/AzureAD/microsoft-authentication-library-for-js/blob/dev/lib/msal-node/docs/caching.md
                 */
                if (req.session.tokenCache) {
                    msalInstance.getTokenCache().deserialize(req.session.tokenCache);
                }

                const tokenResponse = await msalInstance.acquireTokenSilent({
                    account: req.session.account,
                    scopes: options.scopes || [],
                });

                /**
                 * On successful token acquisition, write the updated token
                 * cache back to the session. For more, see:
                 * https://github.com/AzureAD/microsoft-authentication-library-for-js/blob/dev/lib/msal-node/docs/caching.md
                 */
                req.session.tokenCache = msalInstance.getTokenCache().serialize();
                req.session.accessToken = tokenResponse.accessToken;
                req.session.idToken = tokenResponse.idToken;
                req.session.account = tokenResponse.account;

                res.redirect(options.successRedirect);
            } catch (error) {
                if (error instanceof msal.InteractionRequiredAuthError) {
                    return this.login({
                        scopes: options.scopes || [],
                        redirectUri: options.redirectUri,
                        successRedirect: options.successRedirect || '/',
                    })(req, res, next);
                }

                next(error);
            }
        };
    }

    handleRedirect(options = {}) {
        return async (req, res, next) => {
            if (!req.body || !req.body.state) {
                return next(new Error('Error: response not found'));
            }

            const authCodeRequest = {
                ...req.session.authCodeRequest,
                code: req.body.code,
                codeVerifier: req.session.pkceCodes.verifier,
            };

            try {
                const msalInstance = this.getMsalInstance(this.msalConfig);

                if (req.session.tokenCache) {
                    msalInstance.getTokenCache().deserialize(req.session.tokenCache);
                }

                const tokenResponse = await msalInstance.acquireTokenByCode(authCodeRequest, req.body);

                req.session.tokenCache = msalInstance.getTokenCache().serialize();
                req.session.idToken = tokenResponse.idToken;
                req.session.account = tokenResponse.account;
                req.session.isAuthenticated = true;

                const state = JSON.parse(this.cryptoProvider.base64Decode(req.body.state));
                res.redirect(state.successRedirect);
            } catch (error) {
                next(error);
            }
        }
    }

    logout(options = {}) {
        return (req, res, next) => {

            /**
             * Construct a logout URI and redirect the user to end the
             * session with Azure AD. For more information, visit:
             * https://docs.microsoft.com/azure/active-directory/develop/v2-protocols-oidc#send-a-sign-out-request
             */
            let logoutUri = `${this.msalConfig.auth.authority}/oauth2/v2.0/`;

            if (options.postLogoutRedirectUri) {
                logoutUri += `logout?post_logout_redirect_uri=${options.postLogoutRedirectUri}`;
            }

            req.session.destroy(() => {
                res.redirect(logoutUri);
            });
        }
    }

    /**
     * Instantiates a new MSAL ConfidentialClientApplication object
     * @param msalConfig: MSAL Node Configuration object
     * @returns
     */
    getMsalInstance(msalConfig) {
        return new msal.ConfidentialClientApplication(msalConfig);
    }


    /**
     * Prepares the auth code request parameters and initiates the first leg of auth code flow
     * @param req: Express request object
     * @param res: Express response object
     * @param next: Express next function
     * @param authCodeUrlRequestParams: parameters for requesting an auth code url
     * @param authCodeRequestParams: parameters for requesting tokens using auth code
     */
    redirectToAuthCodeUrl(authCodeUrlRequestParams, authCodeRequestParams, msalInstance) {
        return async (req, res, next) => {
            // Generate PKCE Codes before starting the authorization flow
            const { verifier, challenge } = await this.cryptoProvider.generatePkceCodes();

            // Set generated PKCE codes and method as session vars
            req.session.pkceCodes = {
                challengeMethod: 'S256',
                verifier: verifier,
                challenge: challenge,
            };

            /**
             * By manipulating the request objects below before each request, we can obtain
             * auth artifacts with desired claims. For more information, visit:
             * https://azuread.github.io/microsoft-authentication-library-for-js/ref/modules/_azure_msal_node.html#authorizationurlrequest
             * https://azuread.github.io/microsoft-authentication-library-for-js/ref/modules/_azure_msal_node.html#authorizationcoderequest
             **/
            req.session.authCodeUrlRequest = {
                ...authCodeUrlRequestParams,
                responseMode: msal.ResponseMode.FORM_POST, // recommended for confidential clients
                codeChallenge: req.session.pkceCodes.challenge,
                codeChallengeMethod: req.session.pkceCodes.challengeMethod,
            };

            req.session.authCodeRequest = {
                ...authCodeRequestParams,
                code: '',
            };

            try {
                const authCodeUrlResponse = await msalInstance.getAuthCodeUrl(req.session.authCodeUrlRequest);
                res.redirect(authCodeUrlResponse);
            } catch (error) {
                next(error);
            }
        };
    }

    /**
     * Retrieves cloud discovery metadata from the /discovery/instance endpoint
     * @returns
     */
    async getCloudDiscoveryMetadata(authority) {
        const endpoint = 'https://login.microsoftonline.com/common/discovery/instance';

        try {
            const response = await axios.get(endpoint, {
                params: {
                    'api-version': '1.1',
                    'authorization_endpoint': `${authority}/oauth2/v2.0/authorize`
                }
            });

            return await response.data;
        } catch (error) {
            throw error;
        }
    }

    /**
     * Retrieves oidc metadata from the openid endpoint
     * @returns
     */
    async getAuthorityMetadata(authority) {
        const endpoint = `${authority}/v2.0/.well-known/openid-configuration`;

        try {
            const response = await axios.get(endpoint);
            return await response.data;
        } catch (error) {
            console.log(error);
        }
    }
}

const authProvider = new AuthProvider(msalConfig);

module.exports = authProvider;
- Ardından, routes klasörünün altında auth.js adlı yeni bir dosya oluşturun ve aşağıdaki kodu buraya ekleyin:
/*
 * Copyright (c) Microsoft Corporation. All rights reserved.
 * Licensed under the MIT License.
 */

var express = require('express');

const authProvider = require('../auth/AuthProvider');
const { REDIRECT_URI, POST_LOGOUT_REDIRECT_URI } = require('../authConfig');

const router = express.Router();

router.get('/signin', authProvider.login({
    scopes: [],
    redirectUri: REDIRECT_URI,
    successRedirect: '/'
}));

router.get('/acquireToken', authProvider.acquireToken({
    scopes: ['User.Read'],
    redirectUri: REDIRECT_URI,
    successRedirect: '/users/profile'
}));

router.post('/redirect', authProvider.handleRedirect());

router.get('/signout', authProvider.logout({
    postLogoutRedirectUri: POST_LOGOUT_REDIRECT_URI
}));

module.exports = router;
- Mevcut kodu aşağıdaki kod parçacığıyla değiştirerek index.js yolunu güncelleştirin:
/*
 * Copyright (c) Microsoft Corporation. All rights reserved.
 * Licensed under the MIT License.
 */

var express = require('express');
var router = express.Router();

router.get('/', function (req, res, next) {
    res.render('index', {
        title: 'MSAL Node & Express Web App',
        isAuthenticated: req.session.isAuthenticated,
        username: req.session.account?.username,
    });
});

module.exports = router;
- Son olarak, mevcut kodu aşağıdaki kod parçacığıyla değiştirerek users.js yolunu güncelleştirin:
/*
 * Copyright (c) Microsoft Corporation. All rights reserved.
 * Licensed under the MIT License.
 */

var express = require('express');
var router = express.Router();

var fetch = require('../fetch');

var { GRAPH_ME_ENDPOINT } = require('../authConfig');

// custom middleware to check auth state
function isAuthenticated(req, res, next) {
    if (!req.session.isAuthenticated) {
        return res.redirect('/auth/signin'); // redirect to sign-in route
    }

    next();
};

router.get('/id',
    isAuthenticated, // check if user is authenticated
    async function (req, res, next) {
        res.render('id', { idTokenClaims: req.session.account.idTokenClaims });
    }
);

router.get('/profile',
    isAuthenticated, // check if user is authenticated
    async function (req, res, next) {
        try {
            const graphResponse = await fetch(GRAPH_ME_ENDPOINT, req.session.accessToken);
            res.render('profile', { profile: graphResponse });
        } catch (error) {
            next(error);
        }
    }
);

module.exports = router;
Microsoft Graph API'sini çağırmak için kod ekleme
Projenizin kökünde fetch.js adlı bir dosya oluşturun ve aşağıdaki kodu ekleyin:
/*
 * Copyright (c) Microsoft Corporation. All rights reserved.
 * Licensed under the MIT License.
 */

var axios = require('axios');

/**
 * Attaches a given access token to a MS Graph API call
 * @param endpoint: REST API endpoint to call
 * @param accessToken: raw access token string
 */
async function fetch(endpoint, accessToken) {
    const options = {
        headers: {
            Authorization: `Bearer ${accessToken}`
        }
    };

    console.log(`request made to ${endpoint} at: ` + new Date().toString());

    try {
        const response = await axios.get(endpoint, options);
        return await response.data;
    } catch (error) {
        throw new Error(error);
    }
}

module.exports = fetch;
Verileri görüntülemek için görünüm ekleme
- Views klasöründe, mevcut kodu aşağıdakilerle değiştirerek index.hbs dosyasını güncelleştirin:
<h1>{{title}}</h1>
{{#if isAuthenticated }}
<p>Hi {{username}}!</p>
<a href="/users/id">View ID token claims</a>
<br>
<a href="/auth/acquireToken">Acquire a token to call the Microsoft Graph API</a>
<br>
<a href="/auth/signout">Sign out</a>
{{else}}
<p>Welcome to {{title}}</p>
<a href="/auth/signin">Sign in</a>
{{/if}}
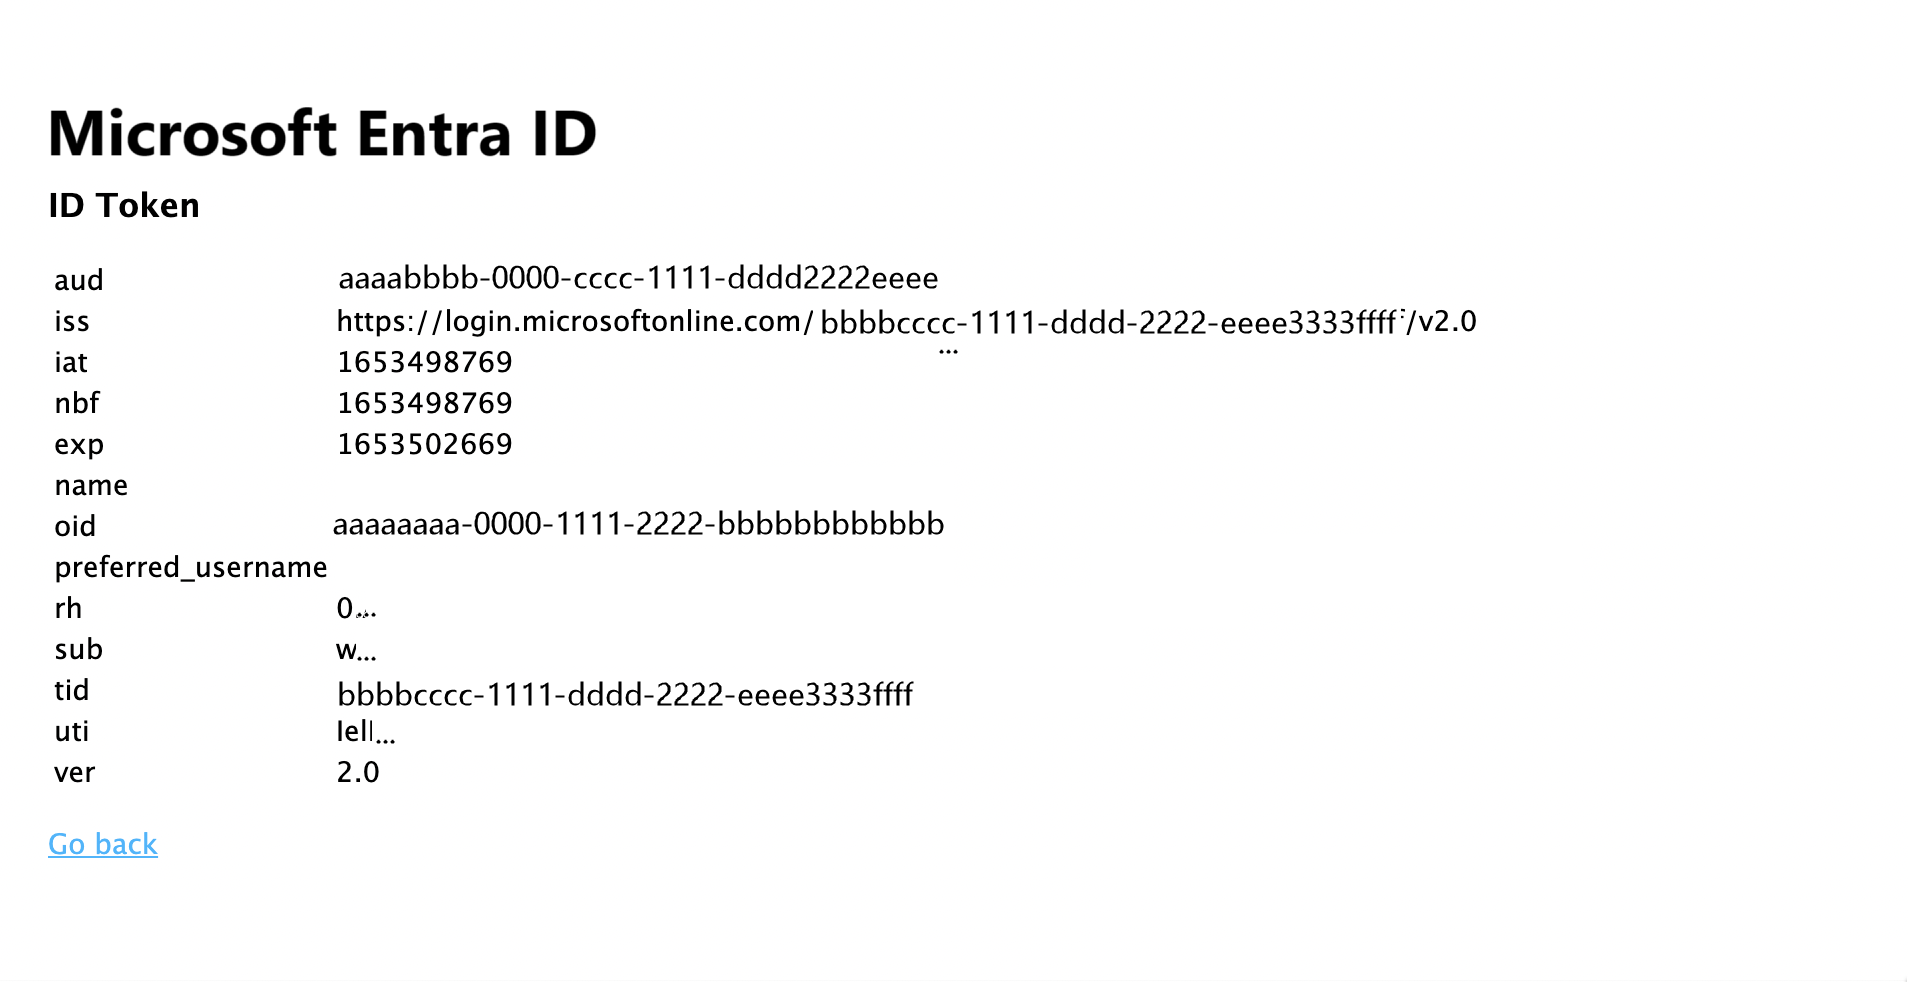
- Yine aynı klasörde, kullanıcının kimlik belirtecinin içeriğini görüntülemek için id.hbs adlı başka bir dosya oluşturun:
<h1>Azure AD</h1>
<h3>ID Token</h3>
<table>
    <tbody>
        {{#each idTokenClaims}}
        <tr>
            <td>{{@key}}</td>
            <td>{{this}}</td>
        </tr>
        {{/each}}
    </tbody>
</table>
<br>
<a href="https://aka.ms/id-tokens" target="_blank">Learn about claims in this ID token</a>
<br>
<a href="/">Go back</a>
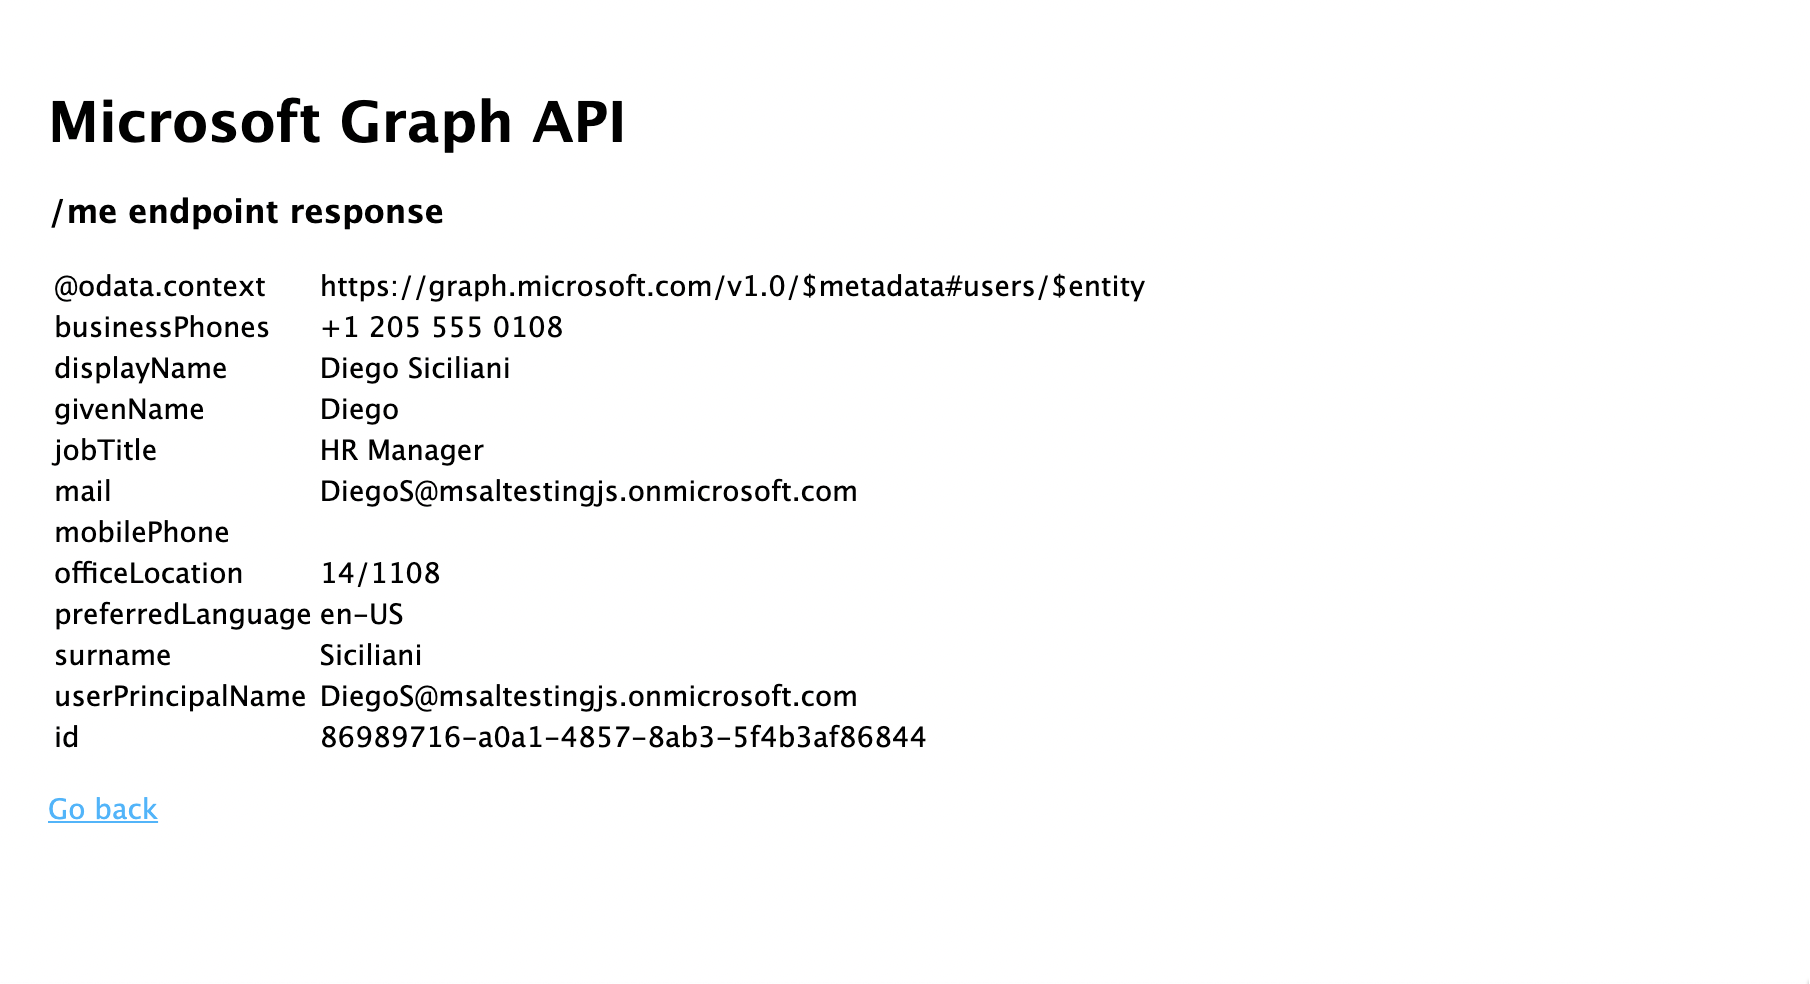
- Son olarak, Microsoft Graph'a yapılan çağrının sonucunu görüntülemek için profile.hbs adlı başka bir dosya oluşturun:
<h1>Microsoft Graph API</h1>
<h3>/me endpoint response</h3>
<table>
    <tbody>
        {{#each profile}}
        <tr>
            <td>{{@key}}</td>
            <td>{{this}}</td>
        </tr>
        {{/each}}
    </tbody>
</table>
<br>
<a href="/">Go back</a>
Yönlendiricileri kaydetme ve durum yönetimi ekleme
Proje klasörünün kökündeki app.js dosyasında, daha önce oluşturduğunuz yolları kaydedin ve express-session paketini kullanarak kimlik doğrulama durumunu izlemek için oturum desteği ekleyin. Var olan kodu aşağıdaki kod parçacığıyla değiştirin:
/*
 * Copyright (c) Microsoft Corporation. All rights reserved.
 * Licensed under the MIT License.
 */

require('dotenv').config();

var path = require('path');
var express = require('express');
var session = require('express-session');
var createError = require('http-errors');
var cookieParser = require('cookie-parser');
var logger = require('morgan');

var indexRouter = require('./routes/index');
var usersRouter = require('./routes/users');
var authRouter = require('./routes/auth');

// initialize express
var app = express();

/**
 * Using express-session middleware for persistent user session. Be sure to
 * familiarize yourself with available options. Visit: https://www.npmjs.com/package/express-session
 */
 app.use(session({
    secret: process.env.EXPRESS_SESSION_SECRET,
    resave: false,
    saveUninitialized: false,
    cookie: {
        httpOnly: true,
        secure: false, // set this to true on production
    }
}));

// view engine setup
app.set('views', path.join(__dirname, 'views'));
app.set('view engine', 'hbs');

app.use(logger('dev'));
app.use(express.json());
app.use(cookieParser());
app.use(express.urlencoded({ extended: false }));
app.use(express.static(path.join(__dirname, 'public')));

app.use('/', indexRouter);
app.use('/users', usersRouter);
app.use('/auth', authRouter);

// catch 404 and forward to error handler
app.use(function (req, res, next) {
    next(createError(404));
});

// error handler
app.use(function (err, req, res, next) {
    // set locals, only providing error in development
    res.locals.message = err.message;
    res.locals.error = req.app.get('env') === 'development' ? err : {};

    // render the error page
    res.status(err.status || 500);
    res.render('error');
});

module.exports = app;
Oturum açmayı test edin ve Microsoft Graph'ı arayın
Uygulamanın oluşturulmasını tamamladınız ve artık uygulamanın işlevselliğini test etmeye hazırsınız.
- Proje klasörünüzün kökünden aşağıdaki komutu çalıştırarak Node.js konsol uygulamasını başlatın:
npm start
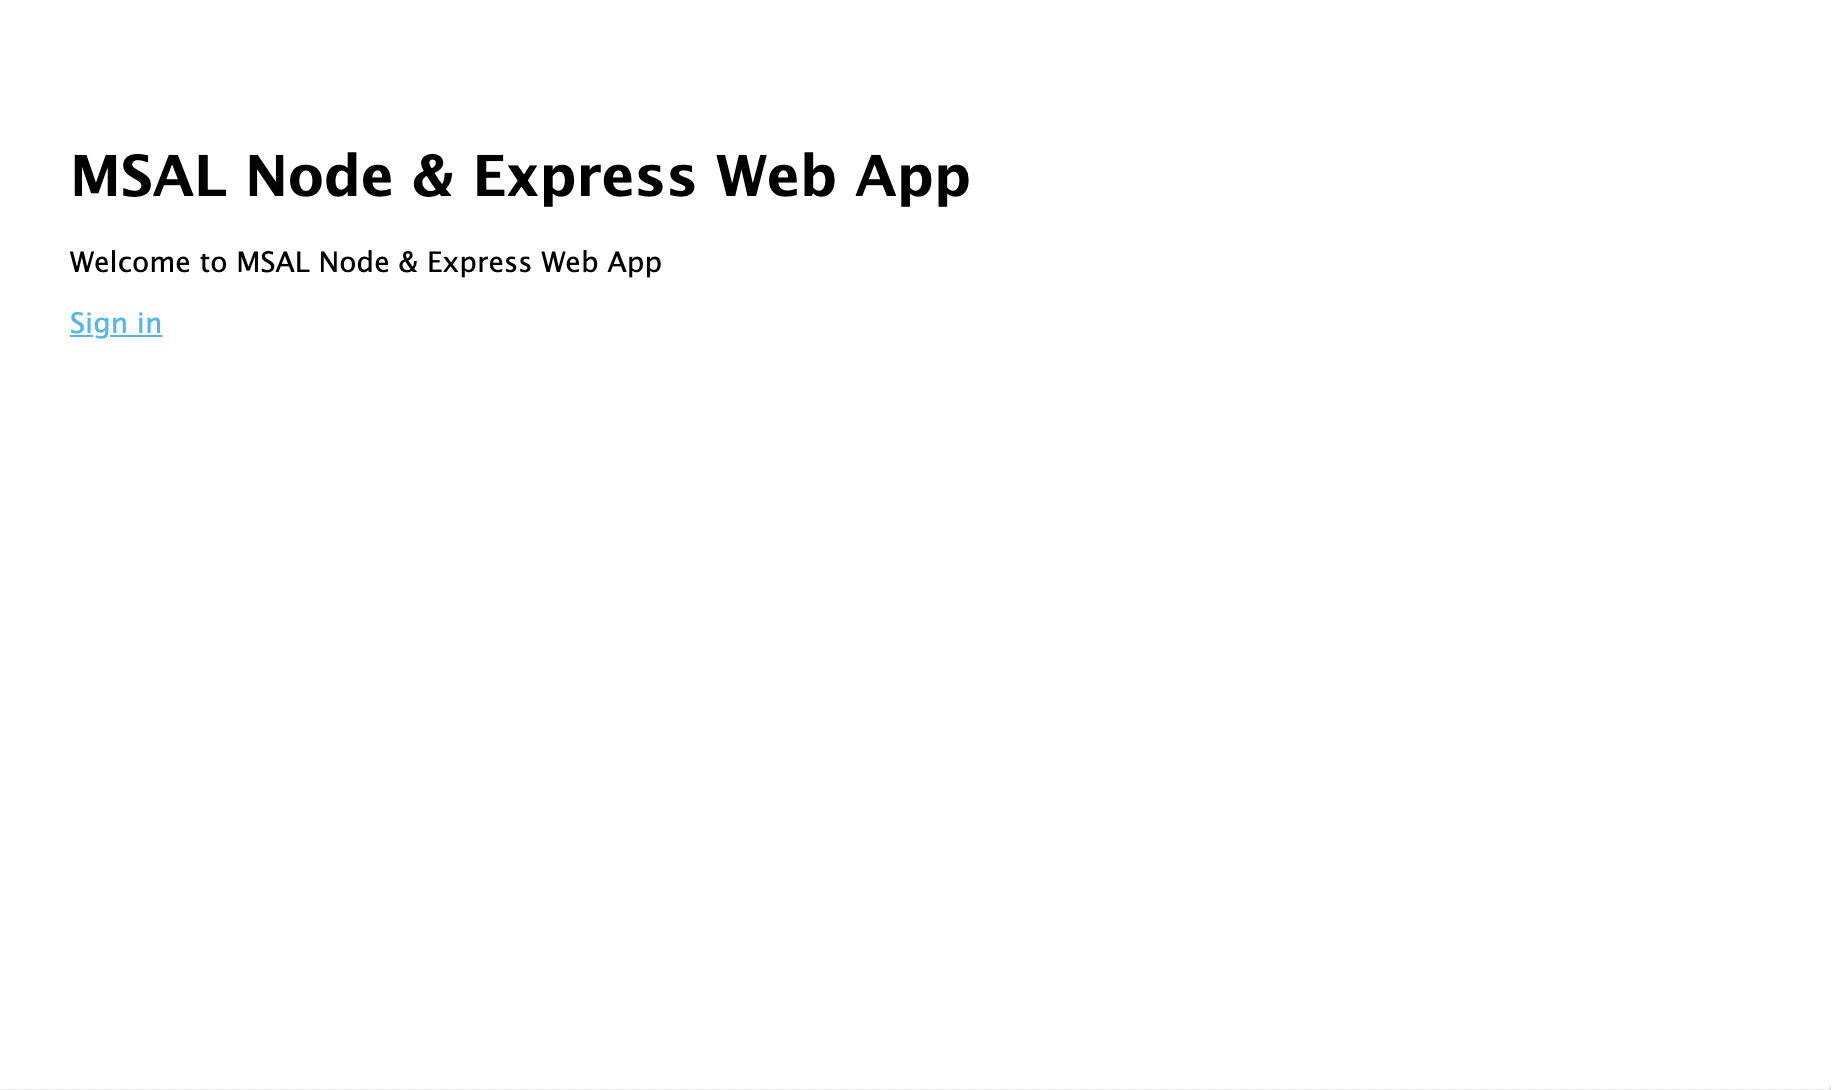
- Bir tarayıcı penceresi açın ve adresine
http://localhost:3000gidin. Bir karşılama sayfası görmeniz gerekir:
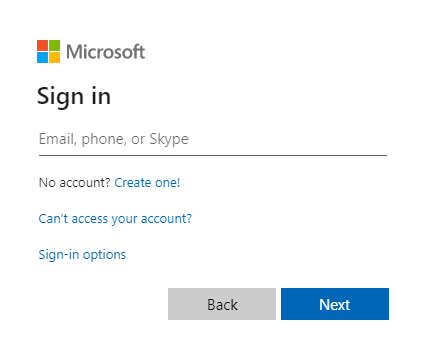
- Oturum aç bağlantısı'ı seçin. Microsoft Entra oturum açma ekranını görmeniz gerekir:
- Kimlik bilgilerinizi girdikten sonra uygulama izinlerini onaylamanızı isteyen bir onay ekranı görmeniz gerekir.
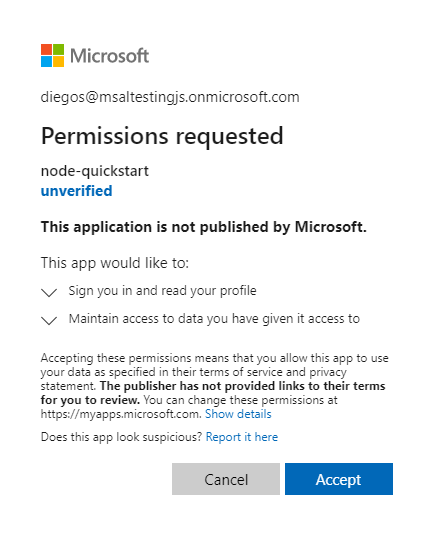
- Onay verdiğinizde uygulama giriş sayfasına geri yönlendirilmelisiniz.
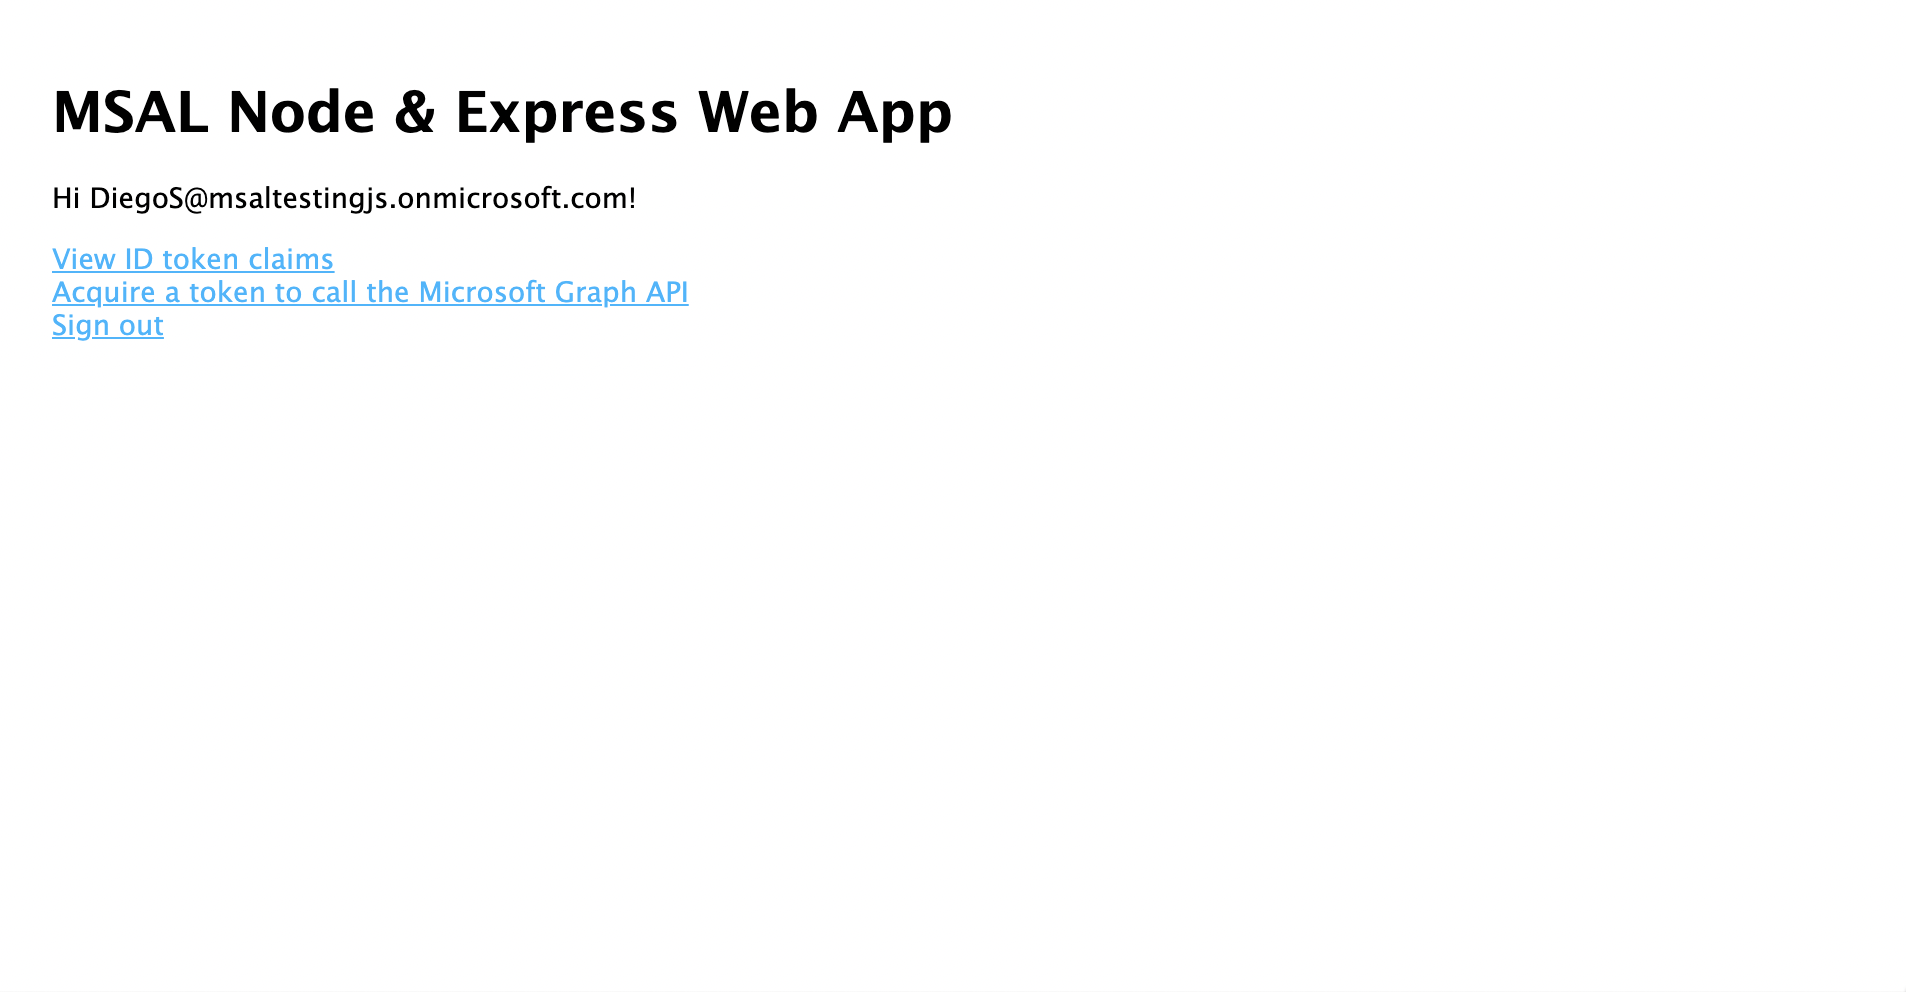
- Oturum açmış kullanıcının kimlik belirtecinin içeriğini görüntülemek için Kimlik Belirtecini Görüntüle bağlantısını seçin.
- Giriş sayfasına dönün ve Erişim belirteci al ve Microsoft Graph API'yi çağır bağlantısını seçin. Bunu yaptıktan sonra, oturum açmış kullanıcının Microsoft Graph /me uç noktasından gelen yanıtı görmeniz gerekir.
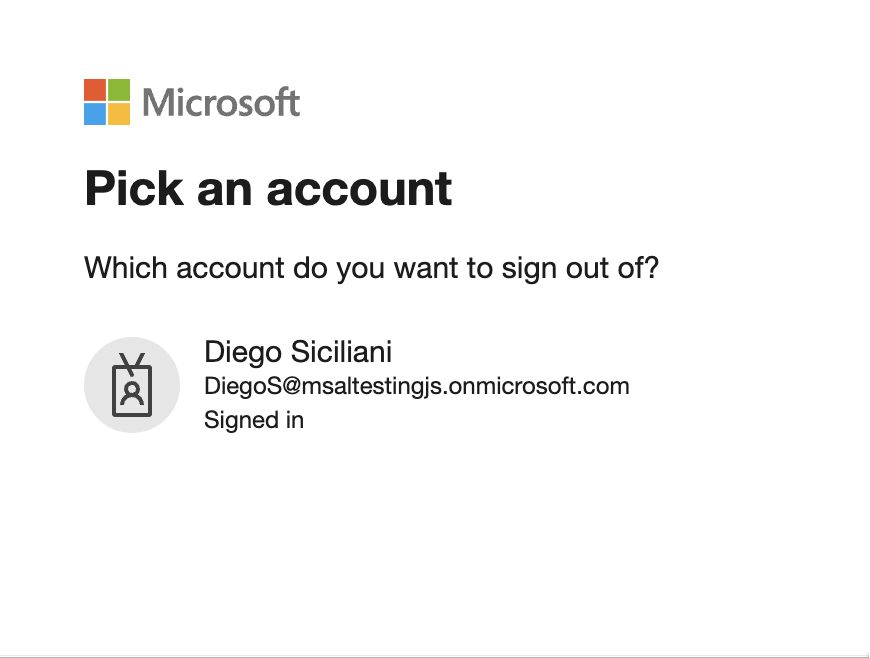
- Giriş sayfasına dönün ve Oturumu kapat bağlantısını seçin. Microsoft Entra oturumu kapatma ekranını görmelisiniz.
Uygulama nasıl çalışır?
Bu öğreticide, Azure portalında Microsoft Entra uygulama kaydınızdan alınan parametreleri içeren bir yapılandırma nesnesi (msalConfig) geçirerek bir MSAL Node ConfidentialClientApplication nesnesi oluşturmuştunuz. Oluşturduğunuz web uygulaması, kullanıcılarla oturum açmak için OpenID Connect protokolunu ve erişim belirteçlerini almak için OAuth 2.0 yetkilendirme kodu akışını kullanır.
Sonraki adımlar
Microsoft kimlik platformunda Node.js ve Express web uygulaması geliştirme hakkında daha ayrıntılı bilgi edinmek isterseniz çok parçalı senaryo serimize bakın: