Not
Bu sayfaya erişim yetkilendirme gerektiriyor. Oturum açmayı veya dizinleri değiştirmeyi deneyebilirsiniz.
Bu sayfaya erişim yetkilendirme gerektiriyor. Dizinleri değiştirmeyi deneyebilirsiniz.
Şunlar için geçerlidir:✅ Fabric Veri Mühendisliği ve Veri Bilimi
Fabric Veri Mühendisliği için Livy API'sini kullanarak Spark toplu işleri göndermeyi öğrenin. Livy API şu anda Azure Hizmet Sorumlusu'nu (SPN) desteklememektedir.
Önkoşullar
Fabric Premium veya Trial capacity ile Lakehouse.
Visual Studio Code gibi,Jupyter Notebooks ,PySpark ve Python içinMicrosoft Authentication Library (MSAL) içeren uzak bir istemci.Fabric Rest API'sine erişmek için bir Microsoft Entra uygulama belirteci gereklidir. Microsoft kimlik platformu ile bir uygulamayı kaydetme.
Göl evinizdeki bazı veriler arasında, bu örnekte NYC Taxi & Limousine Commission'a ait
green_tripdata_2022_08 isimli bir parquet dosyası göl evine yüklenmiştir.
Livy API,işlemler için birleşik bir uç nokta tanımlar. Bu makaledeki örnekleri izlediğinizde {Entra_TenantID}, {Entra_ClientID}, {Fabric_WorkspaceID} ve {Fabric_LakehouseID} yer tutucularını uygun değerlerle değiştirin.
Livy API Batch'iniz için Visual Studio Code yapılandırma
Fabric Lakehouse'unuzda Lakehouse Settings öğesini seçin.

Livy uç noktası bölümüne gidin.
&;lt;c2><c1><c0><sb0>Lakehouse Livy endpoint ve oturum işi bağlantı dizesini gösteren ekran görüntüsü.</sb0></c0></c1></c2>
Batch işi bağlantı dizesini (görüntüdeki ikinci kırmızı kutu) kodunuza kopyalayın.
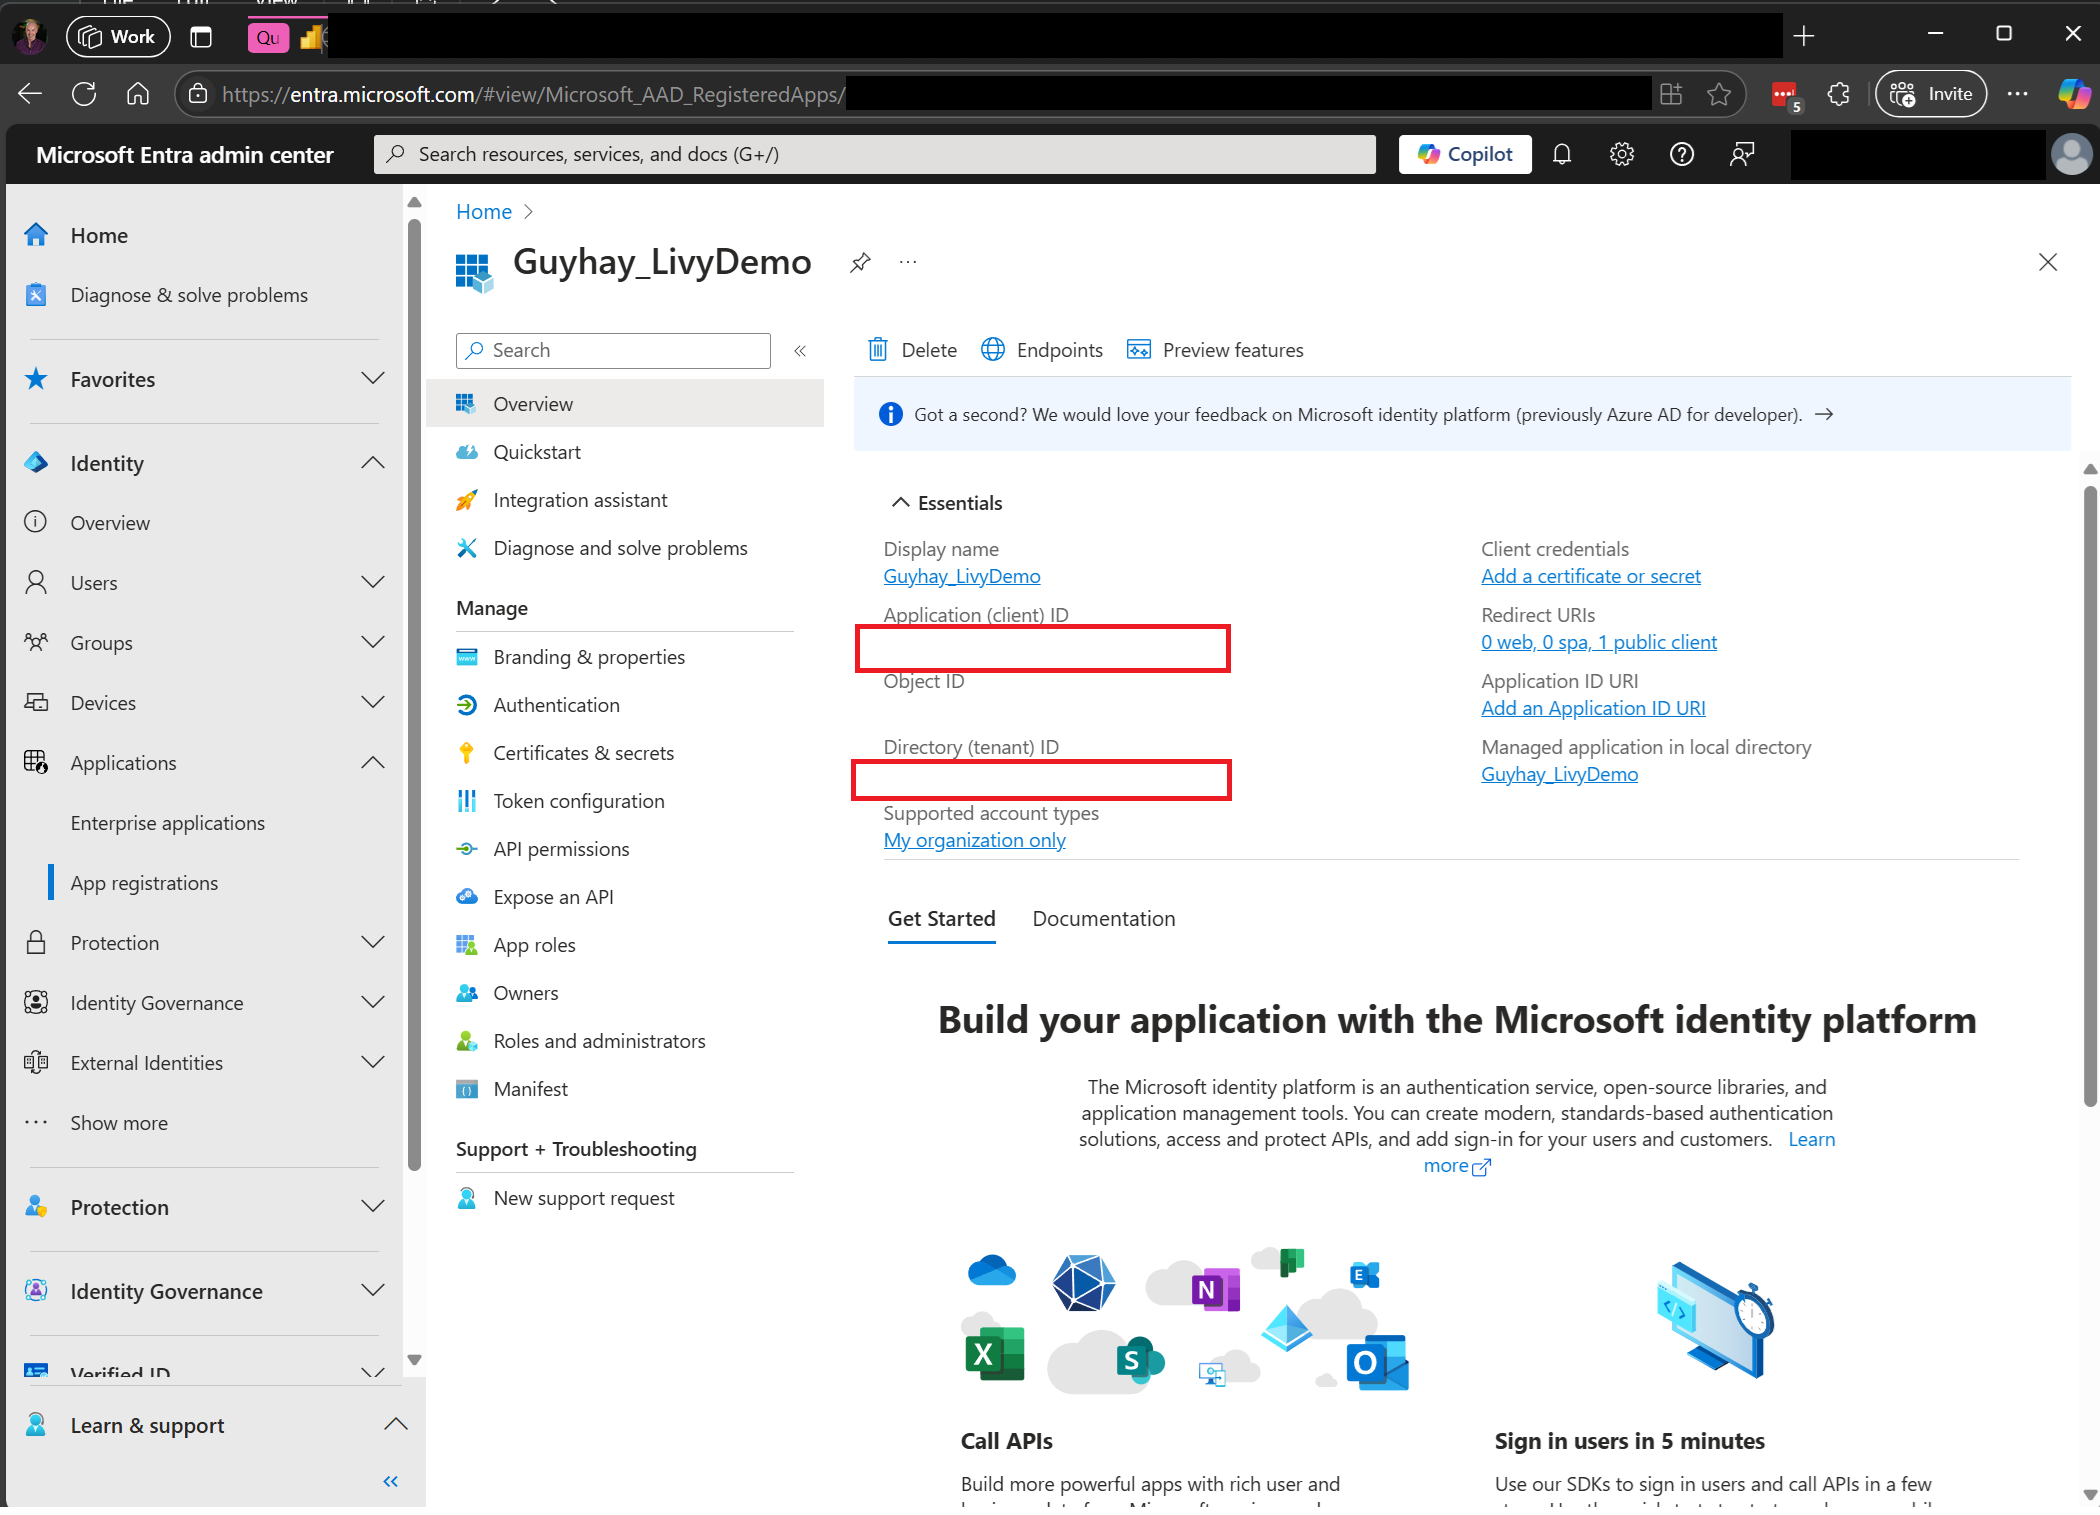
Microsoft Entra yönetim merkezi adresine gidin ve hem Uygulama (istemci) Kimliği hem de Dizin (kiracı) kimliğini kodunuzla kopyalayın.


Spark Batch kodu oluşturma ve Lakehouse'unuza yükleme
Visual Studio Code'da
.ipynbnot defteri oluşturun ve aşağıdaki kodu ekleyinimport sys import os from pyspark.sql import SparkSession from pyspark.conf import SparkConf from pyspark.sql.functions import col if __name__ == "__main__": #Spark session builder spark_session = (SparkSession .builder .appName("batch_demo") .getOrCreate()) spark_context = spark_session.sparkContext spark_context.setLogLevel("DEBUG") tableName = spark_context.getConf().get("spark.targetTable") if tableName is not None: print("tableName: " + str(tableName)) else: print("tableName is None") df_valid_totalPrice = spark_session.sql("SELECT * FROM green_tripdata_2022 where total_amount > 0") df_valid_totalPrice_plus_year = df_valid_totalPrice.withColumn("transaction_year", col("lpep_pickup_datetime").substr(1, 4)) deltaTablePath = f"Tables/{tableName}CleanedTransactions" df_valid_totalPrice_plus_year.write.mode('overwrite').format('delta').save(deltaTablePath)Python dosyasını yerel olarak kaydedin. Bu Python kod yükü, bir Lakehouse'daki veriler üzerinde çalışan ve Lakehouse'unuza yüklenmesi gereken iki Spark deyimi içerir. Visual Studio Code'daki Livy API toplu işinizde referans almak için yükün ABFS (Azure Blob Dosya Sistemi) yoluna ve
SELECTSQL ifadesindeki Lakehouse tablo adınıza ihtiyacınız vardır.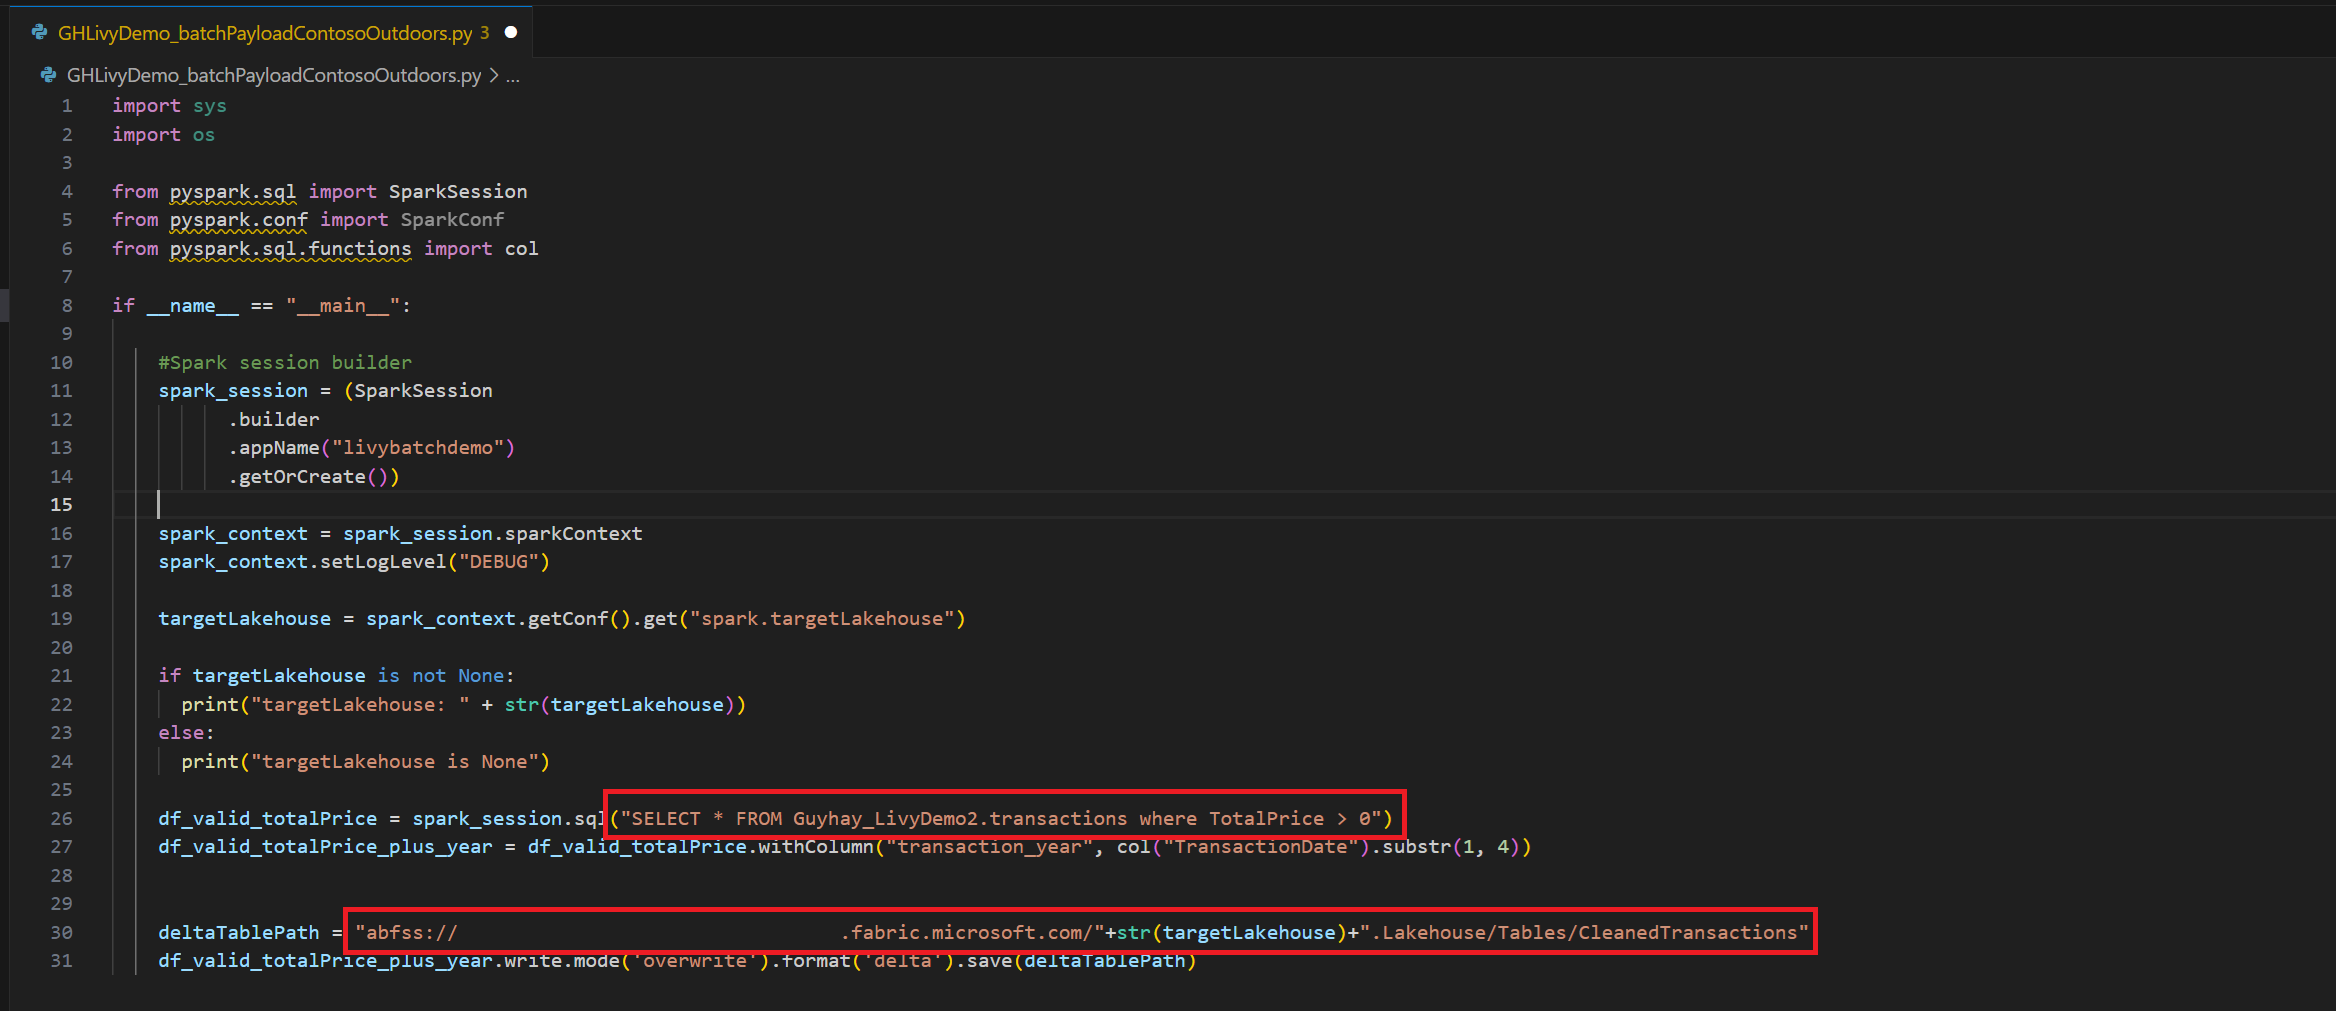
Python yükünü Lakehouse'unuzun dosyalar bölümüne yükleyin. Lakehouse gezgininde Dosyalar'ı seçin. Ardından >Veri al>Dosyaları karşıya yükle'yi seçin. Dosya seçici aracılığıyla dosyaları seçin.
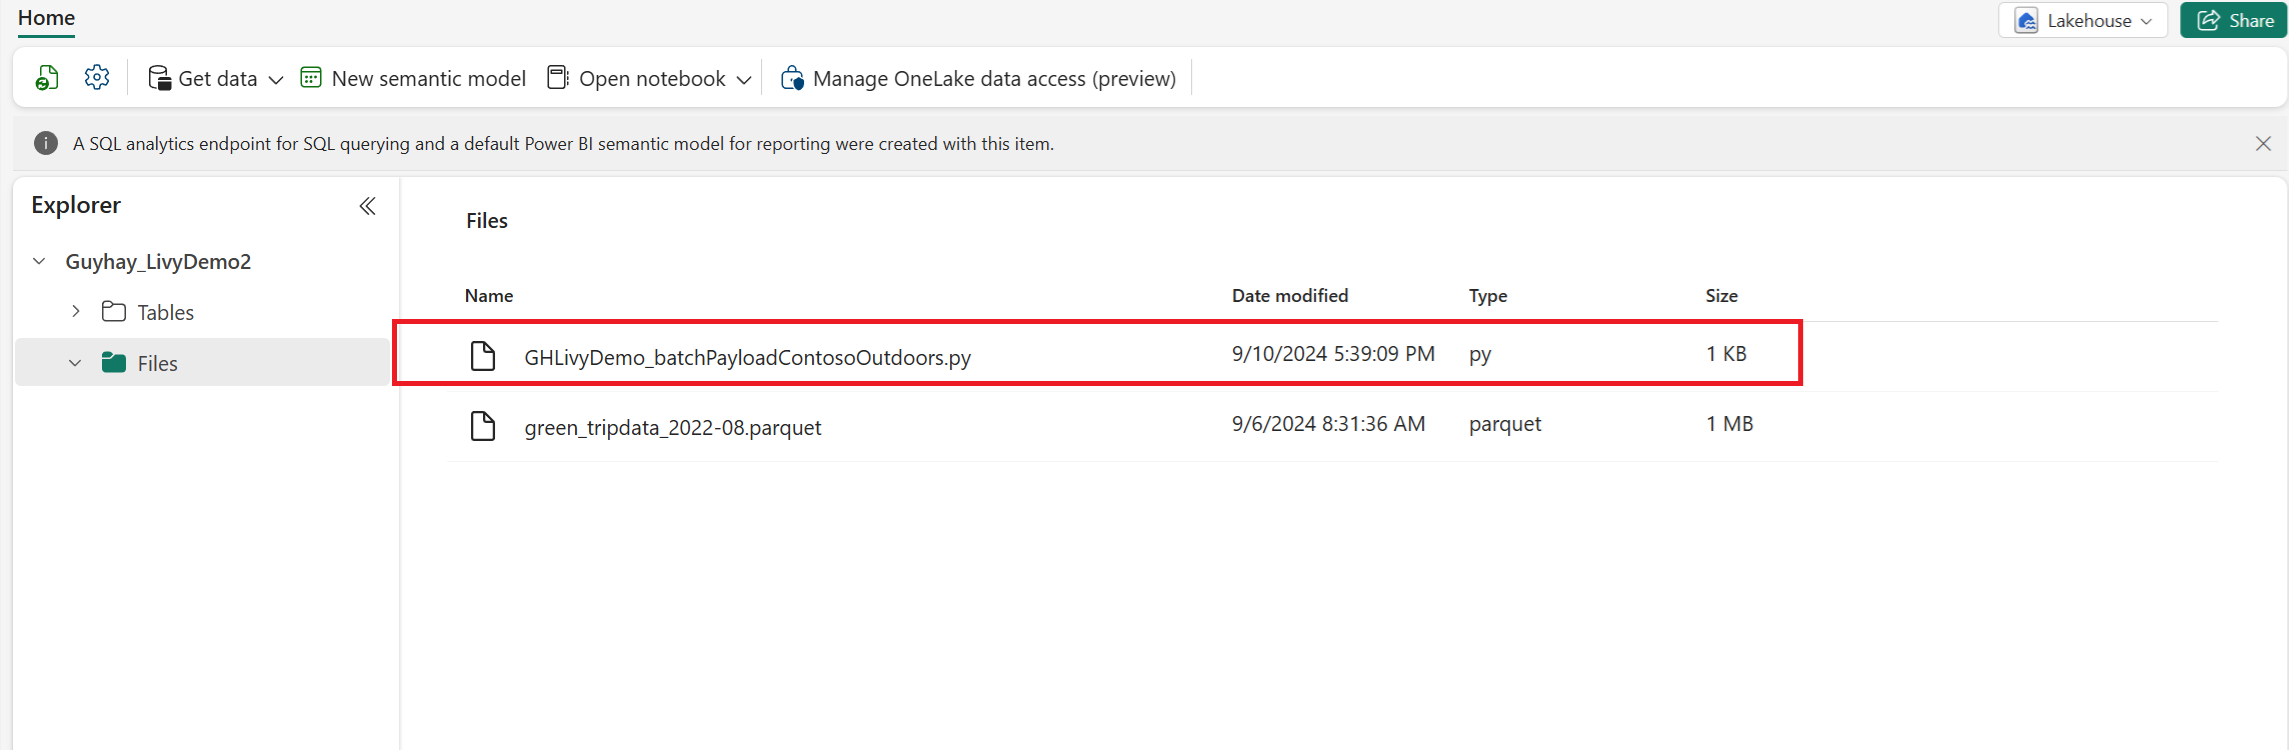
Dosya Lakehouse'unuzun Dosyalar bölümünde olduğunda, yük dosyasının adının sağındaki üç noktayı (üç nokta) seçin ve Özellikler'i seçin.
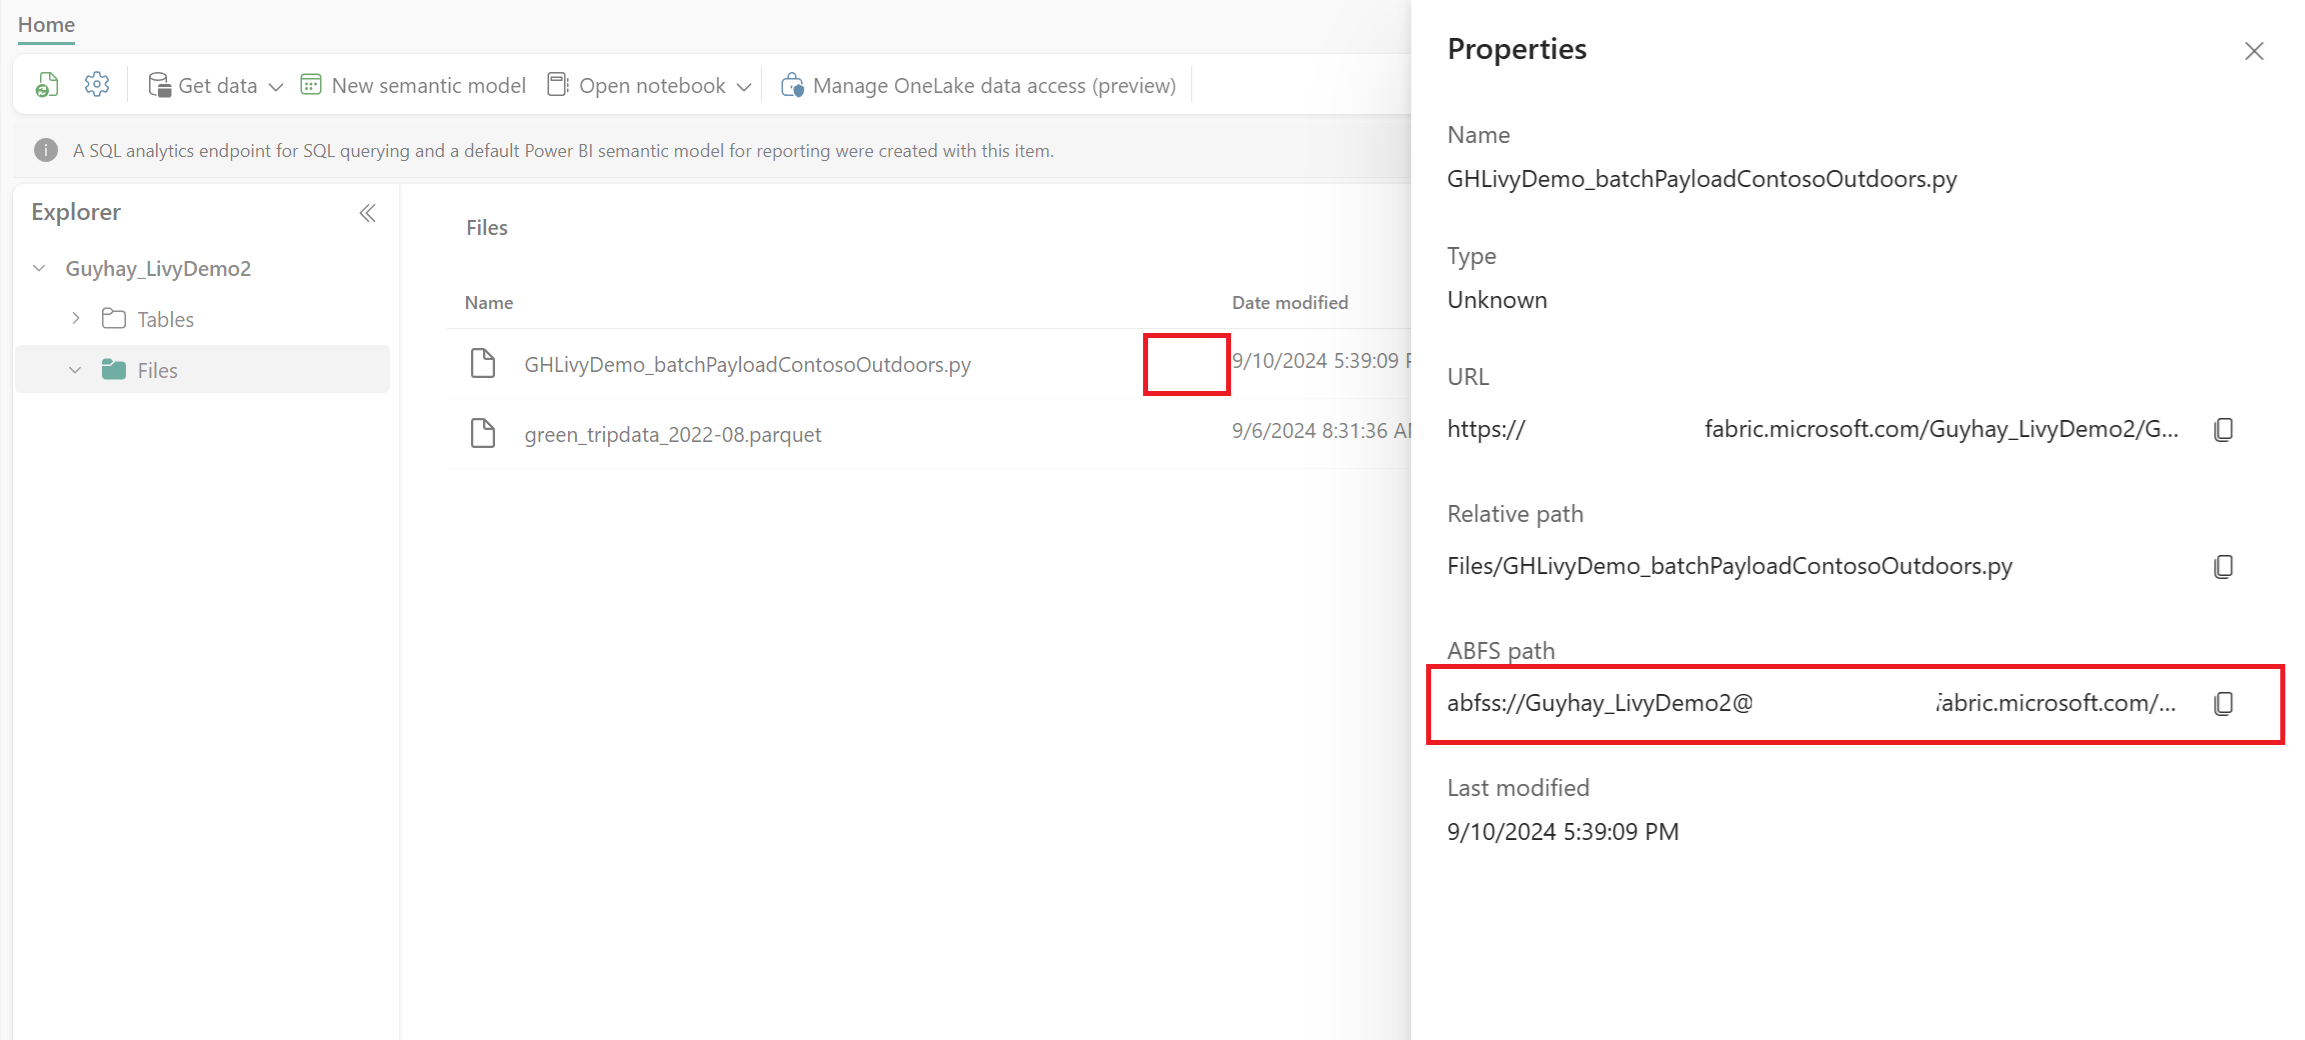
Bu ABFS yolunu 1. adımda Not Defteri hücrenize kopyalayın.


Microsoft Entra kullanıcı belirteci veya Microsoft Entra SPN belirteci kullanarak Livy API Spark toplu oturumu kimliğini doğrulama
Microsoft Entra SPN belirteci kullanarak Livy API Spark toplu oturumlarının kimliğini doğrulama
Visual Studio Code bir
.ipynbnot defteri oluşturun ve aşağıdaki kodu ekleyin.import sys from msal import ConfidentialClientApplication # Configuration - Replace with your actual values tenant_id = "Entra_TenantID" # Microsoft Entra tenant ID client_id = "Entra_ClientID" # Service Principal Application ID # Certificate paths - Update these paths to your certificate files certificate_path = "PATH_TO_YOUR_CERTIFICATE.pem" # Public certificate file private_key_path = "PATH_TO_YOUR_PRIVATE_KEY.pem" # Private key file certificate_thumbprint = "YOUR_CERTIFICATE_THUMBPRINT" # Certificate thumbprint # OAuth settings audience = "https://analysis.windows.net/powerbi/api/.default" authority = f"https://login.windows.net/{tenant_id}" def get_access_token(client_id, audience, authority, certificate_path, private_key_path, certificate_thumbprint=None): """ Get an app-only access token for a Service Principal using OAuth 2.0 client credentials flow. This function uses certificate-based authentication which is more secure than client secrets. Args: client_id (str): The Service Principal's client ID audience (str): The audience for the token (resource scope) authority (str): The OAuth authority URL certificate_path (str): Path to the certificate file (.pem format) private_key_path (str): Path to the private key file (.pem format) certificate_thumbprint (str): Certificate thumbprint (optional but recommended) Returns: str: The access token for API authentication Raises: Exception: If token acquisition fails """ try: # Read the certificate from PEM file with open(certificate_path, "r", encoding="utf-8") as f: certificate_pem = f.read() # Read the private key from PEM file with open(private_key_path, "r", encoding="utf-8") as f: private_key_pem = f.read() # Create the confidential client application app = ConfidentialClientApplication( client_id=client_id, authority=authority, client_credential={ "private_key": private_key_pem, "thumbprint": certificate_thumbprint, "certificate": certificate_pem } ) # Acquire token using client credentials flow token_response = app.acquire_token_for_client(scopes=[audience]) if "access_token" in token_response: print("Successfully acquired access token") return token_response["access_token"] else: raise Exception(f"Failed to retrieve token: {token_response.get('error_description', 'Unknown error')}") except FileNotFoundError as e: print(f"Certificate file not found: {e}") sys.exit(1) except Exception as e: print(f"Error retrieving token: {e}", file=sys.stderr) sys.exit(1) # Get the access token token = get_access_token(client_id, audience, authority, certificate_path, private_key_path, certificate_thumbprint)Not defteri hücresini çalıştırın, Microsoft Entra belirtecinin döndürüldiğini görmeniz gerekir.


Microsoft Entra kullanıcı belirteci kullanarak Livy API Spark oturumlarının kimliğini doğrulama
Visual Studio Code bir
.ipynbnot defteri oluşturun ve aşağıdaki kodu ekleyin.from msal import PublicClientApplication import requests import time # Configuration - Replace with your actual values tenant_id = "Entra_TenantID" # Microsoft Entra tenant ID client_id = "Entra_ClientID" # Application ID (can be the same as above or different) # Required scopes for Livy API access scopes = [ "https://api.fabric.microsoft.com/Lakehouse.Execute.All", # Required — execute operations in lakehouses "https://api.fabric.microsoft.com/Lakehouse.Read.All", # Required — read lakehouse metadata "https://api.fabric.microsoft.com/Code.AccessFabric.All", # Required — general Fabric API access from Spark Runtime "https://api.fabric.microsoft.com/Code.AccessStorage.All", # Required — access OneLake and Azure storage from Spark Runtime ] # Optional scopes — add these only if your Spark jobs need access to the corresponding services: # "https://api.fabric.microsoft.com/Code.AccessAzureKeyvault.All" # Optional — access Azure Key Vault from Spark Runtime # "https://api.fabric.microsoft.com/Code.AccessAzureDataLake.All" # Optional — access Azure Data Lake Storage Gen1 from Spark Runtime # "https://api.fabric.microsoft.com/Code.AccessAzureDataExplorer.All" # Optional — access Azure Data Explorer from Spark Runtime # "https://api.fabric.microsoft.com/Code.AccessSQL.All" # Optional — access Azure SQL audience tokens from Spark Runtime def get_access_token(tenant_id, client_id, scopes): """ Get an access token using interactive authentication. This method will open a browser window for user authentication. Args: tenant_id (str): The Azure Active Directory tenant ID client_id (str): The application client ID scopes (list): List of required permission scopes Returns: str: The access token, or None if authentication fails """ app = PublicClientApplication( client_id, authority=f"https://login.microsoftonline.com/{tenant_id}" ) print("Opening browser for interactive authentication...") token_response = app.acquire_token_interactive(scopes=scopes) if "access_token" in token_response: print("Successfully authenticated") return token_response["access_token"] else: print(f"Authentication failed: {token_response.get('error_description', 'Unknown error')}") return None # Uncomment the lines below to use interactive authentication token = get_access_token(tenant_id, client_id, scopes) print("Access token acquired via interactive login")Not defteri hücresini çalıştırın, tarayıcınızda oturum açabileceğiniz kimliği seçmenize olanak sağlayan bir açılır pencere görünmelidir.
Oturum açmak istediğiniz kimliği seçtikten sonra Microsoft Entra uygulama kayıt API'sinin izinlerini onaylamanız gerekir.

Kimlik doğrulamasını tamamladıktan sonra tarayıcı penceresini kapatın.

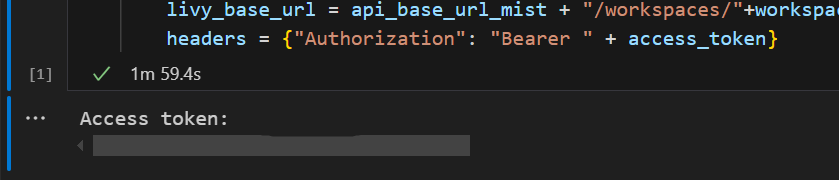
Visual Studio Code'de, Microsoft Entra belirtecinin döndürüldiğini görmeniz gerekir.


Livy API'sinin Code.* kapsamlarını anlama
Spark işleriniz Livy API aracılığıyla çalıştırıldığında kapsamlar, Code.* Spark Çalışma Zamanı'nın kimliği doğrulanmış kullanıcı adına hangi dış hizmetlere erişebileceğini denetler. İki gereklidir; geri kalanı, iş yükünüze bağlı olarak isteğe bağlıdır.
Gerekli Kod.* kapsamları
| Scope | Açıklama |
|---|---|
Code.AccessFabric.All |
Microsoft Fabric erişim belirteçlerinin alınabilmesini sağlar. Tüm Livy API işlemleri için gereklidir. |
Code.AccessStorage.All |
OneLake ve Azure depolama alanına erişim belirteçleri almaya izin verir. Lakehouse'larda veri okuma ve yazma işlemleri için gereklidir. |
İsteğe bağlı Code.* kapsamları
Bu kapsamları yalnızca Spark işlerinizin çalışma zamanında ilgili Azure hizmetlerine erişmesi gerekiyorsa ekleyin.
| Scope | Açıklama | Ne zaman kullanılır? |
|---|---|---|
Code.AccessAzureKeyvault.All |
Azure Key Vault için erişim belirteçlerine erişim izni verir. | Spark kodunuz Azure Key Vault'tan anahtarları, gizli bilgileri veya sertifikaları alır. |
Code.AccessAzureDataLake.All |
1. Nesil Azure Data Lake Storage erişim belirteçlerinin alınabilmesini sağlar. | Spark kodunuz 1. Nesil Azure Data Lake Storage hesaplarından okur veya bu hesaplara yazar. |
Code.AccessAzureDataExplorer.All |
Azure Veri Gezgini (Kusto) için erişim belirteçleri almaya izin verir. | Spark kodunuz Azure Veri Gezgini kümelere veri sorgular veya veri alır. |
Code.AccessSQL.All |
Azure SQL erişim belirteçlerinin alınabilmesini sağlar. | Spark kodunuzun Azure SQL veritabanlarına bağlanması gerekir. |
Uyarı
Lakehouse.Execute.All ve Lakehouse.Read.All kapsamları da gereklidir ancak Code.* ailesinin bir parçası değildir. Bunlar, sırasıyla Fabric lakehouse'larda işlem yürütme ve meta verileri okuma izni verir.
Livy Batch gönderin ve toplu işlemi denetleyin.
Başka bir not defteri hücresi ekleyin ve bu kodu ekleyin.
# submit payload to existing batch session

import requests
import time
import json

api_base_url = "https://api.fabric.microsoft.com/v1"  # Base URL for Fabric APIs

# Fabric Resource IDs - Replace with your workspace and lakehouse IDs
workspace_id = "Fabric_WorkspaceID"
lakehouse_id = "Fabric_LakehouseID"

# Construct the Livy Batch API URL
# URL pattern: {base_url}/workspaces/{workspace_id}/lakehouses/{lakehouse_id}/livyApi/versions/{api_version}/batches
livy_base_url = f"{api_base_url}/workspaces/{workspace_id}/lakehouses/{lakehouse_id}/livyApi/versions/2023-12-01/batches"

# Set up authentication headers
headers = {"Authorization": f"Bearer {token}"}

print(f"Livy Batch API URL: {livy_base_url}")

new_table_name = "TABLE_NAME"  # Name for the new table

# Configure the batch job
print("Configuring batch job parameters...")

# Batch job configuration - Modify these values for your use case
payload_data = {
    # Job name - will appear in the Fabric UI
    "name": f"livy_batch_demo_{new_table_name}",

    # Path to your Python file in the lakehouse
    "file": "<ABFSS_PATH_TO_YOUR_PYTHON_FILE>",  # Replace with your Python file path

    # Optional: Spark configuration parameters
    "conf": {
        "spark.targetTable": new_table_name,  # Custom configuration for your application
    },
}

print("Batch Job Configuration:")
print(json.dumps(payload_data, indent=2))

try:
    # Submit the batch job
    print("\nSubmitting batch job...")
    post_batch = requests.post(livy_base_url, headers=headers, json=payload_data)

    if post_batch.status_code == 202:
        batch_info = post_batch.json()
        print("Livy batch job submitted successfully!")
        print(f"Batch Job Info: {json.dumps(batch_info, indent=2)}")

        # Extract batch ID for monitoring
        batch_id = batch_info['id']
        livy_batch_get_url = f"{livy_base_url}/{batch_id}"

        print(f"\nBatch Job ID: {batch_id}")
        print(f"Monitoring URL: {livy_batch_get_url}")

    else:
        print(f"Failed to submit batch job. Status code: {post_batch.status_code}")
        print(f"Response: {post_batch.text}")

except requests.exceptions.RequestException as e:
    print(f"Network error occurred: {e}")
except json.JSONDecodeError as e:
    print(f"JSON decode error: {e}")
    print(f"Response text: {post_batch.text}")
except Exception as e:
    print(f"Unexpected error: {e}")
Not defteri hücresini çalıştırın; Livy Batch işi oluşturulup çalıştırılırken birkaç satırın yazdırıldığını görmelisiniz.

Değişiklikleri görmek için Lakehouse'unuza geri dönün.

Fabric Ortamları ile Entegrasyon
Varsayılan olarak, bu Livy API oturumu çalışma alanı için varsayılan başlangıç havuzunda çalışır. Alternatif olarak, livy API oturumunun bu Spark işleri için kullandığı Spark havuzunu özelleştirmek için Fabric Ortamları >Microsoft Fabric içinde ortam oluşturabilir, yapılandırabilir ve kullanabilirsiniz. Fabric Ortamınızı kullanmak için, önceki not defteri hücresini bu tek satır değişikliğiyle güncelleştirin.
payload_data = {
    "name":"livybatchdemo_with"+ newlakehouseName,
    "file":"abfss://YourABFSPathToYourPayload.py",
    "conf": {
        "spark.targetLakehouse": "Fabric_LakehouseID",
        "spark.fabric.environmentDetails" : "{\"id\" : \""EnvironmentID"\"}"  # remove this line to use starter pools instead of an environment, replace "EnvironmentID" with your environment ID
        }
    }
İzleme hub'ında işlerinizi görüntüleme
Sol taraftaki gezinti bağlantılarında İzleyici'yi seçerek çeşitli Apache Spark etkinliklerini görüntülemek için İzleme hub'ına erişebilirsiniz.
Toplu iş tamamlanma haline geldiğinde, İzleyici'ye giderek oturum durumunu görüntüleyebilirsiniz.
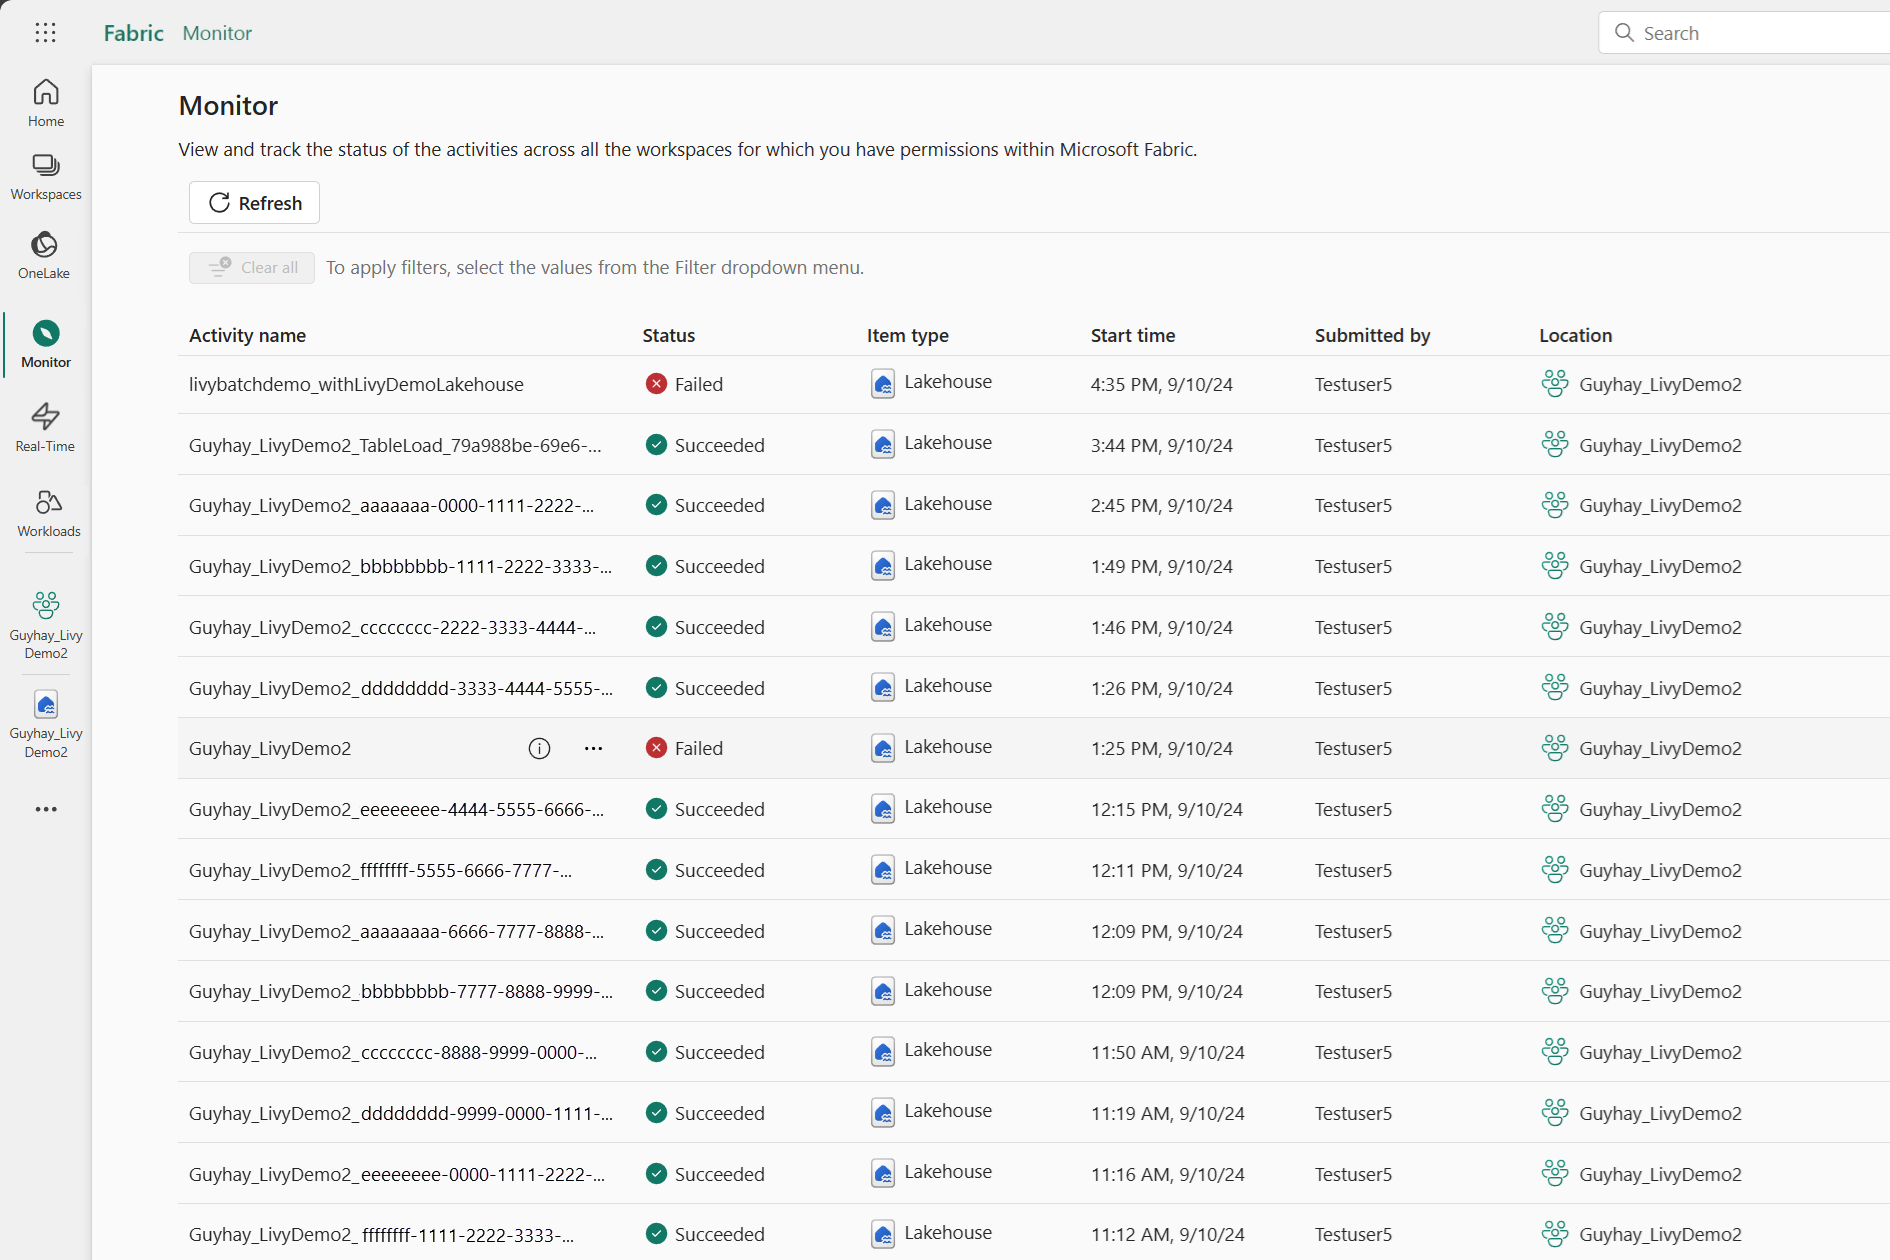
En son etkinlik adını seçin ve açın.

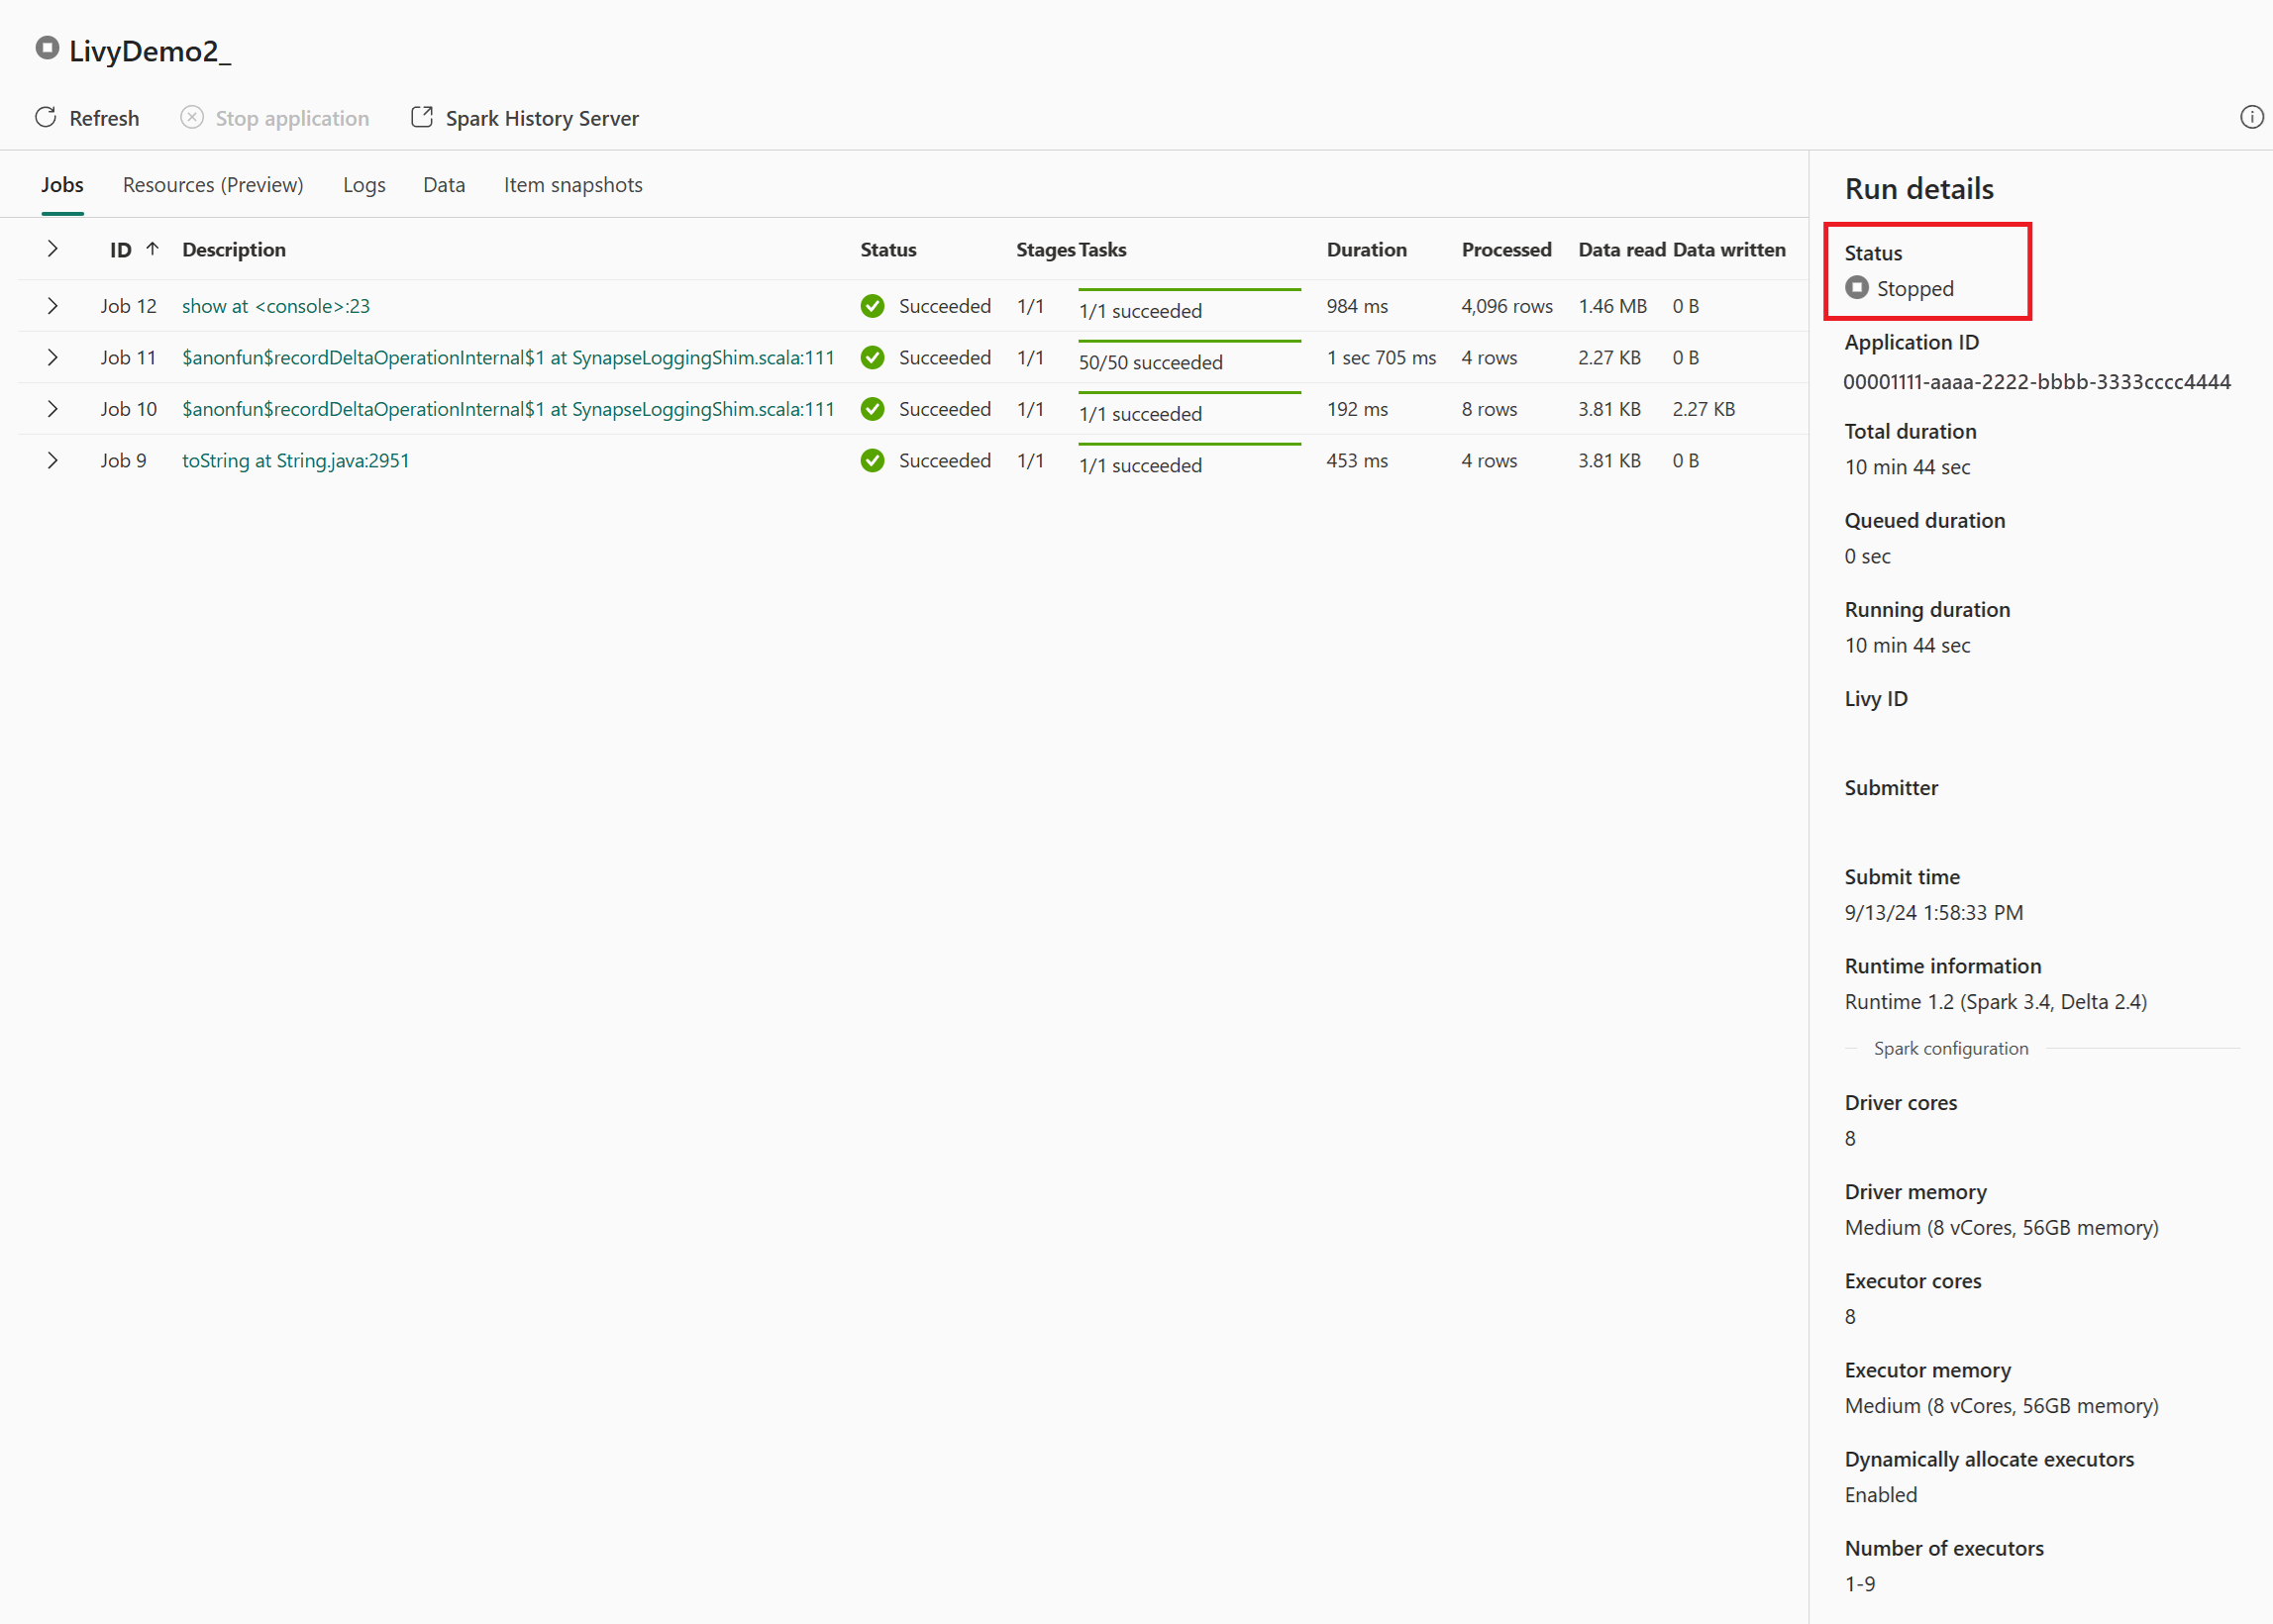
Bu Livy API oturum örneğinde, önceki toplu gönderiminizi, çalıştırma ayrıntılarınızı, Spark sürümlerini ve yapılandırmanızı görebilirsiniz. Sağ üst kısımdaki durduruldu durumuna dikkat edin.


İşlemin tamamını özetlemek için şunlara ihtiyacınız var: Visual Studio Code gibi bir uzak istemci, bir Microsoft Entra uygulama belirteci, Livy API uç noktası URL'si, Lakehouse'unuzda kimlik doğrulama, Lakehouse'unuzda bir Spark yükü ve son olarak bir toplu Livy API oturumu.