Create a standalone Office Add-in from your Script Lab code
If you created a snippet in Script Lab, you may want to turn it into a standalone add-in. You can copy the code from Script Lab into a project generated by the Yeoman Generator for Office Add-ins (also called "Yo Office"). Then you can continue developing the code as an add-in that you can eventually deploy to others.
The steps in this article refer to Visual Studio Code, but you can use any code editor that you prefer.
You need to create the standalone add-in project which will be the new development location for your snippet code.
Run the command yo office --projectType taskpane --ts true --host <host> --name "my-add-in", where <host> is one of the following values.
- excel
- outlook
- powerpoint
- word
Önemli
The --name argument value must be in double quotation marks, even if it has no spaces.
The previous command creates a new project folder named my-add-in. It's configured to run in the host you specified, and uses TypeScript. Script Lab uses TypeScript by default, but most of the snippets are JavaScript. You can build a Yo Office JavaScript project if you prefer, but just be sure any code you copy over is JavaScript.
Use an existing snippet in Script Lab to learn how to copy a snippet to a Yo Office generated project.
- Open Office (Word, Excel, PowerPoint, or Outlook) and then open Script Lab.
- Select Script Lab > Code. If you're working in Outlook, open an email message to see Script Lab on the ribbon.
- Open your snippet in Script Lab. If you want to start with an existing sample, go to the Script Lab task pane and choose Samples.
Now you can copy the code from the snippet to the Yo Office project in VS Code.
- In VS Code, open the my-add-in project.
In the next steps, you'll copy code from several tabs in Script Lab.
- In VS Code, open the /src/taskpane/taskpane.ts file. If you're using a JavaScript project, the filename is taskpane.js.
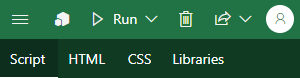
- In Script Lab, select the Script tab.
- Copy all of the code in the Script tab to the clipboard. Replace the entire contents of taskpane.ts (or taskpane.js for JavaScript) with the code you copied.
- In VS Code, open the /src/taskpane/taskpane.html file.
- In Script Lab, select the HTML tab.
- Copy all of the HTML in the HTML tab to the clipboard. Replace all of the HTML inside the
<body>tag with the HTML you copied.
- In VS Code, open the /src/taskpane/taskpane.css file.
- In Script Lab, select the CSS tab.
- Copy all of the CSS in the CSS tab to the clipboard. Replace the entire contents of taskpane.css with the CSS you copied.
- Save all changes to the files you updated in previous steps.
Script Lab uses jQuery in the snippets. You need to add this dependency to the Yo Office project to run the code successfully.
Open the taskpane.html file, and add the following script tag to the
<head>section.<script src="https://ajax.aspnetcdn.com/ajax/jquery/jquery-3.3.1.js"></script>Not
The specific version of jQuery may vary. You can determine which version Script Lab is using by choosing the Libraries tab.
Open a terminal in VS Code and enter the following commands.
npm install --save-dev jquery@3.1.1
npm install --save-dev @types/jquery@3.3.1
If you created a snippet that has additional library dependencies, be sure to add them to the Yo Office project. Find a list of all library dependencies on the Libraries tab in Script Lab.
Script Lab handles the Office.onReady initialization automatically. You'll need to modify the code to provide your own Office.onReady handler.
Open the taskpane.ts (or taskpane.js for JavaScript) file.
For Excel, PowerPoint, or Word, replace:
$("#run").on("click", () => tryCatch(run));with:
Office.onReady(function () {
  // Office is ready.
  $(document).ready(function () {
    // The document is ready.
    $("#run").on("click", () => tryCatch(run));
  });
});
For Outlook, replace:
$("#get").on("click", get);
$("#set").on("click", set);
$("#save").on("click", save);
with:
Office.onReady(function () {
  // Office is ready
  $(document).ready(function () {
    // The document is ready
    $("#get").on("click", get);
    $("#set").on("click", set);
    $("#save").on("click", save);
  });
});
Save the file.
If your snippet uses custom functions, you need to use the Yo Office custom functions template. To turn custom functions into a standalone add-in, follow these steps.
Run the command
yo office --projectType excel-functions --ts true --name "my-functions".Önemli
The
--nameargument value must be in double quotation marks, even if it has no spaces.Open Excel, and then open Script Lab.
Select Script Lab > Code.
Open your snippet in Script Lab. If you want to start with an existing sample, go to the Script Lab task pane, choose Samples, and search under the Custom Functions section.
Open the /src/functions/functions.ts file. If you're using a JavaScript project, the filename is functions.js.
In Script Lab, select the Script tab.
Copy all of the code in the Script tab to the clipboard. Paste the code at the top of the functions.ts (or functions.js for JavaScript) with the code you copied.
Save the file.
Once all the steps are complete, run and test out your standalone add-in. Run the following command to get started.
npm start
Office will start and you can open the task pane for your add-in from the ribbon. Congratulations! Now you can continue building your add-in as a standalone project.
When you're ready to stop the dev server and uninstall the add-in, run the following command.
npm stop
Many snippets in Script Lab write output to a console section at the bottom of the task pane. The Yo Office project doesn't have a console section. All console.log* statements will write to the default debug console (such as your browser developer tools). If you want the output to go to your task pane, you'll need to update the code.
Office Add-ins geri bildirimi
Office Add-ins, açık kaynak bir projedir. Geri bildirim sağlamak için bir bağlantı seçin: