Not
Bu sayfaya erişim yetkilendirme gerektiriyor. Oturum açmayı veya dizinleri değiştirmeyi deneyebilirsiniz.
Bu sayfaya erişim yetkilendirme gerektiriyor. Dizinleri değiştirmeyi deneyebilirsiniz.
Code apps can connect to Power Platform connectors.
Use the following steps:
- Create and set up connections in Power Apps
- Add a connection to a code app
- Update the app to call connections
Note
Use these steps after you initialize the app by using pac code init. This step is the third step in how to create a code app from scratch.
Create and set up connections in Power Apps
Start by creating and configuring connections at Power Apps. Copy connection metadata from there for use in later steps.
All connectors are officially supported except the ones listed in the following section.
Connectors that aren't yet supported
Important
You can now create connections directly from the CLI rather than through the Power Apps maker portal. See Create a connection from the CLI (preview).
Launch the Power Apps Connections page
Go to Power Apps and navigate to the Connections page from the left-hand navigation.
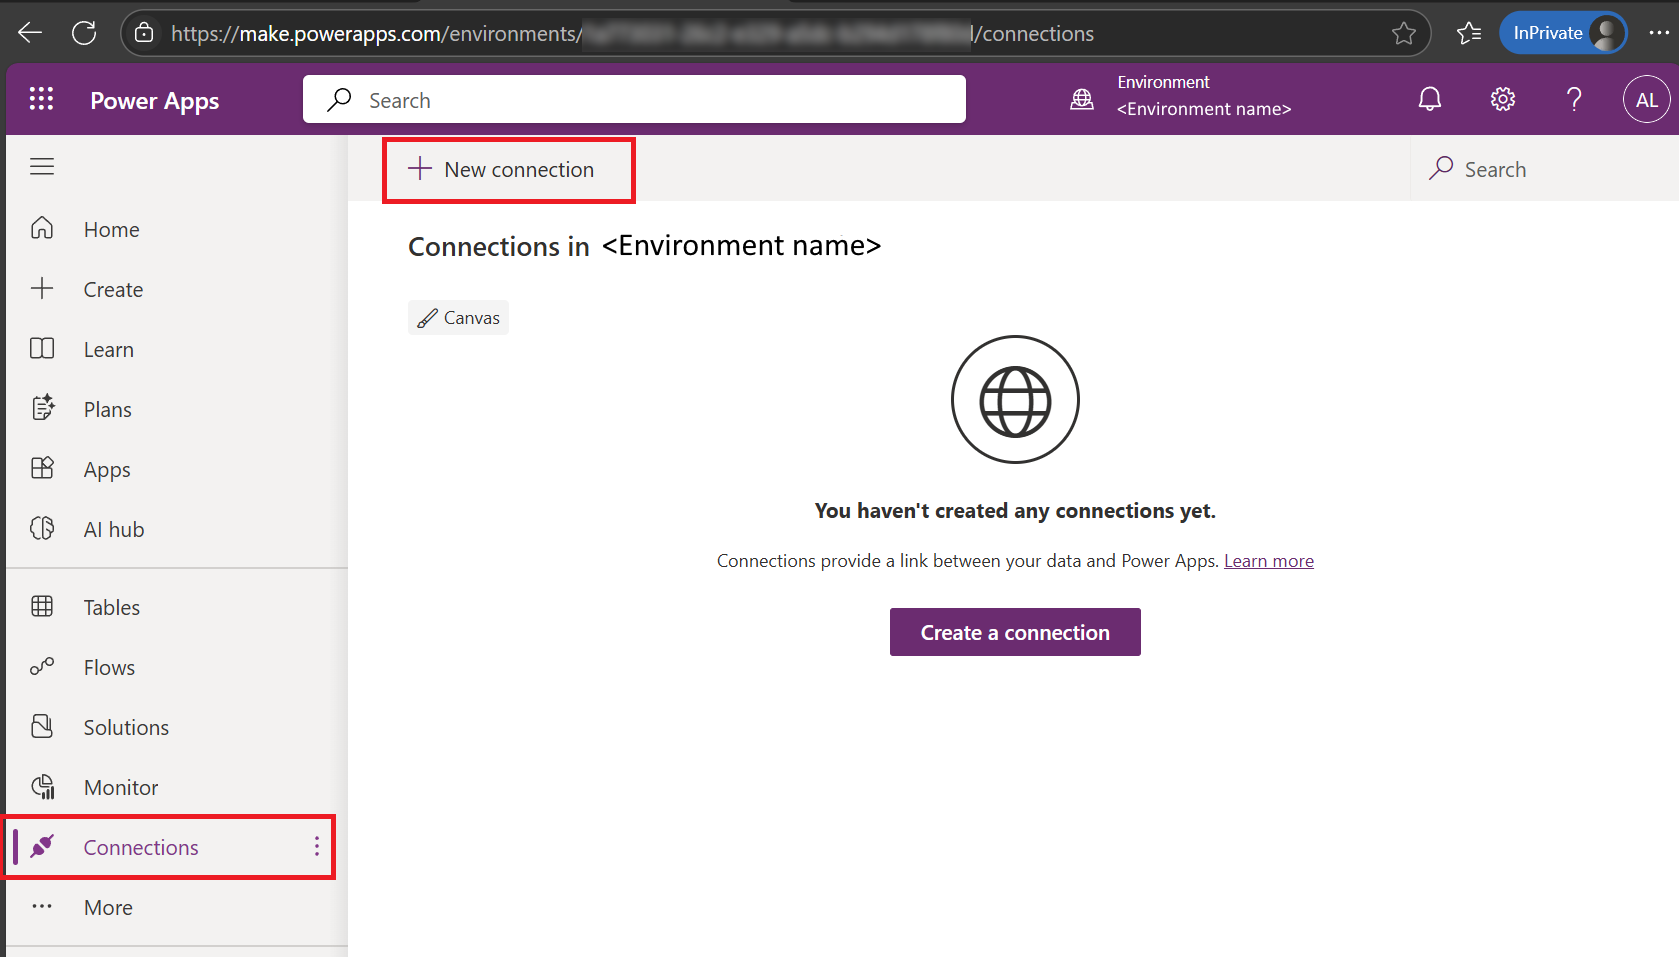
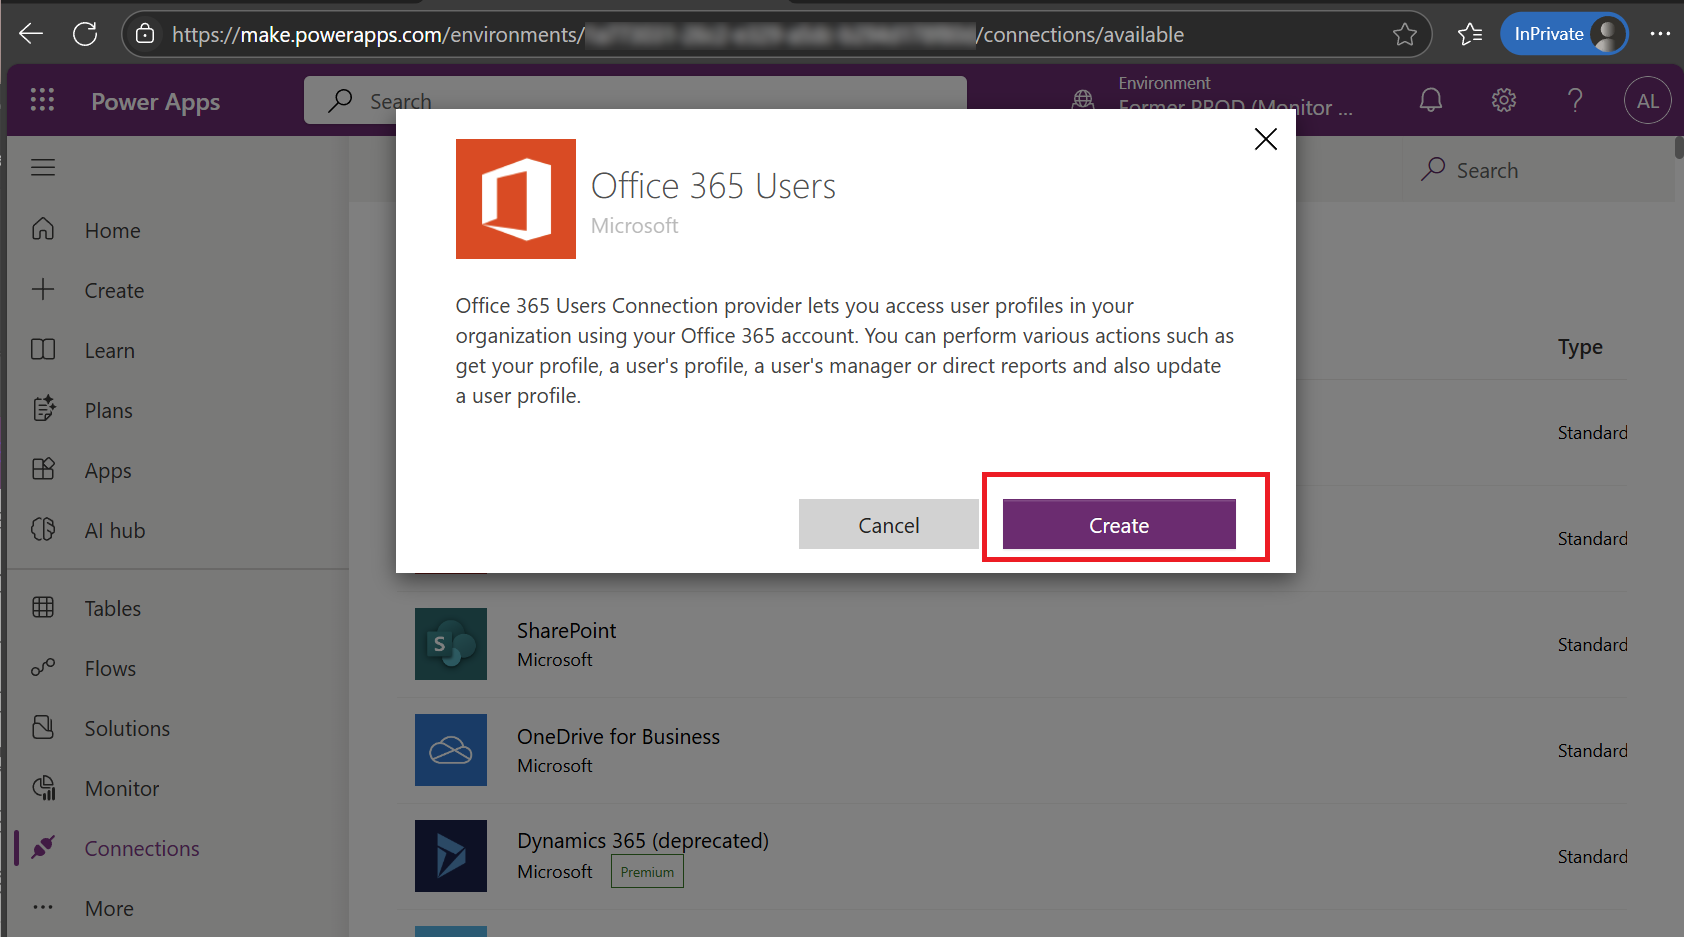
Example: Create an Office 365 Users connection
Select + New connection and select Office 365 Users. Select Create.
Note
If you already have an Office 365 Users connection, use that connection instead of creating a new one.
(Optional) Create a SQL connection (or a connection for another tabular data source)
Tip
For a step-by-step guide to connecting your code app to Azure SQL, see How to: Connect your code app to Azure SQL.
Get connection metadata for all created connections
Use one of the following methods:
Use PAC CLI
Use the Power Apps CLI to list your available connections and get their IDs by using the pac connection list command.
pac connection list shows a table of all your connections, including the Connection ID and API Name. The API name acts as the appId when you add a data source.

Use Power Apps URL
You can also get this information by using Power Apps. When you view the details of a connection, you can see the URL.
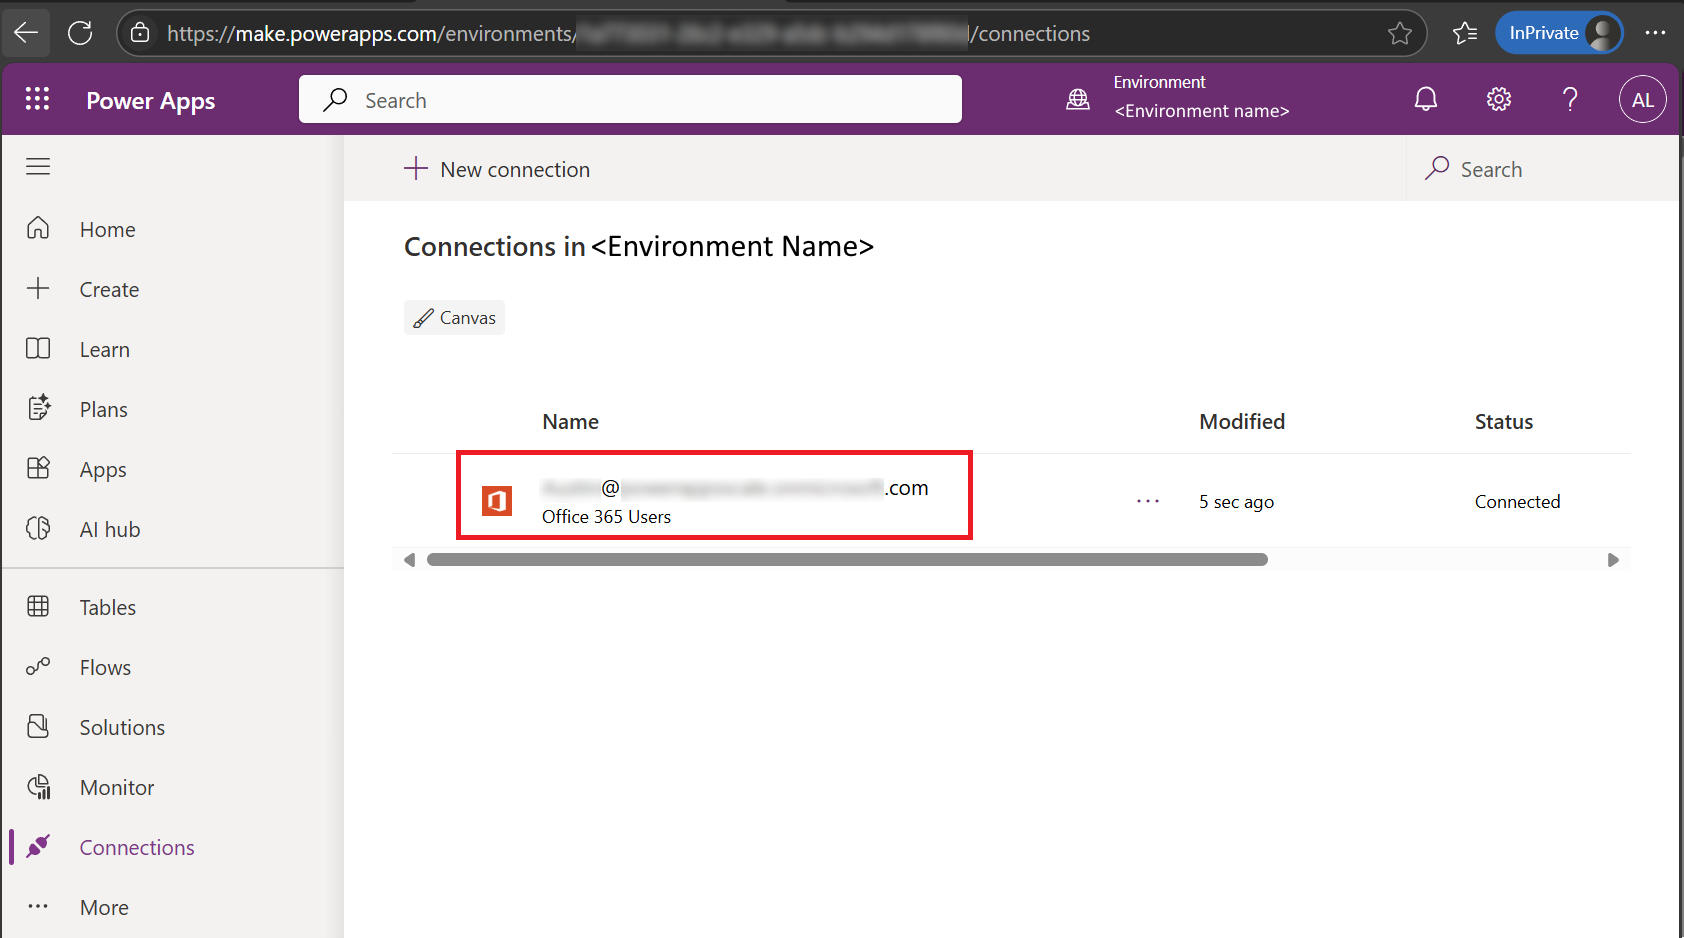
The API name and connection ID show up in the URL:
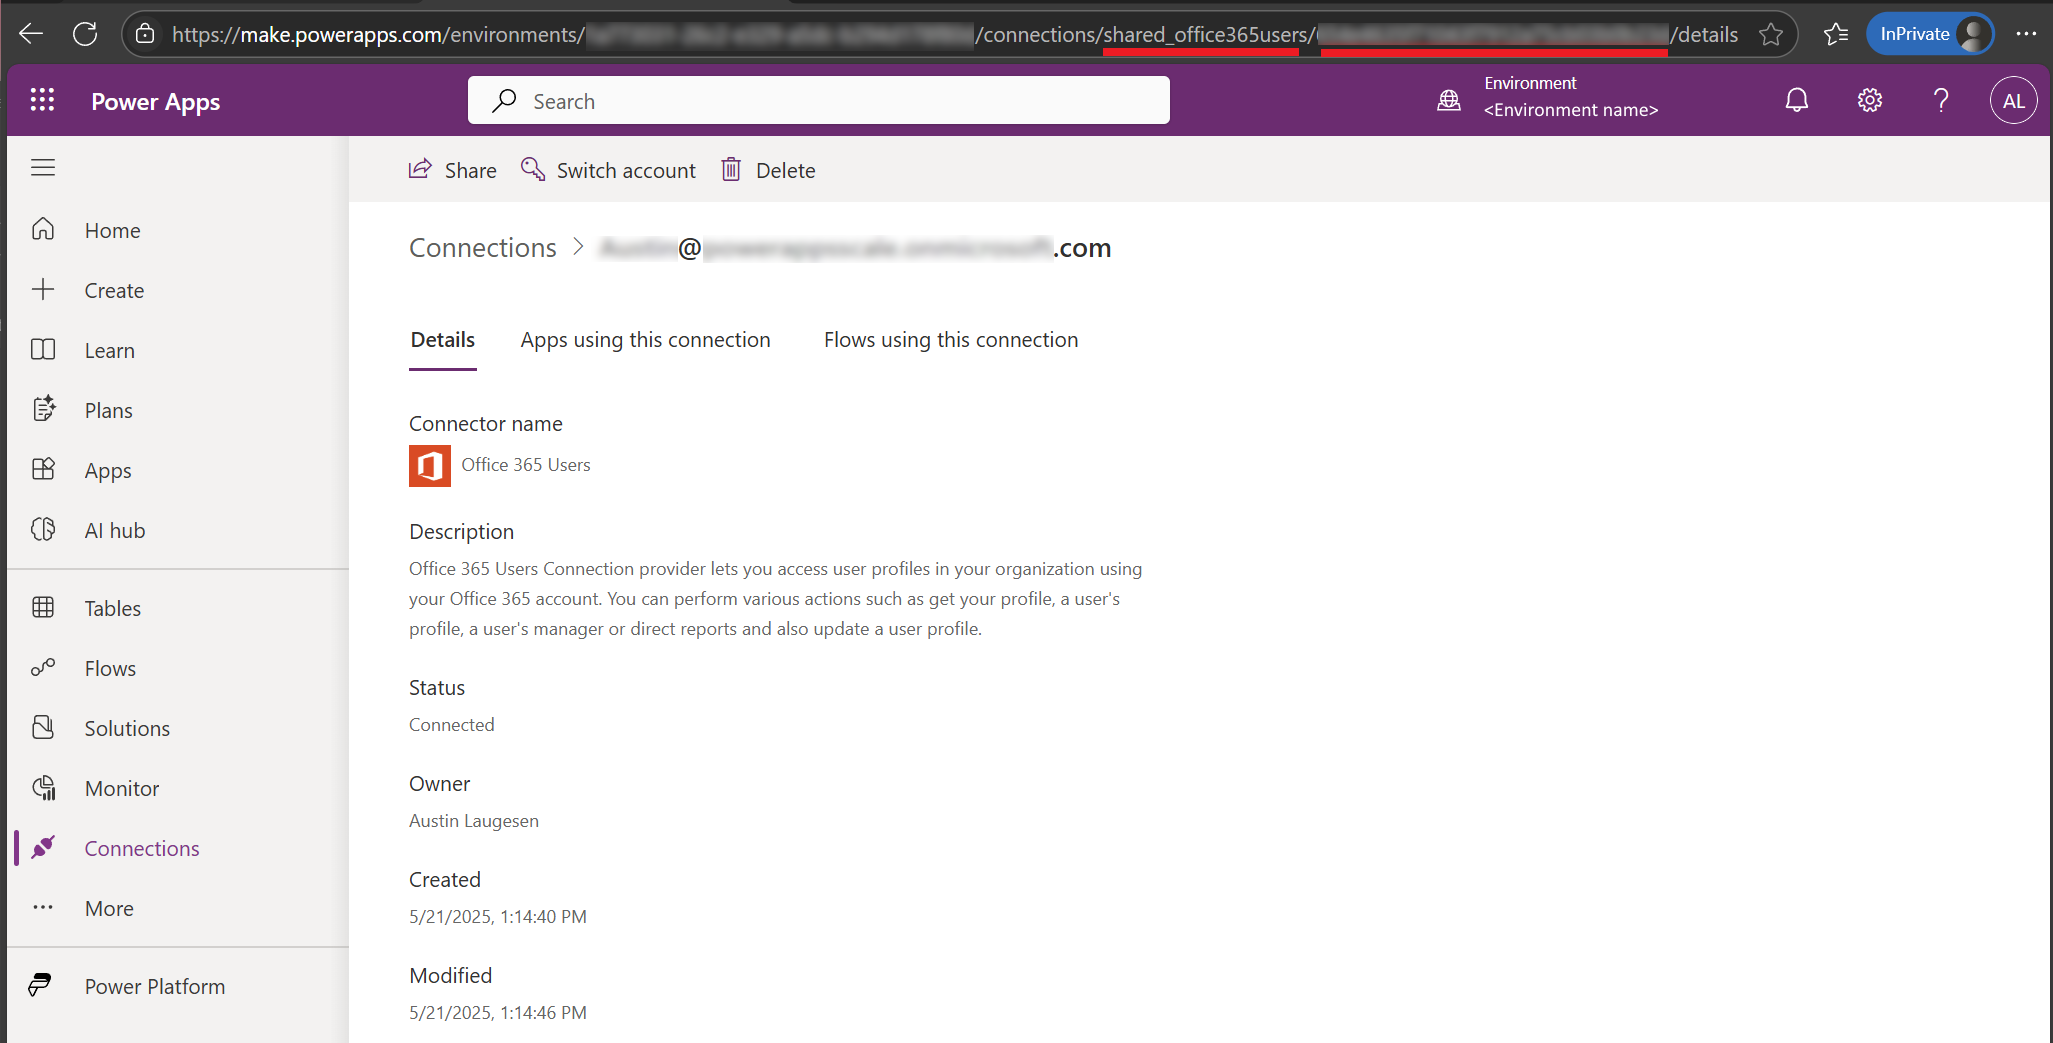
Copy the API name and the connection ID from PAC CLI to the URL for each connection.
Add a connection to a code app
After you create or identify existing connections to use, and copy the connection metadata from the previous step, add those connections to the app.
When you add the data sources to the app, the process automatically generates a typed TypeScript model and service file in the repo. For example, the Office 365 Users data source produces Office365UsersModel and Office365UsersService files.
Add a nontabular data source
Add a nontabular data source (such as Office 365 Users) to the app by using the PAC CLI pac code add-data-source command.
From a command line, run the following command. Use the API name and connection ID that you collected from previous steps.
pac code add-data-source -a <apiName> -c <connectionId>
For example:
pac code add-data-source -a "shared_office365users" -c "aaaaaaaa000011112222bbbbbbbbbbbb"
Add a tabular data source
SQL or SharePoint are examples of tabular data sources.
Use the same PAC CLI pac code add-data-source command, but include a table ID and dataset name. The schema of your tabular data source specifies these values. If you don't already have these values, see Discover available datasets and tables.
pac code add-data-source -a <apiName> -c <connectionId> -t <tableId> -d <datasetName>
SQL example
pac code add-data-source `
-a "shared_sql" `
-c "aaaaaaaa000011112222bbbbbbbbbbbb" `
-t "[dbo].[MobileDeviceInventory]" `
-d "paconnectivitysql0425.database.windows.net,paruntimedb"

pac code add-data-source `
-a "shared_sql" `
-c "aaaaaaaa000011112222bbbbbbbbbbbb" `
-t "[dbo].[EmployeeInformation]" `
-d "paconnectivitysql0425.database.windows.net,paruntimedb"
SharePoint example
For SharePoint, -t is the List name and -d is the SharePoint site:
pac code add-data-source `
-a "shared_sharepointonline" `
-c "aaaaaaaa000011112222bbbbbbbbbbbb" `
-t "Travel%20Request" `
-d "https://contoso.sharepoint.com/sites/TravelPolicies"
Discover available datasets and tables
Use PAC CLI pac code list commands to discover available datasets, tables, and stored procedures for your connections. This method is easier than manually retrieving metadata through browser developer tools.
List datasets:
pac code list-datasets -a <apiId> -c <connectionId>
List tables:
pac code list-tables -a <apiId> -c <connectionId> -d <datasetName>
List SQL stored procedures:
pac code list-sql-stored-procedures -c <connectionId> -d <datasetName>
Example workflow for SQL Server:
# Step 1: List available datasets
pac code list-datasets -a "shared_sql" -c "aaaaaaaa000011112222bbbbbbbbbbbb"

# Step 2: List tables in the dataset
pac code list-tables -a "shared_sql" -c "aaaaaaaa000011112222bbbbbbbbbbbb" `
  -d "paconnectivitysql0425.database.windows.net,paruntimedb"

# Step 3: Add the table to your code app
pac code add-data-source -a "shared_sql" -c "aaaaaaaa000011112222bbbbbbbbbbbb" `
  -t "[dbo].[MobileDeviceInventory]" `
  -d "paconnectivitysql0425.database.windows.net,paruntimedb"
Tip
Copy the exact Name values from the command output when using them with add-data-source. Names are case-sensitive and might contain special characters.
Add a SQL stored procedure as a data source
Run the following command from a command line. Use the API name and connection ID that you collected previously.
pac code add-data-source -a <apiId> -c <connectionId> -d <dataSourceName> -sp <storedProcedureName>
For example:
pac code add-data-source `
–a "shared_sql" `
-c "33dd33ddee44ff55aa6677bb77bb77bb" `
-d "paconnectivitysql0425.database.windows.net,paruntimedb" `
-sp "[dbo].[GetRecordById]"
Delete data sources
If needed, you can delete data sources after adding them.
Run the following command from a command line. Use the API name and connection ID that you collected previously.
pac code delete-data-source -a <apiName> -ds <dataSourceName>
For example:
pac code delete-data-source `
-a "shared_sql" `
-ds "MobileDeviceInventory"
Important
If the schema on a connection changes, no command exists to refresh the typed model and service files. Instead, delete the data source and readd it.
Use connection references to add a data source
Starting in version 1.51.1 of the Power Apps CLI released in December 2025, you can use connection references to add data sources to your code app. A connection reference is a solution component that points to a specific connection for a connector. Instead of binding your app directly to a user-specific connection, bind it to a reference. This approach makes the solution environment-aware and portable across Dev, Test, and Prod environments for smooth application lifecycle management.
Note
This section assumes you have a basic knowledge of solutions in Power Apps and connection references. You should have a solution created already and a connection reference in that solution for your data source. If you don't, follow the steps outlined in the links below to create one.
Get the solution ID
Use one of the following methods to get the ID of your solution:
Use the PAC CLI solution list command:
Open a command prompt or terminal window.
Run the following command to get a list of solutions in the environment you're connected to:
pac solution list --json | ConvertFrom-Json | Format-TableThis command outputs a table to the console with the
Id,SolutionUniqueName, andFriendlyNamesolution properties.Copy the solution
Idand save it for later use.
Use the Power Apps solution explorer:
Sign in to Power Apps.
On the left pane, select Solutions. If the item isn't in the side panel pane, select More and then select the item you want.
Find the solution that contains the connection reference for your data source.
Select the solution to open it.
In the URL of the browser, find the solution ID at the end of the URL. Your URL is of the form:
https://make.powerapps.com/environments/environmentId/solutions/solutionIdCopy the solution ID from the URL and save it for later use.
Get the name of the connection reference to your data source
Use one of the following methods to get the connection reference to your data source:
Use the PAC CLI code command to list the connection references in a solution:
Open a command prompt or terminal window.
Run the following command to get the solution ID and name of the connection reference to your data source:
pac code list-connection-references -env <environmentURL> -s <solutionID>The output includes the display name, logical name, and description of the connection references in the solution.
Use the Power Apps solution explorer to examine the connection references in a solution:
- Sign in to Power Apps.
- On the left pane, select Solutions. If the item isn't in the side panel pane, select More and then select the item you want.
- Find the solution that contains the connection reference for your data source.
- Select Connection References from the list of Objects in the left pane.
Add the data source to your code app by using the connection reference
From a command line, run the following command. Use the solution ID and connection reference logical name collected from previous steps.
pac code add-data-source -a <apiName> -cr <connectionReferenceLogicalName> -s <solutionID>
The app now uses the connection associated with the connection reference in your Power Apps solution.
Update the app to call connections
After you add connections, update the app to use the generated model and service.
Note
You can also make these changes by using an agent in your IDE. For instance, in Visual Studio Code, you might use GitHub Copilot agent mode to make them for you after you add the data sources.
Import required types and services
When you add a data source, the portal automatically generates model and service files. It places these files in the
/generated/services/folder. For example, if you addOffice365Usersas a data source, the portal creates the following files:Office365UsersModel.ts– Defines the data model for request and response objects in theOffice365Usersconnector.Office365UsersService.ts– Provides service methods for interacting with theOffice365Usersdata.
Import and use these files in your code like this:
import { Office365UsersService } from './generated/services/Office365UsersService';
import type { User } from './generated/models/Office365UsersModel';
Update the app to use the nontabular data source (for example, Office 365 Users)
For the typed connection API, view the generated files under the
src/generated/modelsandsrc/generated/servicesfolders.await Office365UsersService.MyProfile()const profile = (await Office365UsersService.MyProfile_V2("id,displayName,jobTitle,id,userPrincipalName")).data; setUser(profile); if (profile?.id || profile?.userPrincipalName) { // Try both id and userPrincipalName for photo let photoData = null; try { photoData = (await Office365UsersService.UserPhoto_V2(profile.id || profile.userPrincipalName)).data; } catch { // fallback to userPrincipalName if id fails if (profile.userPrincipalName) { photoData = (await Office365UsersService.UserPhoto_V2(profile.userPrincipalName)).data; } } if (photoData) setPhoto(`data:image/jpeg;base64,${photoData}`);(Optional) Update the app to use the tabular data source (for example, SQL)
For the typed connection API, view the generated files under the
src/Modelsandsrc/Servicesfolders.For example:
await MobileDeviceInventoryService.create(<record>)
await MobileDeviceInventoryService.update(id, <record>)
await MobileDeviceInventoryService.delete(id)
await MobileDeviceInventoryService.get(id)
await MobileDeviceInventoryService.getall()
await MobileDeviceInventoryService.update(assetId, changedFields); setAssets((prevAssets) => prevAssets.map((asset) => { if (asset.id === assetId) {Run the app locally to verify changes
Use this command in the terminal:
npm run devPush the app to run on Power Apps
Use this command in the terminal:
npm run build | pac code push