Connect to SQL Server with strict encryption
Applies to:
SQL Server 2022 (16.x)
Strict connection encryption enforces good security practices and makes SQL Server traffic manageable by standard network appliances.
In this article, we'll show you how to connect to SQL Server 2022 (16.x) using the strict connection type.
Prerequisite
- SQL Server 2022 (16.x)
- ODBC or OLE DB Driver for SQL Server
- ODBC Driver for SQL Server version 18.1.2.1 or higher
- OLE DB Driver for SQL Server version 19.2.0 or higher
- Create and install a TLS certificate in SQL Server. For more information, see Enable encrypted connections to the Database Engine
Connect to SQL Server using a .NET application
For information on building and connecting to SQL Server using the strict encryption type, see Connection String Syntax on how to properly build the connection string. For more information on the new connection string properties, see Additional changes to connection string encryption properties.
Connect using an ODBC DSN
You can test a connection with the Strict connection encryption type using an ODBC DSN to SQL Server.
Search for the ODBC Data Sources app in Windows.
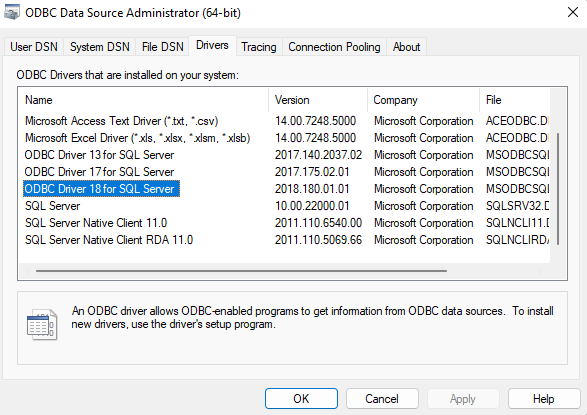
Make sure you have the latest ODBC driver by looking in the Drivers tab of ODBC Data Source Administrator.
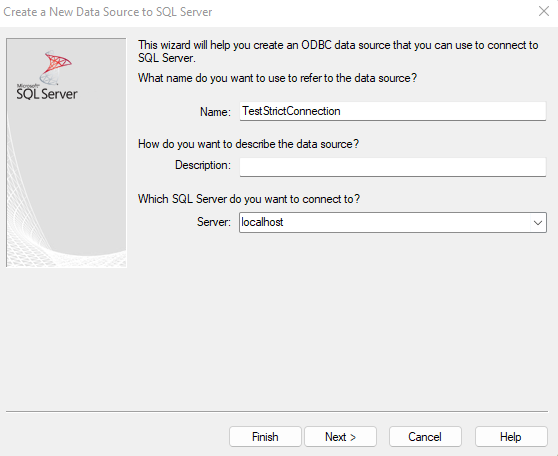
In the System DSN tab, select Add to create a DSN. Then select the ODBC Driver 18 for SQL Server. Select Finish. We're going to use this to test our connection.
In the Create a New Data Source to SQL Server window, provide a name for this data source, and add your SQL Server 2022 (16.x) server name to Server. Select Next.
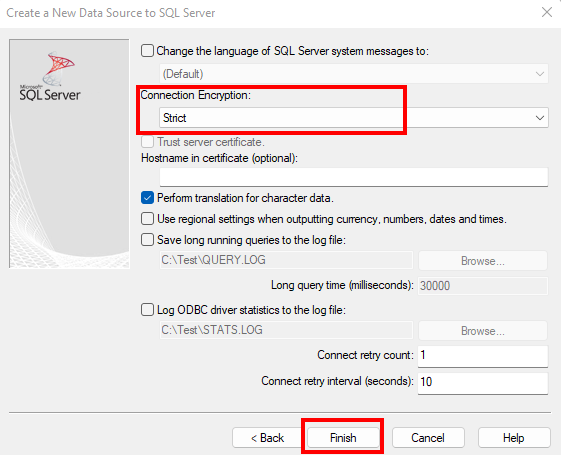
Use all default values for all the settings until you get to the screen that has Connection Encryption. Select Strict. If the server name that you entered differs from that in the certificate or if the IP address is used instead, set HostName in certificate to the one used in your certificate. Select Finish.
When the dialog box ODBC Microsoft SQL Server Setup pops up, select the Test Data Source... button to test the connection. This should enforce the
strictconnection to SQL Server for this test.
Connect using Universal Data Link
You can also test the connection to SQL Server with strict encryption using the OLE DB Driver with Universal Data Link (UDL).
To create a UDL file to test your connection, right-click on your desktop, and select New > Text Document. You'll need to change the extension from
txttoudl. You can give the file any name you want.Note
You'll need to be able to see the extension name in order to change the extension from
txttoudl. If you cannot see the extension, you can enable viewing the extension by opening File Explorer > View > Show > File name extensions.Open the UDL file that you created, and go over to the Provider tab to select the Microsoft OLE DB Driver 19 for SQL Server. Select Next >>.
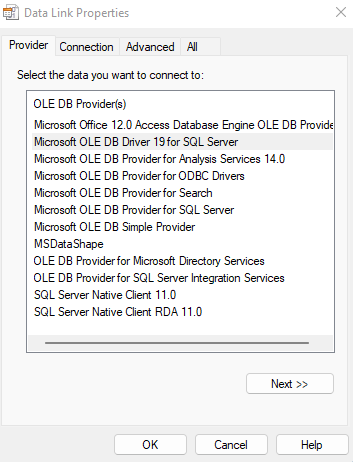
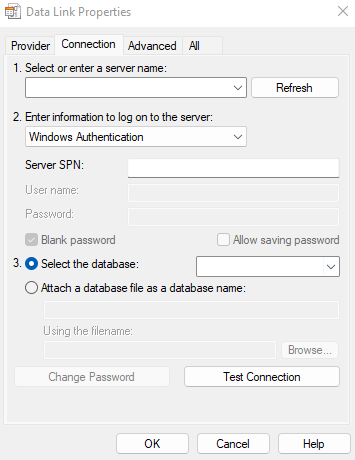
On the Connection tab, enter your SQL Server server name, and select the authentication method you use for logging into SQL Server.
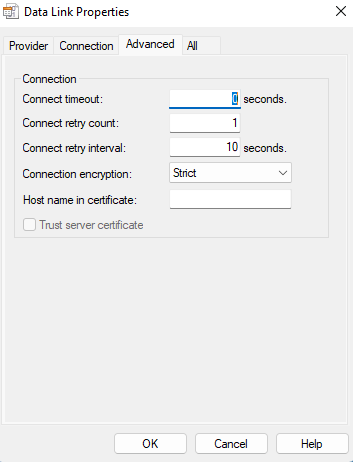
In the Advanced tab, select Strict for Connection encryption. If the server name that you entered differs from that in the certificate or if the IP address is used instead, set Host name in certificate to the one used in your certificate. Go back to the Connection tab when you're done.
Select Test Connection to test the connection with the
strictconnection encryption.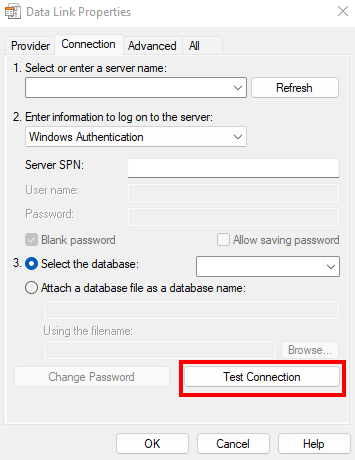
Remarks
If you see SSL certificate validation failed, validate that:
- Server certificate is valid on the machine you're using for testing
- At least one of the following is true:
- Provider SQL Server matches CA name or one of the DNS names in the certificate.
HostNameInCertificateconnection string property matches CA name or one of the DNS names in the certificate.