Not
Bu sayfaya erişim yetkilendirme gerektiriyor. Oturum açmayı veya dizinleri değiştirmeyi deneyebilirsiniz.
Bu sayfaya erişim yetkilendirme gerektiriyor. Dizinleri değiştirmeyi deneyebilirsiniz.
This article describes how to use the Recovery Tool to restore a Surface device to its factory state.
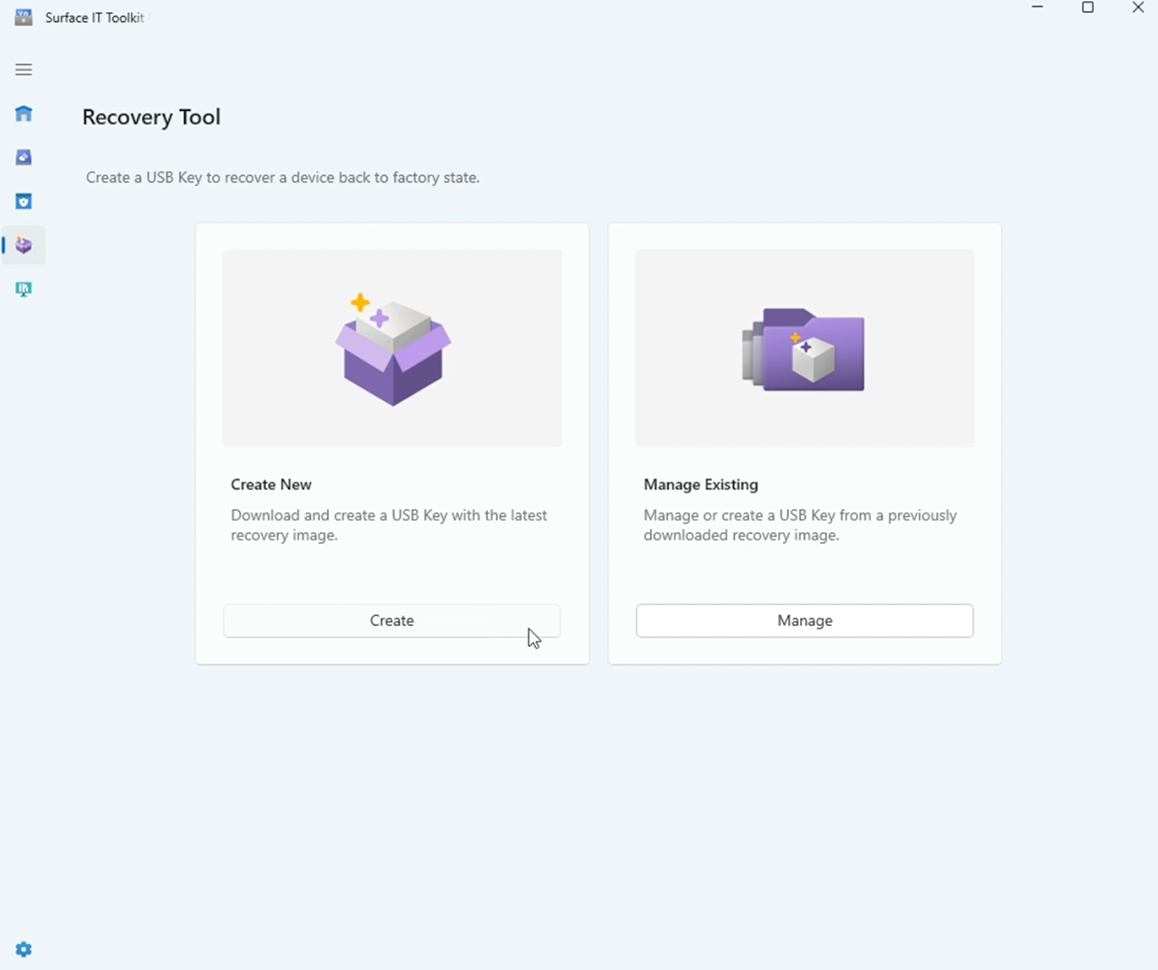
Open Surface IT Toolkit and go to the Recovery Tool section to begin the process of creating a USB key.
Select Create to download and create a USB key with the latest recovery image for a Surface device. Alternatively, if you have a previously downloaded recovery image, select Manage Existing.
On the Select Device screen, choose the specific Surface device that you wish to recover. The toolkit displays a list of managed devices and a dropdown menu for all supported devices. Select Next.
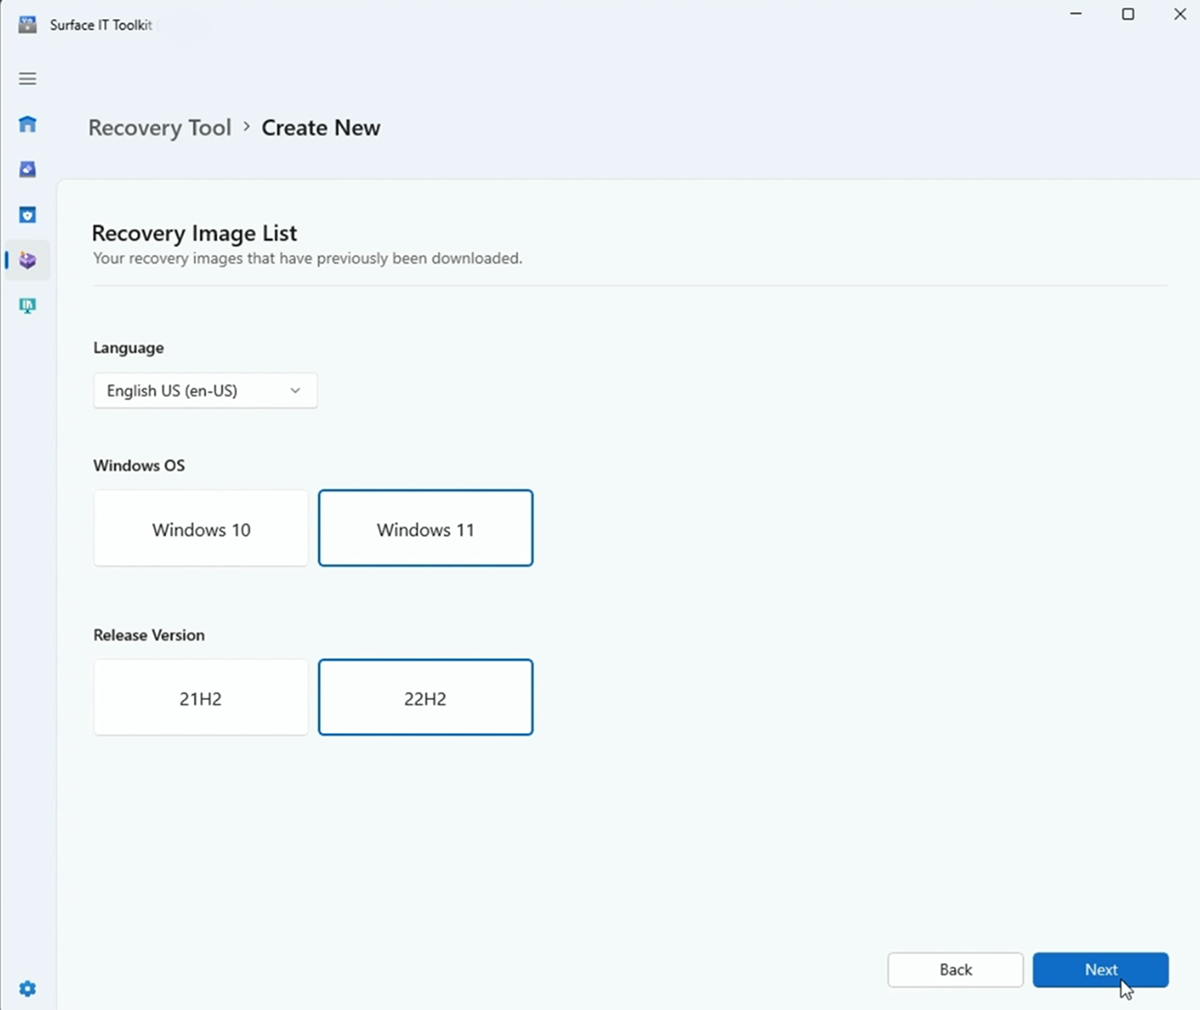
If creating a new recovery USB, select the base language and version of Windows for the recovery image. Options for Windows 10 and Windows 11, along with different feature updates like 21H2 and 22H2, are available. Select Next.
Choose a specific language pack from global regions, including Americas, Asia Pacific, China, Japan, Western Europe and Arabic, or Eastern Europe. Select Next.
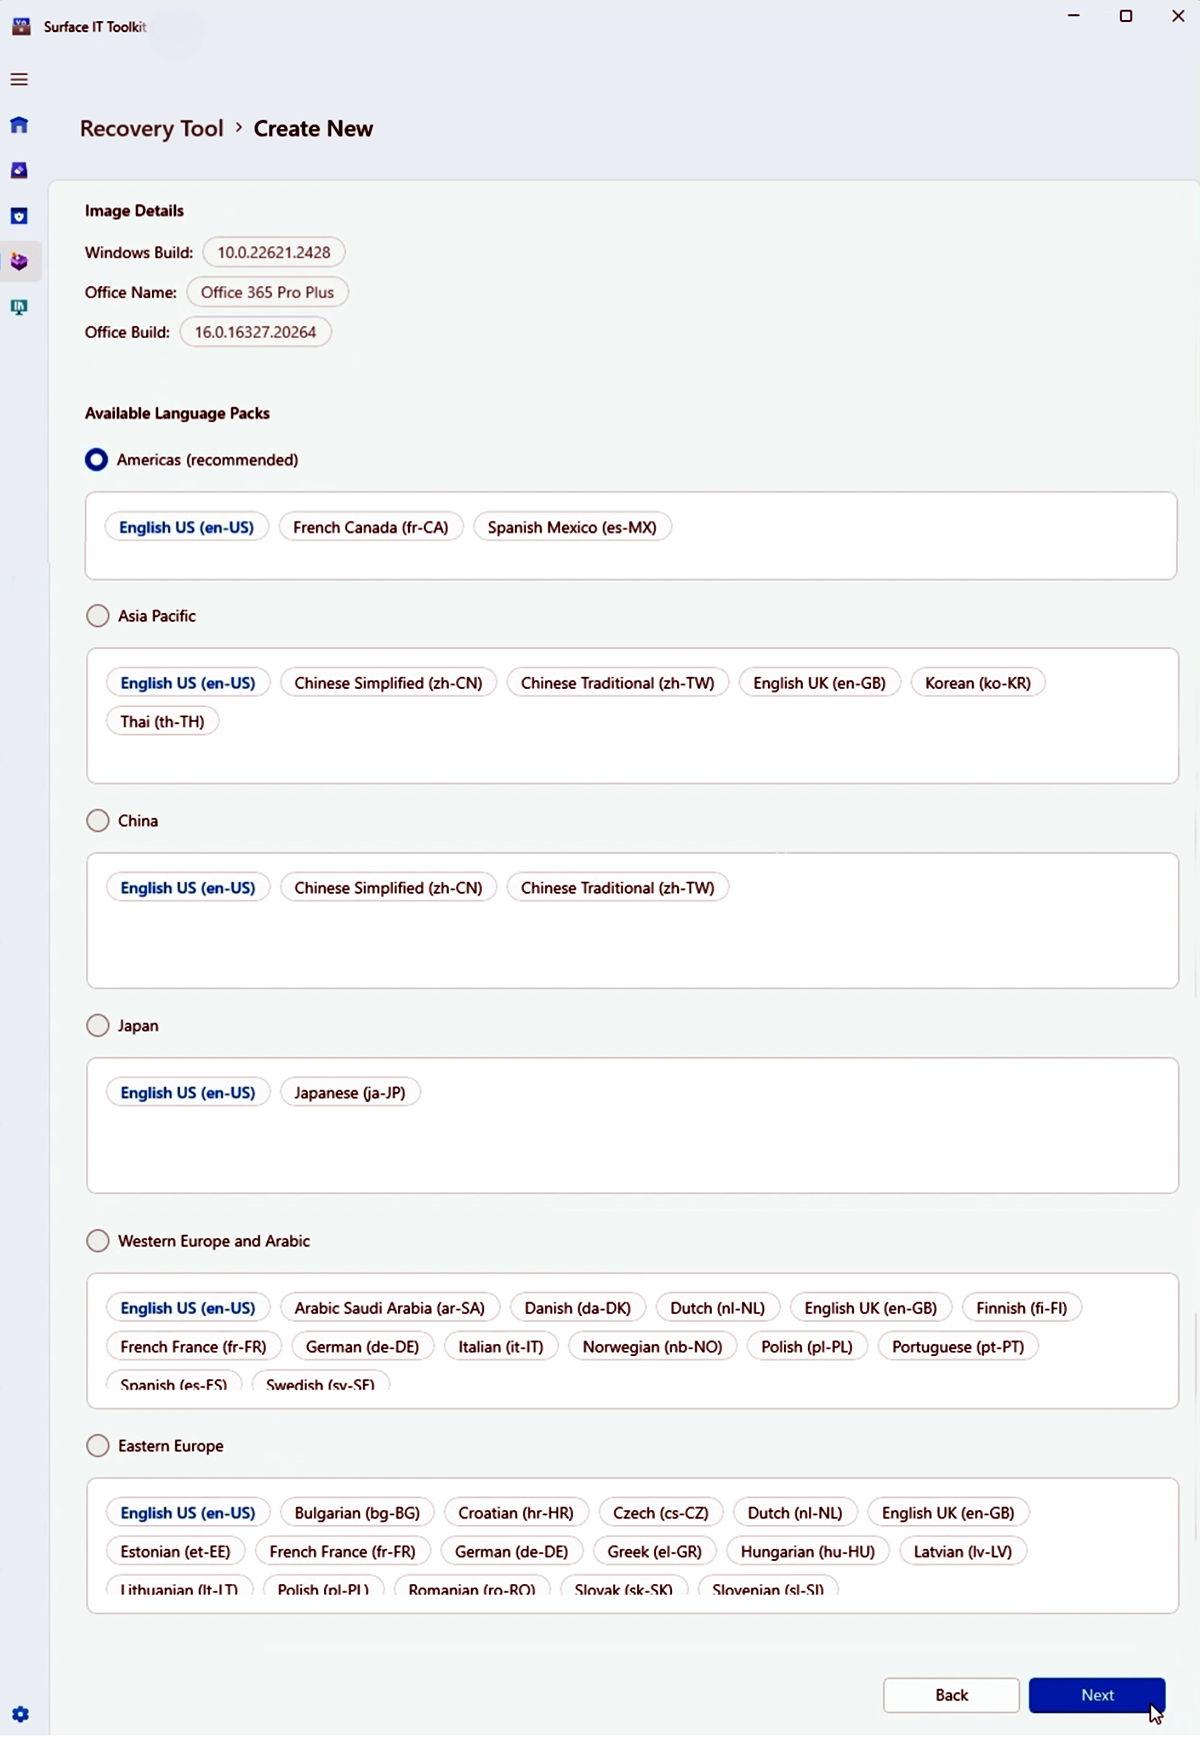
Confirm your selections including the device model, Windows build, Office build (if applicable), and language pack.
Under USB Key Selection, choose the USB to use for the recovery image. Make sure the USB drive you intend to use is correctly identified and ready to be formatted.
Select Create to start the process. A progress bar indicates that the recovery USB is ready to use.
Once the USB creation process reaches 100%, a confirmation message indicates that the recovery USB is ready to use.
Throughout the process, ensure you have a stable Internet connection for the download and that no data you wish to keep is on the USB drive when formatted during the process.
Restore Surface device
After the USB key is created, use it to restore the chosen Surface device back to its original state:
- Shut down your Surface device.
- Insert the bootable USB drive into the USB port on your Surface device.
- Press and hold the Volume-down button on the device.
- While holding the Volume-down button, press and release the Power button. The Microsoft or Surface logo appears on your screen.
- Continue to hold the Volume-down button until you see spinning dots beneath the logo.
- Follow the on-screen instructions to boot from your USB drive.
Recover earlier Surface devices
If you don't see your Surface device listed as a supported device in the Recovery tool, under All Devices, you can download a recovery image from Microsoft Support.
Go to the Surface Recovery Image Download page, select your product, enter the serial number, and download the appropriate image.