Driver installation
Note
The print driver provided in the 3D printing SDK is an experimental 3D printer device driver still under development.
Driver installation instructions
To install the printer, use the following installation instructions:
If the 3D printer implements a Microsoft OS descriptor 3DPRINT ("MS_COMP_3DPRINT") or is one of the supported Vendor ID (VID)/Product ID (PID) combinations in the MS3DPrintUSB.inf file, follow the steps in Automatic installation of the driver via PnP section below.
If the 3D printer is experimental or in development, follow the steps in Install the driver manually section below to print to an existing COM port or print G-Code to file.
For information on MS_COMP_3DPRINT, see Getting started guide - Microsoft Standard Driver for 3D Printers.
For more information on OS descriptors, see Microsoft OS Descriptors for USB Devices.
Automatic installation of the driver via PnP
If the device does not have a MSO descriptor or a supported hardware ID (VID/PID), add the new VID/PID combination to the MS3DPrintUSB_{architecture}\MS3DPrintUSB.inf file and restart Windows with advanced settings and driver signing disabled. This option should only be used temporarily and for development purposes.
Execute these two commands from an elevated command prompt:
pnputil -a {PathToSDK}\Bin\MS3DPrintUSB_{architecture}\MS3DPrintUSB.inf
pnputil -a {PathToSDK}\Bin\RenderFilters_{architecture}\MS3DPrinter.inf
Plug in the USB serial device. A new Generic 3D Printer device should be installed under Devices and Printers.
Install the driver manually
Search for printmanagement.msc in Cortana.
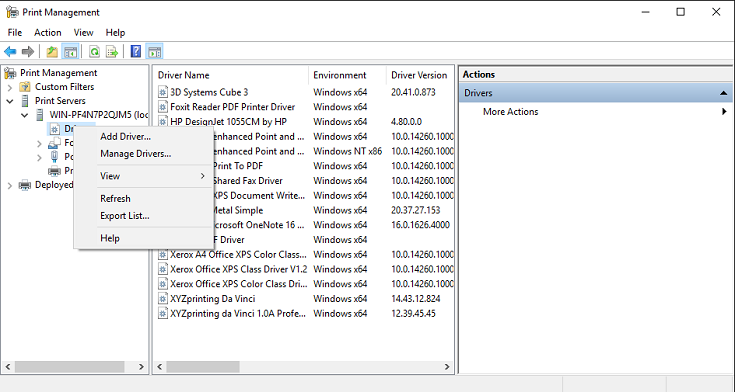
Expand Print Servers, expand the name of your machine, right-click on Drivers, then select Add Driver….
Click Next, select (x64), click Next, then click Have Disk.
Navigate to the RenderFiltersV4_x64 folder, select MS3DPrinter.inf, then click OK.
Click OK, click Next, then click Finish.
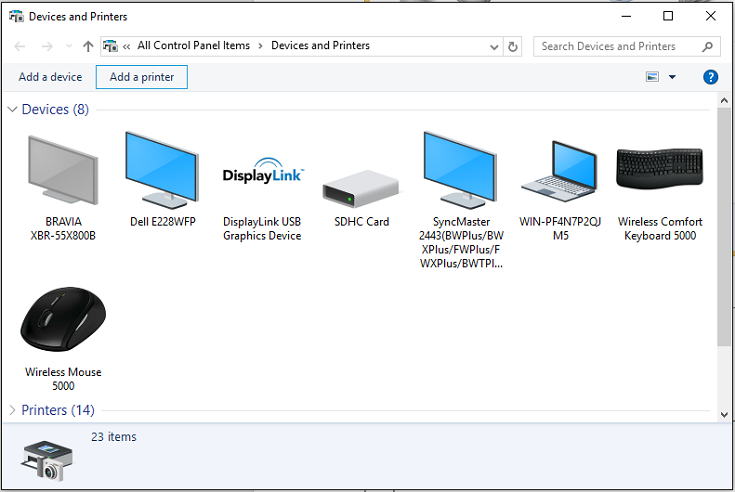
From Windows Start, type Devices and Printers.
Click Add a printer.
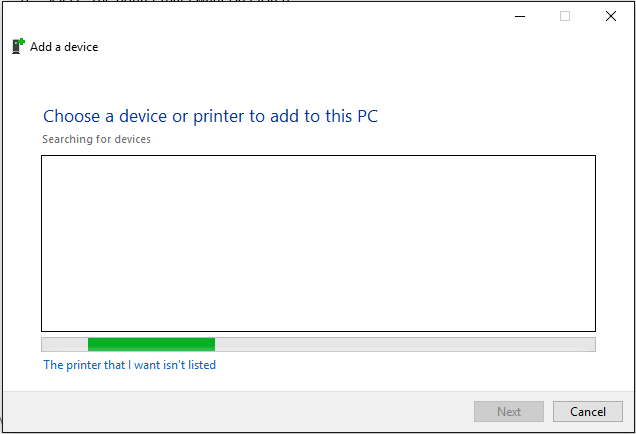
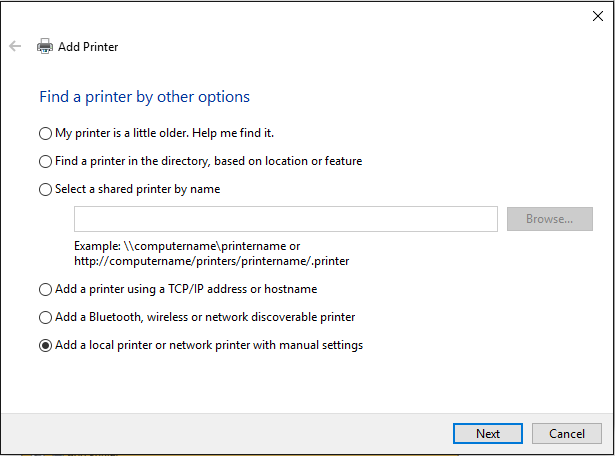
Select The printer that I want isn't listed.
Select Add a local printer or network printer with manual settings, then click Next.
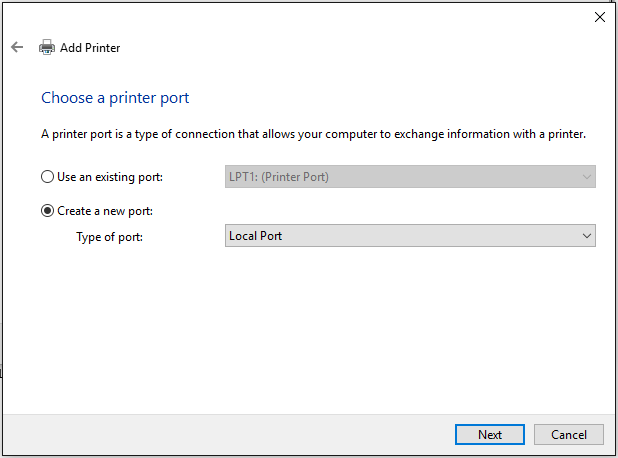
Choose Create a new port and select 3D Port for the type of port, then click Next.
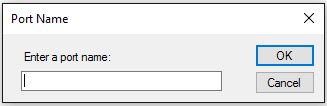
Enter a port name and click OK.
Click Have Disk….

Browse to the generic 3D Print Driver binary package from the SDK and click OK.
Click Next.

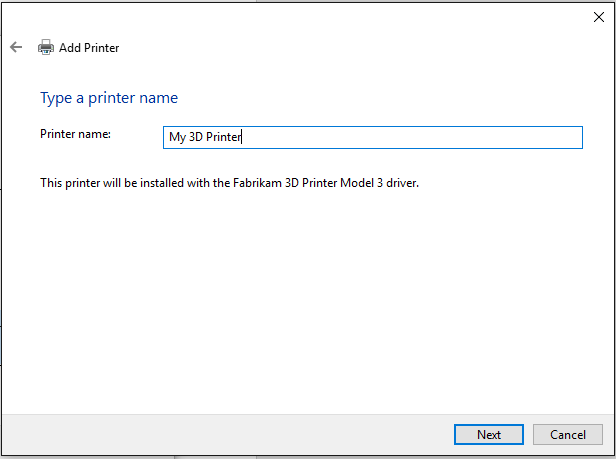
You can change the 3D printer name here if you want (it will show up in the printer UI), then click Next, then click OK to allow the command to be run as an Administrator.
After the installation completes, click Finish.
Geri Bildirim
Çok yakında: 2024 boyunca, içerik için geri bildirim mekanizması olarak GitHub Sorunları’nı kullanımdan kaldıracak ve yeni bir geri bildirim sistemiyle değiştireceğiz. Daha fazla bilgi için bkz. https://aka.ms/ContentUserFeedback.
Gönderin ve geri bildirimi görüntüleyin