Not
Bu sayfaya erişim yetkilendirme gerektiriyor. Oturum açmayı veya dizinleri değiştirmeyi deneyebilirsiniz.
Bu sayfaya erişim yetkilendirme gerektiriyor. Dizinleri değiştirmeyi deneyebilirsiniz.
Bu konuda, Depolama Alanları Doğrudan'a sunucuların veya sürücülerin nasıl ekleneceği açıklanmaktadır.
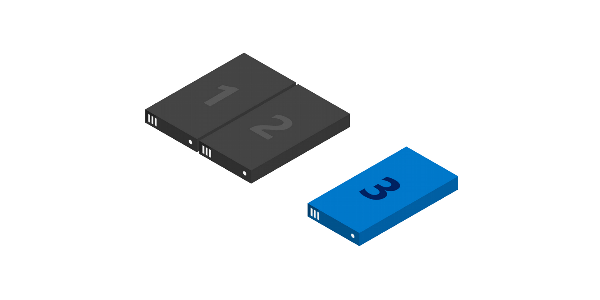
Sunucu ekleme
Genellikle ölçeği genişletme olarak adlandırılan sunucuları eklemek depolama kapasitesi ekler ve depolama performansını artırabilir ve daha iyi depolama verimliliği sağlayabilir. Dağıtımınız hiper yakınsanmış durumdaysa, sunucu eklemek iş yükünüz için daha fazla işlem kaynağı da sağlar.

Tipik dağıtımlar, sunucu ekleyerek ölçeği genişletmek kolaydır. Yalnızca iki adım vardır:
Yük Devretme Kümesi ek bileşenini veya PowerShell'deki Test Kümesi cmdlet'ini kullanarak küme doğrulama sihirbazını çalıştırın (Yönetici olarak çalıştırın). Eklemek istediğiniz yeni NewNode< sunucusunu> ekleyin.
Test-Cluster -Node <Node>, <Node>, <Node>, <NewNode> -Include "Storage Spaces Direct", Inventory, Network, "System Configuration"Bu, yeni sunucunun Windows Server 2016 Datacenter Edition çalıştırdığını, mevcut sunucularla aynı Active Directory Etki Alanı Hizmetleri etki alanına katıldığını, gerekli tüm rollere ve özelliklere sahip olduğunu ve ağ yapılandırmasının düzgün yapılandırıldığını onaylar.
Important
Artık ihtiyacınız olmayan eski verileri veya meta verileri içeren sürücüleri yeniden kullanıyorsanız, Disk Yönetimi veya Reset-PhysicalDisk cmdlet'ini kullanarak bu sürücüleri temizleyin. Eski veri veya meta bilgi tespit edilirse sürücüler havuza alınmaz.
Sunucuyu eklemeyi tamamlamak için kümede aşağıdaki cmdlet'i çalıştırın:
Add-ClusterNode -Name NewNode
Note
Otomatik havuz oluşturma, yalnızca bir havuza sahip olmanıza bağlıdır. Birden çok havuz oluşturmak için standart yapılandırmayı atladıysanız Add-PhysicalDisk kullanarak tercih ettiğiniz havuza yeni sürücüler eklemeniz gerekir.
2'den 3 sunucuya: üç yönlü yansıtmanın kilidini açma
İki sunucuyla yalnızca iki yönlü yansıtılmış birimler oluşturabilirsiniz (dağıtılmış RAID-1 ile karşılaştırın). Üç sunucuyla, daha iyi hataya dayanıklılık için üç yönlü yansıtılmış birimler oluşturabilirsiniz. Mümkün olduğunda üç yönlü yansıtma kullanmanızı öneririz.
Çift taraflı aynalı birimler doğrudan üç taraflı aynalamaya yükseltilemez. Bunun yerine, yeni bir birim oluşturabilir ve verilerinizi bu birime geçirebilirsiniz (örneğin , Depolama Çoğaltması kullanarak) ve ardından eski birimi kaldırabilirsiniz.
Üç yönlü yansıtılmış birimler oluşturmaya başlamak için birkaç iyi seçeneğiniz vardır. İstediğinizi kullanabilirsiniz.
Seçenek 1
Oluşturma işleminden sonra her yeni birimde PhysicalDiskRedundancy = 2 değerini belirtin.
New-Volume -FriendlyName <Name> -FileSystem CSVFS_ReFS -StoragePoolFriendlyName S2D* -Size <Size> -PhysicalDiskRedundancy 2
Seçenek 2
Bunun yerine havuzun Mirror adlı ResiliencySetting nesnesinde PhysicalDiskRedundancyDefault = 2 ayarlayabilirsiniz. Ardından, yeni yansıtılmış birimler belirtmeseniz bile otomatik olarak üç yönlü yansıtma kullanır.
Get-StoragePool S2D* | Get-ResiliencySetting -Name Mirror | Set-ResiliencySetting -PhysicalDiskRedundancyDefault 2

New-Volume -FriendlyName <Name> -FileSystem CSVFS_ReFS -StoragePoolFriendlyName S2D* -Size <Size>
Seçenek 3
StorageTier şablonunda Capacity adlı PhysicalDiskRedundancy = 2 değerini ayarlayın ve ardından katmana başvurarak birimler oluşturun.
Set-StorageTier -FriendlyName Capacity -PhysicalDiskRedundancy 2

New-Volume -FriendlyName <Name> -FileSystem CSVFS_ReFS -StoragePoolFriendlyName S2D* -StorageTierFriendlyNames Capacity -StorageTierSizes <Size>
3 ile 4 arasında sunucu: çift eşliğin kilidini açma
Dört sunucuyla, genellikle silme kodlaması olarak da adlandırılan çift eşlik kullanabilirsiniz (dağıtılmış RAID-6 ile karşılaştırın). Bu, üç yönlü yansıtma ile aynı hataya dayanıklılık sağlar, ancak daha iyi depolama verimliliği sağlar. Daha fazla bilgi edinmek için bkz . Hataya dayanıklılık ve depolama verimliliği.
Daha küçük bir dağıtımdan geliyorsanız, çift eşlik birimleri oluşturmaya başlamak için birkaç iyi seçeneğiniz vardır. İstediğinizi kullanabilirsiniz.
Seçenek 1
Oluşturma sonrasında her yeni birimde PhysicalDiskRedundancy = 2 ve ResiliencySettingName = Parity değerini belirtin.
New-Volume -FriendlyName <Name> -FileSystem CSVFS_ReFS -StoragePoolFriendlyName S2D* -Size <Size> -PhysicalDiskRedundancy 2 -ResiliencySettingName Parity
Seçenek 2
Havuzun Eşlik adlı ResiliencySetting nesnesinde PhysicalDiskRedundancy = 2 değerini ayarlayın. Ardından, yeni eşlik birimleri belirtmeseniz bile otomatik olarak çift eşlik kullanır
Get-StoragePool S2D* | Get-ResiliencySetting -Name Parity | Set-ResiliencySetting -PhysicalDiskRedundancyDefault 2

New-Volume -FriendlyName <Name> -FileSystem CSVFS_ReFS -StoragePoolFriendlyName S2D* -Size <Size> -ResiliencySettingName Parity
Dört sunucuyla, yansıtmalı hızlandırılmış eşlik kullanmaya da başlayabilirsiniz, burada tek bir birim hem yansıtma hem de eşlik içerir.
Bunun için, Dört sunucuda Enable-ClusterS2D'yi ilk kez çalıştırsaydınız oluşturulabilecekleri gibi StorageTier şablonlarınızı hem Performans hem de Kapasite katmanlarına sahip olacak şekilde güncelleştirmeniz gerekir. Özellikle, her iki katmanda da kapasite cihazlarınızın MediaType'ı (SSD veya HDD gibi) ve PhysicalDiskRedundancy = 2 olmalıdır. Performans katmanı ResiliencySettingName = Mirror, Kapasite katmanı ise ResiliencySettingName = Parity olmalıdır.
Seçenek 3
Mevcut katman şablonunu kaldırmak ve iki yeni şablon oluşturmak daha kolay olabilir. Bu, katman şablonuna başvurarak oluşturulmuş önceden var olan birimleri etkilemez: yalnızca bir şablon.
Remove-StorageTier -FriendlyName Capacity

New-StorageTier -StoragePoolFriendlyName S2D* -MediaType HDD -PhysicalDiskRedundancy 2 -ResiliencySettingName Mirror -FriendlyName Performance
New-StorageTier -StoragePoolFriendlyName S2D* -MediaType HDD -PhysicalDiskRedundancy 2 -ResiliencySettingName Parity -FriendlyName Capacity
Hepsi bu kadar! Artık bu katman şablonlarına başvurarak ayna ile hızlandırılmış parite birimleri oluşturmaya hazırsınız.
Example
New-Volume -FriendlyName "Sir-Mix-A-Lot" -FileSystem CSVFS_ReFS -StoragePoolFriendlyName S2D* -StorageTierFriendlyNames Performance, Capacity -StorageTierSizes <Size, Size>
4 sunucunun ötesinde: daha fazla eşlik verimliliği
Siz dört sunucunun ötesine ölçeklendikçe, yeni birimler artan düzeydeki parite kodlama verimliliğinden yararlanabilir. Örneğin, altı ile yedi sunucu arasında verimlilik, 50,0%'den 66,7%'a çıkar ve Reed-Solomon 4+2(2+2 yerine) kullanılabilir. Bu yeni verimliliğin keyfini çıkarmaya başlamak için uygulamanız gereken hiçbir adım yoktur; mümkün olan en iyi kodlama, her birim oluşturduğunuzda otomatik olarak belirlenir.
Ancak, önceden var olan birimler yeni ve daha geniş kodlamaya " dönüştürülmeyecektir ". Bunun iyi bir nedeni, bunu yapmak için dağıtımın tamamında tek tek her biti etkileyen büyük bir hesaplama gerekmesidir. Önceden var olan verilerin daha yüksek verimlilikte kodlanmış olmasını istiyorsanız, bunları yeni birimlere geçirebilirsiniz.
Daha fazla ayrıntı için bkz . Hataya dayanıklılık ve depolama verimliliği.
Kasa veya raf hataya dayanıklılık özelliği kullanılırken sunucu ekleme
Dağıtımınız şasi veya raf arızalara karşı dayanıklılık kullanıyorsa, yeni sunucuları kümeye eklemeden önce şasilerini veya raflarını belirtmeniz gerekir. Bu, Depolama Alanları Doğrudan'a hataya dayanıklılığı en üst düzeye çıkarmak için verileri en iyi şekilde dağıtmayı bildirir.
Yükseltilmiş bir PowerShell oturumu açıp aşağıdaki komutu kullanarak düğüm için geçici bir hata etki alanı oluşturun; burada <NewNode> , yeni küme düğümünün adıdır:
New-ClusterFaultDomain -Type Node -Name <NewNode>Bu geçici hata etki alanını, ParentName< tarafından> belirtildiği gibi yeni sunucunun gerçek dünyada bulunduğu kasaya veya rafa taşıyın:
Set-ClusterFaultDomain -Name <NewNode> -Parent <ParentName>Daha fazla bilgi için bkz . Windows Server 2016'da hata etki alanı tanıma.
Sunucu ekleme bölümünde açıklandığı gibi sunucuyu kümeye ekleyin. Yeni sunucu kümeye katıldığında, adı kullanılarak otomatik olarak varsayılan hata etki alanıyla ilişkilendirilir.
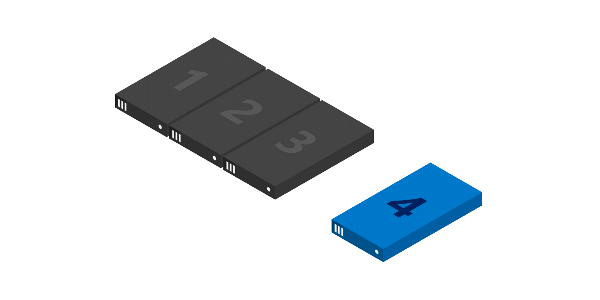
Sürücü ekleme
Depolama kapasitesini artıran ve performansı iyileştirebilen ölçek büyütme, sürücülerin eklenmesi ile gerçekleştirilir. Kullanılabilir yuvalarınız varsa, sunucu eklemeden depolama kapasitenizi genişletmek için her sunucuya sürücü ekleyebilirsiniz. Önbellek sürücülerini veya kapasite sürücülerini istediğiniz zaman bağımsız olarak ekleyebilirsiniz.
Important
Tüm sunucuların aynı depolama yapılandırmalarına sahip olması önemle önerilir.
Genişletmek için sürücüleri bağlayın ve Windows'un bunları keşfettiğini kontrol edin. CanPool özelliği True olarak ayarlanmış şekilde PowerShell'deki Get-PhysicalDisk cmdlet'inin çıkışında görünmelidir. CanPool = False olarak gösterildiyse, CannotPoolReason özelliğini denetleyerek nedenini görebilirsiniz.
Get-PhysicalDisk | Select SerialNumber, CanPool, CannotPoolReason
Kısa bir süre içinde uygun sürücüler Depolama Alanları Doğrudan tarafından otomatik olarak talep edilir, depolama havuzuna eklenir ve birimler tüm sürücüler arasında otomatik olarak eşit olarak yeniden dağıtılır. Bu noktada, artık birimlerinizi genişletebilir veya yeni birimler oluşturabilirsiniz.
Sürücüler görünmüyorsa donanım değişikliklerini el ile tarayın. Bu işlem, Eylem menüsünün altındaki Cihaz Yöneticisi kullanılarak yapılabilir. Eski veriler veya meta veriler içeriyorsa, bunları yeniden biçimlendirmeyi göz önünde bulundurun. Bu, Disk Yönetimi kullanılarak veya Reset-PhysicalDisk cmdlet'iyle yapılabilir.
Note
Otomatik havuz oluşturma, yalnızca bir havuza sahip olmanıza bağlıdır. Birden çok havuz oluşturmak için standart yapılandırmayı atladıysanız Add-PhysicalDisk kullanarak tercih ettiğiniz havuza yeni sürücüler eklemeniz gerekir.
Sürücü veya sunucu ekledikten sonra sürücü kullanımını iyileştirme
Zaman içinde, sürücüler eklendikçe veya kaldırıldıkçe, havuzdaki sürücüler arasında veri dağıtımı düzensiz hale gelebilir. Bazı durumlarda, havuzdaki diğer sürücüler çok daha düşük tüketime sahipken bu durum bazı sürücülerin dolu olmasına neden olabilir.
Havuz genelinde bile sürücü ayırmayı sürdürmeye yardımcı olmak için, havuza sürücü veya sunucu ekledikten sonra Depolama Alanları Doğrudan, sürücü kullanımını otomatik olarak iyileştirir (Bu, Paylaşılan SAS kasalarını kullanan Depolama Alanları sistemleri için el ile gerçekleştirilen bir işlemdir). Optimizasyon, havuza yeni bir sürücü ekledikten 15 dakika sonra başlar. Havuz iyileştirme düşük öncelikli bir arka plan işlemi olarak çalışır, bu nedenle özellikle büyük sabit sürücüler kullanıyorsanız tamamlanması saatler veya günler sürebilir.
İyileştirme, biri İyileştir , diğeri yeniden dengeleme adlı iki işi kullanır ve bunların ilerleme durumunu aşağıdaki komutla izleyebilirsiniz:
Get-StorageJob
Optimize-StoragePool cmdlet'ini kullanarak depolama havuzunu el ile iyileştirebilirsiniz. İşte bir örnek:
Get-StoragePool <PoolName> | Optimize-StoragePool