Not
Bu sayfaya erişim yetkilendirme gerektiriyor. Oturum açmayı veya dizinleri değiştirmeyi deneyebilirsiniz.
Bu sayfaya erişim yetkilendirme gerektiriyor. Dizinleri değiştirmeyi deneyebilirsiniz.
Visual Studio Code, WSL uzantısıyla birlikte WSL'yi doğrudan VS Code'dan tam zamanlı geliştirme ortamınız olarak kullanmanızı sağlar. Şunları yapabilirsiniz:
- Linux tabanlı bir ortamda geliştirme
- Linux'a özgü araç zincirlerini ve yardımcı programları kullanma
- Linux tabanlı uygulamalarınızı Windows'un rahatlığında çalıştırın ve hata ayıklayın, bu sırada Outlook ve Office gibi üretkenlik araçlarına erişiminizi koruyun.
- Seçtiğiniz Linux dağıtımını çalıştırmak için VS Code yerleşik terminalini kullanın
- Intellisense kod tamamlama, lint, hata ayıklama desteği, kod parçacıkları ve birim testi gibi VS Code özelliklerinden yararlanın
- VS Code'un yerleşik Git desteğiyle sürüm denetiminizi kolayca yönetin
- WSL projelerinizde komutları ve VS Code uzantılarını doğrudan çalıştırma
- Linux veya bağlı Windows dosya sisteminizdeki (örneğin
/mnt/c) dosyaları, yol sorunları, ikili dosya uyumluluğu veya diğer işletim sistemi zorlukları konusunda endişelenmeden düzenleme.
VS Code ve WSL uzantısını yükleme
VS Code yükleme sayfasını ziyaret edin ve geçerli sistem mimariniz için Windows yükleyicisini seçin. Visual Studio Code'u Windows'a yükleyin (WSL dosya sisteminizde değil).
Yükleme sırasında Ek Görevleri Seçin sorulduğunda, WSL'de kod komutunu kullanarak kolayca bir klasör açabilmek için PATH'e Ekle seçeneğini işaretlediğinizden emin olun.
WSL uzantısını yükleyin. Uzak makinelerle veya Geliştirme Kapsayıcılarıyla da çalışmayı planlıyorsanız, bunun yerine Uzak - SSH ve Geliştirme Kapsayıcıları ile birlikte WSL uzantısını içeren Uzaktan Geliştirme uzantı paketini yükleyebilirsiniz.
Linux dağıtımınızı güncelleştirme
Bazı WSL Linux dağıtımlarında, VS Code sunucusunun başlatılması için gereken kitaplıklar eksiktir. Paket yöneticisini kullanarak Linux dağıtımınıza ek kitaplıklar ekleyebilirsiniz.
Örneğin, Debian veya Ubuntu'u güncelleştirmek için şunu kullanın:
sudo apt-get update
wget (web sunucularından içerik almak için) ve ca-certificates eklemek için (SSL tabanlı uygulamaların SSL bağlantılarının orijinalliğini denetlemesine izin vermek için) girin:
sudo apt-get install wget ca-certificates
Visual Studio Code'da WSL projesi açma
Komut satırından
WSL dağıtımınızdan bir proje açmak için dağıtımın komut satırını açın ve şunu girin: code .
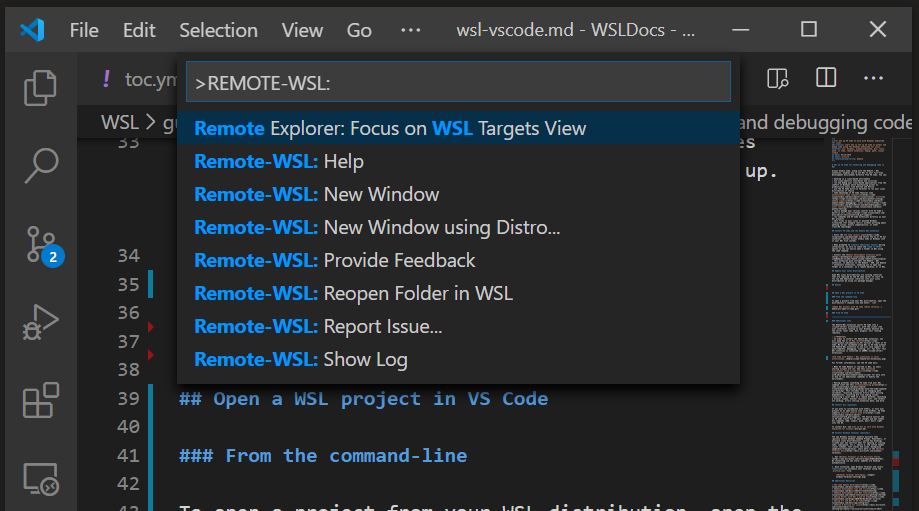
VS Code'dan
Komut paletini açmak için VS Code'da Ctrl + Shift + P kısayolunu kullanarak daha fazla VS Code WSL seçeneğine de erişebilirsiniz. Daha sonra yazarsanız WSL , klasörü WSL oturumunda yeniden açmanızı, hangi dağıtımı açmak istediğinizi belirtmenizi ve daha fazlasını yapmanızı sağlayan kullanılabilir seçeneklerin listesini görürsünüz.
VS Code WSL içindeki uzantılar
WSL uzantısı, WINDOWS makinenizde çalışan istemci (kullanıcı arabirimi) ve WSL dağıtımınızda "uzaktan" çalıştırılan sunucu (kodunuz, Git, eklentiler vb.) ile VS Code'u bir "istemci-sunucu" mimarisine böler.
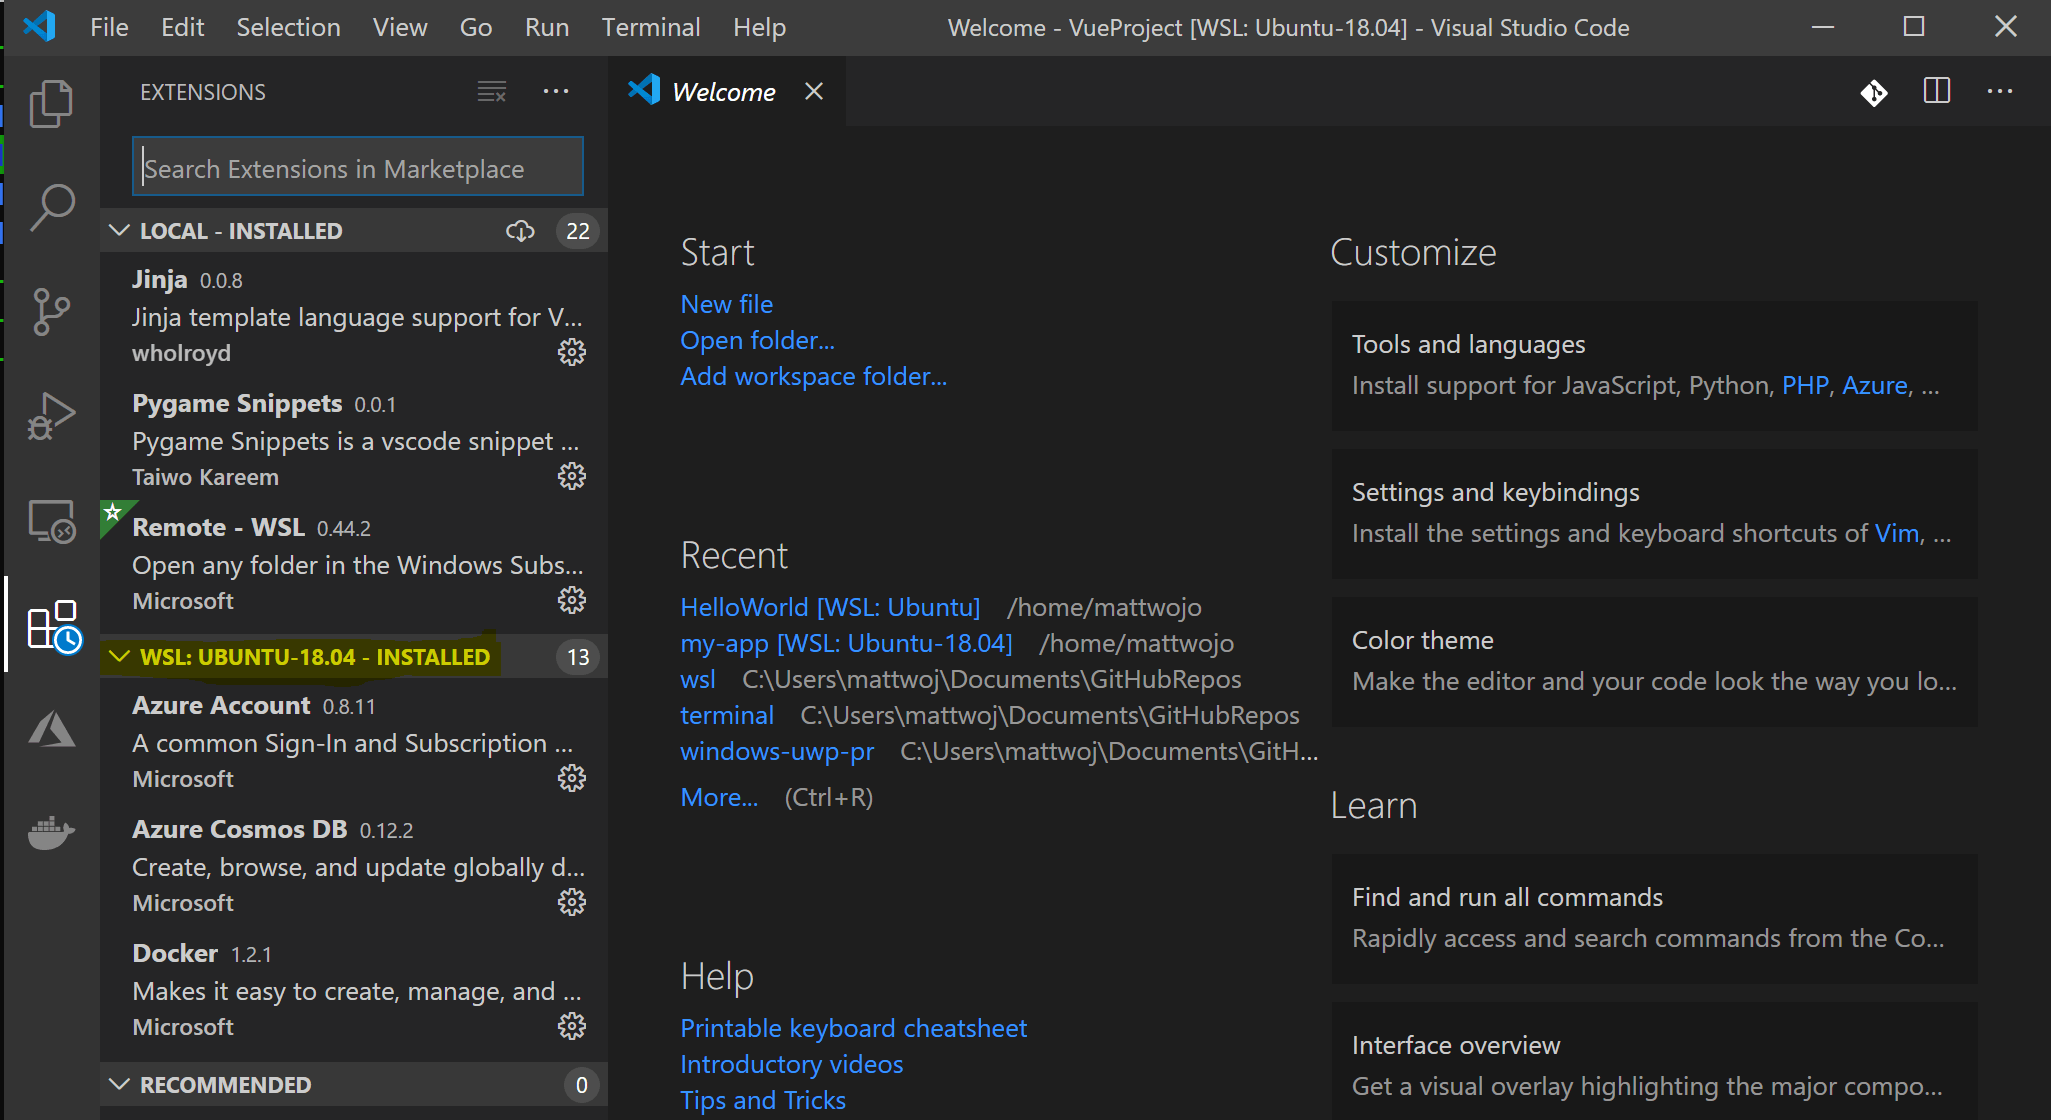
WSL uzantısını çalıştırırken 'Uzantılar' sekmesi seçildiğinde yerel makineniz ile WSL dağıtımınız arasında bölünmüş uzantıların listesi görüntülenir.
Tema gibi yerel bir uzantı yüklemenin yalnızca bir kez yüklenmesi gerekir.
Python uzantısı gibi bazı uzantılar veya lint veya hata ayıklama gibi işlemleri işleyen herhangi bir şey her WSL dağıtımına ayrı olarak yüklenmelidir. VS Code, WSL dağıtımınızda yüklü olmayan yerel olarak yüklenmiş bir uzantınız varsa, bir uyarı simgesi ⚠ ve yeşil bir "WSL'ye yükle" düğmesi görüntüler.
Daha fazla bilgi için VS Code belgelerine bakın:
WSL'de VS Code başlatıldığında, herhangi bir kabuk başlatma betiği çalıştırılmaz. Ek komutları çalıştırma veya ortamı değiştirme hakkında daha fazla bilgi için bu gelişmiş ortam kurulum betiği makalesine bakın.
WSL komut satırınızdan VS Code'u başlatırken sorun mu yaşıyorsunuz? Bu sorun giderme kılavuzu yol değişkenlerini değiştirme, eksik bağımlılıklarla ilgili uzantı hatalarını çözme, Git satırı sonlandırma sorunlarını çözme, uzak makineye yerel VSIX yükleme, tarayıcı penceresi başlatma, engelleyici localhost bağlantı noktası, web yuvaları çalışmıyor, uzantı verilerini depolama hataları ve daha fazlasını içerir.
Git'i yükleme (isteğe bağlı)
Başkalarıyla işbirliği yapmayı veya projenizi açık kaynak bir sitede (GitHub gibi) barındırmayı planlıyorsanız VS Code, Gitile
Git'i yüklemek için bkz. Linux için Windows Alt Sistemi ile çalışmak üzere Git'i ayarlama.
Windows Terminali'ni yükleme (isteğe bağlı)
Windows Terminal birden çok sekmeyi (Komut İstemi, PowerShell veya birden çok Linux dağıtımı arasında hızla geçiş yapma), özel anahtar bağlamalarını (sekmeleri açmak veya kapatmak için kendi kısayol tuşlarınızı oluşturun, kopyala+yapıştır vb.), emojileri ve özel temaları ☺ (renk düzenleri, yazı tipi stilleri ve boyutları, arka plan görüntüsü/bulanıklık/saydamlık) etkinleştirir. Windows Terminal Windows 11 önceden yüklenmiş olarak gelir. Windows Terminal belgeleri hakkında daha fazla bilgi edinin.
Microsoft Store'da Windows Terminali'ni edinin: Mağaza aracılığıyla yüklenerek güncelleştirmeler otomatik olarak işlenir.
Yüklendikten sonra Windows Terminali'ni açın ve dosyayı kullanarak terminalinizi özelleştirmek için Ayarlar'ı
settings.jsonseçin.
Ek Kaynaklar
- VS Code WSL belgeleri
- VS Code WSL kılavuzu
- Uzaktan geliştirme ipuçları ve püf noktaları
- WSL 2 ve VS Code ile Docker kullanma
- VS Code'da C++ ve WSL kullanma
Göz önünde bulundurmak isteyebileceğiniz birkaç ek uzantı şunlardır:
- diğer düzenleyicilerden anahtar haritaları
: Bu uzantılar, başka bir metin düzenleyicisinden (Atom, Sublime, Vim, eMacs, Notepad++ vb.) geçiş yaptığınız durumlarda ortamınızın kendinizi evinizde gibi hissetmesini sağlayabilir. - Settings Sync: VS Code,GitHub veya Microsoft hesabı kullanarak ayarlarınızı, uzantılarınızı ve anahtar bağlamalarınızı farklı makineler arasında eşitlemenizi sağlayan yerleşik Ayarlar Eşitleme özelliğine sahiptir.
GitHub'da bizimle işbirliği yapın
Bu içeriğin kaynağı GitHub'da bulunabilir; burada ayrıca sorunları ve çekme isteklerini oluşturup gözden geçirebilirsiniz. Daha fazla bilgi için katkıda bulunan kılavuzumuzu inceleyin.
Windows Subsystem for Linux