Create a billing schedule
A billing schedule is a component that allows you to implement scheduled recurring billing. For example, you might need to set up a recurring monthly bill for a customer to be billed every two weeks for six months.
To create a new billing schedule, follow these steps:
Go to Subscription billing > Recurring contract billing > Billing schedules > All billing schedules.
Select + New, which is located in the upper left of the screen.
In the Create billing schedule dialog, select a Billing schedule group. The group supplies the default values for the new schedule.
Select the corresponding Customer account that you want linked to the Billing schedule.
Enter the Start date and Number of periods that you want the customer to be billed. The End date will automatically update when you enter the Number of periods. If you update the End date instead, the Number of periods field is set to 0. After you've entered the information, select OK.
Note
Make sure that you define a number sequence for the billing schedule number sequence on the Recurring contract billing parameters page. You can do so by going to Subscription billing > Recurring contract billing > Setup > Recurring contract billing parameters.
After you've created the billing schedule, double-click the Billing schedule number and then add a description in the Description field.
In the Milestone template field, select the milestone template that you want for Milestone billing.
Note
The Invoice account and Currency code fields are updated with information from the customer. The Billing frequency and Billing interval fields are updated automatically depending on the Billing schedule group that you've selected.
If you want to have separate invoices, set the Invoice separately toggle to Yes.
If you want to automatically renew the billing schedule after the final billing period, set the Renew automatically toggle to Yes, and then set the Lines to add per renewal field.
If you want to prorate the amount of the billing schedule, set the Prorate partial periods toggle to Yes.
If you want to align the billing schedule detail lines with the end of a month, set the Align to month toggle to Yes.
In the Contract start date and Contract end date fields, enter the dates of the contract. These dates are for information only.
The Payment field allows you to view the payment information for the customer. However, you can only change the Payment information if the line item is active.
Note
The Parameters fields are set automatically, based on the values on the Recurring contract billing parameters page.
Under Billing schedule header, review and update the Delivery address and Bill to address fields on the Address tab. On the Contact information tab, you can associate an end user account with the billing schedule, enter contact details, and track partner commission information in the Partner account and Partner commission rate fields. Also, you have access to view the various totals under the Total tab, audit information under the Hold tab, and view the history of terminations that have been applied or removed under Termination.
Select Save when you've finished making your changes.
If you scroll down to Billing schedule lines, you can select + Add line and then select an Item number and Item type. Then, select the Pricing method and Unit field. Update the Billing frequency, Start date, and End date fields if needed.
Note
If the item that you selected is a parent item in a revenue split, the child item will be updated automatically. You can only update the parent item in the revenue split. Also, you'll need to update the Billing frequency prior to sending the first invoice.
To remove an item from a billing schedule, select the line under Billing schedule lines, select Remove, and then select Save.
You can also generate a quotation document directly from a billing schedule. To do so, select the billing schedule, select Generate quotation on the Billing schedule header Action Pane, complete the options on the Sales quotation page such as From date and To date, and then select Create.
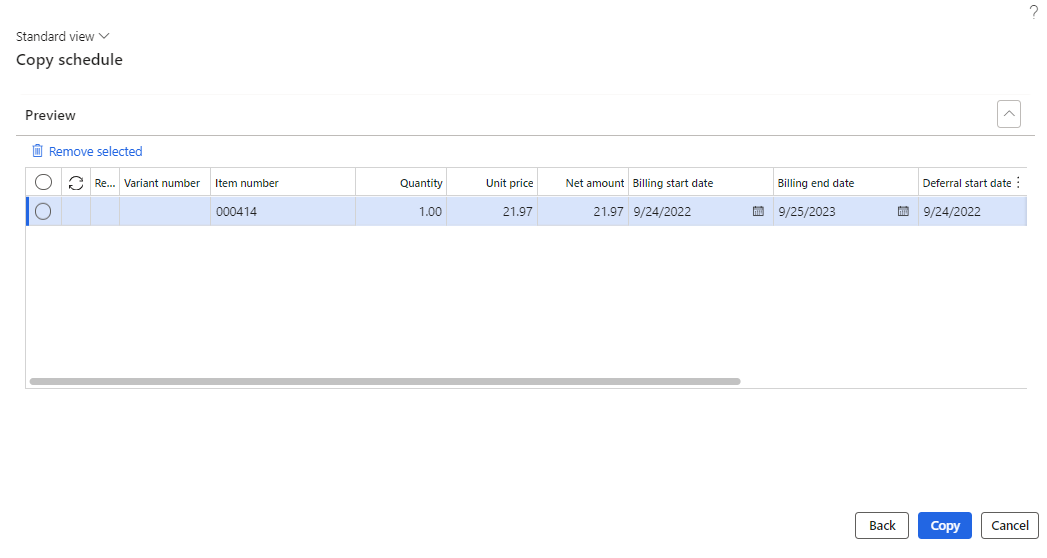
On the Copy schedule page, you can copy an existing billing schedule to create a new billing schedule. Copying the existing schedule will replicate the setting that you selected from the original billing schedule to the new one. Additionally, the page will allow you to transfer items from one billing schedule to another.
Follow these steps to copy a billing schedule:
Go to Subscription billing > Billing schedules > All billing schedules or Active billing schedules. Select the existing billing schedule that you want to copy.
In the Action Pane under Billing schedules, select Copy schedule.
Under Customer account, enter the corresponding Customer account.
Update the Billing start date and Billing end date.
Enter the values of the optional fields as required: End user account, Partner account, Customer reference, Customer requisition, and Deferral start date.
Select View Preview to select billing schedule lines that you want to copy.
Select Copy.