Exercise - Call Microsoft Graph from SharePoint Framework components
- 17 minutes
In this exercise, you'll create a new SharePoint Framework project with a single client-side web part that uses React and Microsoft Graph to display the currently logged-in user's personal details in an office Persona card. You'll use the Microsoft Graph HTTP client API included in the SharePoint Framework to authenticate and call the Microsoft Graph REST API.
Prerequisites
Important
In most cases, installing the latest version of the following tools is the best option. The versions listed here were used when this module was published and last tested.
- Node.js v22.*
- Gulp-cli v3.*
- Yeoman v5.*
- Yeoman Generator for SharePoint v1.21.1
- Visual Studio Code
Create the Persona SharePoint Framework solution
Open a command prompt and change to the folder where you want to create the project.
Run the SharePoint Yeoman generator by executing the following command:
yo @microsoft/sharepoint
Use the following to complete the prompt that is displayed (if more options are presented, accept the default answer):
- What is your solution name?: MSGraphSPFx
- Which type of client-side component to create?: WebPart
- What is your Web part name?: GraphPersona
- Which template would you like to use?: React
After provisioning the folders required for the project, the generator will install all the dependency packages by running npm install automatically. When npm completes downloading all dependencies, open the project in Visual Studio Code.
Update the solution dependencies
Install the Microsoft Graph TypeScript type declarations by executing the following statement on the command line:
npm install @microsoft/microsoft-graph-types --DE
Update the Persona web part
Update the default web part to pass the React component an instance of the Microsoft Graph client API.
Open the web part file src/webparts/graphPersona/GraphPersonaWebPart.ts.
Add the following import statement after the existing import statements:
import { MSGraphClientV3 } from '@microsoft/sp-http';
Locate the render() method. This method creates a new instance of a React element by passing in the component class and the properties to bind to it. The only property being set is the description property.
Replace the render() method with the following code that uses asynchronous rendering and initializes a new instance fo the Microsoft Graph client:
protected get isRenderAsync(): boolean {
  return true;
}

public async render(): Promise<void> {
  const client: MSGraphClientV3 = await this.context.msGraphClientFactory.getClient('3');

  const element: React.ReactElement<IGraphPersonaProps> = React.createElement(
    GraphPersona,
    {
      graphClient: client,
      isDarkTheme: this._isDarkTheme,
      environmentMessage: this._environmentMessage,
      hasTeamsContext: !!this.context.sdks.microsoftTeams,
      userDisplayName: this.context.pageContext.user.displayName
    }
  );

  ReactDom.render(element, this.domElement);

  this.renderCompleted();
}

protected renderCompleted(): void {
  super.renderCompleted();
}
Note
The public property of the GraphPersona React component's graphClient property will be defined in the next step.
Implement the GraphPersona React component
After updating the public signature of the GraphPersona component, the public property interface of the component needs to be updated to accept the Microsoft Graph client.
Open the src/webparts/graphPersona/components/IGraphPersonaProps.ts.
Replace the contents with the following code to change the public signature of the component:
import { MSGraphClientV3 } from '@microsoft/sp-http';

export interface IGraphPersonaProps {
  graphClient: MSGraphClientV3;
  isDarkTheme: boolean;
  environmentMessage: string;
  hasTeamsContext: boolean;
  userDisplayName: string;
}
Create a new interface that will keep track of the state of the component's state.
Create a new file IGraphPersonaState.ts and save it to the folder: src/webparts/graphPersona/components/.
Add the following code to define a new state object that will be used by the component:
export interface IGraphPersonaState {
  name: string;
  email: string;
  phone: string;
  image: string;
}
Update the component's references to add the new state interface, support for the Microsoft Graph, Fabric React Persona control, and other necessary controls.
Open the src/webparts/graphPersona/components/GraphPersona.tsx.
Add the following import statements after the existing import statements:
import { IGraphPersonaState } from './IGraphPersonaState';

import { GraphError, ResponseType } from '@microsoft/microsoft-graph-client';
import * as MicrosoftGraph from '@microsoft/microsoft-graph-types';

import {
  Persona,
  PersonaSize
} from 'office-ui-fabric-react/lib/components/Persona';

import { Link } from 'office-ui-fabric-react/lib/components/Link';
Update the public signature of the component to include the state.
Locate the class GraphPersona declaration.
At the end of the line, notice there's generic type with two parameters, the second is an empty object {}:
export default class GraphPersona extends React.Component<IGraphPersonaProps, {}>
Update the second parameter to be the state interface previously created:
export default class GraphPersona extends React.Component<IGraphPersonaProps, IGraphPersonaState>
Add the following constructor to the GraphPersona class to initialize the state of the component:
constructor(props: IGraphPersonaProps) {
  super(props);

  this.state = {
    name: '',
    email: '',
    phone: '',
    image: null
  };
}
Update the contents of the render() method to the following code. This will display the Fabric React Persona card:
public render(): React.ReactElement<IGraphPersonaProps> {
  return (
    <Persona primaryText={this.state.name}
             secondaryText={this.state.email}
             onRenderSecondaryText={this._renderMail}
             tertiaryText={this.state.phone}
             onRenderTertiaryText={this._renderPhone}
             imageUrl={this.state.image}
             size={PersonaSize.size100} />
  );
}
The code in the Persona card references two utility methods to control rendering of the secondary and tertiary text. Add the following to methods to the GraphPersona class that will be used to render the text:
private _renderMail = (): JSX.Element => {
  if (this.state.email) {
    return <Link href={`mailto:${this.state.email}`}>{this.state.email}</Link>;
  } else {
    return <div />;
  }
}

private _renderPhone = (): JSX.Element => {
  if (this.state.phone) {
    return <Link href={`tel:${this.state.phone}`}>{this.state.phone}</Link>;
  } else {
    return <div />;
  }
}
The last step is to update the loading, or mounting, phase of the React component. When the component loads on the page, it should call Microsoft Graph to get details on the current user and their photo. When each of these results complete, they'll update the component's state, which will trigger the component to rerender.
Add the following method to the GraphPersona class:
public componentDidMount(): void {
  /* eslint-disable @typescript-eslint/no-floating-promises */
  this.props.graphClient
    .api('me')
    .get((error: GraphError, user: MicrosoftGraph.User) => {
      this.setState({
        name: user.displayName,
        email: user.mail,
        phone: user.businessPhones[0]
      });
    });

  this.props.graphClient
    .api('/me/photo/$value')
    .responseType(ResponseType.BLOB)
    .get((error: GraphError, photoResponse: Blob) => {
      const blobUrl = window.URL.createObjectURL(photoResponse);
      this.setState({ image: blobUrl });
    });
  /* eslint-enable @typescript-eslint/no-floating-promises */
}
Finally, because we're no longer using the styles and export imports, remove the following lines from the GraphPersona.tsx file:
import styles from './GraphPersona.module.scss';
// .. code omitted for brevity
import { escape } from '@microsoft/sp-lodash-subset';
Update the package permission requests
The last step before testing is to notify SharePoint that upon deployment to production, this app requires permission to the Microsoft Graph to access the user's persona details.
Open the config/package-solution.json file.
Locate the solution section. Add the following permission request element just after the property isDomainIsolated:
"webApiPermissionRequests": [
  {
    "resource": "Microsoft Graph",
    "scope": "User.ReadBasic.All"
  }
],
Create the SharePoint package for deployment
Build the solution by executing the following command on the command line:
gulp build
Bundle the solution by executing the following command on the command line:
gulp bundle --ship
Package the solution by executing the following command on the command line:
gulp package-solution --ship
Deploy and trust the SharePoint package
In the browser, navigate to your SharePoint Online Tenant App Catalog.
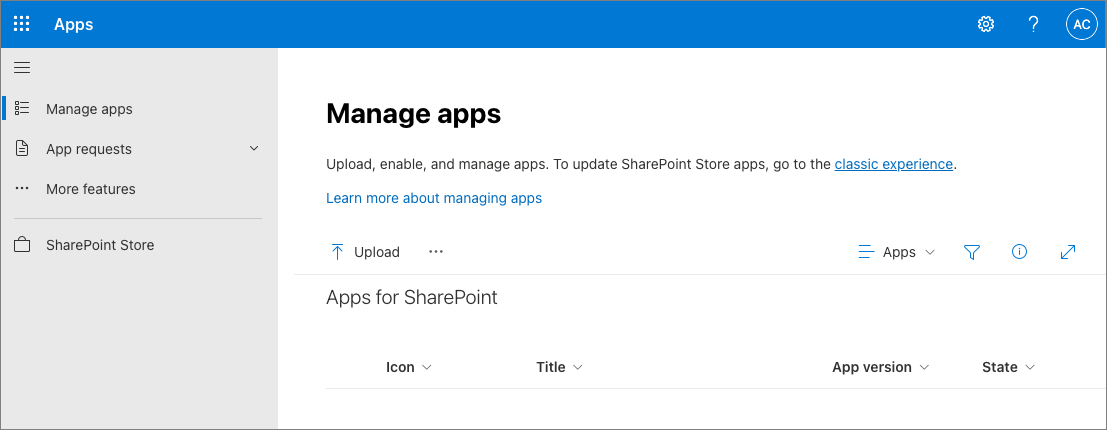
Drag the generated SharePoint package from /sharepoint/solution/ms-graph-sp-fx.sppkg into the Apps for SharePoint library.
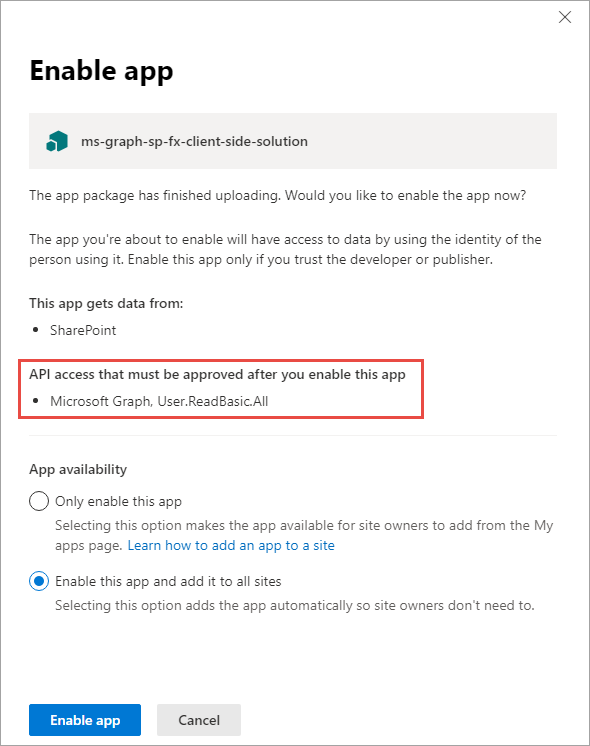
In the Enable app panel, make note of the section that lists the API access requests that should be reviewed. You might need to approve or reject these requests in the next step. Ensure the Enable this app and add it to all sites radio button is selected and then select Enable app.
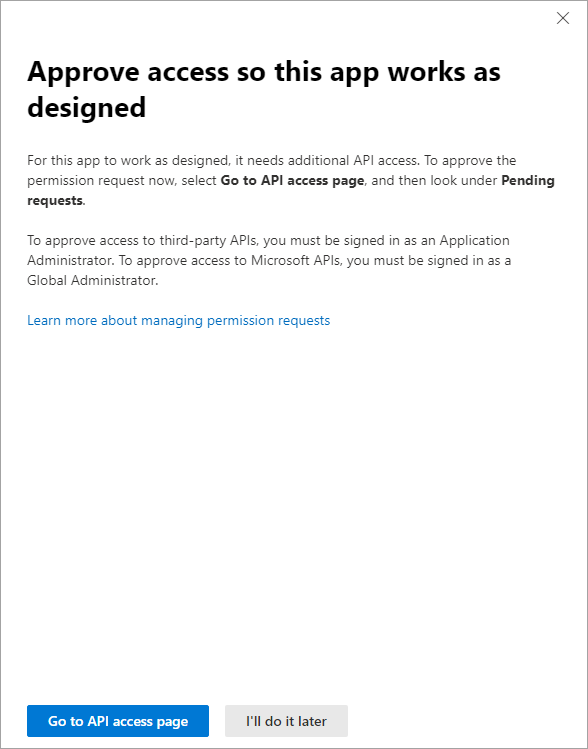
In the Approve access so this app works as designed panel, select Go to API access page. This will take you to the API access page in the SharePoint admin center.
Tip
The App Permissions page is also accessible from the Tenant's App Catalog page by selecting the More Features link in the navigation, then selecting Open under the App Permissions section:

Approve the API permission request
Note
If you completed the exercise Call Microsoft Entra ID secured REST APIs in this module, you've already approved the permission request for User.ReadBasic.All so you might skip this step and move to testing the web part.
Select the Pending approval for the Microsoft Graph permission User.ReadBasic.All.
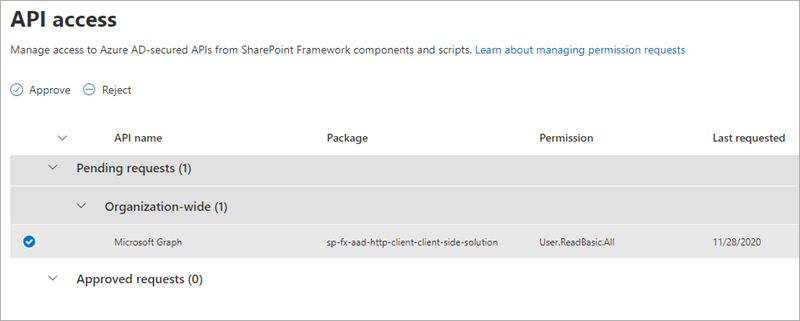
Select the Approve or Reject button, followed by selecting Approve.
Test the web part
Note
The SharePoint Framework includes a SharePoint-hosted workbench for testing custom solutions. However, the workbench won't work the first time when testing solutions that use Microsoft Graph due to how the workbench operates and authentication requirements. So, the first time you test a Microsoft Graph enabled SPFx solution, you'll need to test it on a real modern page.
Once this is done and your browser is authenticated, you can use the local web server and SharePoint-hosted workbench to test the solution.
Test the web part on a SharePoint Online modern page
From the site's homepage, select Mew > Page.
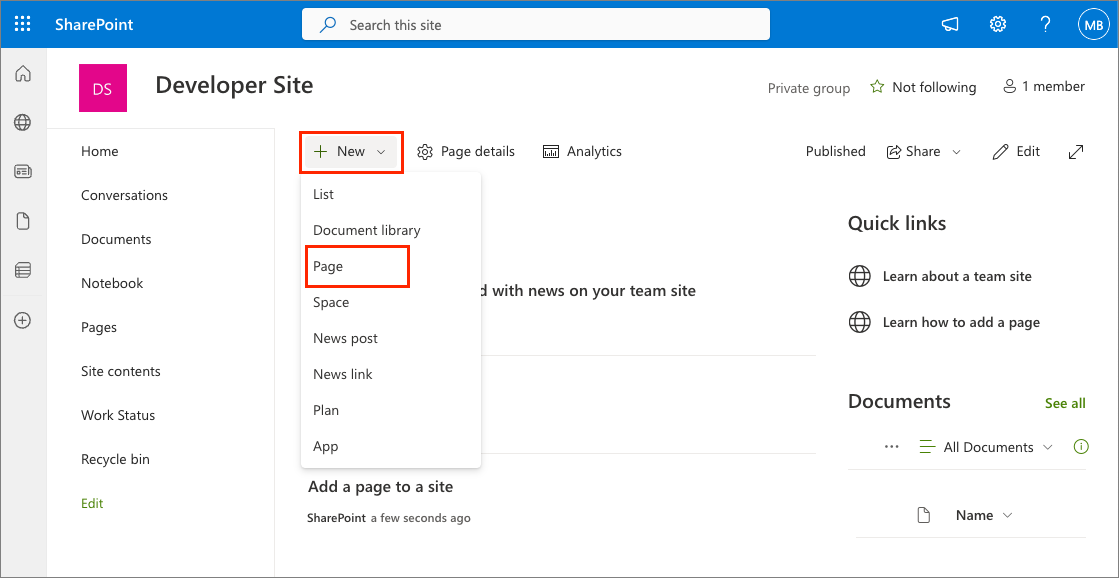
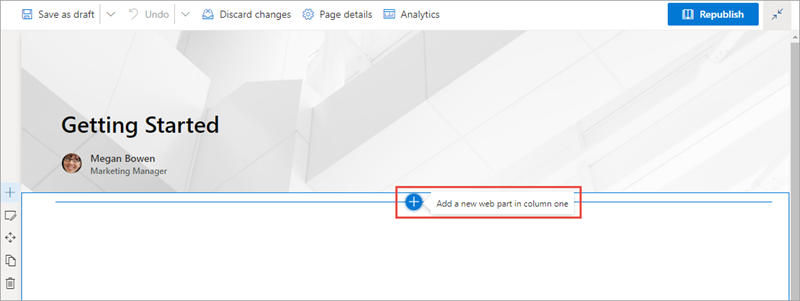
Add the web part to the page and test.
In the browser, select the Web part icon button to open the list of available web parts:
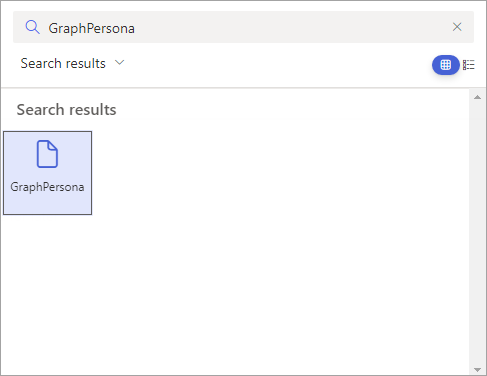
Search for the GraphPersona web part and select it:
When the page loads, notice after a brief delay, it will display the current user's details on the Persona card:

Summary
In this exercise, you created a new SharePoint Framework project with a single client-side web part that uses React and Microsoft Graph to display the currently logged-in user's personal details in an office Persona card. You used the Microsoft Graph HTTP client API included in the SharePoint Framework to authenticate and call the Microsoft Graph REST API.