Create highly available SQL databases with Azure Stack Hub
Important
Starting from Azure Stack Hub build 2108, the SQL and MySQL resource providers are offered to subscriptions that have been granted access. If you want to start using this feature, or if you need to upgrade from a previous version, open a support case and our support engineers will guide you through the deployment or upgrade process.
As an Azure Stack Hub Operator, you can configure server VMs to host SQL Server databases. After a SQL hosting server is created and managed by Azure Stack Hub, users who have subscribed to SQL services can easily create SQL databases.
This article shows how to use an Azure Stack Hub quickstart template to create a SQL Server AlwaysOn availability group, add it as an Azure Stack Hub SQL Hosting Server, and then create a highly available SQL database.
What you'll learn:
- Create a SQL Server AlwaysOn availability group from a template.
- Configure the SQL Server AlwaysOn availability group as an Azure Stack Hub SQL Hosting Server.
- Create a highly available SQL database.
A two VM SQL Server AlwaysOn availability group will be created and configured using available Azure Stack Marketplace items.
Before starting, ensure that the SQL Server resource provider has been successfully installed and the following items are available in Azure Stack Marketplace:
Important
All of the following are required for the Azure Stack Hub quickstart template to be used.
Windows Server 2016 Datacenter.
SQL Server 2016 SP1 or SP2 (Enterprise or Developer) on Windows Server 2016 server image.
Note
Standard version is not supported. When setting up the SQL Server AlwaysOn availability group with SQL Server Standard version, only one database can be created for one availability group. This limitation makes Standard version unsuitable for our scenario. For more details, check the document here.
SQL Server IaaS Extension version 1.3.20180 or higher. The SQL IaaS Extension installs necessary components that are required by the Marketplace SQL Server items for all Windows versions. It enables SQL-specific settings to be configured on SQL virtual machines (VMs). If the extension isn't installed in the local marketplace, provisioning of SQL will fail.
To learn more about adding items to Azure Stack Marketplace, see the Azure Stack Hub Marketplace overview.
Create a SQL Server AlwaysOn availability group
Use the steps in this section to deploy the SQL Server AlwaysOn availability group by using the sql-2016-alwayson Azure Stack Hub quickstart template. This template deploys two SQL Server Enterprise or Developer instances in an Always On Availability Group. It creates the following resources:
- A network security group.
- A virtual network.
- Four storage accounts (one for Active Directory (AD), one for SQL, one for file share witness, and one for VM diagnostics).
- Four public IP addresses (one for AD, two for each SQL VM, and one for public load balancer bound to SQL AlwaysOn listener).
- One external load balancer for SQL VMs with Public IP bound to the SQL AlwaysOn listener.
- One VM (Windows Server 2016) configured as Domain Controller for a new forest with a single domain.
- Two VMs (Windows Server 2016) configured with SQL Server 2016 SP1 or SP2 Enterprise or Developer Edition and clustered. These must be marketplace images.
- One VM (Windows Server 2016) configured as the file share witness for the cluster.
- One availability set containing the SQL and file share witness VMs.
-
Sign in to the user portal:
- For an integrated system deployment, the portal address will vary based on your solution's region and external domain name. It will be in the format of
https://portal.<region>.<FQDN>. - For the Azure Stack Development Kit (ASDK), the portal address is
https://portal.local.azurestack.external.
- For an integrated system deployment, the portal address will vary based on your solution's region and external domain name. It will be in the format of
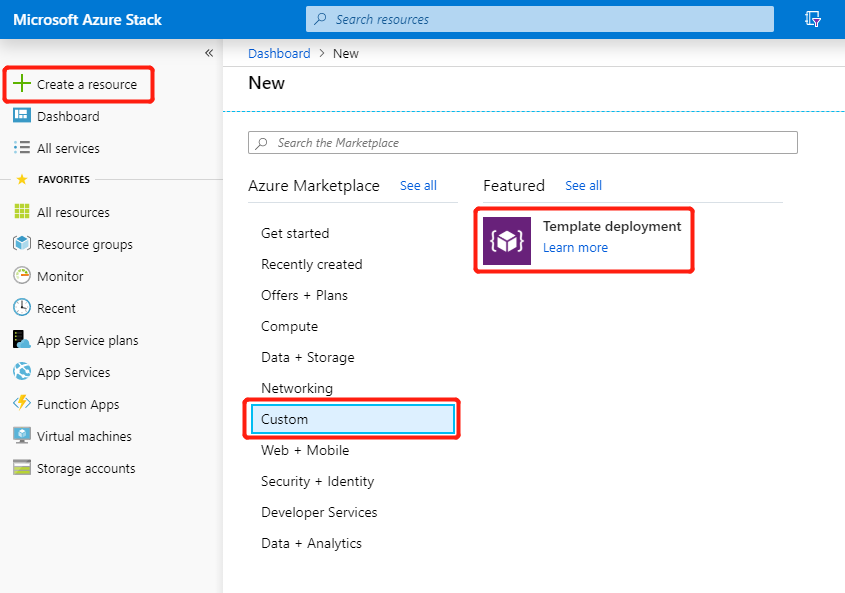
Select + Create a resource > Custom, and then Template deployment.
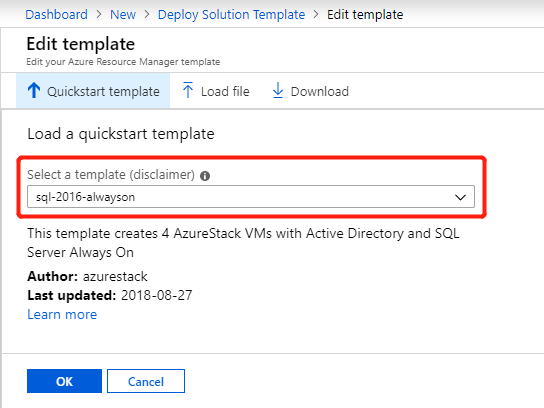
On the Custom deployment blade, select Edit template > Quickstart template and then use the drop-down list of available custom templates to select the sql-2016-alwayson template. Select OK, then Save.
On the Custom deployment blade, select Edit parameters and review the default values. Modify the values as necessary to provide all required parameter information and then select OK.
At a minimum:
- Provide complex passwords for the ADMINPASSWORD, SQLSERVERSERVICEACCOUNTPASSWORD, and SQLAUTHPASSWORD parameters.
- Enter the DNS Suffix for reverse lookup in all lowercase letters for the DNSSUFFIX parameter (azurestack.external for ASDK installations before version 2107).
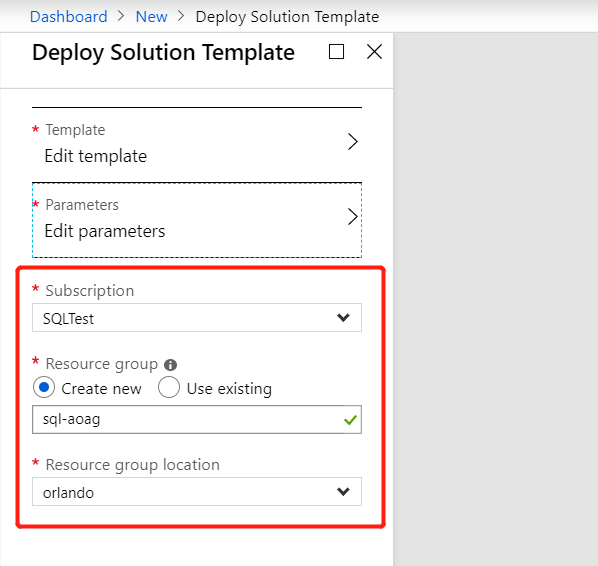
On the Custom deployment blade, choose the subscription to use and create a new resource group or select an existing resource group for the custom deployment.
Next, select the resource group location (local for ASDK installations before version 2107) and then click Create. The custom deployment settings will be validated and then the deployment will start.
In the user portal, select Resource groups and then the name of the resource group you created for the custom deployment (resource-group for this example). View the status of the deployment to ensure all deployments have completed successfully.
Next, review the resource group items and select the SQLPIPsql<resource group name> public IP address item. Record the public IP address and full FQDN of the load balancer public IP. You'll need to provide this to an Azure Stack Hub operator so they can create a SQL hosting server leveraging this SQL AlwaysOn availability group.
Note
The template deployment will take several hours to complete.
Enable automatic seeding
After the template has successfully deployed and configured the SQL AlwaysON availability group, you must enable automatic seeding on each instance of SQL Server in the availability group.
When you create an availability group with automatic seeding, SQL Server automatically creates the secondary replicas for every database in the group without any other manual intervention necessary. This measure ensures high availability of AlwaysOn databases.
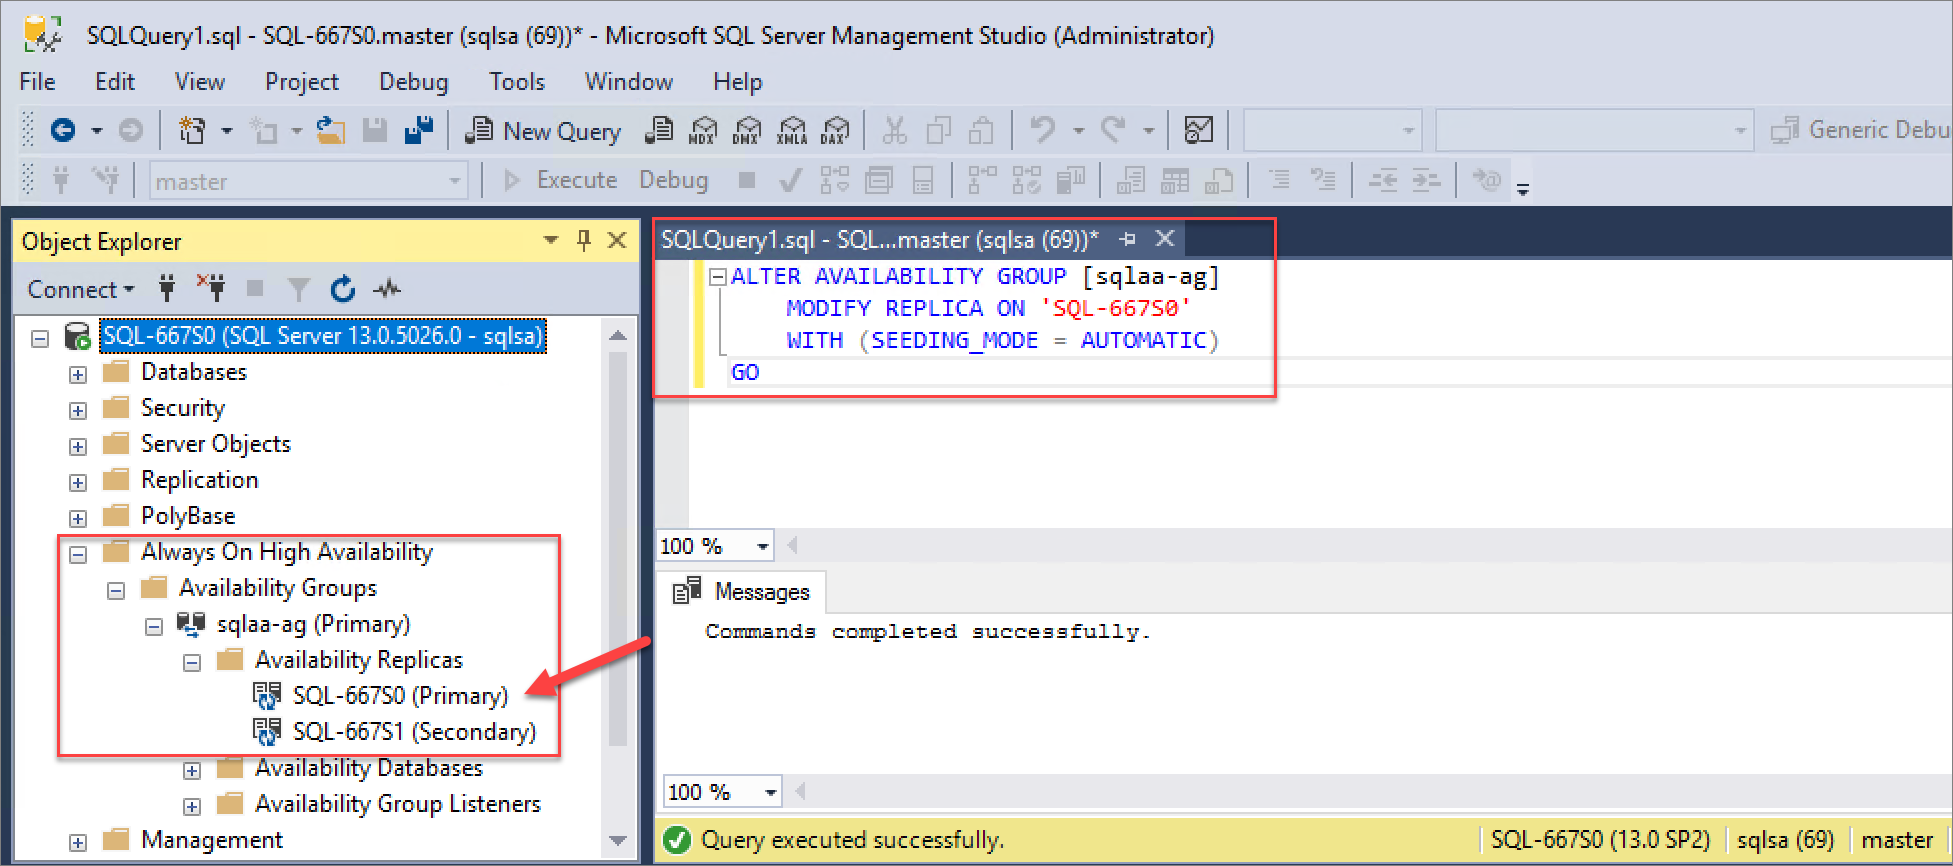
Use these SQL commands to configure automatic seeding for the AlwaysOn availability group. Replace <PrimaryInstanceName> with the primary instance SQL Server name, <SecondaryInstanceName> with the secondary instance SQL Server name and <availability_group_name> with the AlwaysOn availability group name as necessary.
On the primary SQL instance:
ALTER AVAILABILITY GROUP [<availability_group_name>]
    MODIFY REPLICA ON '<PrimaryInstanceName>'
    WITH (SEEDING_MODE = AUTOMATIC)
GO

ALTER AVAILABILITY GROUP [<availability_group_name>]
    MODIFY REPLICA ON '<SecondaryInstanceName>'
    WITH (SEEDING_MODE = AUTOMATIC)
GO
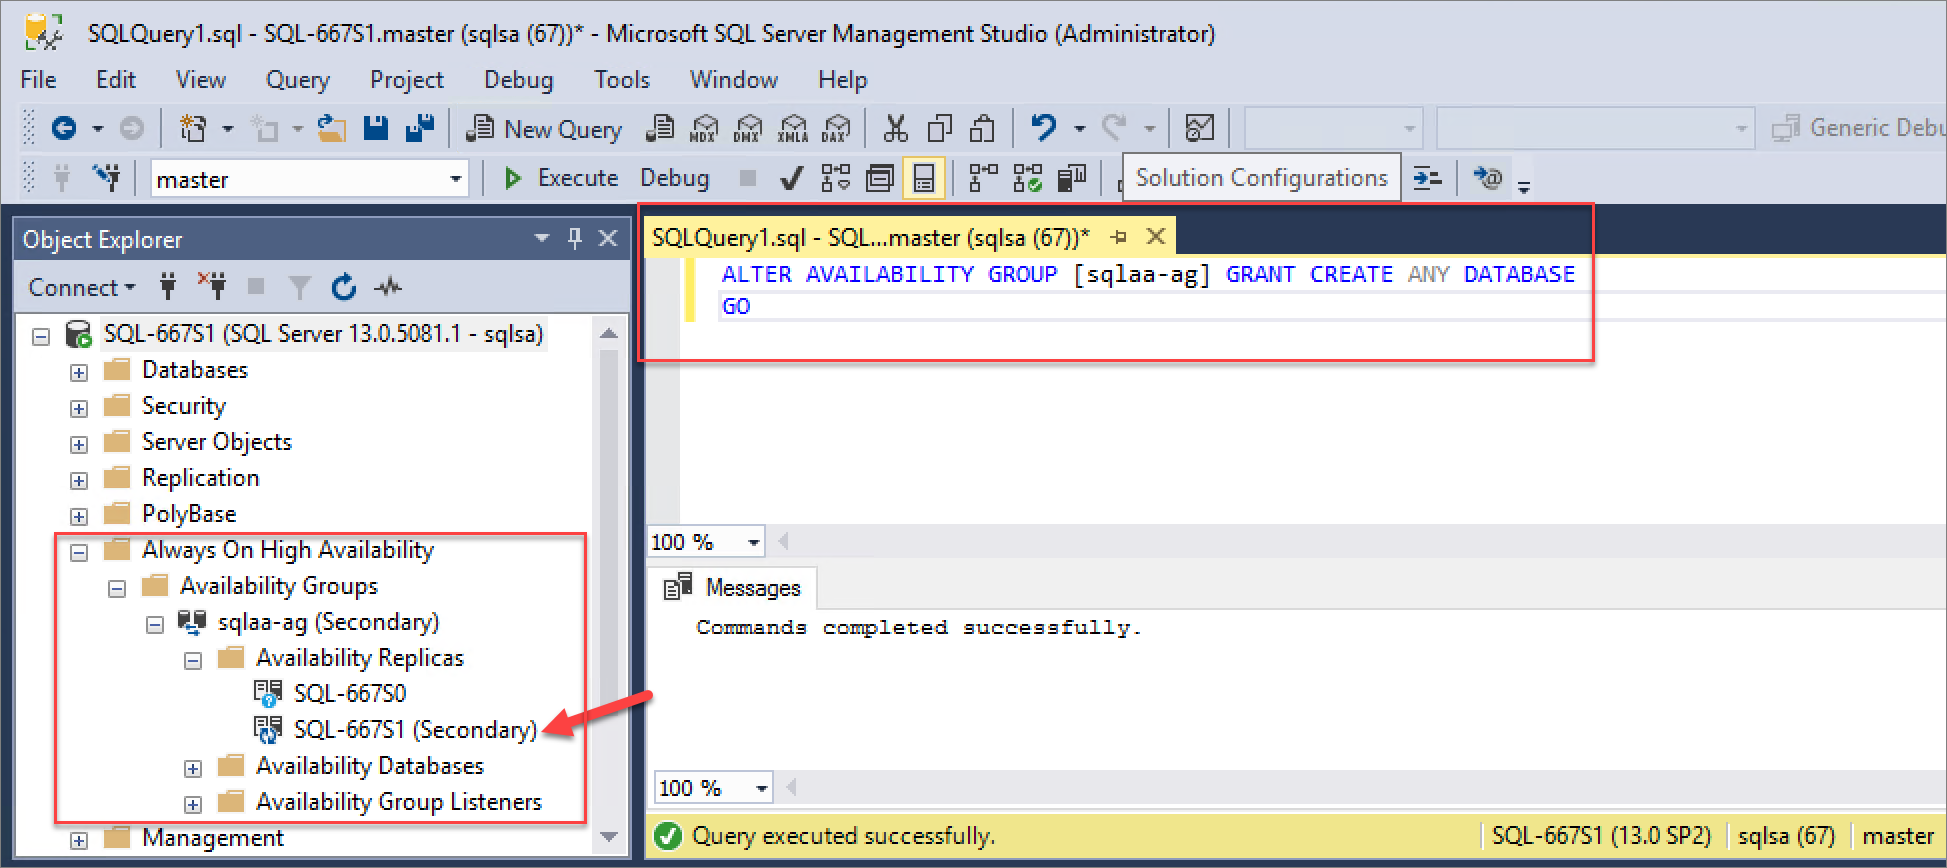
On secondary SQL instances:
ALTER AVAILABILITY GROUP [<availability_group_name>] GRANT CREATE ANY DATABASE
GO
Configure contained database authentication
Before adding a contained database to an availability group, ensure that the contained database authentication server option is set to 1 on every server instance that hosts an availability replica for the availability group. For more information, see contained database authentication.
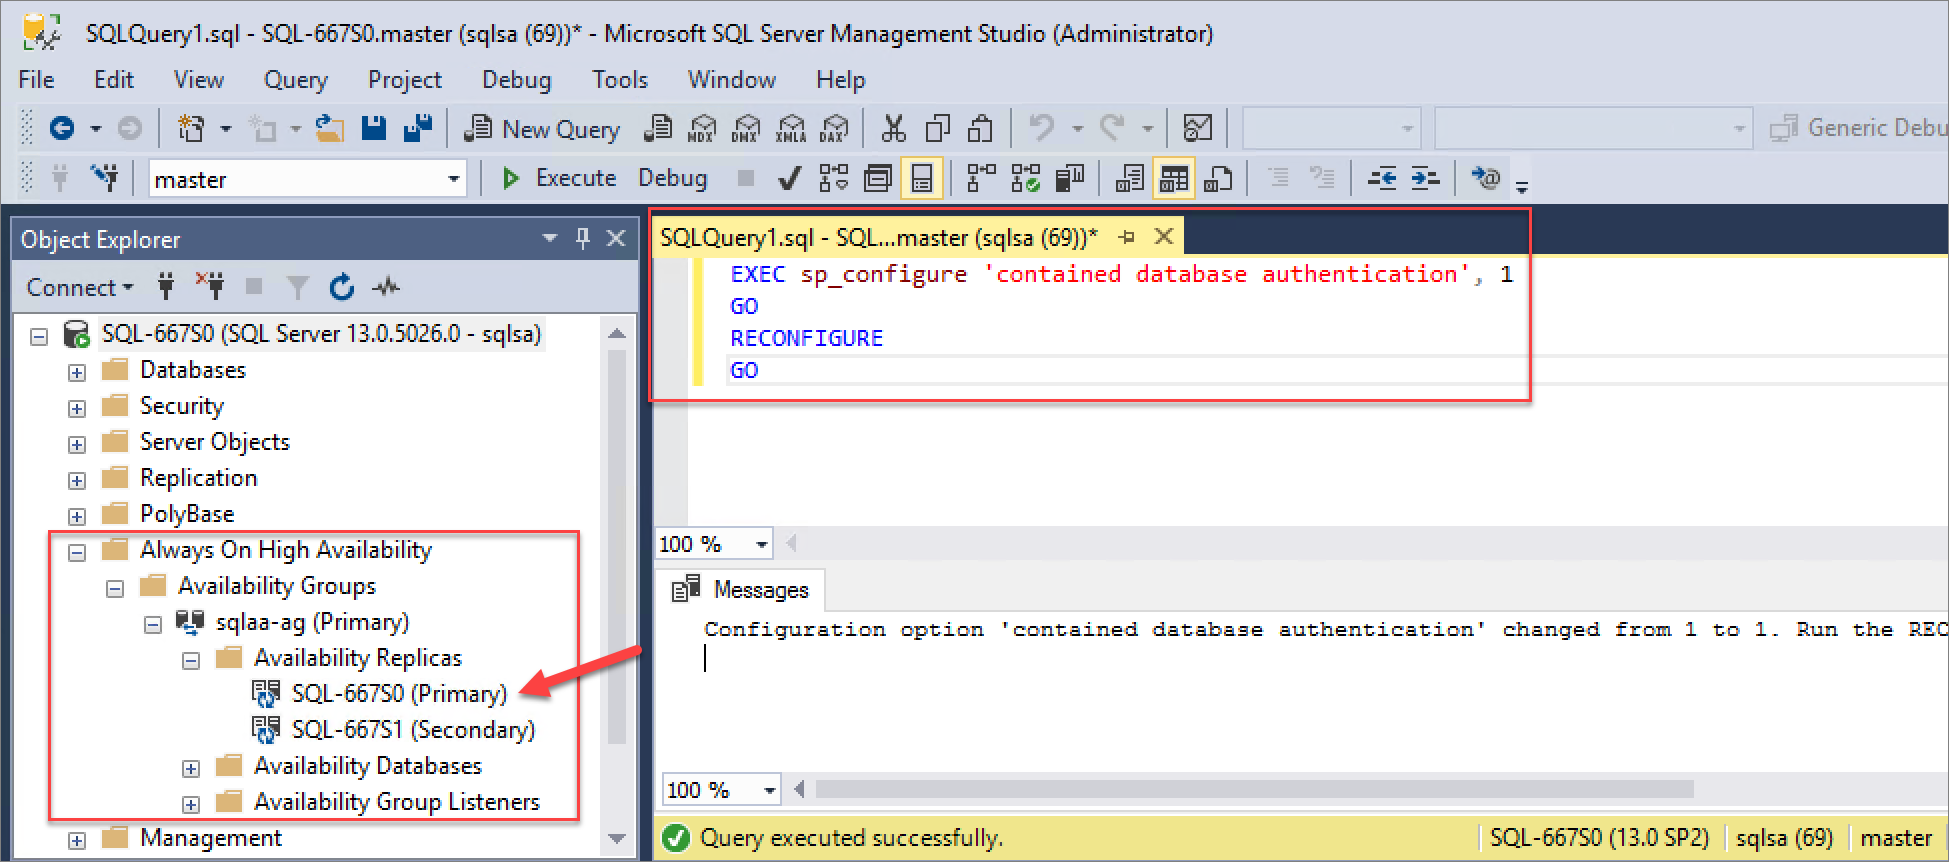
Use these commands to set the contained database authentication server option for each SQL Server instance in the availability group:
EXEC sp_configure 'contained database authentication', 1
GO
RECONFIGURE
GO
Configure an Azure Stack Hub SQL Hosting Server
After the SQL Server AlwayOn availability group has been created and properly configured, an Azure Stack Hub operator has to configure it as an Azure Stack Hub SQL Hosting Server.
Be sure to use the public IP or full FQDN for the public IP of the SQL load balancer recorded previously when the SQL AlwaysOn availability group's resource group was created (SQLPIPsql<resource group name>). In addition, you need to know the SQL Server authentication credentials used to access the SQL instances in the AlwaysOn availability group.
Note
This step must be run from the Azure Stack Hub administrator portal by an Azure Stack Hub operator.
With the SQL AlwaysOn availability group's load balancer listener public IP and SQL authentication login information, an Azure Stack Hub operator can create a SQL Hosting Server using the SQL AlwaysOn availability group.
Also ensure that you have created plans and offers to make SQL AlwaysOn database creation available for users. The operator will need to add the Microsoft.SqlAdapter service to a plan and create a new quota specifically for highly available databases. For more information about creating plans, see Service, plan, offer, subscription overview.
Tip
The Microsoft.SqlAdapter service won't be available to add to plans until the SQL Server resource provider has been deployed.
Create a highly available SQL database
After the SQL AlwaysOn availability group has been created, configured, and added as an Azure Stack Hub SQL Hosting Server by an Azure Stack Hub operator, a tenant user with a subscription including SQL Server database capabilities can create SQL databases supporting AlwaysOn functionality. They can create those databases by following the steps in this section.
Note
Run these steps from the Azure Stack Hub user portal as a tenant user with a subscription providing SQL Server capabilities (Microsoft.SQLAdapter service).
-
Sign in to the user portal:
- For an integrated system deployment, the portal address will vary based on your solution's region and external domain name. It will be in the format of
https://portal.<region>.<FQDN>. - For the Azure Stack Development Kit (ASDK), the portal address is
https://portal.local.azurestack.external.
- For an integrated system deployment, the portal address will vary based on your solution's region and external domain name. It will be in the format of
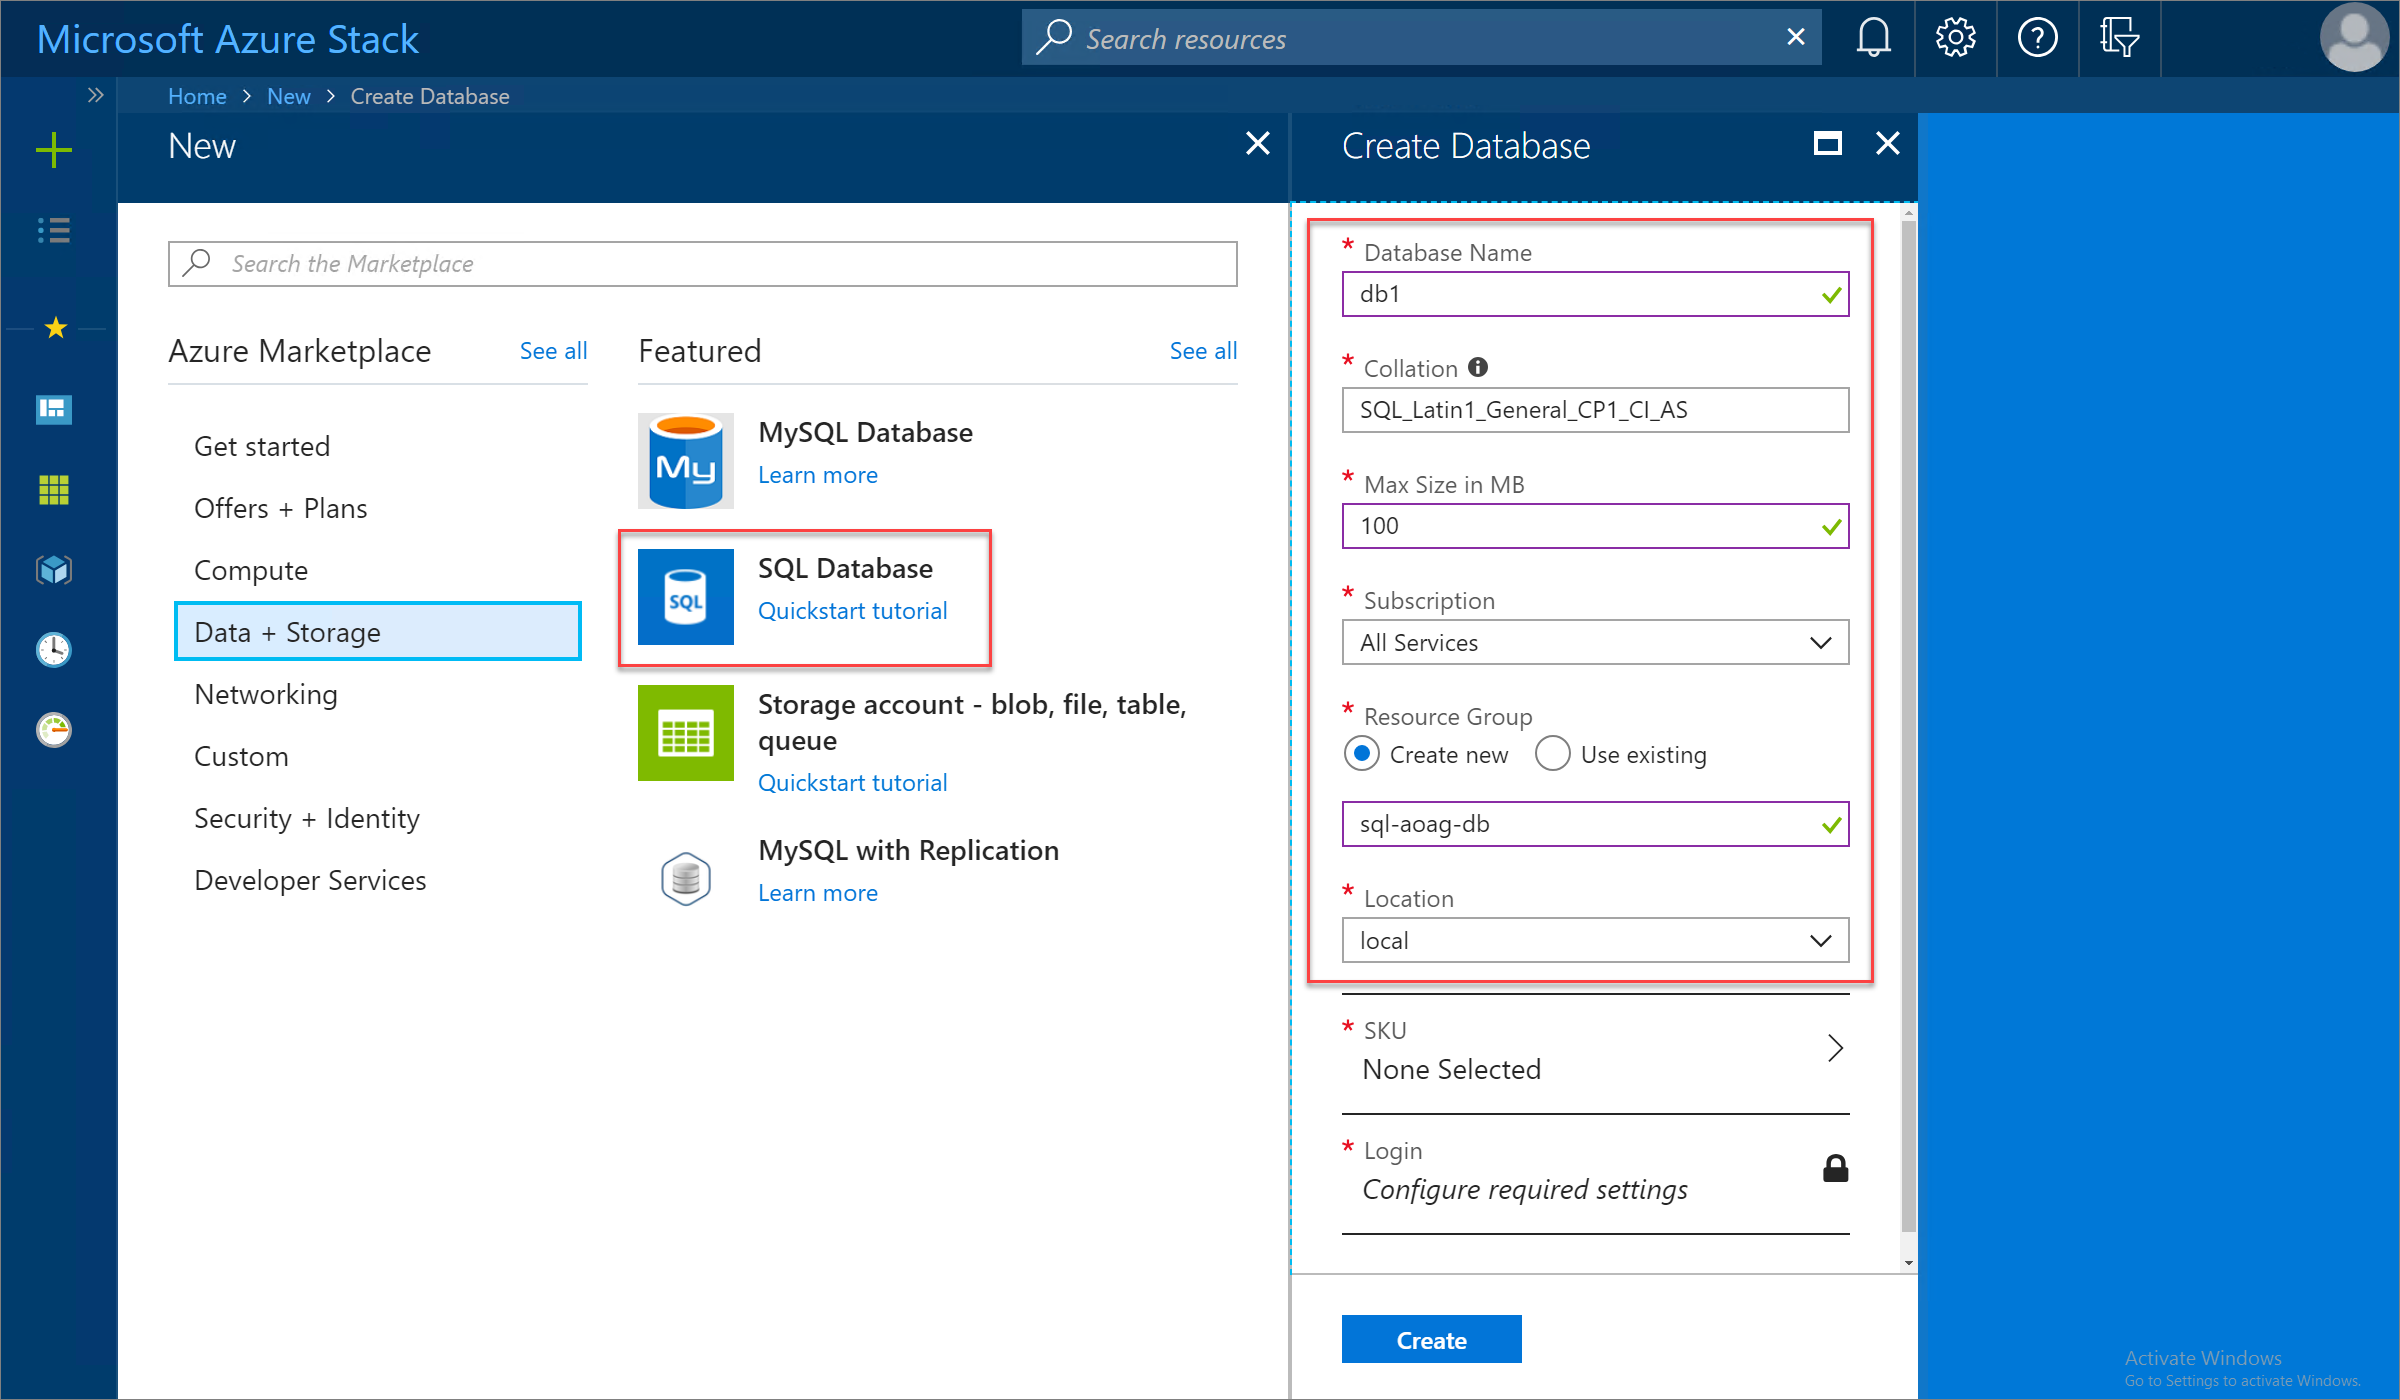
Select + Create a resource > Data + Storage, and then SQL Database.
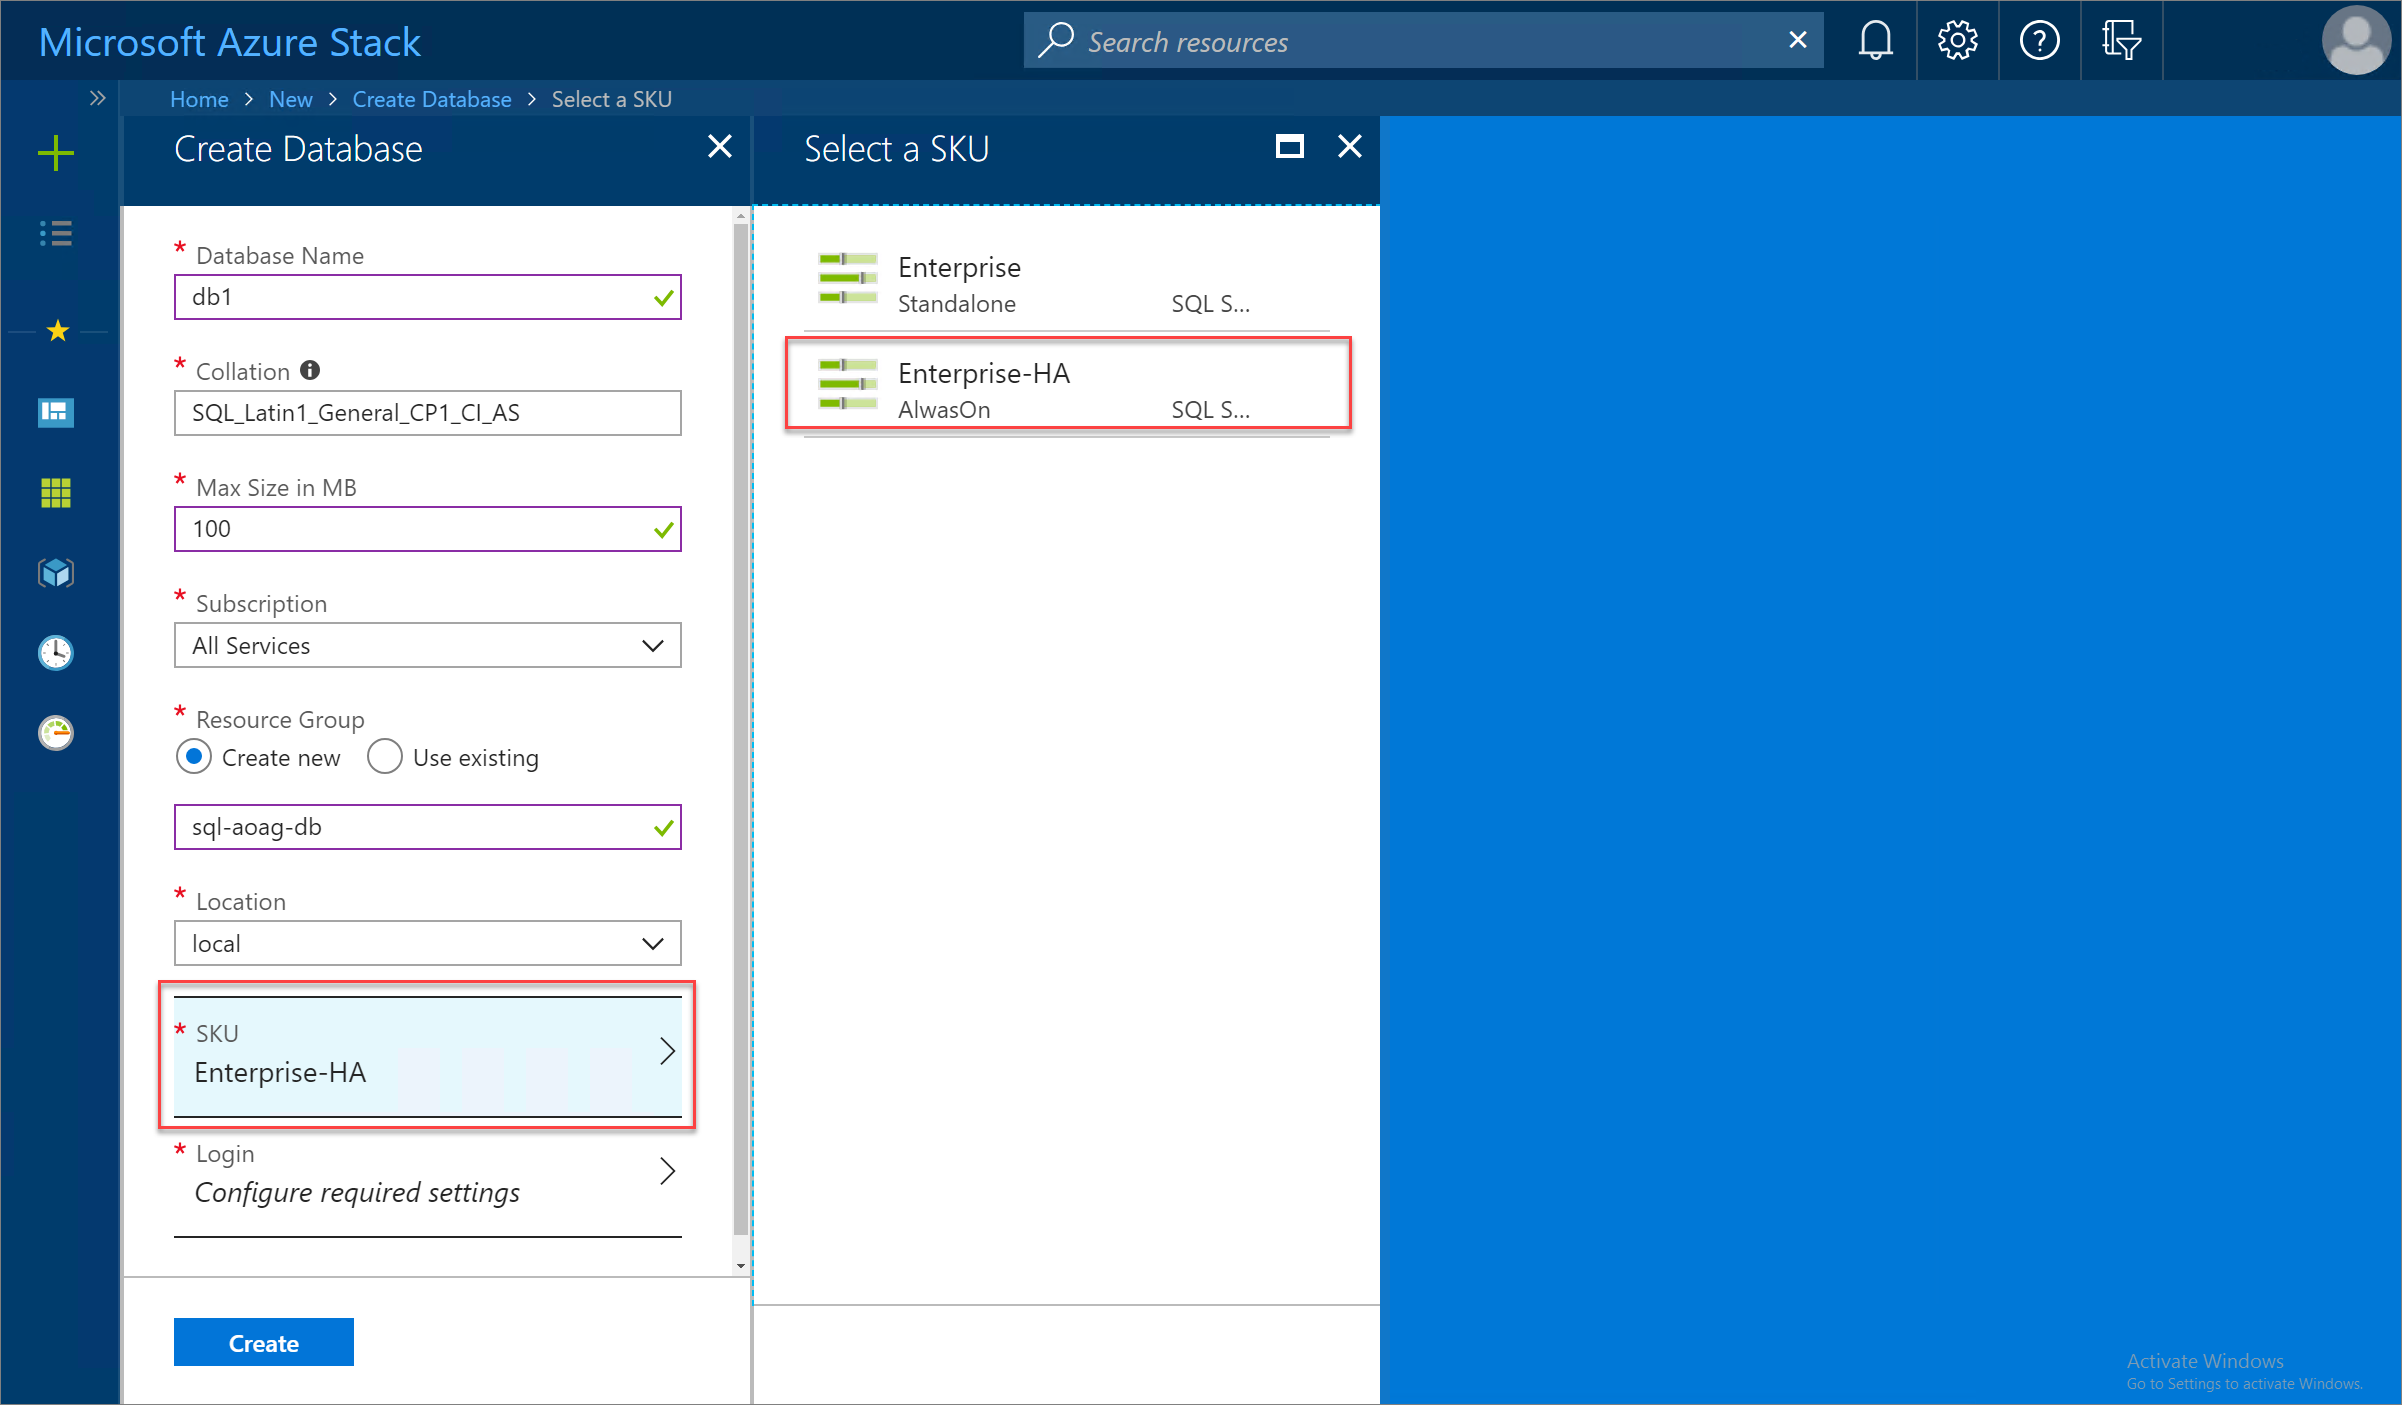
Provide the required database property information. This info includes name, collation, maximum size, and the subscription, resource group, and location to use for the deployment.
Select SKU and then choose the appropriate SQL Hosting Server SKU to use. In this example, the Azure Stack Hub operator has created the Enterprise-HA SKU to support high availability for SQL AlwaysOn availability groups.
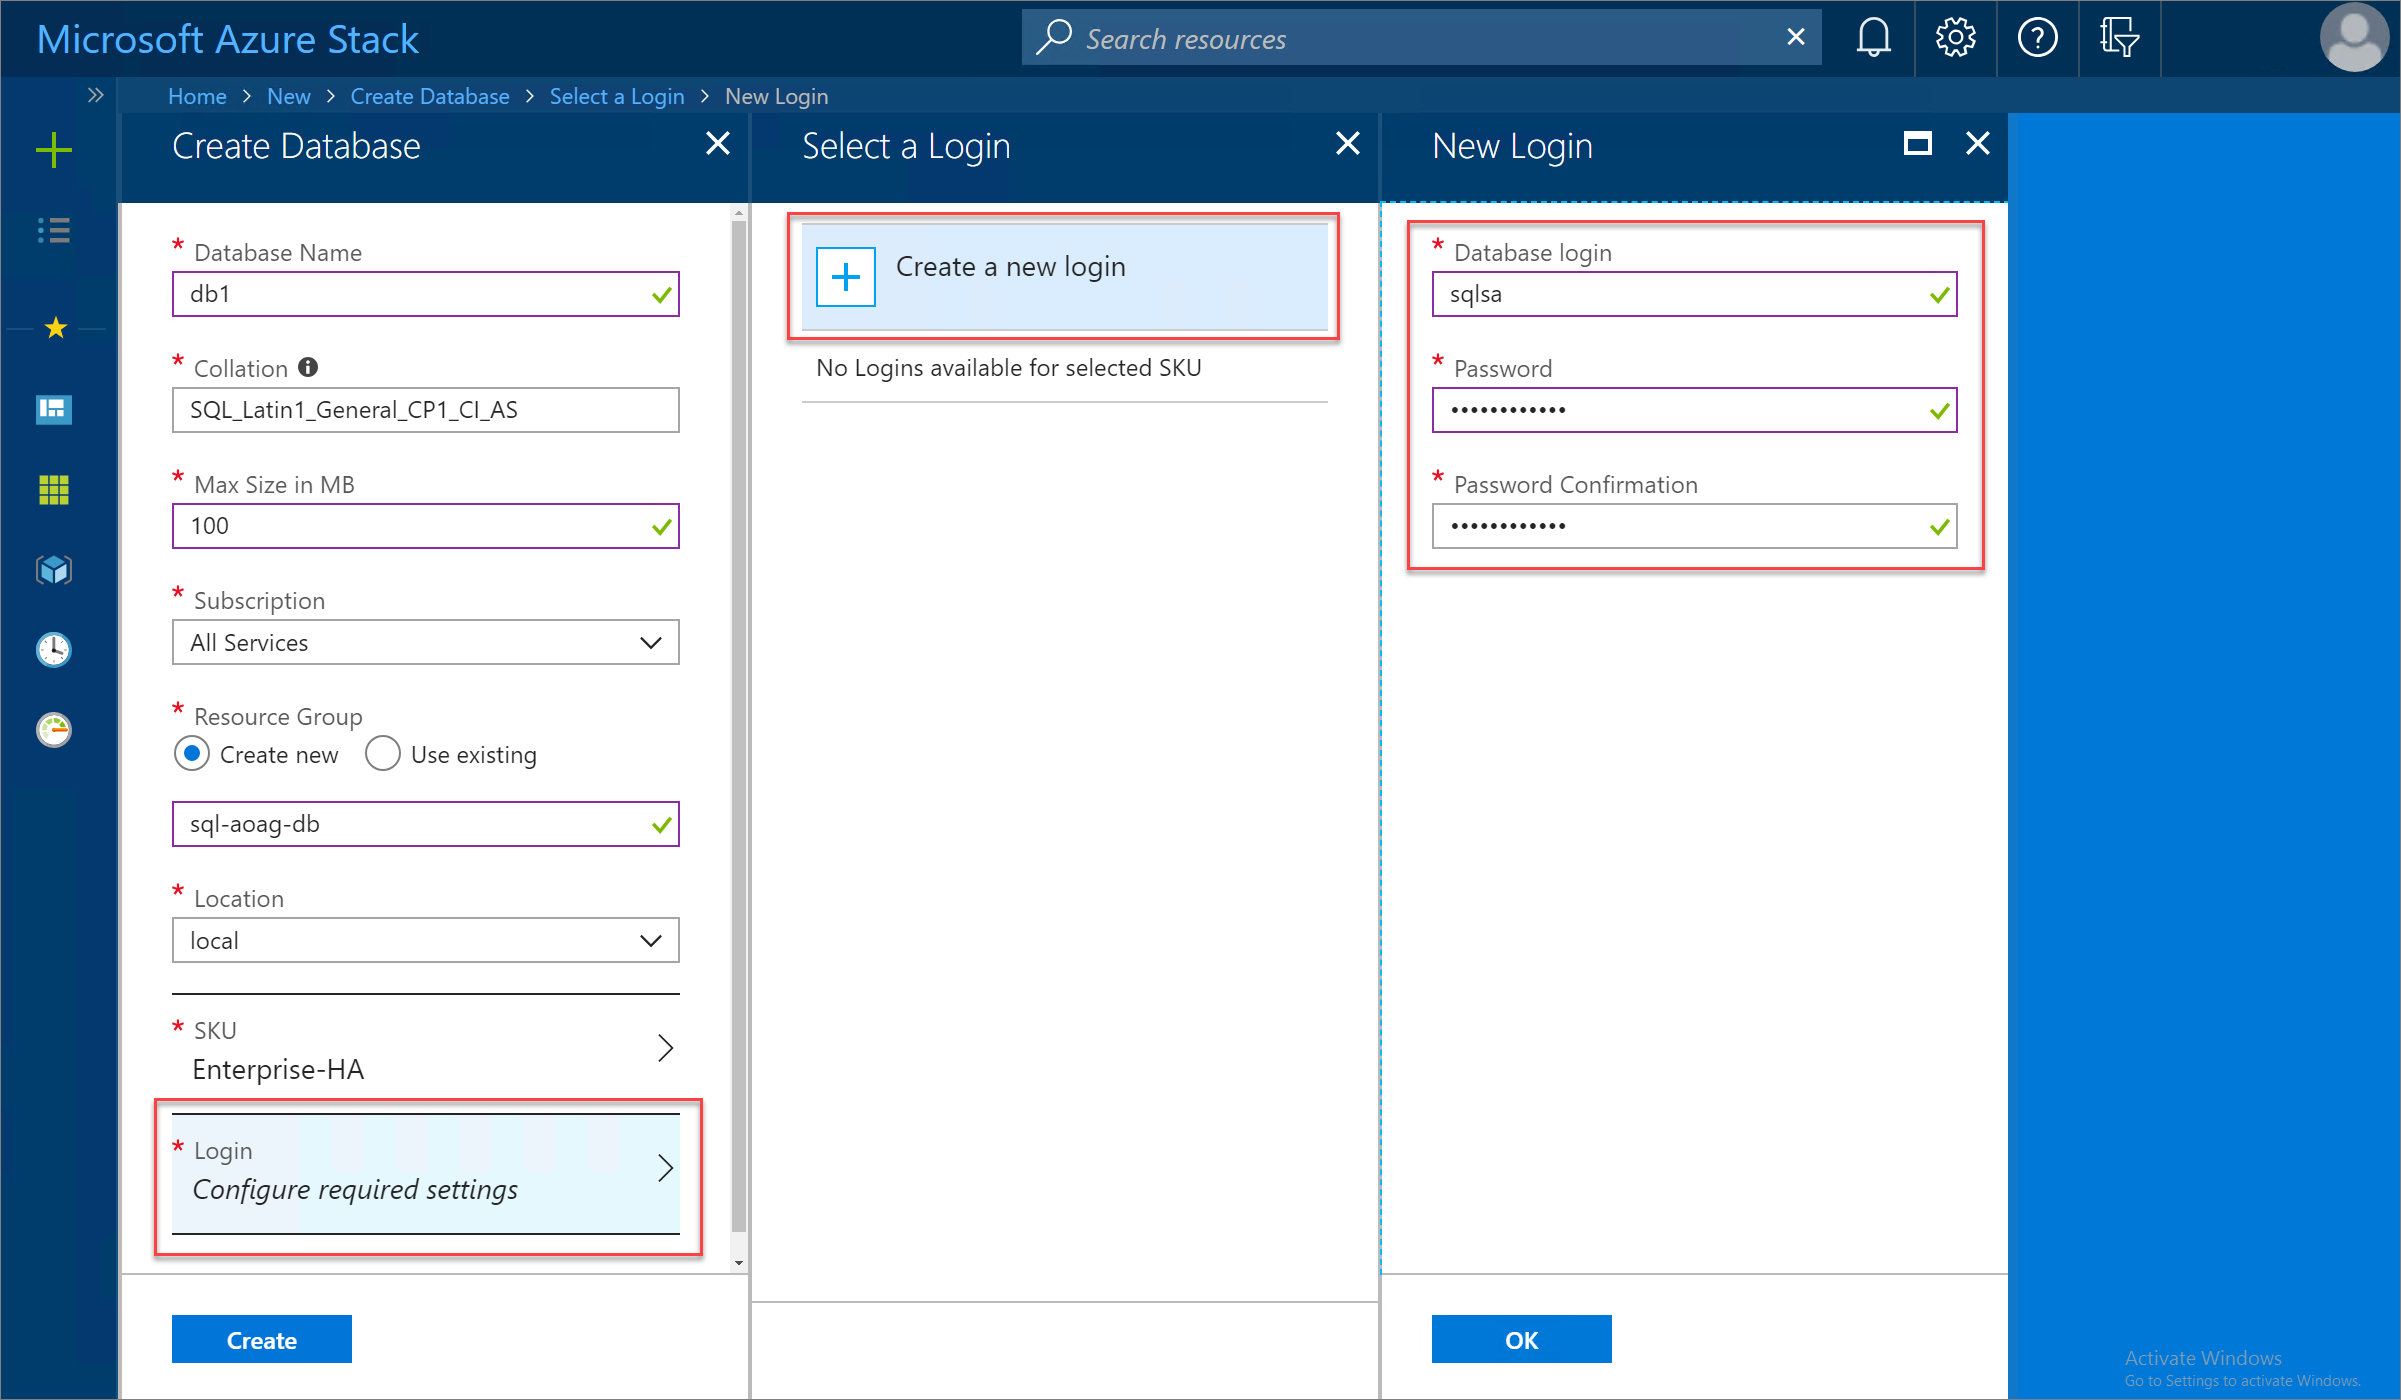
Select Login > Create a new login and then provide the SQL authentication credentials to be used for the new database. When finished, select OK and then Create to begin the database deployment process.
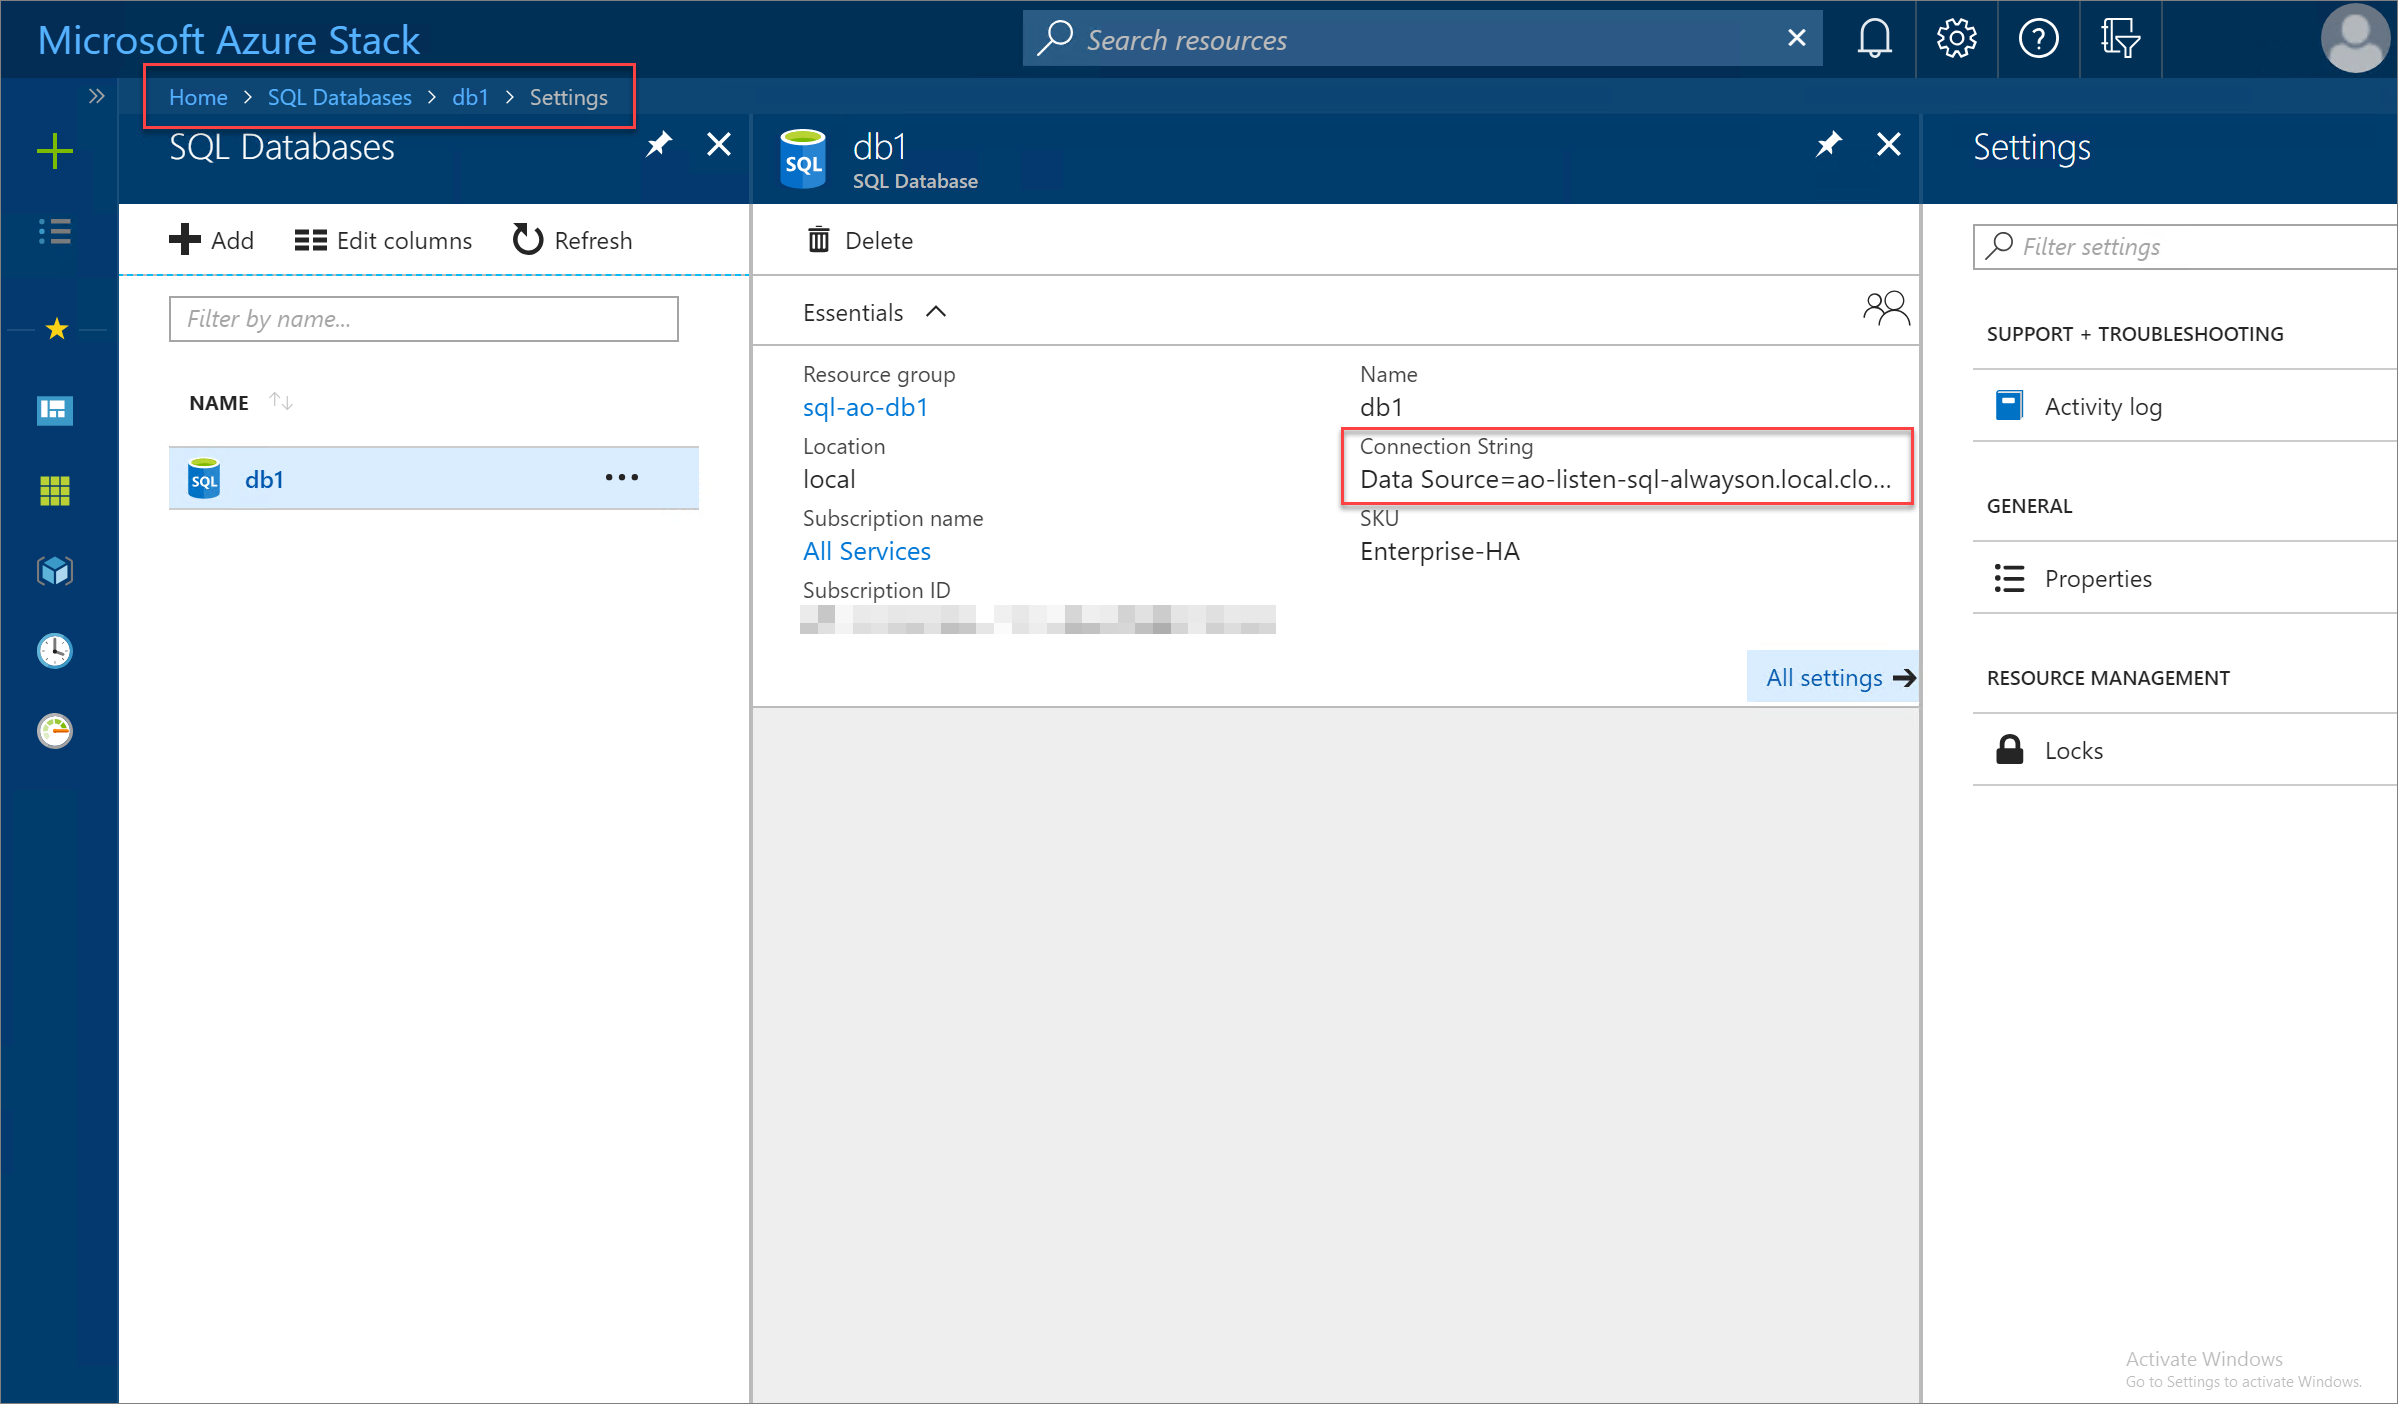
When the SQL database deployment completes successfully, review the database properties to discover the connection string to use for connecting to the new highly available database.
