Quickstart: Add feature flags to a Python app
In this quickstart, you'll create a feature flag in Azure App Configuration and use it to dynamically control Python apps to create an end-to-end implementation of feature management.
The feature management support extends the dynamic configuration feature in App Configuration. These examples in the quickstart build on thePpython apps introduced in the dynamic configuration tutorial. Before you continue, finish the quickstart and the tutorial to create python apps with dynamic configuration first.
This library does not have a dependency on any Azure libraries. They seamlessly integrate with App Configuration through its Python configuration provider.
Prerequisites
- An Azure account with an active subscription. Create one for free.
- An App Configuration store. Create a store.
- Python 3.8 or later - for information on setting up Python on Windows, see the Python on Windows documentation, otherwise see python downloads.
- azure-appconfiguration-provider library 1.2.0 or later.
Add a feature flag
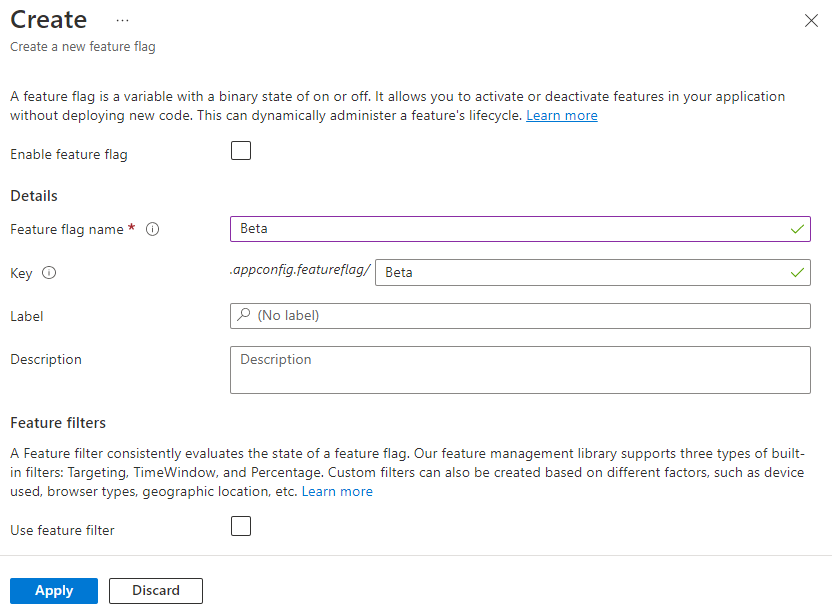
Add a feature flag called Beta to the App Configuration store and leave Label and Description with their default values. For more information about how to add feature flags to a store using the Azure portal or the CLI, go to Create a feature flag. At this stage the Enable feature flag check bock should be unchecked.
Console applications
Install Feature Management by using the
pip installcommand.pip install featuremanagementCreate a new python file called
app.pyand add the following code:from featuremanagement import FeatureManager from azure.identity import InteractiveBrowserCredential from azure.appconfiguration.provider import load import os from time import sleep endpoint = os.environ["APP_CONFIGURATION_ENDPOINT"] # Connecting to Azure App Configuration using an endpoint # credential is used to authenticate the client, the InteractiveBrowserCredential is used for this sample. It will open a browser window to authenticate the user. For all credential options see [credential classes](https://github.com/Azure/azure-sdk-for-python/tree/main/sdk/identity/azure-identity#credential-classes). # feature_flag_enabled makes it so that the provider will load feature flags from Azure App Configuration # feature_flag_refresh_enabled makes it so that the provider will refresh feature flags from Azure App Configuration, when the refresh operation is triggered config = load(endpoint=endpoint, credential=InteractiveBrowserCredential(), feature_flag_enabled=True, feature_flag_refresh_enabled=True) feature_manager = FeatureManager(config) # Is always false print("Beta is ", feature_manager.is_enabled("Beta")) while not feature_manager.is_enabled("Beta"): sleep(5) config.refresh() print("Beta is ", feature_manager.is_enabled("Beta"))
When starting the application, a browser window will open to authenticate the user. The user must have at least the App Configuration Data Reader role to access the App Configuration store, see App Configuration roles for more info.
Set an environment variable named APP_CONFIGURATION_ENDPOINT, and set it to the endpoint to your App Configuration store. At the command line, run the following command and restart the command prompt to allow the change to take effect:
To build and run the app locally using the Windows command prompt, run the following command:
setx APP_CONFIGURATION_ENDPOINT "endpoint-of-your-app-configuration-store"Restart the command prompt to allow the change to take effect. Validate that it's set properly by printing the value of the environment variable.
Run the python application.
python app.pyIn the App Configuration portal select Feature Manager, and change the state of the Beta feature flag to On, using the toggle in the Enabled column.
Key State Beta On After about 30s, which is the refresh interval for the provider, the application will print the following:
Beta is True
Web applications
The following example shows how to update an existing web application, using Azure App Configuration with dynamic refresh to also use feature flags. See Python Dynamic Configuration for a more detailed example of how to use dynamic refresh for configuration values. Before continuing, make sure you have the Beta feature flag enabled in your App Configuration store.
In app.py, set up Azure App Configuration's load method to additionally load feature flags, along with enabling refresh of feature flags.
from featuremanagement import FeatureManager

...

global azure_app_config, feature_manager
# Connecting to Azure App Configuration using an endpoint
# credential is used to authenticate the client, the InteractiveBrowserCredential is used for this sample. It will open a browser window to authenticate the user. For all credential options see [credential classes](https://github.com/Azure/azure-sdk-for-python/tree/main/sdk/identity/azure-identity#credential-classes).
# feature_flag_enabled makes it so that the provider will load feature flags from Azure App Configuration
# feature_flag_refresh_enabled makes it so that the provider will refresh feature flags from Azure App Configuration, when the refresh operation is triggered
azure_app_config = load(endpoint=endpoint, credential=InteractiveBrowserCredential(),
                        refresh_on=[WatchKey("sentinel")],
                        on_refresh_success=on_refresh_success,
                        refresh_interval=10, # Default value is 30 seconds, shortened for this sample
                        feature_flag_enabled=True,
                        feature_flag_refresh_enabled=True,
                    )
feature_manager = FeatureManager(config)
Also update your routes to check for updated feature flags.
@app.route("/")
def index():
    ...
    context["message"] = azure_app_config.get("message")
    context["beta"] = feature_manager.is_enabled("Beta")
    ...
Update your template index.html to use the new feature flags.
...

<body>
  <main>
    <div>
      <h1>{{message}}</h1>
      {% if beta %}
      <h2>Beta is enabled</h2>
      {% endif %}
    </div>
  </main>
</body>
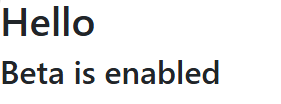
Once you have updated and run your application, you can see the feature flag in action, where the Beta is enabled message will appear on the page, but only if the feature flag is enabled in the App Configuration store.
You can find a full sample project here.
Whenever these endpoints are triggered, a refresh check can be performed to ensure the latest configuration values are used. The check can return immediately if the refresh interval has yet to pass or a refresh is already in progress.
When a refresh is complete all values are updated at once, so the configuration is always consistent within the object.
Clean up resources
If you don't want to continue using the resources created in this article, delete the resource group you created here to avoid charges.
Important
Deleting a resource group is irreversible. The resource group and all the resources in it are permanently deleted. Ensure that you don't accidentally delete the wrong resource group or resources. If you created the resources for this article inside a resource group that contains other resources you want to keep, delete each resource individually from its respective pane instead of deleting the resource group.
- Sign in to the Azure portal, and select Resource groups.
- In the Filter by name box, enter the name of your resource group.
- In the result list, select the resource group name to see an overview.
- Select Delete resource group.
- You're asked to confirm the deletion of the resource group. Enter the name of your resource group to confirm, and select Delete.
After a few moments, the resource group and all its resources are deleted.
Next steps
In this quickstart, you created a new App Configuration store and used it to manage features in a Python app via the Feature Management library.
- Learn more about feature management.
- Manage feature flags.