About area and iteration paths
Azure DevOps Services | Azure DevOps Server 2022 - Azure DevOps Server 2019
Area paths group work items by team, product, or feature area. Iteration paths group work into sprints, milestones, or other time-related periods. Both fields support hierarchical paths.
Define area and iteration paths for a project, and teams can select which paths to use for their backlog and Agile tools. Learn how Agile tools use these paths in Agile tools that rely on areas and iterations.
Note
Area paths and iteration paths are also known as Classification Nodes. You can manage them programmatically using the Classification Nodes (REST API) or the Azure DevOps CLI command az boards iteration.
Note
Area paths and iteration paths are also referred to as Classification Nodes. You can manage them programmatically via the Classification Nodes (REST API).
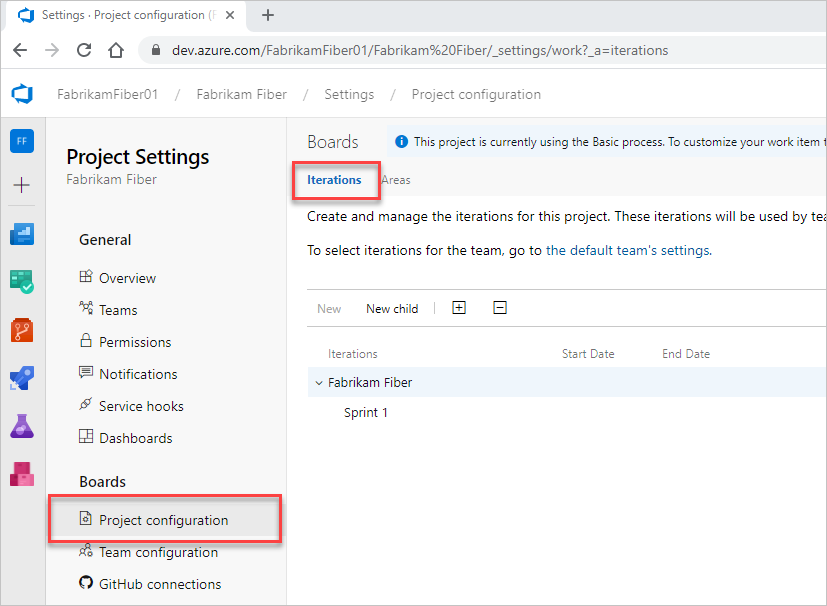
The areas and iterations depend on the process used to create your project. This example shows the default settings for the Scrum process. Dates aren't set by default; you need to set dates to match your sprint or release schedules.
| Iterations | Areas |
|---|---|
 |
 |
Important
- Deleting Area Paths or reconfiguring Iteration Paths causes irreversible data loss. For example, burndown and burnup widget charts, sprint burndown, and velocity charts for teams with changed Area Paths won't display accurate data. Historical trend charts reference the Area Path and Iteration Path as they were defined at the time for each work item. Once deleted, you can't retrieve historical data for these paths.
- You can only delete area and iteration paths that are no longer used by any work items.
Define and assign area paths
If you're new to managing projects and teams, do the following steps to configure your project and teams:
- Determine the number and names of Area Paths needed to categorize your work. At a minimum, add one area path for each team you define.
- Decide on the number and names of teams you want to support. For more information, see About teams and Agile tools.
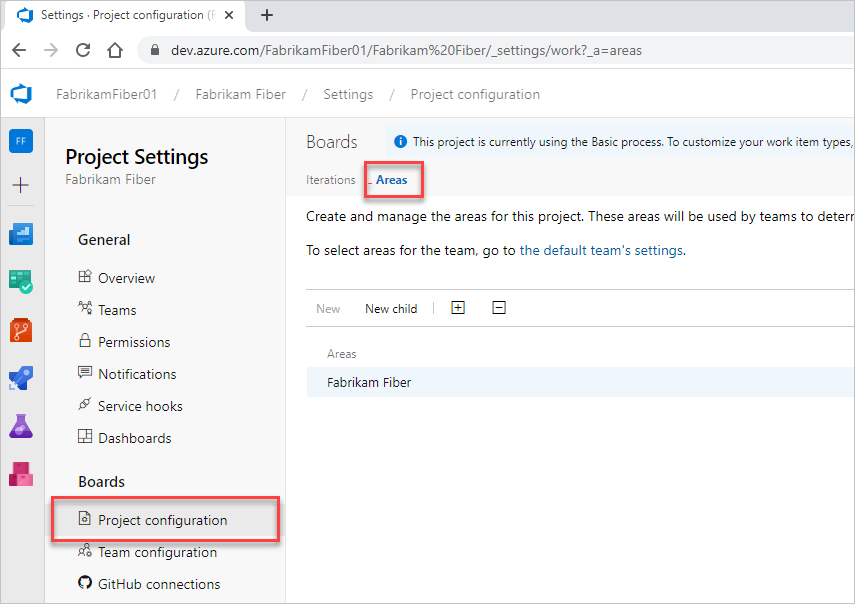
- Open Project settings > Project configuration and define the area paths to support steps 1 and 2 at the project level. Follow these steps: Open Project Settings, Project configuration and Add area paths.
- Define the teams needed to support step 2. For more information, see Add a team, move from one default team to several teams.
- Open the team configuration and assign the default and other area paths to each team. Follow these steps: Open team settings and Set team default area paths.
- Assign work items to the area paths you defined. Use bulk modify to modify several work items at once.
Note
You can define up to 10,000 Area Paths per project and assign up to 300 Area Paths to a single team. For more information, see Work tracking, process, and project limits.
You can assign the same Area Path to more than one team, but this can cause problems if two teams claim ownership over the same set of work items. For more information, see Limitations of multi-team board views.
You can do the following actions at any time:
- Add more child nodes
- Rename an area path (except the root area path)
- Move a child node under another node
- Delete a child node
- Rename a team
- Change the area path assignments made to a team
For more information, see Configure a hierarchy of teams.
How many areas should a team define?
Add areas to support your team's traceability and security requirements. Use areas to represent logical or physical components, and create child areas to represent specific features.
Add areas when you need to:
- Filter queries based on a product or feature area
- Organize or group work items by team or subteams
- Restrict access to work items based on their area.
Each team can create a hierarchy of areas to organize their backlog items, user stories, requirements, tasks, and bugs.
Avoid creating an overly complex area structure. While you can use areas to partition permissions on work items, complex trees require significant overhead for permission management. Duplicating the structure and permissions in other projects might become too cumbersome.
Define and assign iteration paths
Follow these steps to configure Iteration Paths for your project and teams:
- Define the area paths and teams using the guidance in Define area paths and assign to a team.
- Determine the length of the iteration you want to support. We recommend that all teams use the same sprint cadence.
- Decide whether you want a flat structure or a hierarchy of sprints and releases.
- Open Project settings > Project configuration and define the iteration paths to support steps 2 and 3 at the project level. Follow these steps: Open Project Settings, Project configuration and Add iterations and set iteration dates.
- Open the team configuration and assign the default, backlog, and other iteration paths to each team. Follow these steps: Open team settings and Set team default iteration paths.
- Each team should assign an iteration path to their work items that falls under the Backlog iteration path. These work items appear on their product backlogs and boards. Use bulk modify to modify several work items at once. See also Assign backlog items to a sprint.
Note
You can define up to 10,000 Iteration Paths per project and assign up to 300 Iteration Paths to a single team. For more information, see Work tracking, process, and project limits.
You can do the following actions at any time:
- Add more child iteration nodes
- Rename an iteration path (except the root path)
- Move a child iteration path under another node
- Delete a child iteration path
- Change the default and selected iteration paths assigned to a team
How many iterations should a team define?
Define as many child iterations as needed to reflect your project lifecycle. These paths represent a series of events, such as sprints, pre-beta and beta results, and other release milestones. Teams usually leave work items assigned to the team's default iteration if they aren't yet scheduled for work or release.
Add iterations to support the following requirements:
- Define sprints for your Scrum teams to plan and execute their sprints
- Set up more complex multi-release and sprint cycles
- Filter queries based on sprints, milestones, or cycle time for your project
- Support future work that isn't ready to be assigned to a target release cycle.
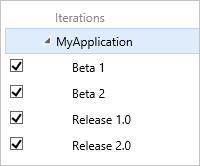
In the following example, Beta 1, Beta 2, Release 1.0, and Release 2.0 are defined for the MyApplication project.
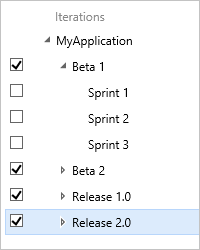
As you create the backlog of product features and tasks, assign them to milestones based on when you expect the team to complete them. As your needs change, you can add events under each major milestone to reflect how your team schedules and manages its work.
For example, the Beta 1 iteration now contains three child nodes, one for each sprint in the Beta 1 time period.
Iterations don't enforce any rules. For example, you can assign a task to an iteration without closing or completing it during that iteration. At the end of an iteration, identify all work items that remain active or open and take appropriate action. You can move them to a different iteration or return them to the backlog.
Naming restrictions
The Area Path and Iteration Path fields, data type=TreePath, consist of multiple node items separated by the backslash (\) character. Minimize the names of nodes and make sure you conform to the following restrictions when you're adding child nodes.
| Restriction type | Restriction |
|---|---|
| Node length | Must not contain more than 255 characters. |
| Reserved names | - Must not consist only of a period . or two periods ...- Must not be a system-reserved name, such as PRN, COM1, COM2, COM3, COM4, COM5, COM6, COM7, COM8, COM9, COM10, LPT1, LPT2, LPT3, LPT4, LPT5, LPT6, LPT7, LPT8, LPT9, NUL, CON, or AUX. For more information about reserved names, see File Names, Paths, and Namespaces. |
| Special characters for nodes | - Must not contain Unicode control characters. - Must not contain any one of the following characters: \ / : * ? " < > | # $ * +.- Must not contain characters prohibited by the local file system. For more information about Windows character restrictions, see Naming Files, Paths, and Namespaces. |
| Path length | Must not contain more than 4,000 Unicode characters. |
| Path hierarchy depth | Must be fewer than 14 levels deep. |