Build and publish a Node.js package
Azure DevOps Services | Azure DevOps Server 2022 - Azure DevOps Server 2019
In this quickstart, you use a pipeline to create a Node.js package with Node Package Manager (npm) and publish a pipeline artifact. You learn how to use Azure Pipelines to build, deploy, and test your JavaScript apps.
Prerequisites
- A GitHub account where you can create a repository. Create a GitHub account for free.
- An Azure DevOps organization. Create one for free.
- An Azure DevOps project. Create one using the Azure DevOps Project Creation Wizard.
- The ability to run pipelines on Microsoft-hosted agents. You need to request the free grant of parallel jobs or purchase a parallel job.
- A GitHub account where you can create a repository. Create a GitHub account for free.
- An Azure DevOps organization. Create one for free.
- An Azure DevOps project. Create one using the Azure DevOps Project Creation Wizard.
- A self-hosted agent. To create one, see Self-hosted agents.
Fork the sample code
Fork the sample Express.js server app.
- Go to the js-e2e-express-server repository.
- Select Fork in the upper-right corner of the page.
- Select your GitHub account. By default, the fork is named the same as the parent repository, but you can name it something different.
Important
During the following procedures, you might be prompted to create a GitHub service connection or redirected to GitHub to sign in, install Azure Pipelines, or authorize Azure Pipelines. Follow the onscreen instructions to complete the process. For more information, see Access to GitHub repositories.
Create your pipeline
- In your Azure DevOps project, select Pipelines > Create Pipeline, and then select GitHub as the location of your source code.
- On the Select a repository screen, select your forked sample repository.
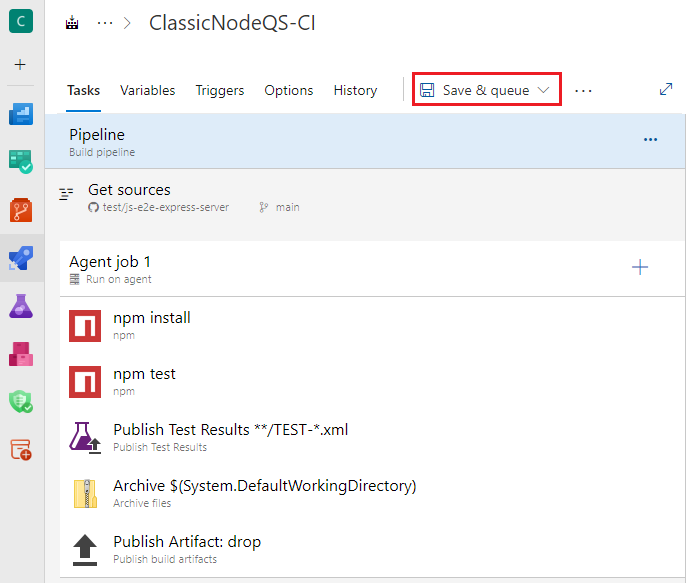
- On the Configure your pipeline screen, select Starter pipeline. Azure Pipelines generates a YAML file called azure-pipelines.yml for your pipeline.
- Select the dropdown caret next to Save and run, select Save, and then select Save again. The file is saved to your forked GitHub repository.
- On the next screen, select Edit.
Build the package and publish an artifact
Edit your azure-pipelines.yml file as follows.
Replace the contents of the file with the following code. The code updates the Node.js tool installer task to use Node.js version 16 LTS.
trigger:
- main

pool:
  vmImage: 'ubuntu-latest'

steps:
- task: UseNode@1
  inputs:
    version: '16.x'
  displayName: 'Install Node.js'

- script: |
    npm install
  displayName: 'npm install'

- script: |
    npm run build
  displayName: 'npm build'
Add the following new tasks to the pipeline:
The copy files task copies the npm package and package.json files from the local download path on the agent and saves them to a local artifact staging path on the agent. Only the src and public folders are copied.
The publish pipeline artifact task gets the files from the artifact staging location and publishes them as artifacts to be output with pipeline builds.
- task: CopyFiles@2
  inputs:
    sourceFolder: '$(Build.SourcesDirectory)'
    contents: |
       src/*
       public/*
    targetFolder: '$(Build.ArtifactStagingDirectory)'
  displayName: 'Copy project files'

- task: PublishPipelineArtifact@1
  inputs:
    artifactName: e2e-server
    targetPath: '$(Build.ArtifactStagingDirectory)'
    publishLocation: 'pipeline'
  displayName: 'Publish npm artifact'
Run your pipeline
Select Validate and save, then select Save, select Run, and select Run again.
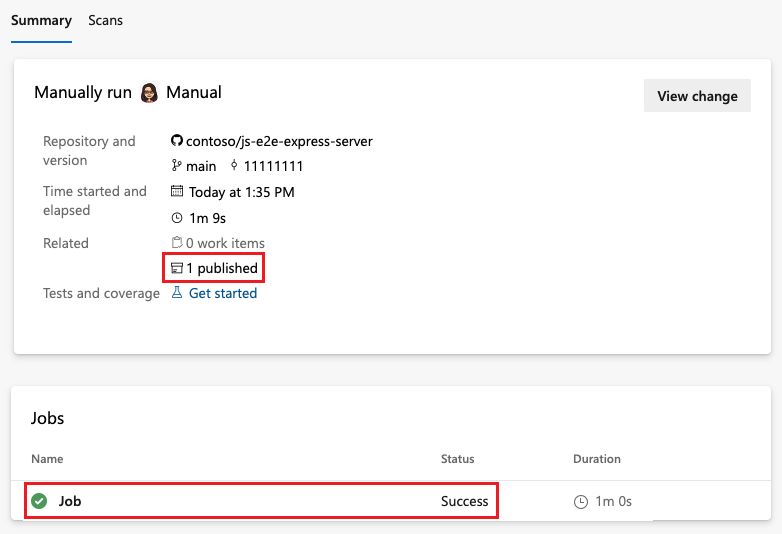
After your pipeline runs, verify that the job ran successfully and that you see a published artifact.
Congratulations, you successfully created and ran a pipeline that built and tested a Node.js package. You can build, test, and deploy Node.js apps as part of your Azure Pipelines continuous integration and continuous delivery (CI/CD) system.
Next steps
Зворотний зв’язок
Очікується незабаром: протягом 2024 року ми будемо припиняти використання механізму реєстрації проблем у GitHub для зворотного зв’язку щодо вмісту й замінювати його новою системою зворотного зв’язку. Докладніше: https://aka.ms/ContentUserFeedback.
Надіслати й переглянути відгук про