Validate XML in workflows with Azure Logic Apps
Applies to: Azure Logic Apps (Consumption + Standard)
In enterprise integration business-to-business (B2B) scenarios, the trading partners in an agreement often have to make sure that the messages they exchange are valid before any data processing can start. Your logic app workflow can validate XML messages and documents by using the XML Validation action and a predefined schema.
If you're new to logic apps, review What is Azure Logic Apps? For more information about B2B enterprise integration, review B2B enterprise integration workflows with Azure Logic Apps and Enterprise Integration Pack.
Prerequisites
An Azure account and subscription. If you don't have a subscription yet, sign up for a free Azure account.
The logic app workflow, blank or existing, where you want to use the XML Validation action.
If you have a blank workflow, use any trigger you want. This example uses the Request trigger.
An integration account resource where you define and store artifacts, such as trading partners, agreements, certificates, and so on, for use in your enterprise integration and B2B workflows. This resource has to meet the following requirements:
Is associated with the same Azure subscription as your logic app resource.
Exists in the same location or Azure region as your logic app resource where you plan to use the XML Validation* action.
If you're using the Logic App (Consumption) resource type, your integration account requires the following items:
The schema to use for validating XML content.
If you're using the Logic App (Standard) resource type, you don't store schemas in your integration account. Instead, you can directly add schemas to your logic app resource using either the Azure portal or Visual Studio Code. You can then use these schemas across multiple workflows within the same logic app resource.
You still need an integration account to store other artifacts, such as partners, agreements, and certificates, along with using the AS2, X12, and EDIFACT operations. However, you don't need to link your logic app resource to your integration account, so the linking capability doesn't exist. Your integration account still has to meet other requirements, such as using the same Azure subscription and existing in the same location as your logic app resource.
Note
Currently, only the Logic App (Consumption) resource type supports RosettaNet operations. The Logic App (Standard) resource type doesn't include RosettaNet operations.
Add XML validation action
In the Azure portal, open your logic app and workflow in designer view.
If you have a blank logic app that doesn't have a trigger, add any trigger you want. This example uses the Request trigger. Otherwise, continue to the next step.
To add the Request trigger, in the designer search box, enter
HTTP request, and select the Request trigger named When an HTTP request is received.Under the step in your workflow where you want to add the XML Validation action, choose one of the following steps:
For a Consumption logic app, choose one of the following steps:
To add the XML Validation action at the end of your workflow, select New step.
To add the XML Validation action between existing steps, move your pointer over the arrow that connects those steps so that the plus sign (+) appears. Select that plus sign, and then select Add an action.
For a Standard plan-based logic app, choose a step:
To add the XML Validation action at the end of your workflow, select the plus sign (+), and then select Add an action.
To add the XML Validation action between existing steps, select the plus sign (+) that appears between those steps, and then select Add an action.
Under Choose an operation, select Built-in. In the search box, enter
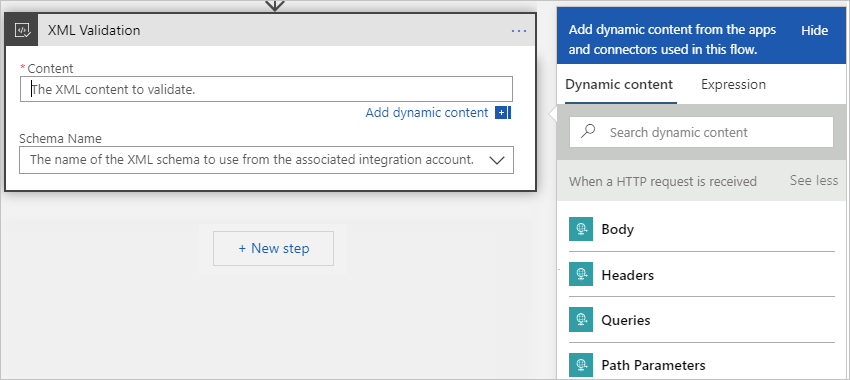
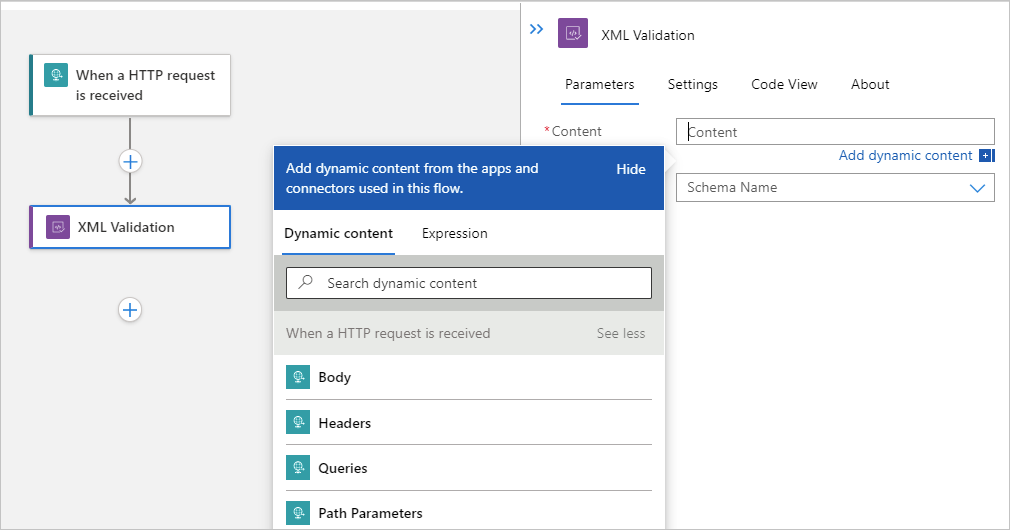
xml validation. From the actions list, select XML Validation.To specify the XML content for validation, click inside the Content box so that the dynamic content list appears.
The dynamic content list shows property tokens that represent the outputs from the previous steps in the workflow. If the list doesn't show an expected property, check the trigger or action heading in the list and whether you can select See more.
For a Consumption logic app, the designer looks like this example:

For a Standard plan-based logic app, the designer looks like this example:

From the dynamic content list, select the property token for the content you want to validate.
This example selects the Body token from the trigger.
To specify the schema to use for validation, open the Schema Name list, and select the schema that you previously added.
When you're done, make sure to save your logic app workflow.
You're now finished setting up your XML Validation action. In a real world app, you might want to store the validated data in a line-of-business (LOB) app such as SalesForce. To send the validated output to Salesforce, add a Salesforce action.
To test your validation action, trigger and run your workflow. For example, for the Request trigger, send a request to the trigger's endpoint URL.
The XML Validation action runs after your workflow is triggered and when XML content is available for validation.