Manage pre and post events maintenance configuration events (preview)
Applies to: ✔️ Windows VMs ✔️ Linux VMs ✔️ On-premises environment ✔️ Azure Arc-enabled servers ✔️ Azure VMs.
This article describes on how to register your subscription and manage pre and post events in Azure Update Manager.
Register your subscription for public preview
To self-register your subscription for public preview, follow these steps:
Sign in to the Azure portal and select More services.
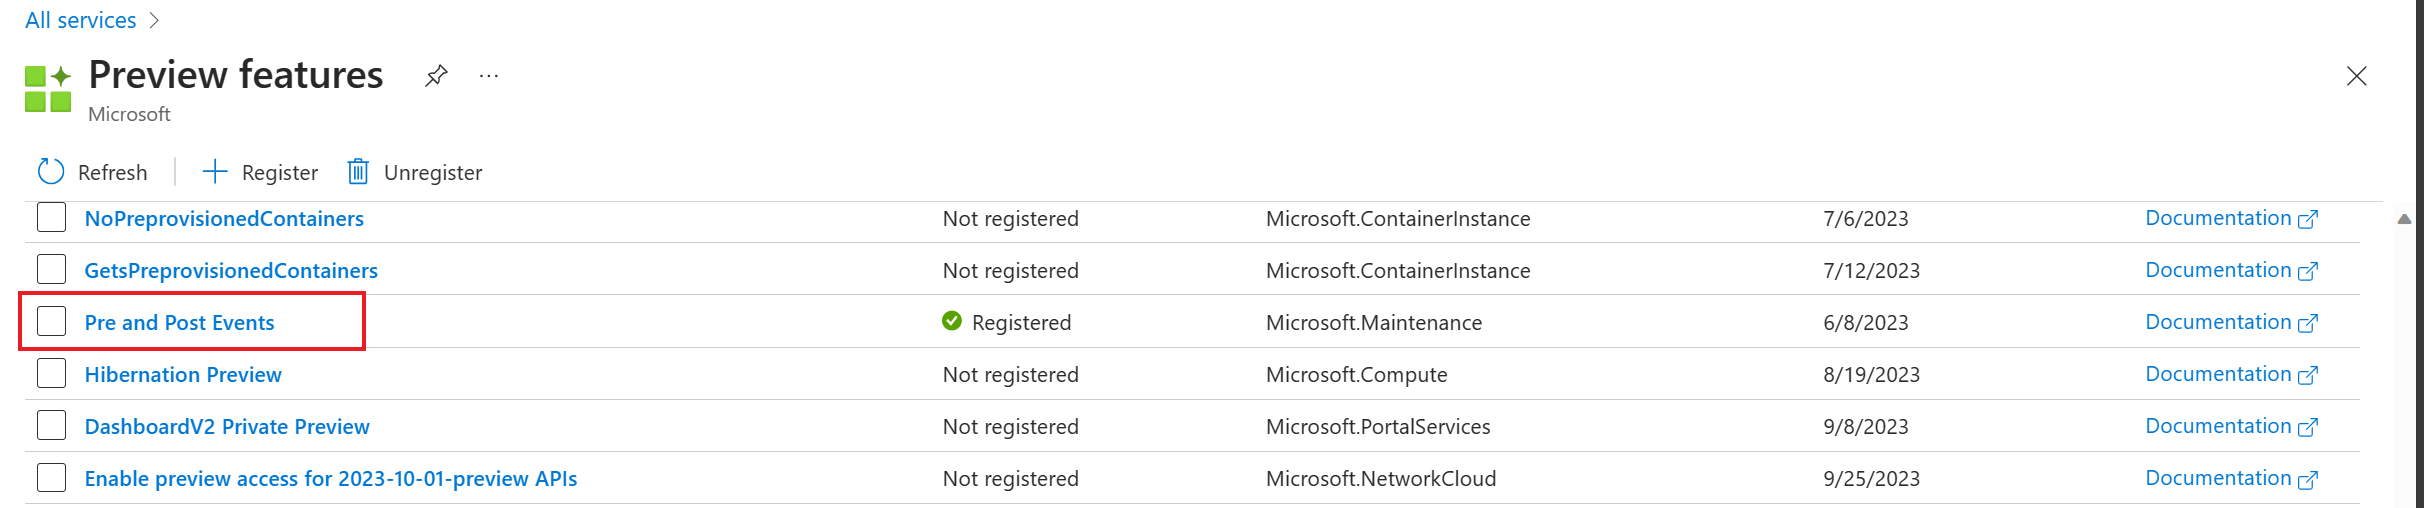
On the All services page, search for Preview features.
On the Preview Features page, search and select Pre and Post Events.
Select the feature and then select Register to register the subscription.

Manage pre and post events
View pre and post events
To view the pre and post events, follow these steps:
Sign in to the Azure portal and go to Azure Update Manager.
Under Manage, select Machines, Maintenance Configurations.
In the Maintenance Configuration page, select the maintenance configuration to which you want to add a pre and post event.
Select Overview and check the Maintenance events. You can see the count of the pre and post events associated to the configuration.
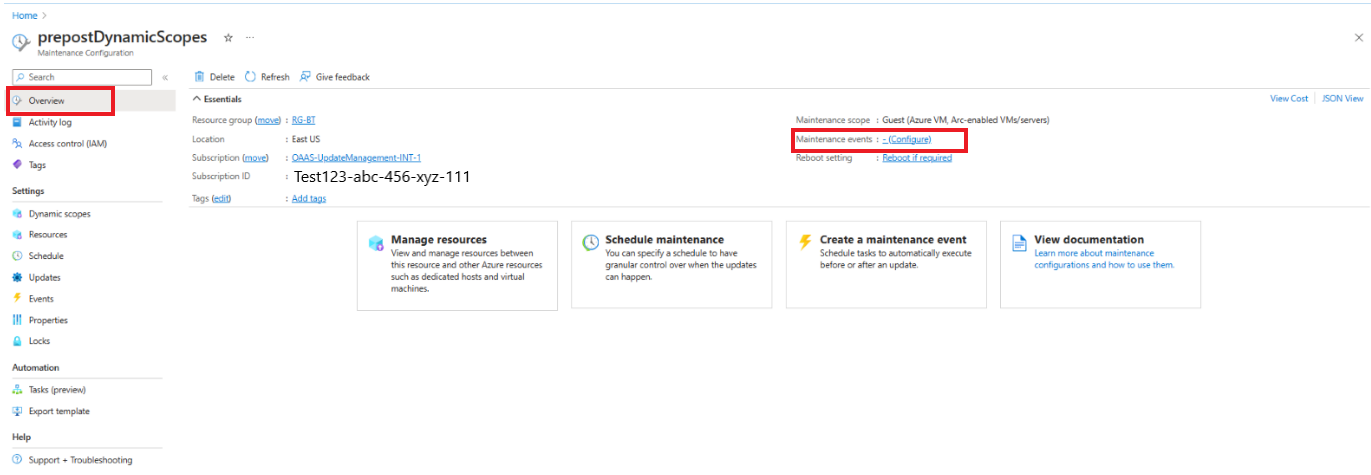
Select the count of the pre and post events to view the list of events and the event types.


Edit pre and post events
To edit the pre and post events, follow these steps:
- Follow the steps listed in View pre and post events.
- In the selected events page, select the pre or post event you want to edit.
- In the selected pre or post event page, you can edit the Event handler/endpoint used or the location of the endpoint.
Manage the execution of pre/post event and schedule run
To check the successful delivery of a pre and post event to an endpoint from Event Grid, follow these steps:
- Sign in to the Azure portal and go to Azure Update Manager.
- Under Manage, select Machines.
- Select Maintenance Configurations from the ribbon at the top.
- In the Maintenance Configuration page, select the maintenance configuration for which you want to view a pre and post event.
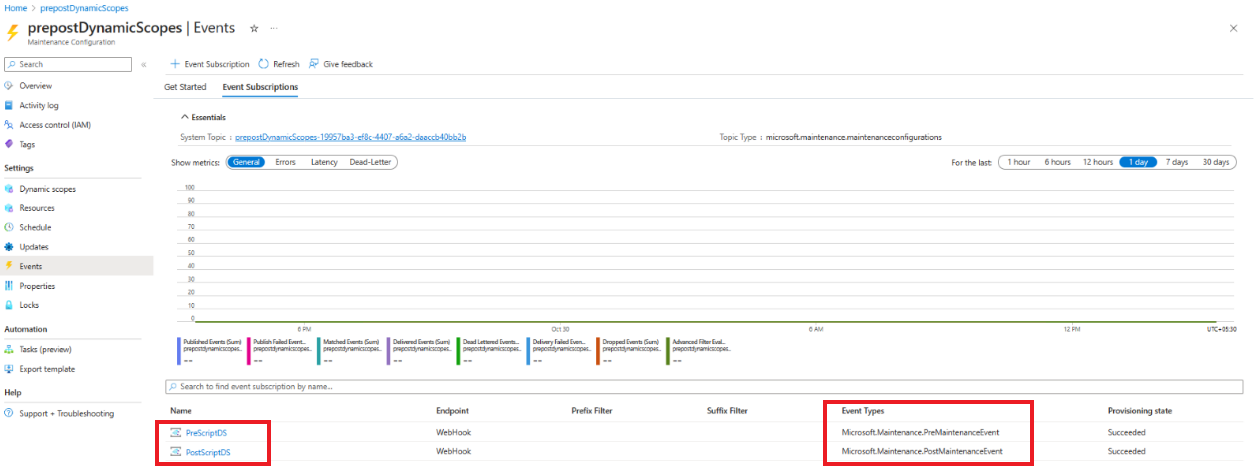
- On the selected Maintenance Configuration page, under Settings in the ToC, select Events.
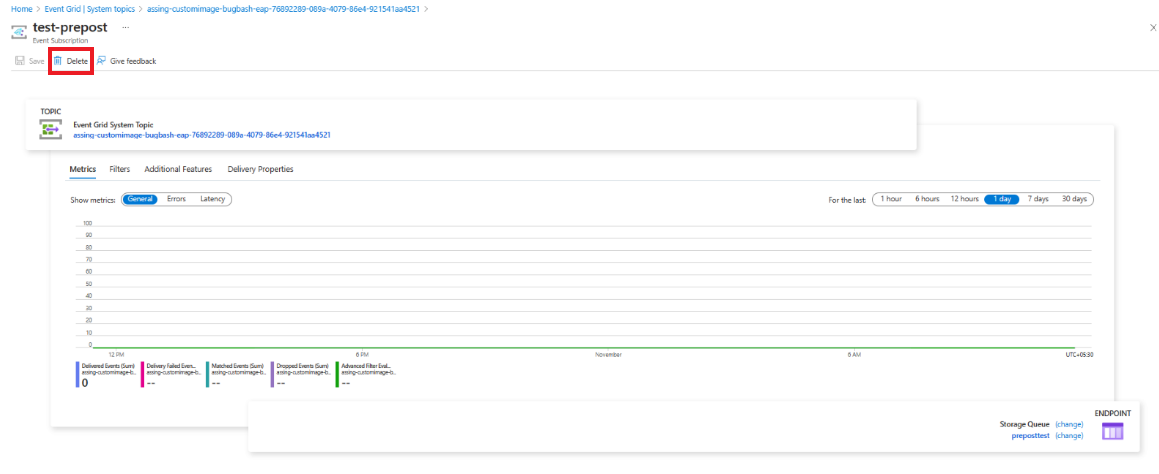
- In the Essentials section, you can view the metrics for all the events under the selected event subscription. In the graph, the count of the Published Events metric should match with the count of Matched Events metric. Both values should also correspond with the Delivered Events count.
- To view the metrics specific to a pre or a post event, select the name of the event from the grid. Here, the count of Matched Events metric should match with the Delivered Events count.
- To view the time at which the event was triggered, hover over the line graph. Learn more.
Note
Azure Event Grid adheres to an at-least-once delivery paradigm. This implies that, in exceptional circumstances, there is a chance of the event handler being invoked more than once for a given event. We recommend you to ensure that the event handler actions are idempotent. In other words, if the event handler is executed multiple times, it should not have any adverse effects. Implementing idempotency ensures the robustness of your application in the face of potential duplicate event invocations.
To check if the endpoint has been triggered and completed in the pre or post event
Sign in to the Azure portal and go to Azure Automation account.
In your Automation account, under Process Automation, select Runbooks.
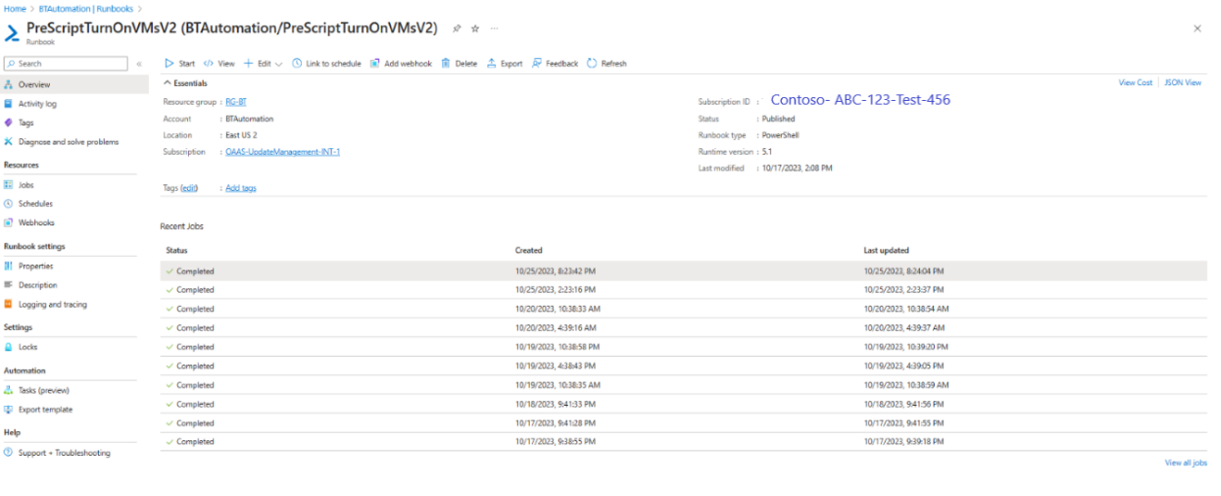
Select the pre or post script that is linked to your Webhook in Event Grid.
In Overview, you can view the status of the Runbook job. The trigger time should be approximately 30 minutes before the schedule start time. Once the job is finished, you can come back to the same section to confirm if the status is Completed. For example, ensure that the VM has been either powered on or off.
For more information on how to retrieve details from Automation account's activity log and job statuses, see Manage runbooks in Azure Automation.

Cancel a schedule run before it begins to run
To cancel the schedule run, the cancelation API in your pre-event must get triggered at least 10 minutes before the schedule maintenance configuration start time. You must call the cancelation API in your pre-event, that is, Runbook script or Azure function code.
To cancel the schedule maintenance run
- Sign in to the Azure portal and go to Azure Update Manager.
- Under Manage in the ToC, select History.
- Select the By Maintenance run ID tab, and select the maintenance run ID for which you want to view the history.
- Select Cancel schedule update. This option is enabled for 10 minutes before the start of the maintenance configuration.
You can obtain the list of machines in the maintenance run from the following ARG query. You can also view the correlation ID by selecting See details:
maintenanceresources
| where type =~ "microsoft.maintenance/maintenanceconfigurations/applyupdates"
| where properties.correlationId has "/subscriptions/your- subscription -id/resourcegroups/your- ResourceGroupName/providers/microsoft.maintenance/maintenanceconfigurations/mc-name/providers/microsoft.maintenance/applyupdates/"
| order by name desc
Note
Azure Update Manager or maintenance configuration will not monitor and automatically cancel the schedule. If the user fails to cancel, the schedule run will proceed with installing updates during the user-defined maintenance window.
Post schedule run
View the history of pre and post events
- Sign in to the Azure portal and go to Azure Update Manager.
- Under Manage, select History.
- Select the By Maintenance run ID tab, select the maintenance run ID for which you want to view the history.
- Select the Events tab in this history page of the selected maintenance run ID.
- You can view the count of events and event names along with the Event type and endpoint details.
Debug pre and post events
To view the job history of an event created through Webhook, follow these steps:
- Find the event name for which you want to view the job logs.
- Under the Job history column, select View runbook history corresponding to the event name. This takes you to the Automation account where the runbooks reside.
- Select the specific runbook name that is associated to the pre or post event. In the overview page, you can view the recent jobs of the runbook along with the execution and status details.
View the status of a canceled schedule run
- Sign in to the Azure portal and go to Azure Update Manager.
- Under Manage, select History.
- Select the By Maintenance run ID tab, and then select the maintenance run ID for which you want to view the status.
- Refer to the Status to view the status. If the maintenance run has been canceled, the status will be displayed as cancelled. Select the status to view the details.
There are two types of cancelations:
- Cancelation by user: When you invoke the cancelation API from your script or code.
- Cancelation by system: When the system invokes the cancelation API due to an internal error. This is done only if the system is unable to send the pre-event to the customer's end point that is 30 minutes before the scheduled patching job. In this case, the upcoming scheduled maintenance configuration will be canceled due to the failure of running the pre-events by the system.
To confirm if the cancelation is by user or system, you can view the status of the maintenance run ID from the ARG query mentioned above in See details. The error message displays whether the schedule run has been canceled by the user or system and the status field confirms the status of the maintenance run.

The above image shows an example of cancelation by the user, where the error message would be Maintenance cancelled using cancellation API at YYYY-MM-DD. If the maintenance run is canceled by the system due to any reason, the error message in the JSON would be Maintenance cancelled due to internal platform failure at YYYY-MM-DD.
Delete pre and post event
To delete pre and post events, follow these steps:
Sign in to the Azure portal and go to Azure Update Manager.
Under Manage, select Machines, Maintenance Configurations.
In the Maintenance Configuration page, select the maintenance configuration to which you want to add a pre and post event.
In the selected Maintenance configuration page, under Settings, select Events.
Select the event Name you want to delete from the grid.
On the selected event page, select Delete.

Next steps
- For an overview of pre and post events (preview) in Azure Update Manager, refer here
- To learn on how to create pre and post events, see pre and post maintenance configuration events.
- To learn how to use pre and post events to turn on and off your VMs using Webhooks, refer here.
- To learn how to use pre and post events to turn on and off your VMs using Azure Functions, refer here.
Зворотний зв’язок
Очікується незабаром: протягом 2024 року ми будемо припиняти використання механізму реєстрації проблем у GitHub для зворотного зв’язку щодо вмісту й замінювати його новою системою зворотного зв’язку. Докладніше: https://aka.ms/ContentUserFeedback.
Надіслати й переглянути відгук про