Create a Channel Integration Framework hosted control
This topic describes how to create a Channel Integration Framework type of hosted control to enable the encoding and escaping of special characters.
Enable the encoding and escaping of special characters
If a channel provider widget passes data that includes special characters to the Unified Service Desk client application, the special characters cause the Channel Integration Framework API calls to fail and the data won't be passed to the Unified Service Desk client application.
To pass data that includes special characters, use the EscapeCharacters UII option. This option is used for encoding and escaping of special characters when Channel Integration Framework API calls are invoked within Unified Service Desk. The option is enabled if it hasn't been added or its value is set as True. If this option is explicitly set as False, encoding and escaping special characters is disabled.
To add the EscapeCharacters UII option
Sign in to the Dynamics 365 instance.
Go to Settings > Unified Service Desk.
Select Options.
On the Active UII Options page, select New.
For the Global Option field, select Others.
For the Name field, enter EscapeCharacters.
For the Value field, select True.
Select Save.
Create the hosted control
Sign in to the Dynamics 365 instance.
On the nav bar, expand Dynamics 365.
Select the Unified Service Desk Administrator app.
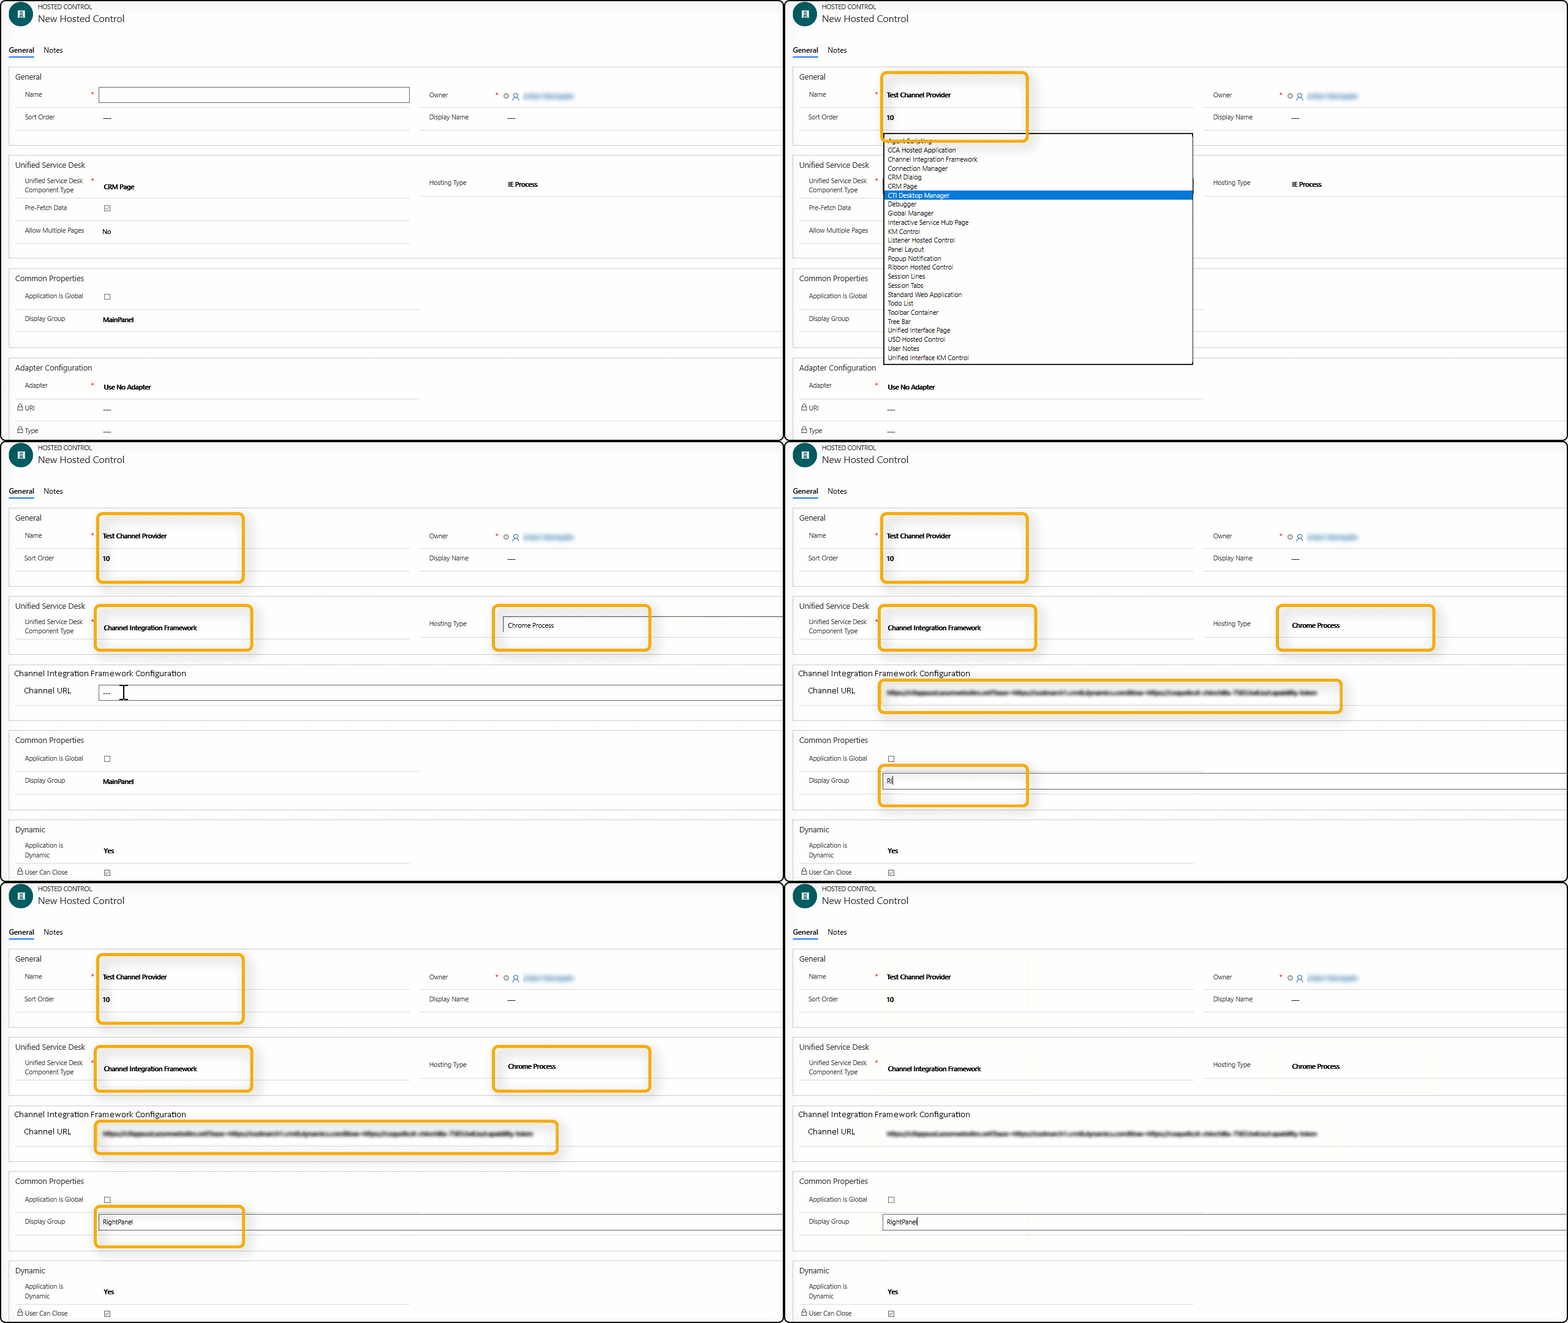
On the Active Hosted Control page, select New.
On the New Hosted Controls page, enter the following details.
Field Value Name Name of the channel provider Unified Service Desk Component Type Channel Integration Framework Hosting Type Chrome Process Channel URL The URL of the provider to host in the widget Application is Global Checked Display Group RightPanel Application is Dynamic Yes User Can Close Checked 
Select Save in the lower-right corner to create the hosted control.
See also
Channel Integration Framework (Hosted Control)
Integrate a channel provider by using Dynamics 365 Channel Integration Framework