Provision Active Directory to Microsoft Entra ID - Configuration
The following document will guide you through configuring Microsoft Entra Cloud Sync for provisioning from Active Directory to Microsoft Entra ID. If you are looking for information on provisioning from Microsoft Entra ID to AD, see Configure - Provisioning Active Directory to Microsoft Entra ID using Microsoft Entra Cloud Sync
The following documentation demonstrates the new guided user experience for Microsoft Entra Cloud Sync.
For additional information and an example of how to configure cloud sync, see the video below.
Configure provisioning
To configure provisioning, follow these steps.
- Sign in to the Microsoft Entra admin center as at least a Hybrid Administrator.
- Browse to Identity > Hybrid management > Microsoft Entra Connect > Cloud sync.

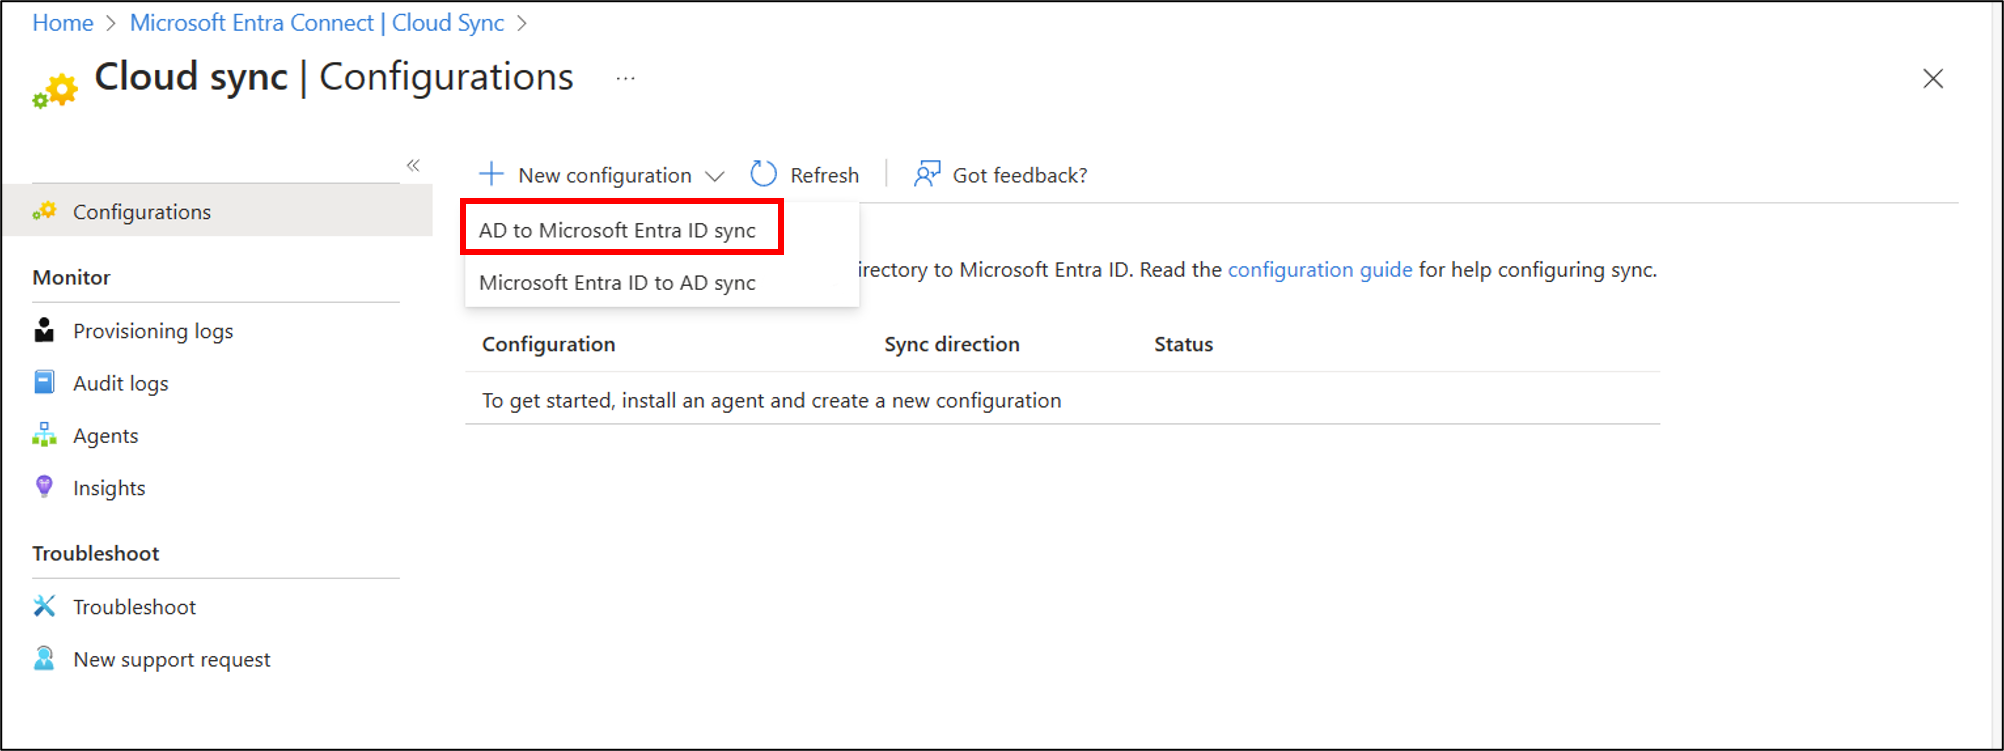
- Select New configuration.
- Select AD to Microsoft Entra ID sync.
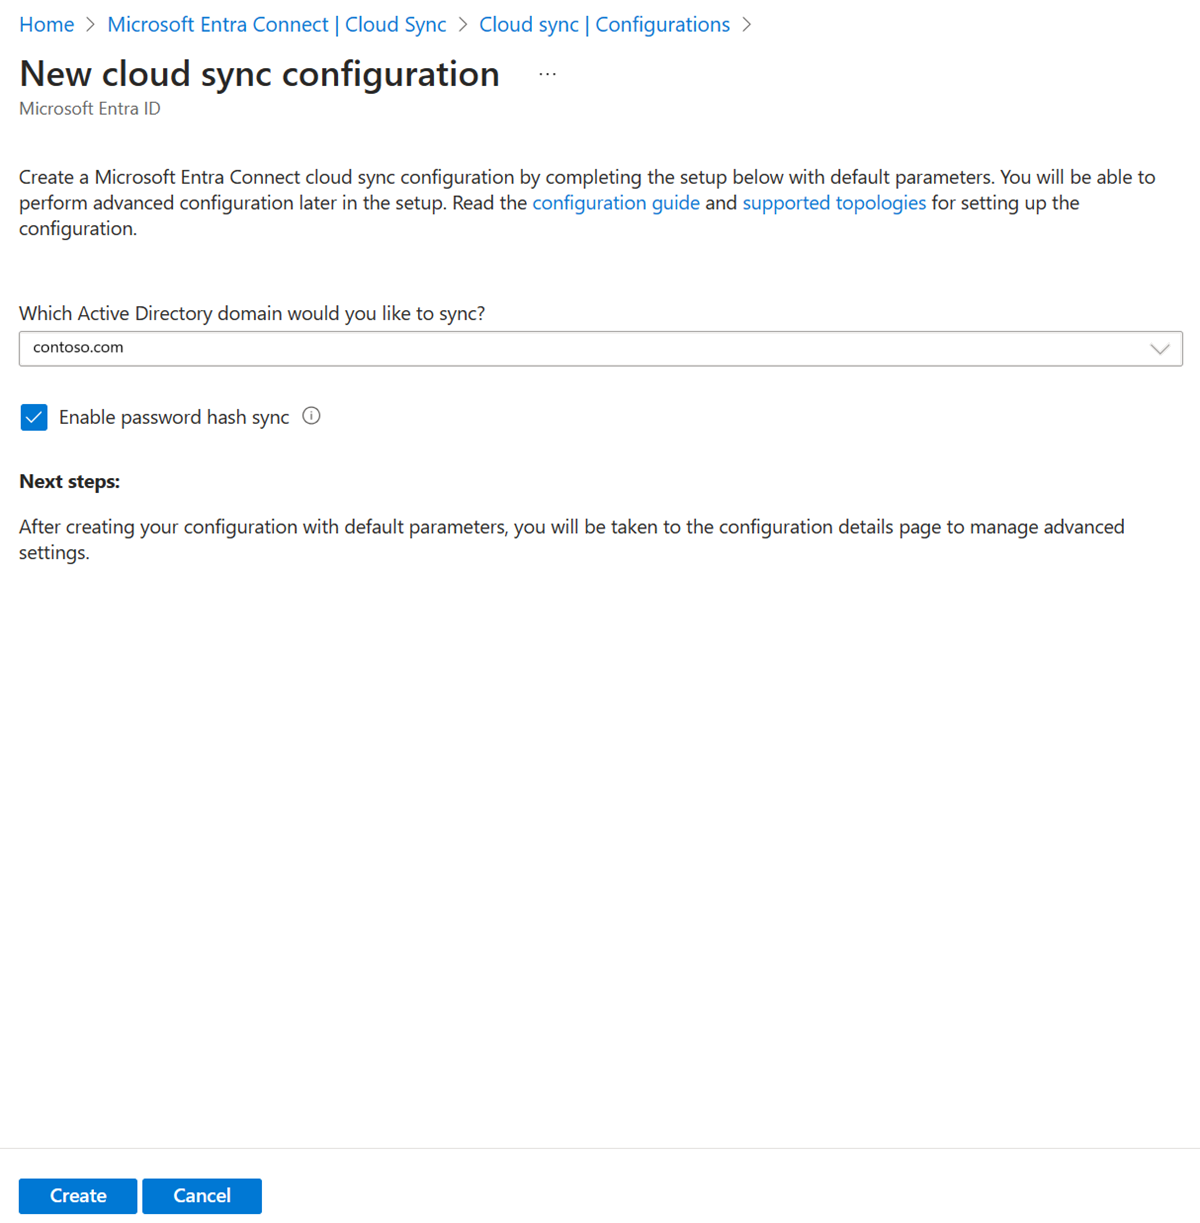
- On the configuration screen, select your domain and whether to enable password hash sync. Click Create.
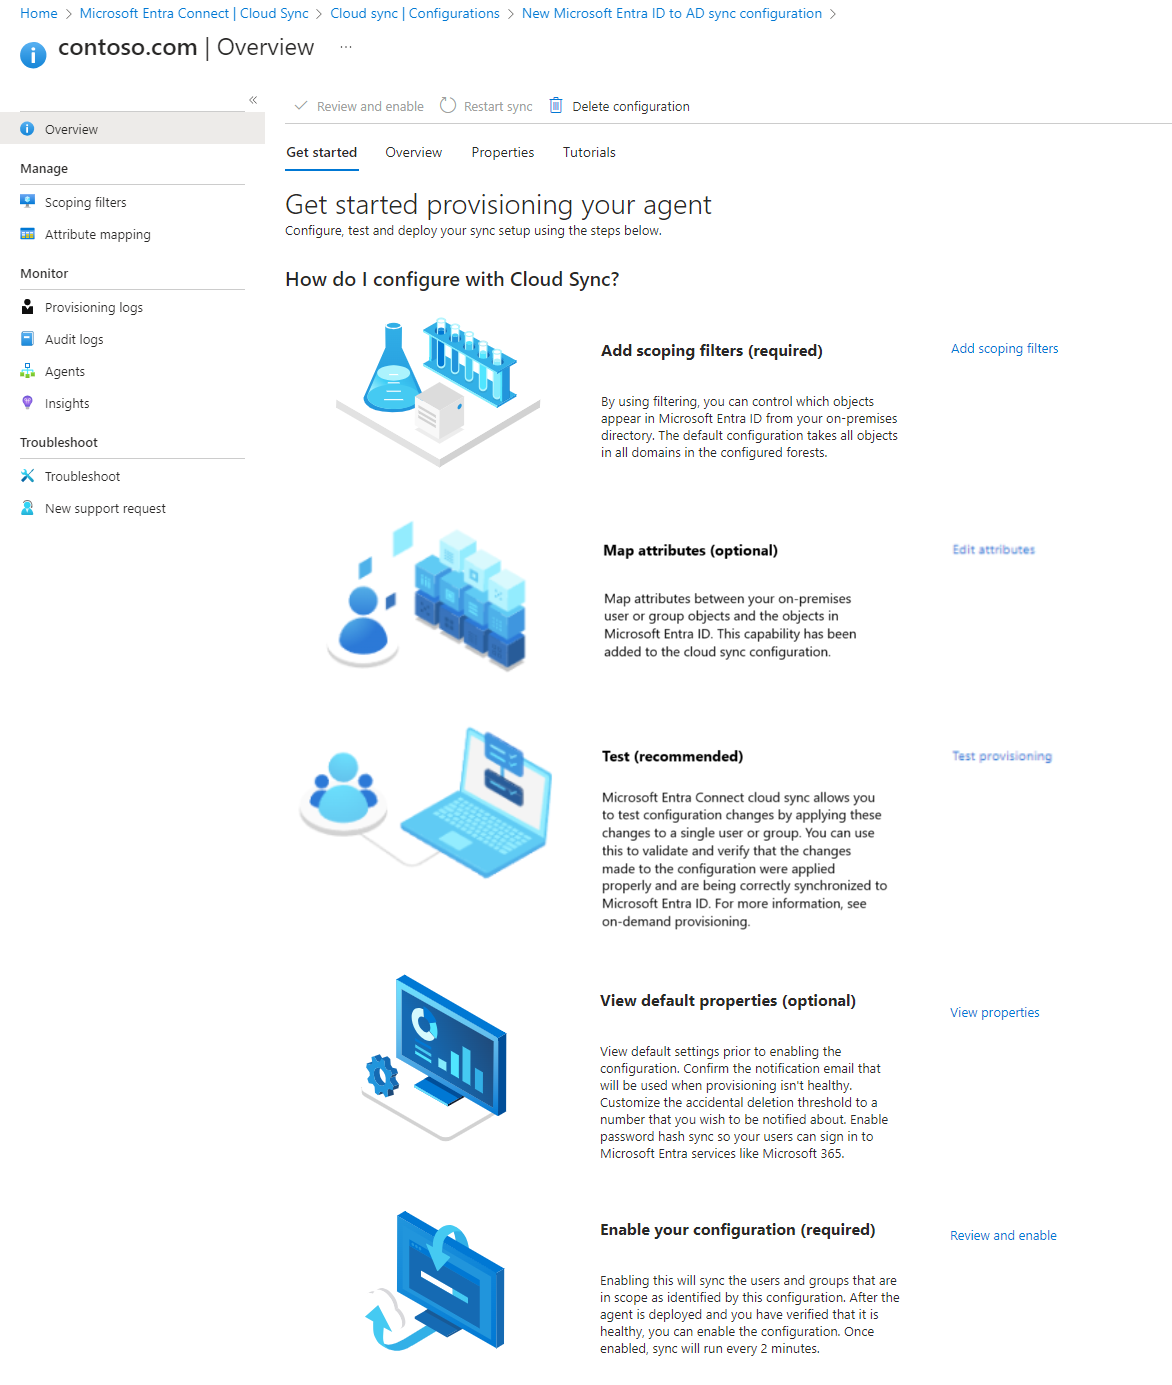
- The Get started screen will open. From here, you can continue configuring cloud sync.
- The configuration is split in to the following 5 sections.
| Section | Description |
|---|---|
| 1. Add scoping filters | Use this section to define what objects appear in Microsoft Entra ID |
| 2. Map attributes | Use this section to map attributes between your on-premises users/groups with Microsoft Entra objects |
| 3. Test | Test your configuration before deploying it |
| 4. View default properties | View the default setting prior to enabling them and make changes where appropriate |
| 5. Enable your configuration | Once ready, enable the configuration and users/groups will begin synchronizing |
Note
During the configuration process the synchronization service account will be created with the format ADToAADSyncServiceAccount@[TenantID].onmicrosoft.com and you may get an error if multi-factor authentication is enabled for the synchronization service account, or other interactive authentication policies are accidentally enabled for the synchronization account. Removing multi-factor authentication or any interactive authentication policies for the synchronization service account should resolve the error and you can complete the configuration smoothly.
Scope provisioning to specific users and groups
By default the provisioning agent will synchronize a subset of the users and groups from your Active Directory. You can further scope the agent to synchronize specific users and groups by using on-premises Active Directory groups or organizational units.
You can configure groups and organizational units within a configuration.
Note
You cannot use nested groups with group scoping. Nested objects beyond the first level will not be included when scoping using security groups. Only use group scope filtering for pilot scenarios as there are limitations to syncing large groups.
- On the Getting started configuration screen. Click either Add scoping filters next to the Add scoping filters icon or on the click Scoping filters on the left under Manage.
- Select the scoping filter. The filter can be one of the following:
- All users: Scopes the configuration to apply to all users that are being synchronized.
- Selected security groups: Scopes the configuration to apply to specific security groups.
- Selected organizational units: Scopes the configuration to apply to specific OUs.
- For security groups and organizational units, supply the appropriate distinguished name and click Add.
- Once your scoping filters are configured, click Save.
- After saving, you should see a message telling you what you still need to do to configure cloud sync. You can click the link to continue.

- Once you've changed the scope, you should restart provisioning to initiate an immediate synchronization of the changes.
Attribute mapping
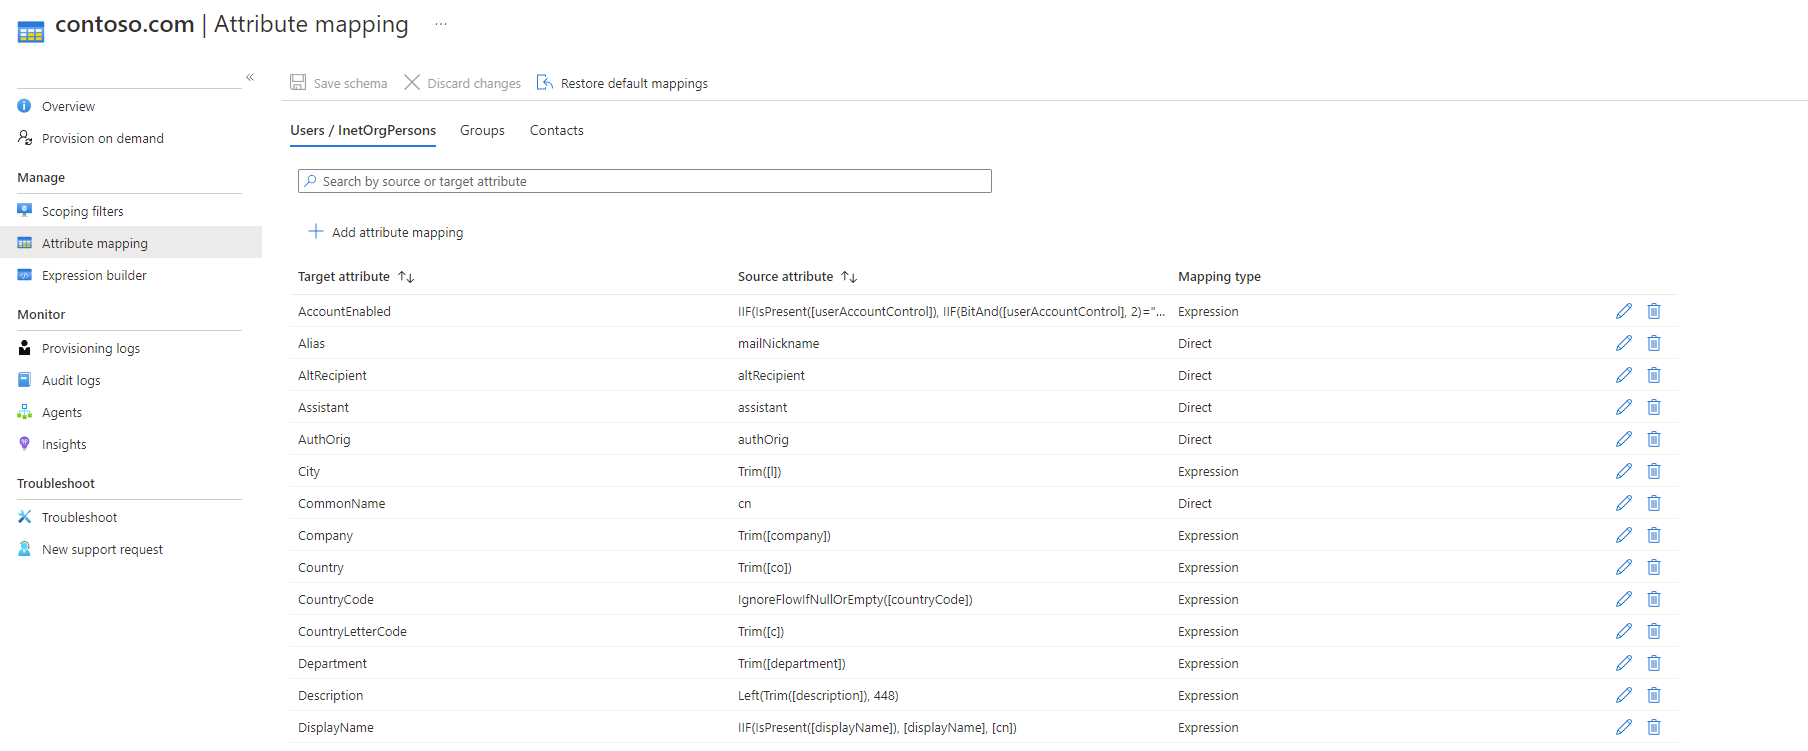
Microsoft Entra Cloud Sync allows you to easily map attributes between your on-premises user/group objects and the objects in Microsoft Entra ID.
You can customize the default attribute-mappings according to your business needs. So, you can change or delete existing attribute-mappings, or create new attribute-mappings.
After saving, you should see a message telling you what you still need to do to configure cloud sync. You can click the link to continue.

For more information, see attribute mapping.
Directory extensions and custom attribute mapping.
Microsoft Entra Cloud Sync allows you to extend the directory with extensions and provides for custom attribute mapping. For more information see Directory extensions and custom attribute mapping.
On-demand provisioning
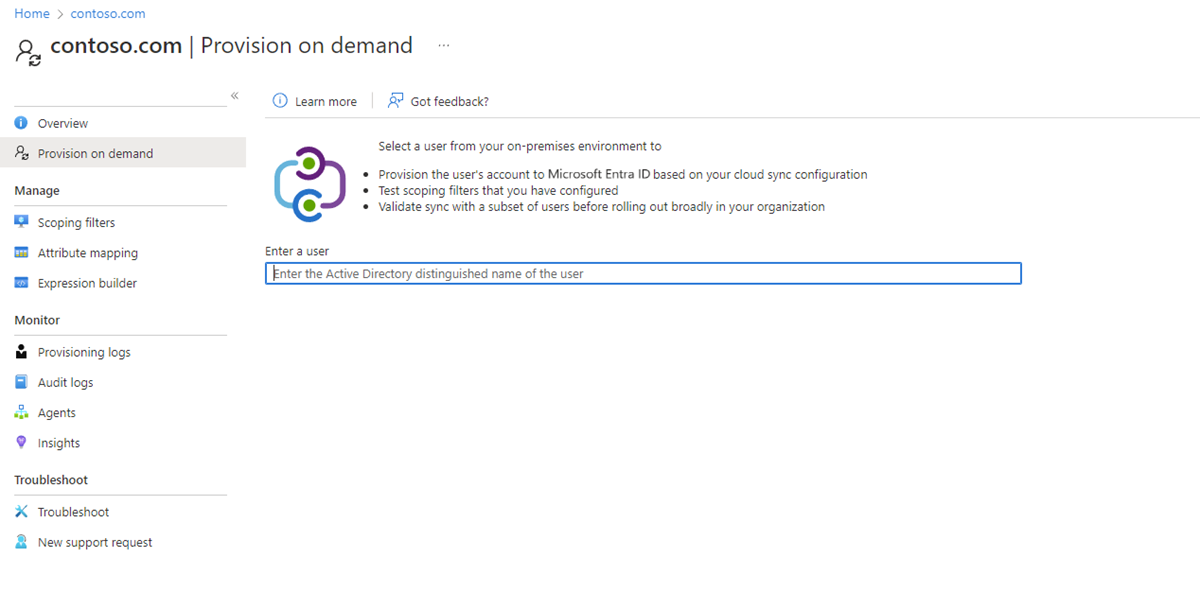
Microsoft Entra Cloud Sync allows you to test configuration changes, by applying these changes to a single user or group.
You can use this to validate and verify that the changes made to the configuration were applied properly and are being correctly synchronized to Microsoft Entra ID.
After testing, you should see a message telling you what you still need to do to configure cloud sync. You can click the link to continue.

For more information, see on-demand provisioning.
Accidental deletions and email notifications
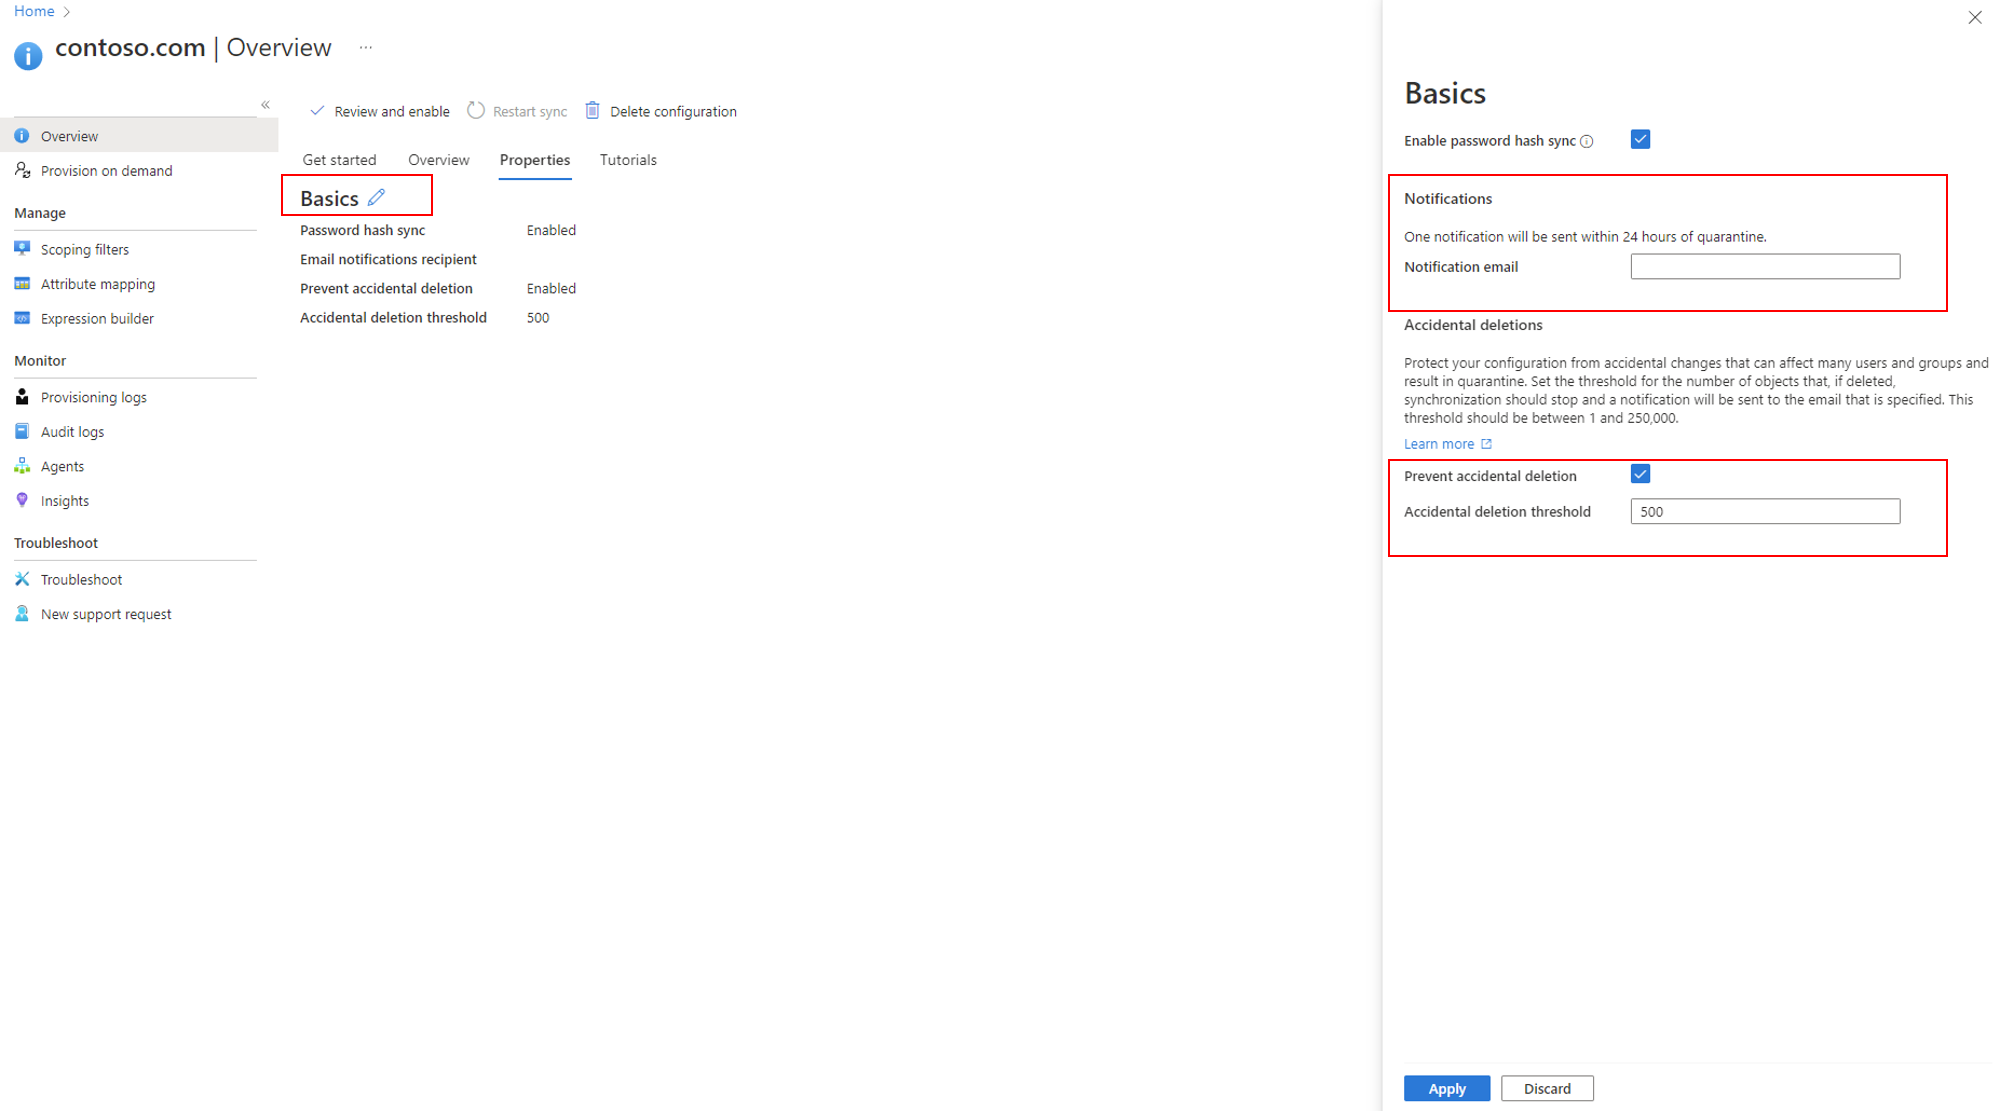
The default properties section provides information on accidental deletions and email notifications.
The accidental delete feature is designed to protect you from accidental configuration changes and changes to your on-premises directory that would affect many users and groups.
This feature allows you to:
- configure the ability to prevent accidental deletes automatically.
- Set the # of objects (threshold) beyond which the configuration will take effect
- set up a notification email address so they can get an email notification once the sync job in question is put in quarantine for this scenario
For more information, see Accidental deletes
Click the pencil next to Basics to change the defaults in a configuration.
Enable your configuration
Once you've finalized and tested your configuration, you can enable it.
Click Enable configuration to enable it.
Quarantines
Cloud sync monitors the health of your configuration and places unhealthy objects in a quarantine state. If most or all of the calls made against the target system consistently fail because of an error, for example, invalid admin credentials, the sync job is marked as in quarantine. For more information, see the troubleshooting section on quarantines.
Restart provisioning
If you don't want to wait for the next scheduled run, trigger the provisioning run by using the Restart sync button.
- Sign in to the Microsoft Entra admin center as at least a Hybrid Administrator.
- Browse to Identity > Hybrid management > Microsoft Entra Connect > Cloud sync.

- Under Configuration, select your configuration.
- At the top, select Restart sync.
Remove a configuration
To delete a configuration, follow these steps.
- Sign in to the Microsoft Entra admin center as at least a Hybrid Administrator.
- Browse to Identity > Hybrid management > Microsoft Entra Connect > Cloud sync.

- Under Configuration, select your configuration.
- At the top of the configuration screen, select Delete configuration.
Important
There's no confirmation prior to deleting a configuration. Make sure this is the action you want to take before you select Delete.
