Walkthrough: Use the cloud to configure group policy on Windows client devices with ADMX templates and Microsoft Intune
Стаття
Примітка
This walkthrough was created as a technical workshop for Microsoft Ignite. It has more prerequisites than typical walkthroughs, as it compares using and configuring ADMX policies in Intune and on-premises.
Group policy administrative templates, also known as ADMX templates, include settings you can configure on Windows client devices, including PCs. The ADMX template settings are available by different services. These settings are used by Mobile Device Management (MDM) providers, including Microsoft Intune. For example, you can turn on Design Ideas in PowerPoint, set a home page in Microsoft Edge, and more.
These templates are built in to Microsoft Intune, and are available as Administrative templates profiles. In this profile, you configure the settings you want to include, and then "assign" this profile to your devices.
Compare the settings in Intune with on-premises ADMX settings.
Create different administrative templates, and configure the settings that target the different groups.
By the end of this lab, you can use Intune and Microsoft 365 to manage your users, and deploy administrative templates.
This feature applies to:
Windows 11
Windows 10 version 1709 and newer
Порада
There are two ways to create an administrative template: Using a template, or using the Settings Catalog. This article focuses on using the Administrative Templates template. The Settings Catalog has more Administrative Template settings available. For the specific steps to use the Settings Catalog, go to Use the settings catalog to configure settings.
Prerequisites
A Microsoft 365 E3 or E5 subscription, which includes Intune and Microsoft Entra ID P1 or P2. If you don't have an E3 or E5 subscription, try it for free.
Create a group policy to push these templates to a Windows 10/11 Enterprise administrator computer in the same domain as the DC. In this walkthrough:
The group policy we created with these templates is called OfficeandEdge. You'll see this name in the images.
The Windows 10/11 Enterprise administrator computer we use is called the Admin computer.
In some organizations, a domain administrator has two accounts:
A typical domain work account
A different domain administrator account used only for domain administrator tasks, such as group policy
The purpose of this Admin computer is for administrators to sign in with their domain administrator account, and access tools designed for managing group policy.
On this Admin computer:
Sign in with a Domain Administrator account.
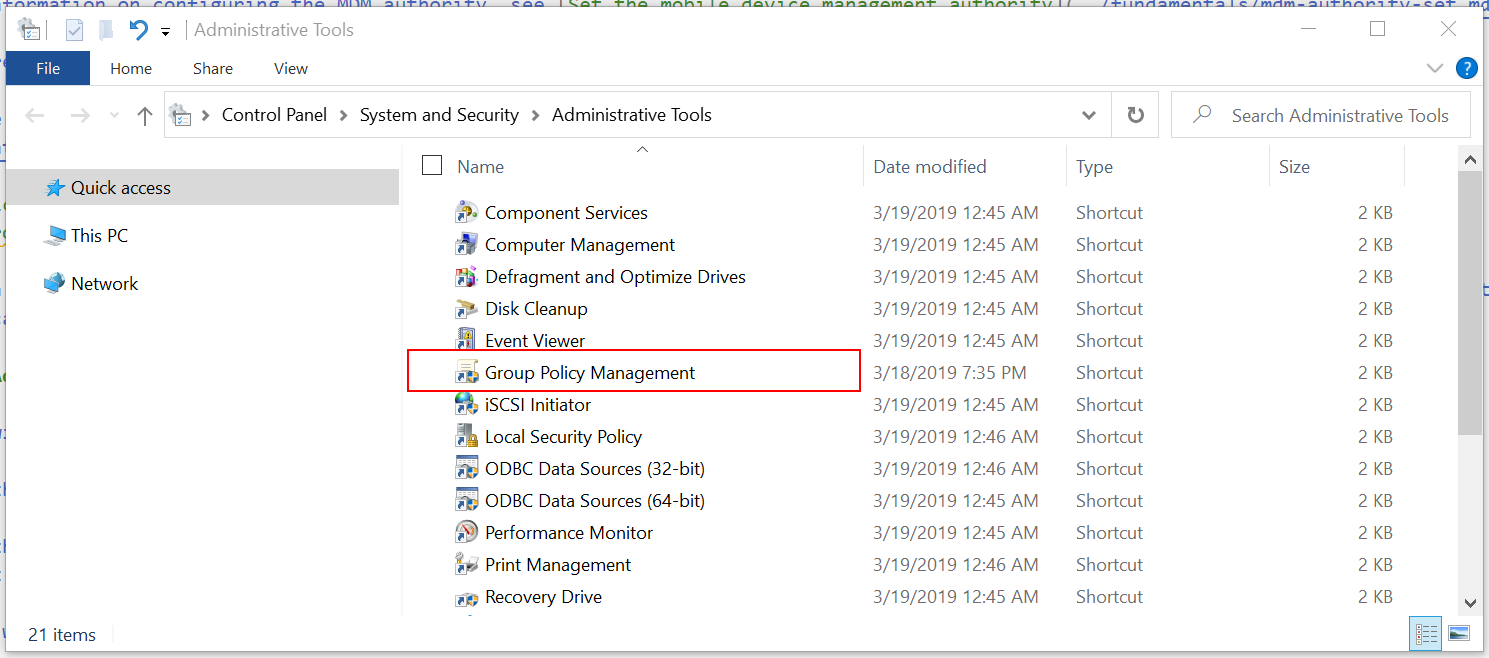
Add the RSAT: Group Policy Management Tools:
Open the Settings app > System > Optional features > Add feature.
If you use a version older than Windows 10 22H2, go to Settings > Apps > Apps & features > Optional features > Add feature.
Select RSAT: Group Policy Management Tools > Add.
Wait while Windows adds the feature. When complete, it eventually shows in the Windows Administrative Tools app.
Be sure you have internet access and administrator rights to the Microsoft 365 subscription, which includes the Intune admin center.
Open the Intune admin center
Open a chromium web browser, such as Microsoft Edge version 77 and later.
User: Enter the administrator account of your Microsoft 365 tenant subscription. Password: Enter its password.
This admin center is focused on device management, and includes Azure services, such as Microsoft Entra ID and Intune. You might not see the Microsoft Entra ID and Intune branding, but you're using them.
Sign in with the administrator account of your Microsoft 365 tenant subscription.
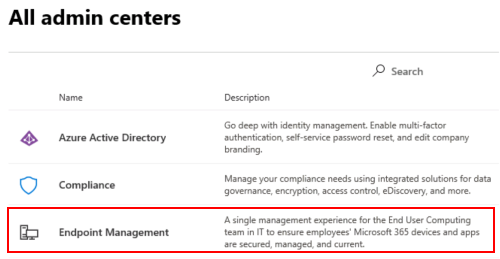
Select Show all > All admin centers > Endpoint management. The Intune admin center opens.
Create groups, and add users
On-premises policies are applied in the LSDOU order - local, site, domain, and organizational unit (OU). In this hierarchy, OU policies overwrite local policies, domain policies overwrite site policies, and so on.
In Intune, policies are applied to users and groups you create. There isn't a hierarchy. For example:
If two policies update the same setting, then the setting shows as a conflict.
If two compliance policies are in conflict, then the most restrictive policy applies.
If two configuration profiles are in conflict, then the setting isn't applied.
In these next steps, you create security groups, and add users to these groups. You can add a user to multiple groups. For example, it's normal for a user to have multiple devices, such as a Surface Pro for work, and an Android mobile device for personal. And, it's normal for a person to access organizational resources from these multiple devices.
In the Intune admin center, select Groups > New group.
Enter the following settings:
Group type: Select Security.
Group name: Enter All Windows 10 student devices.
Membership type: Select Assigned.
Select Members, and add some devices.
Adding devices is optional. The goal is to practice creating groups, and knowing how to add devices. If you're using this walkthrough in a production environment, then be aware of what you're doing.
Select > Create to save your changes.
Don't see your group? Select Refresh.
Select New group, and enter the following settings:
Group type: Select Security.
Group name: Enter All Windows devices.
Membership type: Select Dynamic Device.
Dynamic device members: Select Add dynamic query, and configure your query:
Property: Select deviceOSType.
Operator: Select Equals.
Value: Enter Windows.
Select Add expression. Your expression is shown in the Rule syntax:
When users or devices meet the criteria you enter, they're automatically added to the dynamic groups. In this example, devices are automatically added to this group when the operating system is Windows. If you're using this walkthrough in a production environment, then be careful. The goal is to practice creating dynamic groups.
Save > Create to save your changes.
Create the All Teachers group with the following settings:
Group type: Select Security.
Group name: Enter All Teachers.
Membership type: Select Dynamic User.
Dynamic user members: Select Add dynamic query, and configure your query:
Property: Select department.
Operator: Select Equals.
Value: Enter Teachers.
Select Add expression. Your expression is shown in the Rule syntax.
When users or devices meet the criteria you enter, they're automatically added to the dynamic groups. In this example, users are automatically added to this group when their department is Teachers. You can enter the department and other properties when users are added to your organization. If you're using this walkthrough in a production environment, then be careful. The goal is to practice creating dynamic groups.
Save > Create to save your changes.
Talking points
Dynamic groups are a feature in Microsoft Entra ID P1 or P2. If you don't have Microsoft Entra ID P1 or P2, then you're licensed to only create assigned groups. For more information on dynamic groups, go to:
In the Intune admin center, select Users > All users > select the name of any existing user.
Review some of the information you can add or change. For example, look at the properties you can configure, such as Job Title, Department, City, Office location, and more. You can use these properties in your dynamic queries when creating dynamic groups.
Select Groups to see the membership of this user. You can also remove the user from a group.
Select some of the other options to see more information, and what you can do. For example, look at the assigned license, the user's devices, and more.
What did I just do?
In the Intune admin center, you created new security groups, and added existing users and devices to these groups. We use these groups in later steps in this tutorial.
Create a template in Intune
In this section, we create an administrative template in Intune, look at some settings in Group Policy Management, and compare the same setting in Intune. The goal is to show a setting in group policy, and show the same setting in Intune.
In the Intune admin center, select Devices > Manage devices > Configuration > Create > New policy.
Name: Enter a descriptive name for the profile. Name your profiles so you can easily identify them later. For example, enter Admin template - Windows 10 student devices.
Description: Enter a description for the profile. This setting is optional, but recommended.
Select Next.
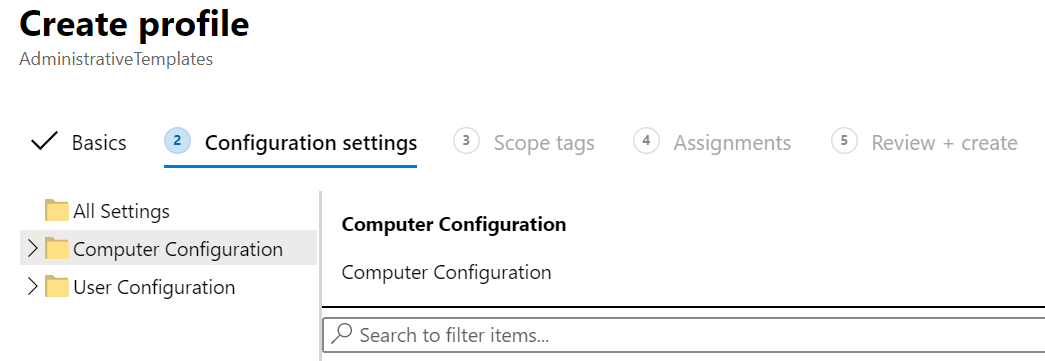
In Configuration settings, All settings show an alphabetical list of all the settings. You can also filter settings that apply to devices (Computer configuration), and settings that apply to users (User configuration):
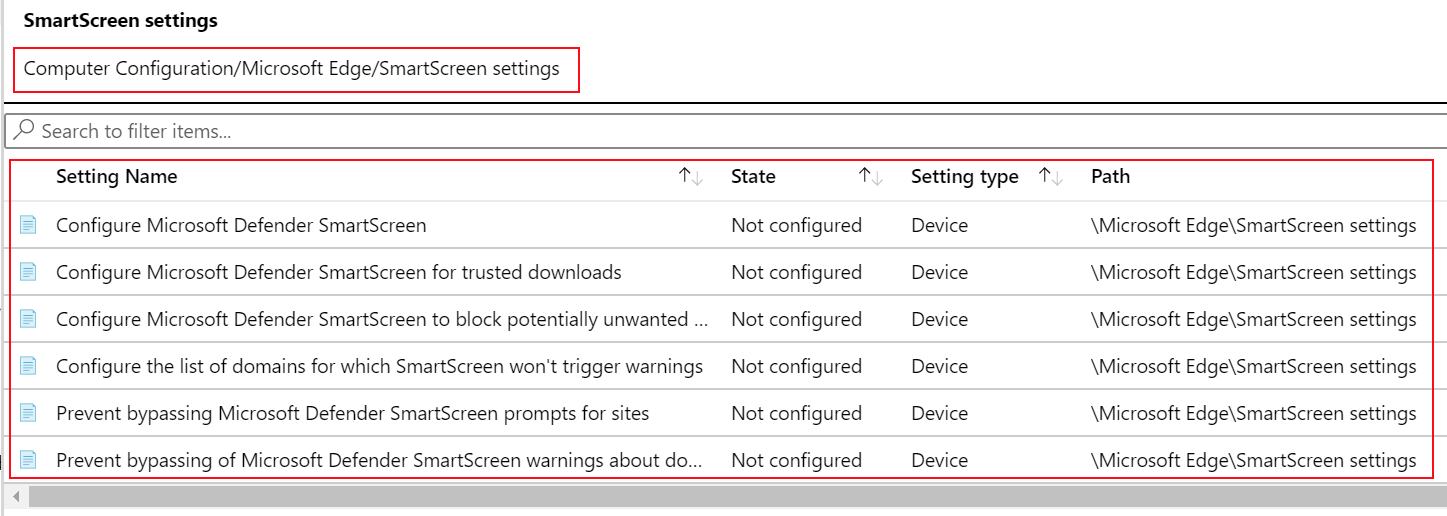
Expand Computer configuration > Microsoft Edge > select SmartScreen settings. Notice the path to the policy, and all the available settings:
In search, enter download. Notice the policy settings are filtered:
Open Group Policy Management
In this section, we show a policy in Intune and its matching policy in Group Policy Management Editor.
Compare a device policy
On the Admin computer, open the Group Policy Management app.
This app gets installed with RSAT: Group Policy Management Tools, which is an optional feature you add on Windows. Prerequisites (in this article) lists the steps to install it.
Expand Domains > select your domain. For example, select contoso.net.
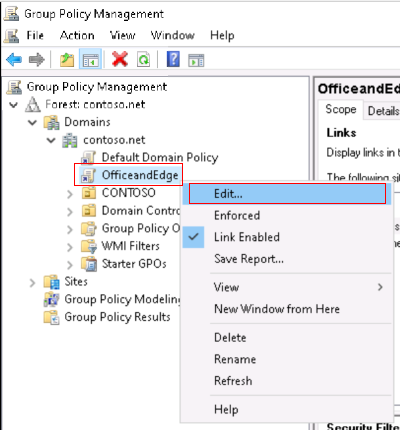
Right-click the OfficeandEdge policy > Edit. The Group Policy Management Editor app opens.
OfficeandEdge is a group policy that includes the Office and Microsoft Edge ADMX templates. This policy is described in prerequisites (in this article).
Expand Computer configuration > Policies > Administrative Templates > Control Panel > Personalization. Notice the available settings.
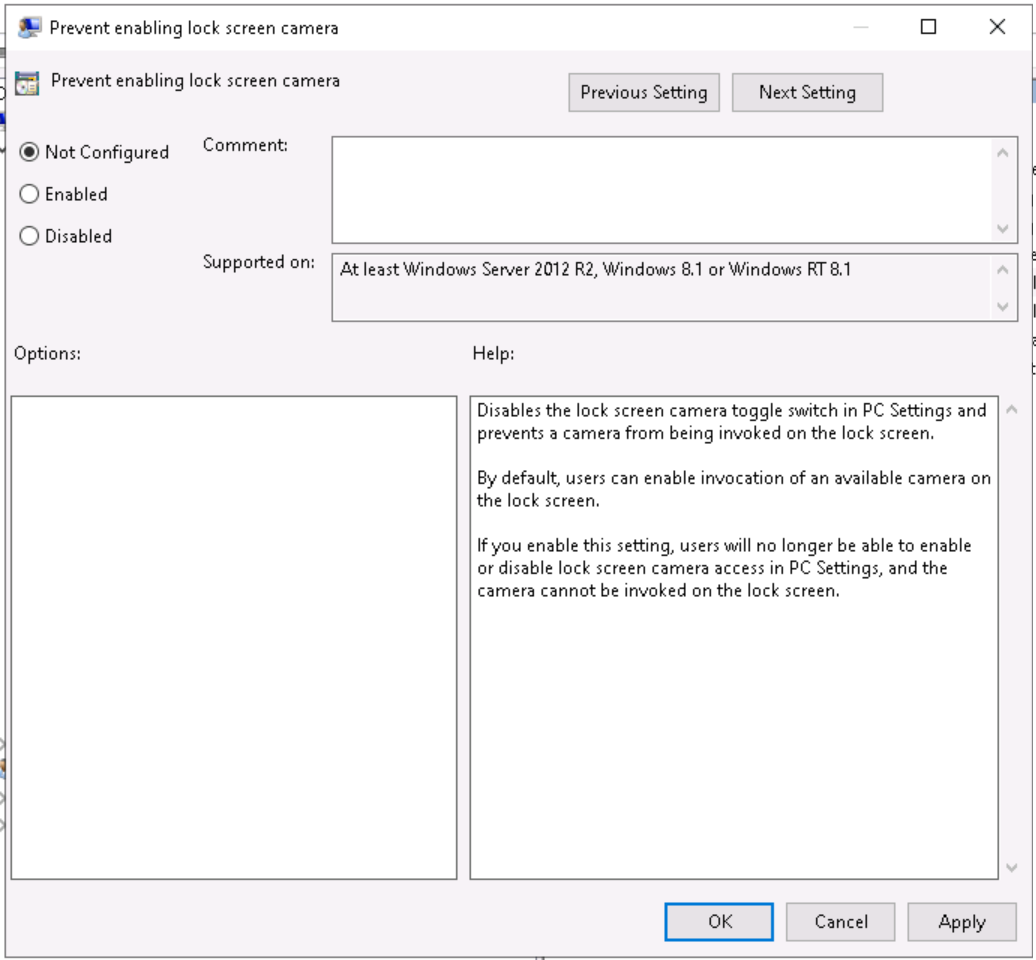
Double-click Prevent enabling lock screen camera, and see the available options:
In the Intune admin center, go to your Admin template - Windows 10 student devices template.
Select Computer configuration > Control Panel > Personalization. Notice the available settings:
The setting type is Device, and the path is /Control Panel/Personalization. This path is similar to what you just saw in Group Policy Management Editor. If you open the Prevent enabling lock screen camera setting, you see the same Not configured, Enabled, and Disabled options you see in Group Policy Management Editor.
Compare a user policy
In your admin template, select Computer configuration > All settings, and search for inprivate browsing. Notice the path.
Do the same for User configuration. Select All settings, and search for inprivate browsing.
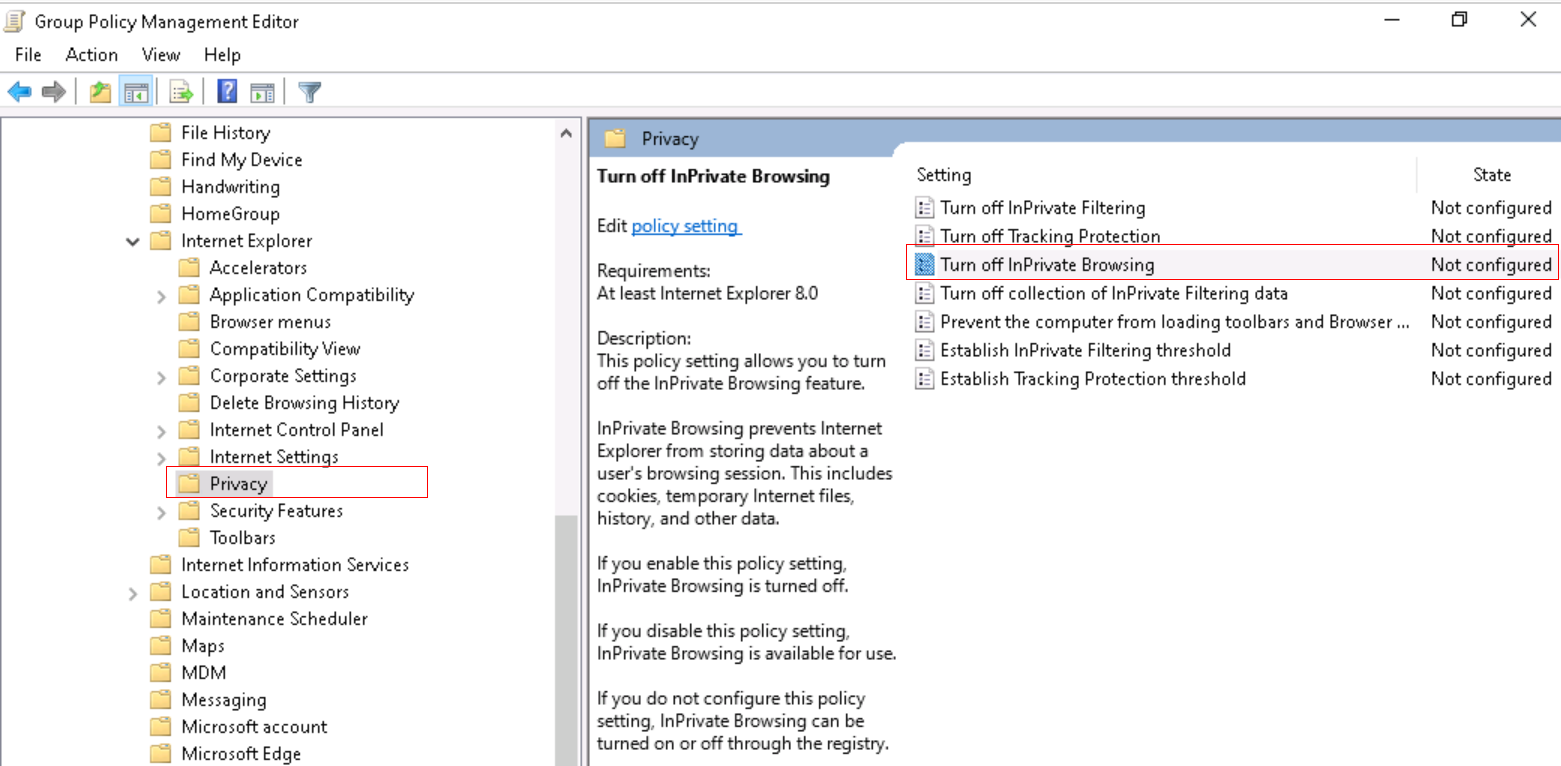
In Group Policy Management Editor, find the matching user and device settings:
Device: Expand Computer configuration > Policies > Administrative Templates > Windows components > Internet Explorer > Privacy > Turn off InPrivate Browsing.
User: Expand User configuration > Policies > Administrative Templates > Windows components > Internet Explorer > Privacy > Turn off InPrivate Browsing.
Порада
To see the built-in Windows policies, you can also use GPEdit (Edit group policy app).
Compare a Microsoft Edge policy
In the Intune admin center, go to your Admin template - Windows 10 student devices template.
Expand Computer configuration > Microsoft Edge > Startup, homepage and new tab page. Notice the available settings.
Do the same for User configuration.
In Group Policy Management Editor, find these settings:
Device: Expand Computer configuration > Policies > Administrative Templates > Microsoft Edge > Startup, homepage and new tab page.
User: Expand User configuration > Policies > Administrative Templates > Microsoft Edge > Startup, homepage and new tab page
What did I just do?
You created an administrative template in Intune. In this template, we looked at some ADMX settings, and looked at the same ADMX settings in Group Policy Management.
Add settings to the Students admin template
In this template, we configure some Internet Explorer settings to lock down devices shared by multiple students.
In your Admin template - Windows 10 student devices, expand Computer configuration, select All settings, and search for Turn off InPrivate Browsing:
Select the Turn off InPrivate Browsing setting. In this window, notice the description and values you can set. These options are similar to what you see in group policy.
Select Enabled > OK to save your changes.
Also configure the following Internet Explorer settings. Be sure to select OK to save your changes.
Allow drag and drop or copy and paste files
Type: Device
Path: \Windows Components\Internet Explorer\Internet Control Panel\Security Page\Internet Zone
Value: Disabled
Prevent ignoring certificate errors
Type: Device
Path: \Windows Components\Internet Explorer\Internet Control Panel
Value: Enabled
Disable changing home page settings
Type: User
Path: \Windows Components\Internet Explorer
Value: Enabled
Home page: Enter a URL, such as contoso.com.
Clear your search filter. Notice the settings you configured are listed at the top:
Assign your template
In your template, select Next until you get to Assignments. Choose Select groups to include:
A list of existing users and groups is shown. Select the All Windows 10 student devices group you created earlier > Select.
If you're using this walkthrough in a production environment, then consider adding groups that are empty. The goal is to practice assigning your template.
Select Next. In Review + create, select Create to save your changes.
As soon as the profile is saved, it applies to the devices when they check in with Intune. If the devices are connected to the internet, it can happen immediately. For more information on policy refresh times, go to How long does it take for devices to get a policy, profile, or app.
When assigning strict or restrictive policies and profiles, don't lock yourself out. Consider creating a group that's excluded from your policies and profiles. The idea is to have access to troubleshoot. Monitor this group to confirm it's being used as intended.
What did I just do?
In the Intune admin center, you created an administrative template device configuration profile, and assigned this profile to a group you created.
Create a OneDrive template
In this section, you create a OneDrive admin template in Intune to control some settings. These specific settings are chosen because they're commonly used by organizations.
Create another profile (Devices > Manage devices > Configuration > Create > New policy).
In your template, select Next until you get to Assignments. Choose Select groups to include:
A list of existing users and groups is shown. Select the All Windows devices group you created earlier > Select.
If you're using this walkthrough in a production environment, then consider adding groups that are empty. The goal is to practice assigning your template.
Select Next. In Review + create, select Create to save your changes.
At this point, you created some administrative templates, and assigned them to groups you created. The next step is to create an administrative template using Windows PowerShell and the Microsoft Graph API for Intune.
Optional: Create a policy using PowerShell and Graph API
This section uses the following resources. We install these resources in this section.
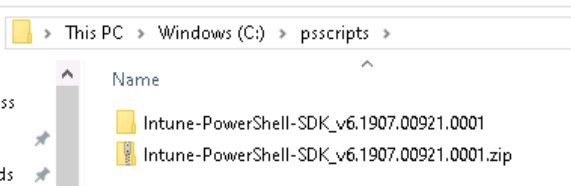
Select Save as, and select a folder you'll remember. c:\psscripts is a good choice.
Open your folder, right-click the .zip file > Extract all > Extract. Your folder structure looks similar to the following folder:
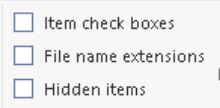
On the View tab, check File name extensions:
In your folder, and go to c:\psscripts\Intune-PowerShell-SDK_v6.1907.00921.0001\drop\outputs\build\Release\net471. Right-click every .dll > Properties > Unblock.
When prompted, sign in with the same Microsoft 365 administrator account. These cmdlets create the policy in your tenant organization.
User: Enter the administrator account of your Microsoft 365 tenant subscription. Password: Enter its password.
Select Accept.
Create the Test Configuration configuration profile. Enter:
PowerShell
$configuration = Invoke-MSGraphRequest -Url https://graph.microsoft.com/beta/deviceManagement/groupPolicyConfigurations -Content'{"displayName":"Test Configuration","description":"A test configuration created through PS"}' -HttpMethod POST
When these cmdlets succeed, the profile is created. To confirm, go to the Intune admin center > Devices > Manage devices > Configuration. Your Test Configuration profile should be listed.
Get all the SettingDefinitions. Enter:
PowerShell
$settingDefinitions = Invoke-MSGraphRequest -Url https://graph.microsoft.com/beta/deviceManagement/groupPolicyDefinitions -HttpMethod GET
Find the definition ID using the setting display name. Enter:
PowerShell
$desiredSettingDefinition = $settingDefinitions.value | ? {$_.DisplayName -Match"Silently sign in users to the OneDrive sync app with their Windows credentials"}
Configure a setting. Enter:
PowerShell
$configuredSetting = Invoke-MSGraphRequest -Url"https://graph.microsoft.com/beta/deviceManagement/groupPolicyConfigurations('$($configuration.id)')/definitionValues" -Content ("{""enabled"":""true"",""configurationType"":""policy"",""definition@odata.bind"":""https://graph.microsoft.com/beta/deviceManagement/groupPolicyDefinitions('$($desiredSettingDefinition.id)')""}") -HttpMethod POST
$configuredSetting = Invoke-MSGraphRequest -Url"https://graph.microsoft.com/beta/deviceManagement/groupPolicyConfigurations('$($configuration.id)')/definitionValues('$($configuredSetting.id)')" -HttpMethod GET
See your policy
In the Intune admin center > Devices > Manage devices > Configuration > Refresh.
Select your Test Configuration profile > Settings.
In the drop-down list, select All products.
You see the Silently sign in users to the OneDrive sync client with their Windows credentials setting is configured.
Policy best practices
When you create policies and profiles in Intune, there are some recommendations and best practices to consider. For more information, go to policy and profile best practices.
Clean up resources
When no longer needed, you can:
Delete the groups you created:
All Windows 10 student devices
All Windows devices
All Teachers
Delete the admin templates you created:
Admin template - Windows 10 student devices
Admin template - OneDrive policies that apply to all Windows 10 users
Test Configuration
Set the Windows PowerShell execution policy back to its original value. The following example sets the execution policy to Restricted:
PowerShell
Set-ExecutionPolicy -ExecutionPolicy Restricted
Next steps
In this tutorial, you got more familiar with the Microsoft Intune admin center, used the query builder to create dynamic groups, and created administrative templates in Intune to configure ADMX settings. You also compared using ADMX templates on-premises and in the cloud with Intune. As a bonus, you used PowerShell cmdlets to create an administrative template.
For more information on administrative templates in Intune, go to:
This module teaches education partners how to set up and configure Intune for Education and manage updates with Windows Update for Business. Part of the Partner Success Series.
Плануйте та виконуйте стратегію розгортання кінцевих точок, використовуючи основні елементи сучасного керування, підходів до спільного керування та інтеграції Microsoft Intune.