Подія
Чемпіонат світу з даних Power BI
14 лют., 16 - 31 бер., 16
Маючи 4 шанси увійти, ви можете виграти пакет конференції і зробити його на live Grand Finale в Лас-Вегасі
ДокладноЦей браузер більше не підтримується.
Замініть його на Microsoft Edge, щоб користуватися перевагами найновіших функцій, оновлень безпеки та технічної підтримки.
Are you a Power BI analyst? Here you can learn more about template apps and how to connect to many of the services that you use to run your business, such as Salesforce, Microsoft Dynamics, and Google Analytics. You can then modify the template app's pre-built dashboard and reports to suit the needs of your organization, and distribute them to your colleagues as apps.
If you're interested in creating template apps yourself for distribution outside your organization, see Create a template app in Power BI. With little or no coding, Power BI partners can build Power BI apps and make them available to Power BI customers.
To install, customize, and distribute a template app, you need:
In the nav pane in the Power BI service, select Apps > Get apps.
In the Power BI apps marketplace that appears, select Template apps. All the template apps available in AppSource are shown. Browse to find the template app you're looking for, or get a filtered selection by using the search box. Type part of the name of the template app, or select a category such as finance, analytics, or marketing to find the item you're looking for.
When you find the template app you're looking for, select it. The template app offer appears. Select Get It Now.
In the dialog box that appears, select Install.
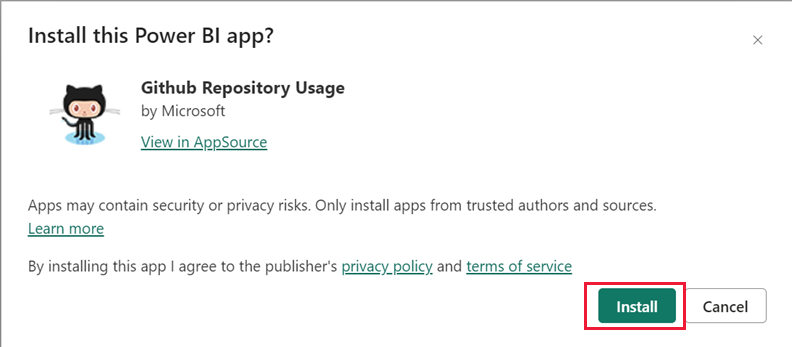
The app is installed, along with a workspace of the same name that has all the artifacts needed for further customization.
Примітка
If you use an installation link for an app that isn't listed on AppSource, a validation dialog box will ask you to confirm your choice.
To be able to install a template app that isn't listed on AppSource, you can request the relevant permissions from your admin. See the template app settings in Power BI admin portal for details.
When the installation finishes successfully, a notification tells you that your new app is ready.

Select Go to app.
The app opens, showing sample data.
Select the Connect your data link on the banner at the top of the page.

This link opens the parameters dialog, where you change the data source from the sample data to your own data source (see known limitations), followed by the authentication method dialog. You might have to redefine the values in these dialogs. See the documentation of the specific template app you're installing for details.
Once you've finished filling out the connection dialogs, the connection process starts. A banner informs you that the data is being refreshed, and that in the meantime you're viewing sample data.
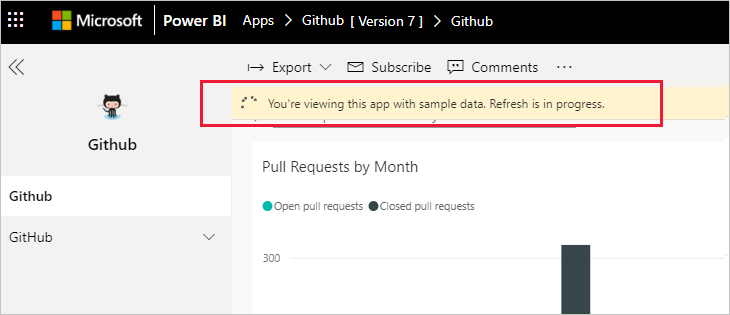
Your report data will automatically refresh once a day, unless you disabled this setting during the sign-in process. You can also set up your own refresh schedule to keep the report data up to date if you so desire.
After you've connected to your data and data refresh is complete, you can customize any of the reports and dashboards the app includes, as well as share the app with your colleagues. Remember, however that any changes you make will be overwritten when you update the app with a new version, unless you save the items you changed under different names. See details about overwriting.
To customize and share your app, select the pencil icon at the top right corner of the page.

For information about editing artifacts in the workspace, see
When you're done making changes to the artifacts in the workspace, you're ready to publish and share the app. See Publish your app to learn how.
From time to time, template app creators release new improved versions of their template apps, via AppSource, a direct link, or both.
If you originally downloaded the app from AppSource, when a new version of the template app becomes available, you get notified in two ways:
An update banner appears in the Power BI service informing you that a new app version is available.

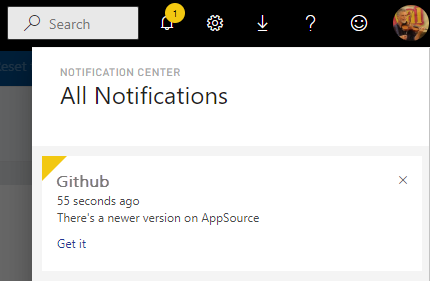
You receive a notification in Power BI's notification pane.
Примітка
If you originally got the app via a direct link rather than through AppSource, the only way to know when a new version is available is to contact the template app creator.
To install the update, either select Get it on the notification banner or in the notification center, or find the app again in AppSource and choose Get it now. If you got a direct link for the update from the Template app creator, select the link.
You're asked how you want the update to affect your currently installed app.
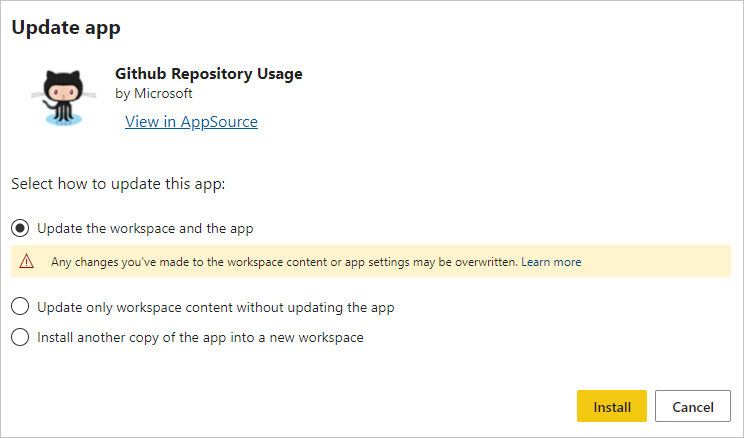
Update the workspace and the app: Updates both the workspace and the app, and republishes the app to your organization. Choose this option if you didn't make any changes to the app or its content and want to overwrite the old app. Your connections will be re-established, and the new version of the app will include any updated app branding, such as app name, logo, and navigation, as well as the latest publisher improvements to content.
Update only workspace content without updating the app: Updates the reports, dashboards, and semantic model in the workspace. After updating the workspace, you can choose what you want to include in the app, and then you need to update the app to republish it to your organization with the changes.
Install another copy of the app into a new workspace: Installs a fresh version of the workspace and app. Choose this option if you don’t want to change your current app.
Overwriting updates the reports, dashboards, and semantic model in the workspace, not the app. Overwriting doesn't change app navigation, setup, and permissions.
If you chose the second option, after you've updated the workspace you need to update the app to apply changes from the workspace to the app.
Overwriting keeps configured parameters and authentication. After the update, an automatic semantic model refresh starts. During this refresh, the app, reports, and dashboards present sample data.
Overwriting always presents sample data until the refresh is complete. If the template app author made changes to the semantic model or parameters, users of the workspace and app won't see the new data until the refresh is complete. Instead, they'll still see sample data during this time.
Overwriting never deletes new reports or dashboards you've added to the workspace. It only overwrites the original reports and dashboards with changes from the original author.
Важливо
Remember to update the app after overwriting to apply changes to the reports and dashboard for your organizational app users.
An installed template app consists of the app and its associated workspace. If you want to remove the template app, you have two options:
Completely remove the app and its associated workspace: To completely remove a template app and its associated workspace, go to the app tile on the Apps page, select the trash icon, and then choose Delete in the dialog that appears.
Unpublish the app: This option removes the app but keeps its associated workspace. This option is useful if there are customizations that you made and want to keep.
To unpublish the app:
Open the app.
Select the edit app pencil icon to open the template app's workspace.
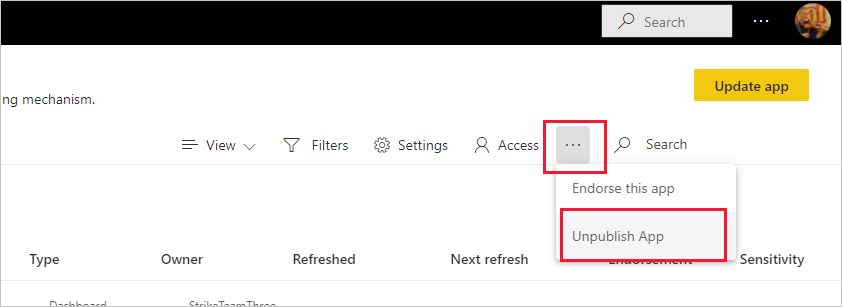
In the template app workspace, select More options (...), and then choose Unpublish App.
Подія
Чемпіонат світу з даних Power BI
14 лют., 16 - 31 бер., 16
Маючи 4 шанси увійти, ви можете виграти пакет конференції і зробити його на live Grand Finale в Лас-Вегасі
ДокладноНавчання
Навчальний шлях
Use advance techniques in canvas apps to perform custom updates and optimization - Training
Use advance techniques in canvas apps to perform custom updates and optimization
Сертифікація
Microsoft Certified: Power BI Data Analyst Associate - Certifications
Demonstrate methods and best practices that align with business and technical requirements for modeling, visualizing, and analyzing data with Microsoft Power BI.
Документація
Τι είναι οι εφαρμογές προτύπου Power BI; - Power BI
Αυτό το άρθρο είναι μια επισκόπηση του προγράμματος εφαρμογής προτύπου Power BI. Μάθετε πώς μπορείτε να δημιουργήσετε εφαρμογές Power BI με λίγο ή καθόλου κωδικοποίηση και να τις αναπτύξετε σε κάθε πελάτη του Power BI.
Δημιουργία εφαρμογών προτύπου στο Power BI - Power BI
Μάθετε πώς μπορείτε να δημιουργήσετε εφαρμογές προτύπου στο Power BI που μπορείτε να διανείμετε σε κάθε πελάτη του Power BI.