Use announcements in Viva Connections
Announcements allow you to create and share time-sensitive messages in Viva Connections. You can set up, manage, and schedule announcements from your organization’s SharePoint home site.

Note
- Announcement notifications are currently only supported on mobile experiences. A future update is planned to support announcement notifications on desktop experiences.
- Users will be required to have a Microsoft Viva suite or Viva Communications and Communities license to utilize the announcements feature. See Microsoft Viva plans and pricing for more info.
- You must have edit permissions or higher to your organization’s SharePoint home site or Viva Connections to author and manage announcements.
- Announcements are unavailable in GCC, GCC High, and DoD environments. For more information, see the list of service availability.
When to use announcements
Announcements are the best way to communicate targeted, time-sensitive information in the Viva Connections app.
Example Scenarios:
- Remind users in a specific role of an upcoming deadline.
- Share details about open enrollment benefits for full-time employees.
- Send a specific call to action for new employees.
Important
For emergencies such as a safety hazard, it’s recommended to use multiple modes of communication.
Best practices for using and writing announcements
- Use announcements sparingly so that users understand their importance. Sending them too frequently can cause users to disregard the notifications.
- Delivery time increases with the size of the targeted audience. Sending an announcement to a group of 50 users might take just a few minutes but sending one to 100,000 users can take several hours.
- Announcements aren’t designed for life-threatening emergencies.
- Keep messages short with a clear call to action. Plan to link to more information for complex topics.
- Specify which audiences need to receive the announcement to ensure the highest engagement possible.
- Allow users to dismiss announcements for less-urgent topics or when there are several high-impact announcements active at the same time.
How announcements display in Viva Connections
Announcements are viewable to users from mobile experiences through Viva Connections.
Note
Announcement notifications are currently only supported on mobile experiences. A future update is planned to support announcement notifications on desktop experiences.
- In Teams: Users get a Teams notification displayed on the lock screen of their mobile device alerting them of a new announcement when the user has enabled it.

- In Viva Connections: Announcements display towards the top of the Viva Connections mobile experience.
Teams Channel announcements displaying in Viva Connections for frontline workers
Microsoft Teams Channel announcements also display in the Viva Connections announcements banner on desktop and mobile experiences for Frontline workers only. Frontline managers can communicate important updates from their Teams Channel by using an @mention. Frontline workers can then select the link within the announcement in Connections to be redirected to the Teams Channel where the announcement was made.
A Teams Channel announcement is displayed in the Viva Connections experience only if:
- The user has been assigned a Microsoft 365 F1 or F3 license;
- Channel mentions are enabled under the Teams Channel notification settings; and
- The Teams channel announcement has been tagged with an @mention and is unread.
Note
- If you have authentication issues, disable the Limited-access user permission lockdown mode under site collection features from your SharePoint site. Learn more about enabling or disabling site collection features.
- Vanity domains are not supported. Contact your organization's support team for more information.
- Additional updates to an existing Teams Channel announcement will not be displayed in Viva Connections. Users will need to follow the link from the original announcement in Viva Connections to view the Teams Channel announcement.
- Teams Channel announcements that are deleted and then undone will show as unread.
For more information, see Sending an announcement to a channel in Microsoft Teams.
Target announcements to frontline audiences based on department, location, and job title
Managers can now send targeted announcements based on an employee’s department, location, and job title to frontline workers on a time-sensitive basis using Regional filtering.
Before Regional filtering can be enabled, Dynamic Teams at Scale (DTAS) and your organizations Hierarchy needs to be set up within the Teams admin center in order for the proper information to be available to filter.
Note
- It is recommended to set up DTAS and your Hierarchy configuration before using this feature to avoid users receiving an error.
- Once DTAS and your Hierarchy has been configured, regional filtering must be enabled in Connections.
Map frontline attributes in the admin center
There's some preliminary configuration required before regional filtering can be enabled in Connections. First, your organization needs to have set up DTAS within the Teams admin center. For more information about the deployment of frontline dynamic teams at scale see the linked article.
If DTAS has been set up for your organization, you'll need to set up your frontline operational hierarchy through a CSV file uploaded to the Teams admin center; enabling you to map your organization’s structure of frontline teams and locations to a hierarchy. After the hierarchy is in place, you'll be able to map your frontline attributes to the Microsoft Entra ID attributes that represent your organization’s departments and job titles. Your final step is to enable regional filtering in Viva Connections.
To get started creating your CSV hierarchy file
In the left navigation of the Teams admin center, choose Teams > Manage frontline teams.
Go to the Operational hierarchy tab.
Choose Get Started. The Operational hierarchy pane opens, and from here, you can upload your hierarchy CSV file or download a CSV template to create one.
Select Download the CSV template to create your file.
After creating the file, return to the Operational hierarchy tab.
Choose Get Started and upload your CSV file.
For more information about deploying your frontline operational hierarchy see the linked article.
To map frontline attributes
Map your attributes on the Map frontline attributes page of the deploy frontline dynamic teams experience. Select the Microsoft Entra attribute for Department and Job title that best represents the departments and job titles in your organization. You can map one or both attributes. For more information on setting up for targeted communications for your frontline see the linked article.
Enable Regional filtering
After the DTAS and Hierarchy service has been configured in Microsoft Teams, enable Regional filtering within the Announcements page in Viva Connections (or from your SharePoint home site).
To enable from Viva Connections:
After accessing the announcements page, select Settings in the upper-right corner of the page.
In the Settings pane, select the toggle to enable Regional filtering.

Select Save to save your changes.

To enable from a SharePoint home site:
After accessing the announcements page, select Settings in the upper-right corner of the page.
In the Settings pane, select the toggle to enable Regional filtering.
Select Save to save your changes.
Filter announcement by Frontline worker properties
After location, department, and role values have been set up in Microsoft Teams, and regional filtering is enabled in Viva Connections, owners and members will see options to filter their announcement based on the new set of frontline worker properties created in Microsoft Teams.
To create an announcement filtered by frontline worker properties, follow the steps for drafting your announcement up to selecting your audience:
Select Filter by property.
Select from three properties to enable announcement filtering based on the following variables:
Location: enter a location in the text field to filter down based on available choices or select the drop-down arrows to choose multiple locations from a list of available options. Up to 10 locations can be selected.
Department: enter a department in the text field to filter down based on available choices or select the drop-down arrows to choose multiple departments from a list of available options.
Job title: enter a job title in the text field to filter down based on available choices, or select the drop-down arrows to choose multiple job titles from a list of available options.


- Continue creating your announcement until you're ready to send.
Accessing the announcements page
Experience owners are able to create announcements through the Viva Connections desktop experience or from their SharePoint home site using the announcements page. To access the announcement page:
- In Viva Connections: Experience owners can select the ellipsis in the upper-right of Viva Connections then select Announcements.The announcements page opens where users can select + New announcement to begin drafting an announcement.

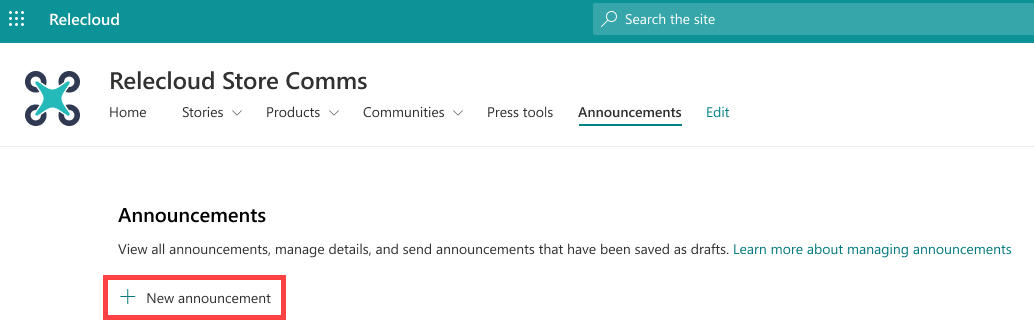
- From the SharePoint home site: The easiest way to access the announcements page is to select Announcements from the site navigation and then + New announcement.

Note
Users can also access the announcement page in SharePoint by:
- Selecting Settings > Manage Viva Connections > Announcements > + New announcement.
- Select + New from the command bar and choose Announcement.
Drafting your announcement
After choosing to create a new announcement either from your Viva Connections experience or from the SharePoint home site, you'll be presented with the following fields for drafting your announcement.
Add a title and message.
Select up to 10 audiences to distribute the announcement to. Audiences can be Microsoft Entra groups, Microsoft 365 Groups, or Microsoft Entra dynamic groups.
Select an end date and time for when the announcement should no longer appear (up to two weeks from the original posting date).

To add a link to more information, add a URL and label for the link under More options.
To allow users to dismiss the announcement after viewing, toggle the Allow users to dismiss setting on under More options.
Select Next to review the details of your announcement.

If the announcement is ready to send immediately, select the Send announcement option.


Note
Once an announcement has been sent, message details and end date can still be edited.
How to schedule an announcement to send later
Follow the steps to access the announcement page and to drafting your announcement.
Toggle on the Schedule to send later option and enter a date and time:
Note
- The end date can be up to two weeks from the original posting date.
- Scheduling is only available in half-hour increments (e.g. you could schedule a post to send at 10:30 but not 10:15).

Select Next to review the details of your announcement.
If the announcement is ready to be scheduled, select Schedule announcement and the announcement will be sent at the scheduled time.

The scheduled date and time can be edited anytime before the announcement has been sent.

Save an announcement as a draft
Follow the steps to access the announcement page and to drafting your announcement.
After writing the title and message, choose the Save as draft button.
You can come back and edit the announcement later from the announcements page.
Manage announcements from the announcements page
You can view all announcements that are active, scheduled, saved as drafts, and expired from the Announcements page.

From the Announcements page, you can complete the following tasks:
Create a new announcement
Choose + New announcement and follow the steps to draft your announcement.
Edit an active, scheduled, and drafted announcement
From the Announcements page, select the edit (pencil) icon for the announcement you want to make changes to.
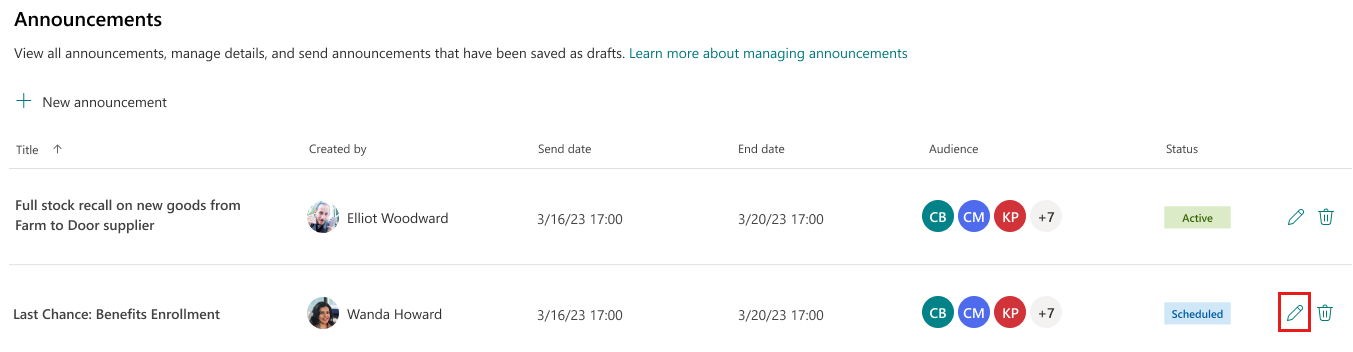
Make any desired changes in the Announcement details pane.
Choose to send or schedule drafted announcements.

Delete an announcement
From your Announcements page, select the delete (trash can) icon for the announcement that you want to delete. Deleted announcements can’t be recovered.

When prompted, choose Yes, delete.
If the announcement was active, users won't be able to view it, but it might still be accessible through a Teams notification.

Feedback
Coming soon: Throughout 2024 we will be phasing out GitHub Issues as the feedback mechanism for content and replacing it with a new feedback system. For more information see: https://aka.ms/ContentUserFeedback.
Submit and view feedback for