Note
Access to this page requires authorization. You can try signing in or changing directories.
Access to this page requires authorization. You can try changing directories.
After you've created a starter simple photo viewer WinUI 3 app, you might be wondering how to reach more users without having to rewrite your app. This tutorial uses Uno Platform to expand the reach of your existing C# WinUI 3 application enabling reuse of the business logic and UI layer across native mobile, web, and desktop. With only minimal changes to the simple photo viewer app, we can run a pixel-perfect copy of the app ported to these platforms.

Prerequisites
Set up your development computer (see Get started with WinUI)
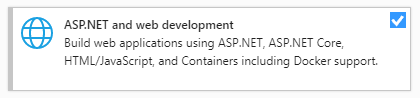
ASP.NET and web development workload (for WebAssembly development)
.NET Multi-platform App UI development installed (for iOS, Android, Mac Catalyst development)

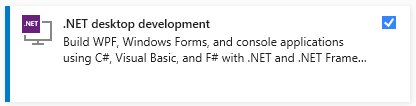
.NET desktop development installed (for Gtk, Wpf, and Linux Framebuffer development)
Finalize your environment
Open a command-line prompt, Windows Terminal if you have it installed, or else Command Prompt or Windows Powershell from the Start Menu.
Install or update the
uno-checktool:Use the following command:
dotnet tool install -g uno.checkTo update the tool, if you already have previously installed an older version:
dotnet tool update -g uno.check
Run the tool with the following command:
uno-checkFollow the instructions indicated by the tool. Because it needs to modify your system, you may be prompted for elevated permissions.
Install the Uno Platform solution templates
Launch Visual Studio, then click Continue without code. Click Extensions -> Manage Extensions from the Menu Bar.

In the Extension Manager expand the Online node and search for Uno, install the Uno Platform extension, or download and install it from the Visual Studio Marketplace, then restart Visual Studio.

Create an application
Now that we're ready to create a multi-platform application, the approach we'll take is to create a new Uno Platform application. We'll copy code from the previous tutorial's SimplePhotos WinUI 3 project into our multi-platform project. This is possible because Uno Platform lets you reuse your existing codebase. For features dependent on OS APIs provided by each platform, you can easily make them work over time. This approach is especially useful if you have an existing application that you want to port to other platforms.
Soon enough, you will be able to reap the benefits of this approach, as you can target more platforms with a familiar XAML flavor and the codebase you already have.
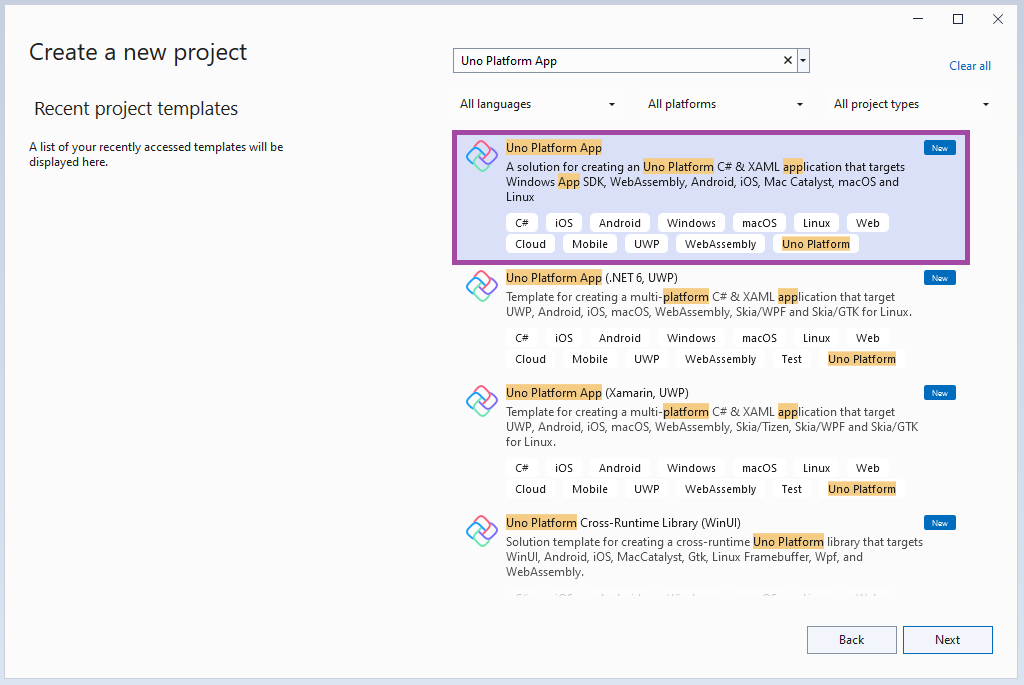
Open Visual Studio and create a new project via File > New > Project:
Search for Uno and select the Uno Platform App project template:
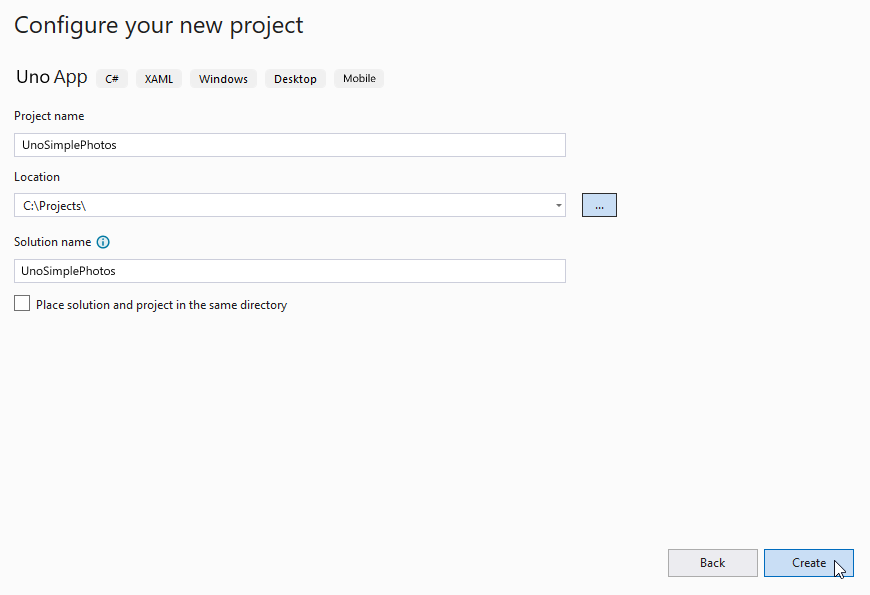
Create a new C# solution using the Uno Platform App type from Visual Studio's Start Page. To avoid conflicting with the code from the previous tutorial, we'll give this solution a different name, "UnoSimplePhotos". Specify the project name, solution name, and directory. In this example, our UnoSimplePhotos multi-platform project belongs to a UnoSimplePhotos solution, which will live in C:\Projects:
Now you'll choose a base template to take your Simple Photo gallery application multi-platform.
The Uno Platform App template comes with two preset options that allow you to quickly get started with either a Blank solution or the Default configuration which includes references to the Uno.Material and Uno.Toolkit libraries. The Default configuration also includes Uno.Extensions which is used for dependency injection, configuration, navigation, and logging. In addition, it uses MVUX in place of MVVM, making it a great starting point for rapidly building real-world applications.
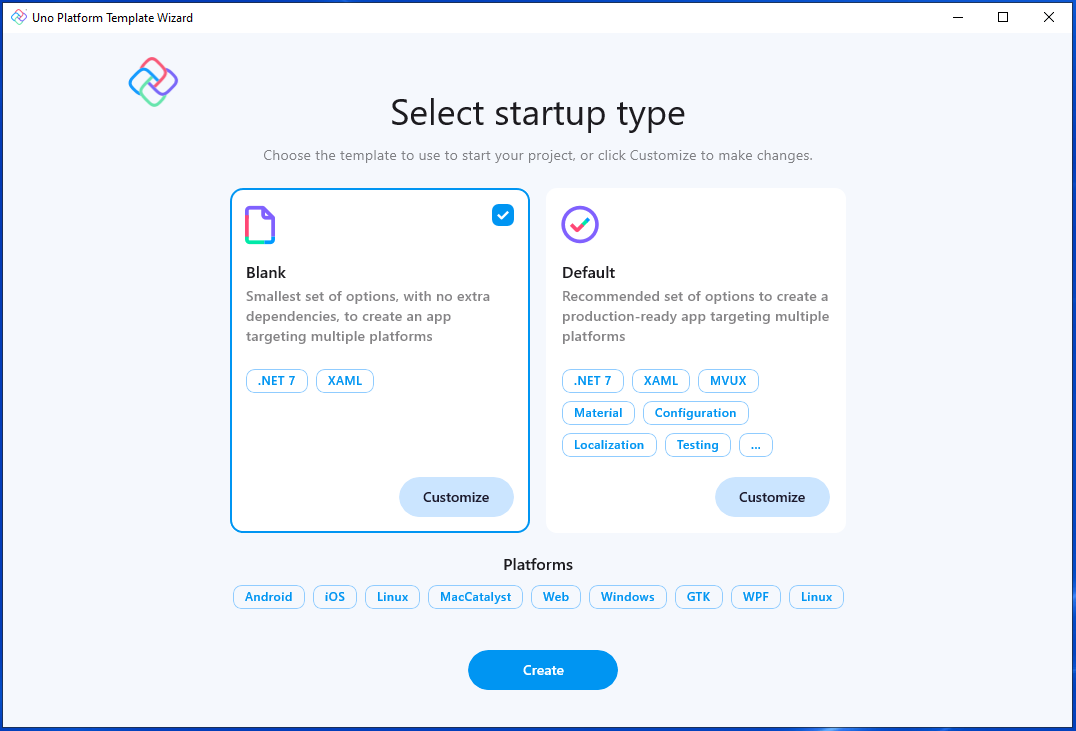
To keep things simple, select the Blank preset. Then, click the Create button. Wait for the projects to be created and their dependencies to be restored.
A banner at the top of the editor may ask to reload projects, click Reload projects:

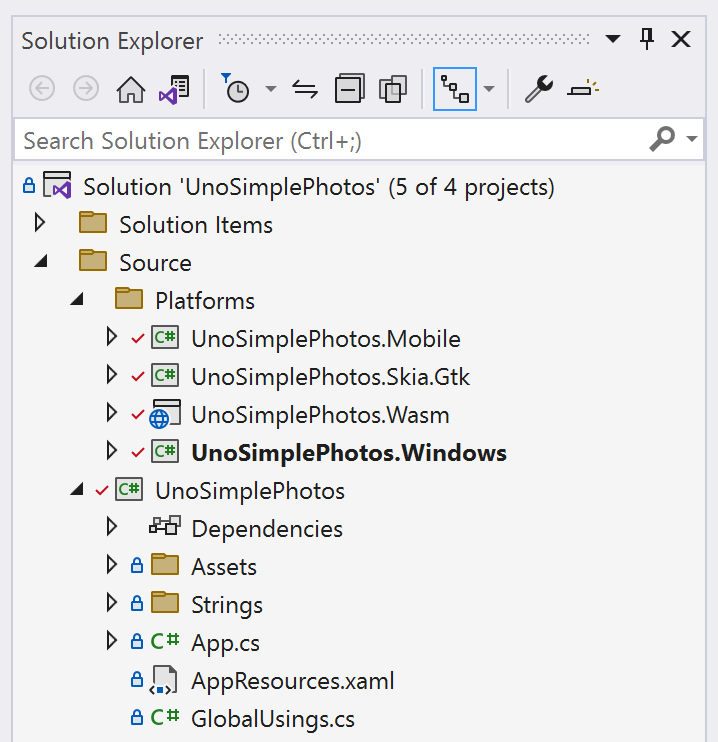
You should see the following default file structure in your Solution Explorer:
Add image assets to the project
Your app will need some images to display. You can use the same images from the previous tutorial.
In the UnoSimplePhotos project, create a new folder named Assets and copy the JPG image files to a Samples subfolder. The Assets folder structure should now look like this:

For more information on creating the Assets folder and adding images to it, see the Uno Platform documentation about Assets and image display.
Preparing your app
Now that you've generated the functional starting point of your multi-platform WinUI application, you can copy code into it from the desktop project.
Copy the view
Because Uno Platform allows you to use the XAML flavor you're already familiar with, you can copy the same code over that you created in the previous tutorial.
Return to the SimplePhotos project from the previous tutorial. In the Solution Explorer, find the file named MainWindow.xaml and open it. Observe that the contents of the view are defined within a Window element rather than a Page. This is because the desktop project is a WinUI 3 application, which can use Window elements to define the contents of the view:
<Window x:Class="SimplePhotos.MainWindow"
        xmlns="http://schemas.microsoft.com/winfx/2006/xaml/presentation"
        xmlns:x="http://schemas.microsoft.com/winfx/2006/xaml"
        xmlns:local="using:SimplePhotos"
        xmlns:d="http://schemas.microsoft.com/expression/blend/2008"
        xmlns:mc="http://schemas.openxmlformats.org/markup-compatibility/2006"
        mc:Ignorable="d">

    <Grid>
        <Grid.Resources>
            <DataTemplate x:Key="ImageGridView_ItemTemplate"
                          x:DataType="local:ImageFileInfo">
                <Grid Height="300"
                      Width="300"
                      Margin="8">
                    <Grid.RowDefinitions>
                        <RowDefinition />
                        <RowDefinition Height="Auto" />
                    </Grid.RowDefinitions>

                    <Image x:Name="ItemImage"
                           Source="Assets/StoreLogo.png"
                           Stretch="Uniform" />

                    <StackPanel Orientation="Vertical"
                                Grid.Row="1">
                        <TextBlock Text="{x:Bind ImageTitle}"
                                   HorizontalAlignment="Center"
                                   Style="{StaticResource SubtitleTextBlockStyle}" />
                        <StackPanel Orientation="Horizontal"
                                    HorizontalAlignment="Center">
                            <TextBlock Text="{x:Bind ImageFileType}"
                                       HorizontalAlignment="Center"
                                       Style="{StaticResource CaptionTextBlockStyle}" />
                            <TextBlock Text="{x:Bind ImageDimensions}"
                                       HorizontalAlignment="Center"
                                       Style="{StaticResource CaptionTextBlockStyle}"
                                       Margin="8,0,0,0" />
                        </StackPanel>

                        <RatingControl Value="{x:Bind ImageRating}"
                                       IsReadOnly="True"/>
                    </StackPanel>
                </Grid>
            </DataTemplate>

            <Style x:Key="ImageGridView_ItemContainerStyle"
                   TargetType="GridViewItem">
                <Setter Property="Background"
                        Value="Gray"/>
                <Setter Property="Margin"
                        Value="8"/>
            </Style>

            <ItemsPanelTemplate x:Key="ImageGridView_ItemsPanelTemplate">
                    <ItemsWrapGrid Orientation="Horizontal"
                                   HorizontalAlignment="Center"/>
                </ItemsPanelTemplate>
        </Grid.Resources>

        <GridView x:Name="ImageGridView"
                  ItemsSource="{x:Bind Images}"
                  ItemTemplate="{StaticResource ImageGridView_ItemTemplate}"
                  ItemContainerStyle="{StaticResource ImageGridView_ItemContainerStyle}"
                  ItemsPanel="{StaticResource ImageGridView_ItemsPanelTemplate}"
                  ContainerContentChanging="ImageGridView_ContainerContentChanging" />
    </Grid>
</Window>
Uno Platform's multi-platform implementation of the controls found in the Window element, such as GridView, Image, and RatingControl, ensure that the view itself will work on all supported platforms with only a trivial amount of effort. Copy the contents of this Window and paste them into the Page element of the MainPage.xaml file in the UnoSimplePhotos Uno Platform project. The MainPage view XAML should look like this:
<Page x:Class="UnoSimplePhotos.MainPage"
      xmlns="http://schemas.microsoft.com/winfx/2006/xaml/presentation"
      xmlns:x="http://schemas.microsoft.com/winfx/2006/xaml"
      xmlns:local="using:UnoSimplePhotos"
      xmlns:d="http://schemas.microsoft.com/expression/blend/2008"
      xmlns:mc="http://schemas.openxmlformats.org/markup-compatibility/2006"
      mc:Ignorable="d">

    <Grid>
        <Grid.Resources>
            <DataTemplate x:Key="ImageGridView_ItemTemplate"
                          x:DataType="local:ImageFileInfo">
                <Grid Height="300"
                      Width="300"
                      Margin="8">
                    <Grid.RowDefinitions>
                        <RowDefinition />
                        <RowDefinition Height="Auto" />
                    </Grid.RowDefinitions>

                    <Image x:Name="ItemImage"
                           Source="Assets/StoreLogo.png"
                           Stretch="Uniform" />

                    <StackPanel Orientation="Vertical"
                                Grid.Row="1">
                        <TextBlock Text="{x:Bind ImageTitle}"
                                   HorizontalAlignment="Center"
                                   Style="{StaticResource SubtitleTextBlockStyle}" />
                        <StackPanel Orientation="Horizontal"
                                    HorizontalAlignment="Center">
                            <TextBlock Text="{x:Bind ImageFileType}"
                                       HorizontalAlignment="Center"
                                       Style="{StaticResource CaptionTextBlockStyle}" />
                            <TextBlock Text="{x:Bind ImageDimensions}"
                                       HorizontalAlignment="Center"
                                       Style="{StaticResource CaptionTextBlockStyle}"
                                       Margin="8,0,0,0" />
                        </StackPanel>

                        <RatingControl Value="{x:Bind ImageRating}"
                                       IsReadOnly="True"/>
                    </StackPanel>
                </Grid>
            </DataTemplate>

            <Style x:Key="ImageGridView_ItemContainerStyle"
                   TargetType="GridViewItem">
                <Setter Property="Background"
                        Value="Gray"/>
                <Setter Property="Margin"
                        Value="8"/>
            </Style>

            <ItemsPanelTemplate x:Key="ImageGridView_ItemsPanelTemplate">
                <ItemsWrapGrid Orientation="Horizontal"
                               HorizontalAlignment="Center"/>
            </ItemsPanelTemplate>
        </Grid.Resources>

        <GridView x:Name="ImageGridView"
                  ItemsSource="{x:Bind Images}"
                  ItemTemplate="{StaticResource ImageGridView_ItemTemplate}"
                  ItemContainerStyle="{StaticResource ImageGridView_ItemContainerStyle}"
                  ItemsPanel="{StaticResource ImageGridView_ItemsPanelTemplate}"
                  ContainerContentChanging="ImageGridView_ContainerContentChanging">
        </GridView>
    </Grid>
</Page>
You may recall that the desktop solution also had a MainWindow.xaml.cs file that contained code-behind which corresponds to the view. In the Uno Platform project, the code-behind for the MainPage view we've copied into is contained in the MainPage.xaml.cs file.
To bring this code-behind multi-platform, we should first move the following into the MainPage.xaml.cs file:
Imagesproperty: Provides theGridViewwith an observable collection of image filesContents of the constructor: Calls
GetItemsAsync()to populate theImagescollection with items representing image filesRemove the manual modification of the
ImageGridViewcontrol'sItemsSourcepropertyImageGridView_ContainerContentChangingmethod: Used as part of a strategy to progressively loadGridViewitems as they are scrolled into viewShowImagemethod: Loads the image files into theGridViewGetItemsAsyncmethod: Gets the image asset files from theSamplesfolderLoadImageInfoAsyncmethod: Constructs anImageFileInfoobject from a createdStorageFile
After moving everything over, MainPage.xaml.cs should now look like this:
using Microsoft.UI.Xaml.Controls;
using System.Collections.ObjectModel;
using Windows.Storage;
using Windows.Storage.Search;

namespace UnoSimplePhotos;

public sealed partial class MainPage : Page
{
    public ObservableCollection<ImageFileInfo> Images { get; }
    = new ObservableCollection<ImageFileInfo>();

    public MainPage()
    {
        this.InitializeComponent();
        GetItemsAsync();
    }

    private void ImageGridView_ContainerContentChanging(ListViewBase sender,
        ContainerContentChangingEventArgs args)
    {
        if (args.InRecycleQueue)
        {
            var templateRoot = args.ItemContainer.ContentTemplateRoot as Grid;
            var image = templateRoot.FindName("ItemImage") as Image;
            image.Source = null;
        }

        if (args.Phase == 0)
        {
            args.RegisterUpdateCallback(ShowImage);
            args.Handled = true;
        }
    }

    private async void ShowImage(ListViewBase sender, ContainerContentChangingEventArgs args)
    {
        if (args.Phase == 1)
        {
            // It's phase 1, so show this item's image.
            var templateRoot = args.ItemContainer.ContentTemplateRoot as Grid;
            var image = templateRoot.FindName("ItemImage") as Image;
            var item = args.Item as ImageFileInfo;
            image.Source = await item.GetImageThumbnailAsync();
        }
    }

    private async Task GetItemsAsync()
    {
        StorageFolder appInstalledFolder = Package.Current.InstalledLocation;
        StorageFolder picturesFolder = await appInstalledFolder.GetFolderAsync("Assets\\Samples");

        var result = picturesFolder.CreateFileQueryWithOptions(new QueryOptions());

        IReadOnlyList<StorageFile> imageFiles = await result.GetFilesAsync();
        foreach (StorageFile file in imageFiles)
        {
            Images.Add(await LoadImageInfoAsync(file));
        }
    }

    public async static Task<ImageFileInfo> LoadImageInfoAsync(StorageFile file)
    {
        var properties = await file.Properties.GetImagePropertiesAsync();
        ImageFileInfo info = new(properties,
                                    file, file.DisplayName, file.DisplayType);

        return info;
    }
}
Note
The files in your Uno app project should use UnoSimplePhotos as the namespace.
So far, the files for the main view we're working with contain all the capabilities of the desktop solution. After we copy over the ImageFileInfo.cs model file, we will learn how to modify the desktop-oriented blocks of code for multi-platform compatibility.
Copy ImageFileInfo from the desktop project and paste it into the ImageFileInfo.cs file. Make the following changes:
Rename the namespace to be
UnoSimplePhotosinstead ofSimplePhotos:// Found towards the top of the file namespace UnoSimplePhotos;Change the parameter type of the
OnPropertyChangedmethod to be nullable:// string -> string? protected void OnPropertyChanged([CallerMemberName] string? propertyName = null) ...Make the
PropertyChangedEventHandlernullable:// PropertyChangedEventHandler -> PropertyChangedEventHandler? public event PropertyChangedEventHandler? PropertyChanged;
Put together, the file should look like this:
using Microsoft.UI.Xaml.Media.Imaging;
using System.ComponentModel;
using System.Runtime.CompilerServices;
using Windows.Storage;
using Windows.Storage.FileProperties;
using Windows.Storage.Streams;
using ThumbnailMode = Windows.Storage.FileProperties.ThumbnailMode;

namespace UnoSimplePhotos;

public class ImageFileInfo : INotifyPropertyChanged
{
    public ImageFileInfo(ImageProperties properties,
        StorageFile imageFile,
        string name,
        string type)
    {
        ImageProperties = properties;
        ImageName = name;
        ImageFileType = type;
        ImageFile = imageFile;
        var rating = (int)properties.Rating;
        var random = new Random();
        ImageRating = rating == 0 ? random.Next(1, 5) : rating;
    }

    public StorageFile ImageFile { get; }

    public ImageProperties ImageProperties { get; }

    public async Task<BitmapImage> GetImageSourceAsync()
    {
        using IRandomAccessStream fileStream = await ImageFile.OpenReadAsync();

        // Create a bitmap to be the image source.
        BitmapImage bitmapImage = new();
        bitmapImage.SetSource(fileStream);

        return bitmapImage;
    }

    public async Task<BitmapImage> GetImageThumbnailAsync()
    {
        StorageItemThumbnail thumbnail =
            await ImageFile.GetThumbnailAsync(ThumbnailMode.PicturesView);
        // Create a bitmap to be the image source.
        var bitmapImage = new BitmapImage();
        bitmapImage.SetSource(thumbnail);
        thumbnail.Dispose();

        return bitmapImage;
    }

    public string ImageName { get; }

    public string ImageFileType { get; }

    public string ImageDimensions => $"{ImageProperties.Width} x {ImageProperties.Height}";

    public string ImageTitle
    {
        get => string.IsNullOrEmpty(ImageProperties.Title) ? ImageName : ImageProperties.Title;
        set
        {
            if (ImageProperties.Title != value)
            {
                ImageProperties.Title = value;
                _ = ImageProperties.SavePropertiesAsync();
                OnPropertyChanged();
            }
        }
    }

    public int ImageRating
    {
        get => (int)ImageProperties.Rating;
        set
        {
            if (ImageProperties.Rating != value)
            {
                ImageProperties.Rating = (uint)value;
                _ = ImageProperties.SavePropertiesAsync();
                OnPropertyChanged();
            }
        }
    }

    public event PropertyChangedEventHandler? PropertyChanged;

    protected void OnPropertyChanged([CallerMemberName] string? propertyName = null) =>
        PropertyChanged?.Invoke(this, new PropertyChangedEventArgs(propertyName));
}
This class will serve as a model to represent the image files in the GridView. Although it should technically possible to run the app at this point, it may not render the images correctly or display their properties. In the next sections, we'll make a set of changes to these copied files to make them compatible in a multi-platform context.
Using preprocessor directives
In the desktop project from the previous tutorial, the MainPage.xaml.cs file contains a GetItemsAsync method that enumerates items from a StorageFolder representing the installed package location. Because that location is not available on certain platforms such as WebAssembly, we'll need to make changes to this method to make it compatible with all platforms. We'll accordingly make some changes to the ImageFileInfo class to ensure compatibility.
First, make the required changes to the GetItemsAsync method. Replace the GetItemsAsync method in the MainPage.xaml.cs file with the following code:
private async Task GetItemsAsync()
{
#if WINDOWS
    StorageFolder appInstalledFolder = Package.Current.InstalledLocation;
    StorageFolder picturesFolder = await appInstalledFolder.GetFolderAsync("UnoSimplePhotos\\Assets\\Samples");

    var result = picturesFolder.CreateFileQueryWithOptions(new QueryOptions());

    IReadOnlyList<StorageFile> imageFiles = await result.GetFilesAsync();
#else
    var imageFileNames = Enumerable.Range(1, 20).Select(i => new Uri($"ms-appx:///UnoSimplePhotos/Assets/Samples/{i}.jpg"));
    var imageFiles = new List<StorageFile>();

    foreach (var file in imageFileNames)
    {
        imageFiles.Add(await StorageFile.GetFileFromApplicationUriAsync(file));
    }
#endif
    foreach (StorageFile file in imageFiles)
    {
        Images.Add(await LoadImageInfoAsync(file));
    }
}
This method now uses a preprocessor directive to determine which code to execute based on the platform. On Windows, the method gets the StorageFolder representing the installed package location and returns the Samples folder from it. On other platforms, the method counts up to 20, getting the image files from the Samples folder using a Uri to represent the image file.
Next, adjust the LoadImageInfoAsync method to accommodate the changes we made to the GetItemsAsync method. Replace the LoadImageInfoAsync method in the MainPage.xaml.cs file with the following code:
public async static Task<ImageFileInfo> LoadImageInfoAsync(StorageFile file)
{
#if WINDOWS
    var properties = await file.Properties.GetImagePropertiesAsync();
    ImageFileInfo info = new(properties,
                                file, file.DisplayName, $"{file.FileType} file");
#else
    ImageFileInfo info = new(file, file.DisplayName, $"{file.FileType} file");
#endif
    return info;
}
Similar to the GetItemsAsync method, this method now uses a preprocessor directive to determine which code to execute based on the platform. On Windows, the method gets the ImageProperties from the StorageFile and uses it to create an ImageFileInfo object. On other platforms, the method constructs an ImageFileInfo object without the ImageProperties parameter. Later, modifications will be made to the ImageFileInfo class to accommodate this change.
Controls like GridView allow for progressive loading of updated item container content as they are scrolled into the viewport. This is done by using the ContainerContentChanging event. In the desktop project from the previous tutorial, the ImageGridView_ContainerContentChanging method uses this event to load the image files into the GridView. Because certain aspects of this event are not supported on all platforms, we'll need to make changes to this method to make it compatible with them.
For instance, the ContainerContentChangingEventArgs.Phase property is currently unsupported on platforms other than Windows. We'll need to make changes to the ImageGridView_ContainerContentChanging method to accommodate this change. Replace the ImageGridView_ContainerContentChanging method in the MainPage.xaml.cs file with the following code:
private void ImageGridView_ContainerContentChanging(
ListViewBase sender,
ContainerContentChangingEventArgs args)
{

    if (args.InRecycleQueue)
    {
        var templateRoot = args.ItemContainer.ContentTemplateRoot as Grid;
        var image = templateRoot?.FindName("ItemImage") as Image;
        if (image is not null)
        {
            image.Source = null;
        }
    }

#if WINDOWS
        if (args.Phase == 0)
        {
            args.RegisterUpdateCallback(ShowImage);
            args.Handled = true;
        }
#else
    ShowImage(sender, args);
#endif
}
The specialized callback is now only registered using ContainerContentChangingEventArgs.RegisterUpdateCallback() if the platform is Windows. Otherwise, the ShowImage method is called directly. We'll also need to make changes to the ShowImage method to work alongside the changes made to the ImageGridView_ContainerContentChanging method. Replace the ShowImage method in the MainPage.xaml.cs file with the following code:
private async void ShowImage(ListViewBase sender, ContainerContentChangingEventArgs args)
{
    if (
#if WINDOWS
            args.Phase == 1
#else
        true
#endif
        )
    {

        // It's phase 1, so show this item's image.
        var templateRoot = args.ItemContainer.ContentTemplateRoot as Grid;
        var image = templateRoot?.FindName("ItemImage") as Image;
        var item = args.Item as ImageFileInfo;
#if WINDOWS
        if (image is not null && item is not null)
        {
            image.Source = await item.GetImageThumbnailAsync();
        }
#else
        if (item is not null)
        {
            await item.GetImageSourceAsync();
        }
#endif
    }
}
Again, preprocessor directives ensure that the ContainerContentChangingEventArgs.Phase property is only used on platforms where it is supported. We make use of the previously unused GetImageSourceAsync() method to load the image files into the GridView on platforms other than Windows. At this point, we'll accommodate the changes made above by editing the ImageFileInfo class.
Creating a separate code path for other platforms
Update ImageFileInfo.cs to include a new property called ImageSource that will be used to load the image file.
public BitmapImage? ImageSource { get; private set; }
Because platforms like the web do not support advanced image file properties that are readily available on Windows, we'll add a constructor overload that does not require an ImageProperties typed parameter. Add the new overload after the existing one using the following code:
public ImageFileInfo(StorageFile imageFile,
    string name,
    string type)
{
    ImageName = name;
    ImageFileType = type;
    ImageFile = imageFile;
}
This constructor overload is used to construct an ImageFileInfo object on platforms other than Windows. Since we did this, it makes sense to make the ImageProperties property nullable. Update the ImageProperties property to be nullable using the following code:
public ImageProperties? ImageProperties { get; }
Update the GetImageSourceAsync method to use the ImageSource property instead of only returning a BitmapImage object. Replace the GetImageSourceAsync method in the ImageFileInfo.cs file with the following code:
public async Task<BitmapImage> GetImageSourceAsync()
{
    using IRandomAccessStream fileStream = await ImageFile.OpenReadAsync();

    // Create a bitmap to be the image source.
    BitmapImage bitmapImage = new();
    bitmapImage.SetSource(fileStream);

    ImageSource = bitmapImage;
    PropertyChanged?.Invoke(this, new PropertyChangedEventArgs(nameof(ImageSource)));

    return bitmapImage;
}
To prevent getting the value of ImageProperties when it's null, make the following changes:
Modify the
ImageDimensionsproperty to use the null conditional operator:public string ImageDimensions => $"{ImageProperties?.Width} x {ImageProperties?.Height}";Change the
ImageTitleproperty to use the null conditional operator:public string ImageTitle { get => string.IsNullOrEmpty(ImageProperties?.Title) ? ImageName : ImageProperties?.Title; set { if (ImageProperties is not null) { if (ImageProperties.Title != value) { ImageProperties.Title = value; _ = ImageProperties.SavePropertiesAsync(); OnPropertyChanged(); } } } }Change
ImageRatingto not rely onImagePropertiesby generating a random star rating for demonstration purposes:public int ImageRating { get => (int)((ImageProperties?.Rating == null || ImageProperties.Rating == 0) ? (uint)Random.Shared.Next(1, 5) : ImageProperties.Rating); set { if (ImageProperties is not null) { if (ImageProperties.Rating != value) { ImageProperties.Rating = (uint)value; _ = ImageProperties.SavePropertiesAsync(); OnPropertyChanged(); } } } }Update the constructor that generates a random integer to no longer do this:
public ImageFileInfo(ImageProperties properties, StorageFile imageFile, string name, string type) { ImageProperties = properties; ImageName = name; ImageFileType = type; ImageFile = imageFile; }
With these edits, the ImageFileInfo class should contain the following code. It now has a newly-separated code path for platforms other than Windows:
using Microsoft.UI.Xaml.Media.Imaging;
using System.ComponentModel;
using System.Runtime.CompilerServices;
using Windows.Storage;
using Windows.Storage.FileProperties;
using Windows.Storage.Streams;
using ThumbnailMode = Windows.Storage.FileProperties.ThumbnailMode;
namespace UnoSimplePhotos;
public class ImageFileInfo : INotifyPropertyChanged
{
public BitmapImage? ImageSource { get; private set; }
public ImageFileInfo(ImageProperties properties,
StorageFile imageFile,
string name,
string type)
{
ImageProperties = properties;
ImageName = name;
ImageFileType = type;
ImageFile = imageFile;
}
public ImageFileInfo(StorageFile imageFile,
string name,
string type)
{
ImageName = name;
ImageFileType = type;
ImageFile = imageFile;
}
public StorageFile ImageFile { get; }
public ImageProperties? ImageProperties { get; }
public async Task<BitmapImage> GetImageSourceAsync()
{
using IRandomAccessStream fileStream = await ImageFile.OpenReadAsync();
// Create a bitmap to be the image source.
BitmapImage bitmapImage = new();
bitmapImage.SetSource(fileStream);
ImageSource = bitmapImage;
PropertyChanged?.Invoke(this, new PropertyChangedEventArgs(nameof(ImageSource)));
return bitmapImage;
}
public async Task<BitmapImage> GetImageThumbnailAsync()
{
StorageItemThumbnail thumbnail =
await ImageFile.GetThumbnailAsync(ThumbnailMode.PicturesView);
// Create a bitmap to be the image source.
var bitmapImage = new BitmapImage();
bitmapImage.SetSource(thumbnail);
thumbnail.Dispose();
return bitmapImage;
}
public string ImageName { get; }
public string ImageFileType { get; }
public string ImageDimensions => $"{ImageProperties?.Width} x {ImageProperties?.Height}";
public string ImageTitle
{
get => string.IsNullOrEmpty(ImageProperties?.Title) ? ImageName : ImageProperties.Title;
set
{
if (ImageProperties is not null)
{
if (ImageProperties.Title != value)
{
ImageProperties.Title = value;
_ = ImageProperties.SavePropertiesAsync();
OnPropertyChanged();
}
}
}
}
public int ImageRating
{
    get => (int)((ImageProperties?.Rating == null || ImageProperties.Rating == 0) ? (uint)Random.Shared.Next(1, 5) : ImageProperties.Rating);
    set
    {
        if (ImageProperties is not null)
        {
            if (ImageProperties.Rating != value)
            {
                ImageProperties.Rating = (uint)value;
                _ = ImageProperties.SavePropertiesAsync();
                OnPropertyChanged();
            }
        }
    }
}
public event PropertyChangedEventHandler? PropertyChanged;
protected void OnPropertyChanged([CallerMemberName] string? propertyName = null) =>
PropertyChanged?.Invoke(this, new PropertyChangedEventArgs(propertyName));
}
This ImageFileInfo class is used to represent the image files in the GridView. Finally, we'll make changes to the MainPage.xaml file to accommodate the changes to the model.
Using platform-specific XAML markup
There are a couple of items in our view markup which should only be evaluated on Windows. Add a new namespace on the Page element of the MainPage.xaml file like this:
...
xmlns:win="http://schemas.microsoft.com/winfx/2006/xaml/presentation"
Now, in MainPage.xaml, replace the ItemsPanel property setter on the GridView element with the following code:
win:ItemsPanel="{StaticResource ImageGridView_ItemsPanelTemplate}"
Prepending the property name with win: ensures that the property is only set on Windows. Do this again within the ImageGridView_ItemTemplate resource. We want to only load elements that use the ImageDimensions property on Windows. Replace the TextBlock element that uses the ImageDimensions property with the following code:
<win:TextBlock Text="{x:Bind ImageDimensions}"
               HorizontalAlignment="Center"
               Style="{StaticResource CaptionTextBlockStyle}"
               Margin="8,0,0,0" />
The MainPage.xaml file should now look like this:
<Page x:Class="UnoSimplePhotos.MainPage"
      xmlns="http://schemas.microsoft.com/winfx/2006/xaml/presentation"
      xmlns:x="http://schemas.microsoft.com/winfx/2006/xaml"
      xmlns:local="using:UnoSimplePhotos"
      xmlns:d="http://schemas.microsoft.com/expression/blend/2008"
      xmlns:mc="http://schemas.openxmlformats.org/markup-compatibility/2006"
      xmlns:win="http://schemas.microsoft.com/winfx/2006/xaml/presentation"
      mc:Ignorable="d"
      Background="{ThemeResource ApplicationPageBackgroundThemeBrush}">

    <Grid>
        <Grid.Resources>
            <DataTemplate x:Key="ImageGridView_ItemTemplate"
                          x:DataType="local:ImageFileInfo">
                <Grid Height="300"
                      Width="300"
                      Margin="8">
                    <Grid.RowDefinitions>
                        <RowDefinition />
                        <RowDefinition Height="Auto" />
                    </Grid.RowDefinitions>

                    <Image x:Name="ItemImage"
                           Source="{x:Bind ImageSource}"
                           Stretch="Uniform" />

                    <StackPanel Orientation="Vertical"
                                Grid.Row="1">
                        <TextBlock Text="{x:Bind ImageTitle}"
                                   HorizontalAlignment="Center"
                                   Style="{StaticResource SubtitleTextBlockStyle}" />
                        <StackPanel Orientation="Horizontal"
                                    HorizontalAlignment="Center">
                            <TextBlock Text="{x:Bind ImageFileType}"
                                       HorizontalAlignment="Center"
                                       Style="{StaticResource CaptionTextBlockStyle}" />
                            <win:TextBlock Text="{x:Bind ImageDimensions}"
                                           HorizontalAlignment="Center"
                                           Style="{StaticResource CaptionTextBlockStyle}"
                                           Margin="8,0,0,0" />
                        </StackPanel>

                        <RatingControl Value="{x:Bind ImageRating}"
                                       IsReadOnly="True" />
                    </StackPanel>
                </Grid>
            </DataTemplate>

            <Style x:Key="ImageGridView_ItemContainerStyle"
                   TargetType="GridViewItem">
                <Setter Property="Background"
                        Value="Gray" />
                <Setter Property="Margin"
                        Value="8"/>
            </Style>

            <ItemsPanelTemplate x:Key="ImageGridView_ItemsPanelTemplate">
                <ItemsWrapGrid Orientation="Horizontal"
                               HorizontalAlignment="Center"/>
            </ItemsPanelTemplate>
        </Grid.Resources>

        <GridView x:Name="ImageGridView"
                  ItemsSource="{x:Bind Images, Mode=OneWay}"
                  win:ItemsPanel="{StaticResource ImageGridView_ItemsPanelTemplate}"
                  ContainerContentChanging="ImageGridView_ContainerContentChanging"
                  ItemContainerStyle="{StaticResource ImageGridView_ItemContainerStyle}"
                  ItemTemplate="{StaticResource ImageGridView_ItemTemplate}" />
    </Grid>
</Page>
Running the app
Launch the UnoSimplePhotos.Windows target. Observe that this WinUI app is very similar to the previous tutorial.
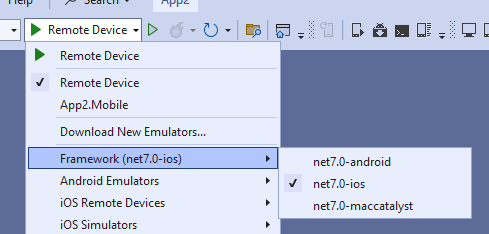
You can now build and run your app on any of the supported platforms. To do so, you can use the debug toolbar drop-down to select a target platform to deploy:
To run the WebAssembly (Wasm) head:
- Right-click on the
UnoSimplePhotos.Wasmproject, select Set as startup project - Press the
UnoSimplePhotos.Wasmbutton to deploy the app - If desired, you can add and use the
UnoSimplePhotos.Serverproject as an alternative
- Right-click on the
To debug for iOS:
Right-click on the
UnoSimplePhotos.Mobileproject, and select Set as startup projectIn the debug toolbar drop-down, select an active iOS device or the simulator. You'll need to be paired with a Mac for this to work.
To debug for Mac Catalyst:
- Right-click on the
UnoSimplePhotos.Mobileproject, and select Set as startup project - In the debug toolbar drop-down, select a remote macOS device. You'll need to be paired with one for this to work.
- Right-click on the
To debug the Android platform:
- Right-click on the
UnoSimplePhotos.Mobileproject, and select Set as startup project - In the debug toolbar drop-down, select either an active Android device or the emulator
- Select an active device in the "Device" sub-menu
- Right-click on the
To debug on Linux with Skia GTK:
- Right-click on the
UnoSimplePhotos.Skia.Gtkproject, and select Set as startup project - Press the
UnoSimplePhotos.Skia.Gtkbutton to deploy the app
- Right-click on the