Note
Access to this page requires authorization. You can try signing in or changing directories.
Access to this page requires authorization. You can try changing directories.
This article shows how to configure an app that's not installed by using MSIX (that is, it's packaged with external location or unpackaged) to use the bootstrapper API so that it explicitly loads the Windows App SDK runtime, and calls Windows App SDK APIs. Apps that are not installed via MSIX include apps packaged with external location, and unpackaged apps.
Important
Beginning in the Windows App SDK 1.0, the default approach to loading the Windows App SDK from a packaged with external location or unpackaged app is to use auto-initialization via the <WindowsPackageType> project property (as well as making additional configuration changes). For the steps involved in auto-initialization in the context of WinUI 3 project, see Create your first WinUI project. Or, if have an existing project that's not WinUI, then see Use the Windows App SDK in an existing project.
If you have advanced needs (such as custom error handling, or to load a specific version of the Windows App SDK), then you can instead call the bootstrapper API explicitly. And that's the approach that this topic demonstrates. Also, for more info, see Use the Windows App SDK runtime for apps packaged with external location or unpackaged.
This topic demonstrates explicitly calling the bootstrapper API from a basic Console app project; but the steps apply to any unpackaged desktop app that uses the Windows App SDK.
Before completing this tutorial, we recommend that you review Runtime architecture to learn more about the Framework package dependency that your app takes when it uses the Windows App SDK, and the additional components required to work in a packaged with external location or unpackaged app.
Prerequisites
- Install tools for the Windows App SDK.
- Ensure that all dependencies for packaged with external location and unpackaged apps are installed (see Windows App SDK deployment guide for framework-dependent apps packaged with external location or unpackaged). An easy way to do that is to run the Windows App SDK runtime installer.
Instructions
You can follow this tutorial using a C# or a C++ project.
Note
The dynamic dependencies and bootstrapper APIs fail when called by an elevated process. As a result, Visual Studio shouldn't be launched elevated. See Dynamic Dependencies doesn't support elevation #567 for more details.
Follow these instructions to configure a C# WinUI project that's either packaged with external location, or unpackaged.
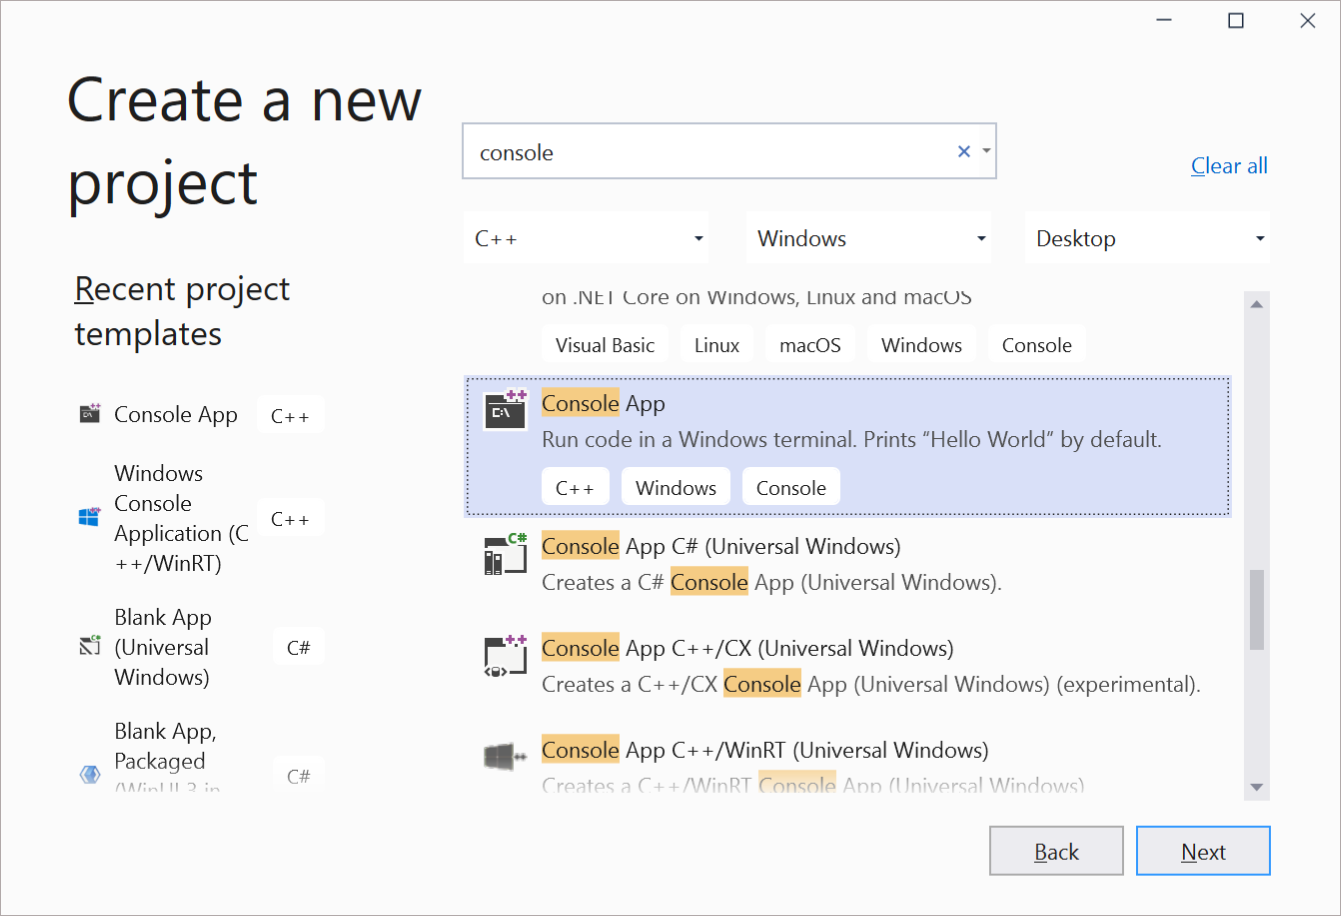
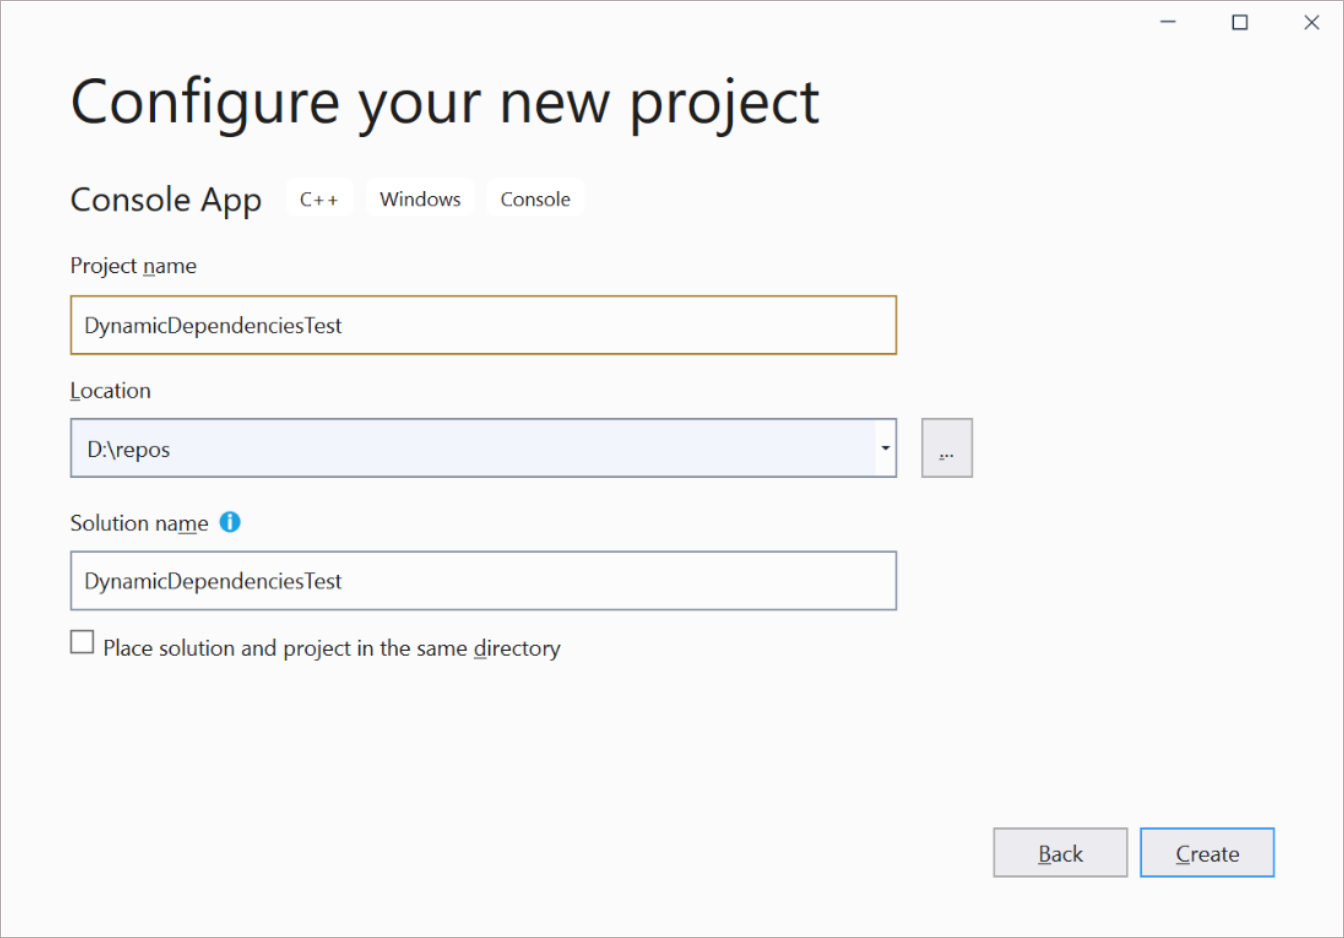
In Visual Studio, create a new C# Console App project. Name the project DynamicDependenciesTest. After you create the project, you should have a "Hello, World!" C# console app.
Next, configure your project.
- In Solution Explorer, right-click your project and choose Edit Project File.
- Replace the value of the TargetFramework element with a Target Framework Moniker. For example, use the following if your app targets Windows 10, version 2004.
<TargetFramework>net8.0-windows10.0.19041.0</TargetFramework>- Save and close the project file.
Change the platform for your solution to x64. The default value in a .NET project is AnyCPU, but WinUI doesn't support that platform.
- Select Build > Configuration Manager.
- Select the drop-down under Active solution platform and click New to open the New Solution Platform dialog box.
- In the drop-down under Type or select the new platform, select x64.
- Click OK to close the New Solution Platform dialog box.
- In Configuration Manager, click Close.
Install the Windows App SDK NuGet package in your project.
- In Solution Explorer, right-click the Dependencies node and choose Manage Nuget Packages.
- In the NuGet Package Manager window, select the Browse tab, and install the Microsoft.WindowsAppSDK package.
You're now ready to use the bootstrapper API (see Use the Windows App SDK runtime for apps packaged with external location or unpackaged) to dynamically take a dependency on the Windows App SDK framework package. This enables you to use the Windows App SDK APIs in your app.
Open the Program.cs code file, and replace the default code with the following code to call the Bootstrap.Initialize method to initialize the bootstrapper. This code defines what version of the Windows App SDK the app is dependent upon when initializing the bootstrapper.
Important
You'll need to edit the code below to suit your specific configuration. See the descriptions of the parameters of the Bootstrap.Initialize method so that you can specify one of the versions of the Windows App SDK that you have installed.
using System;
using Microsoft.Windows.ApplicationModel.DynamicDependency;

namespace DynamicDependenciesTest
{
    class Program
    {
        static void Main(string[] args)
        {
            Bootstrap.Initialize(0x00010002);
            Console.WriteLine("Hello, World!");

            // Release the DDLM and clean up.
            Bootstrap.Shutdown();
        }
    }
}
At its root, the bootstrapper API is a native C/C++ API that enables you to use the Windows App SDK APIs in your app. But in a .NET app that uses the Windows App SDK 1.0 or later, you can use the .NET wrapper for the bootstrapper API. That wrapper provides an easier way of calling the bootstrapper API in a .NET app than calling the native C/C++ functions directly. The previous code example calls the static Initialize and Shutdown methods of the Bootstrap class in the .NET wrapper for the bootstrapper API.
To demonstrate that the Windows App SDK runtime components were loaded properly, add some code that uses the ResourceManager class in the Windows App SDK to load a string resource.
Add a new Resources File (.resw) to your project (leave the default name).
With the resources file open in the editor, create a new string resource with the following properties.
- Name: Message
- Value: Hello, resources!
Save the resources file.
Open the Program.cs code file, and replace the
Console.WriteLine("Hello, World!");line with the following code.
// Create a resource manager using the resource index generated during build. var manager = new Microsoft.Windows.ApplicationModel.Resources.ResourceManager("DynamicDependenciesTest.pri"); // Look up a string in the .resw file using its name. Console.WriteLine(manager.MainResourceMap.GetValue("Resources/Message").ValueAsString);- Click Start Without Debugging (or Start Debugging) to build and run your app. You should see the string
Hello, resources!successfully displayed.
If your project is WPF
For a Windows Presentation Foundation (WPF) app, see Use the Windows App SDK in a WPF app.
Related topics
Collaborate with us on GitHub
The source for this content can be found on GitHub, where you can also create and review issues and pull requests. For more information, see our contributor guide.

Windows developer