Share via


使用 Azure 入口網站,為受控磁碟啟用待用雙重加密

適用於:✔️ Linux VM ✔️ Windows VM ✔️

Azure 磁碟儲存體支援受控磁碟的待用雙重加密。 如需有關待用雙重加密和其他受控磁碟加密類型的概念資訊,請參閱磁碟加密文章的待用雙重加密一節。

限制

Ultra 磁碟或進階 SSD v2 磁碟目前不支援待用雙重加密。

開始使用

  1. 登入 Azure 入口網站

  2. 搜尋 [磁碟加密集] 並加以選取。

    Screenshot of the main Azure portal, disk encryption sets is highlighted in the search bar.

  3. 選取 + 建立

  4. 選取其中一個支援區域。

  5. 對於加密類型,選取 [使用平台管理和客戶自控金鑰進行雙重加密]

    注意

    一旦您建立具有特定加密類型的磁碟加密集,就無法加以變更。 如果您想要使用不同的加密類型,則必須建立新的磁碟加密集。

  6. 填寫其餘資訊。

    Screenshot of the disk encryption set creation blade, regions and double encryption with platform-managed and customer-managed keys are highlighted.

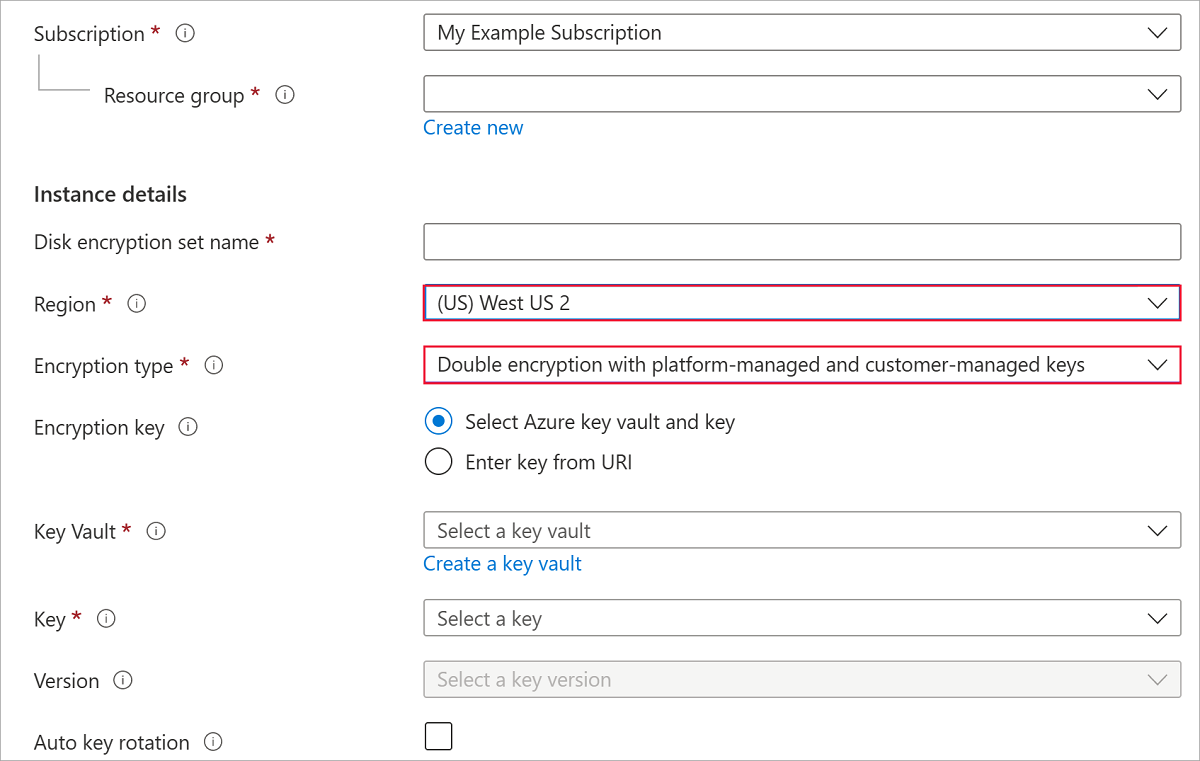
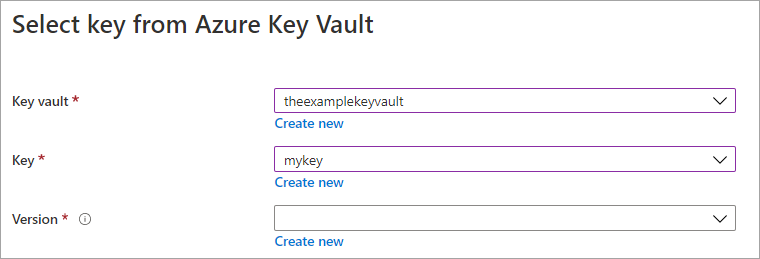
  7. 選取 Azure Key Vault 和金鑰,或視需要建立新的金鑰。

    注意

    如果建立 Key Vault 執行個體,您必須啟用虛刪除和清除保護。 使用金鑰保存庫加密受控磁碟時,這些設定是必要的,並可防止因為意外刪除而遺失資料。

    Screenshot of the Key Vault creation blade.

  8. 選取 建立

  9. 瀏覽至您所建立的磁碟加密集,然後選取顯示的錯誤。 這會設定磁碟加密集,使其發揮作用。

    Screenshot of the disk encryption set displayed error, the error text is: To associate a disk, image, or snapshot with this disk encryption set, you must grant permissions to the key vault.

    應該會彈出通知並成功。 這樣做可讓您搭配金鑰保存庫使用磁碟加密集。

    Screenshot of successful permission and role assignment for your key vault.

  10. 瀏覽至磁碟。

  11. 選取 [加密]

  12. 針對 [金鑰管理],請在 [平台代管和客戶自控金鑰] 下方選取其中一個金鑰。

  13. 選取 [儲存]

    Screenshot of the encryption blade for your managed disk, the aforementioned encryption type is highlighted.

您現在已在受控磁碟上啟用待用雙重加密。

下一步