你当前正在访问 Microsoft Azure Global Edition 技术文档网站。 如果需要访问由世纪互联运营的 Microsoft Azure 中国技术文档网站,请访问 https://docs.azure.cn。
快速入门:使用 Azure CLI 部署适用于 AKS 的 Azure Linux 容器主机群集
通过使用 Azure CLI 部署适用于 AKS 的 Azure Linux 容器主机群集,开始使用 Azure Linux 容器主机。 安装必备组件后,将创建资源组、创建 AKS 群集、连接到群集,并在群集中运行示例多容器应用程序。
先决条件
-
如果没有 Azure 订阅,请在开始之前创建一个 Azure 免费帐户。
在 Azure Cloud Shell 中使用 Bash 环境。 有关详细信息,请参阅 Azure Cloud Shell 快速入门 - Bash。

如需在本地运行 CLI 参考命令,请安装 Azure CLI。 如果在 Windows 或 macOS 上运行,请考虑在 Docker 容器中运行 Azure CLI。 有关详细信息,请参阅如何在 Docker 容器中运行 Azure CLI。
如果使用的是本地安装,请使用 az login 命令登录到 Azure CLI。 若要完成身份验证过程,请遵循终端中显示的步骤。 有关其他登录选项,请参阅使用 Azure CLI 登录。
出现提示时,请在首次使用时安装 Azure CLI 扩展。 有关扩展详细信息,请参阅使用 Azure CLI 的扩展。
运行 az version 以查找安装的版本和依赖库。 若要升级到最新版本,请运行 az upgrade。
创建资源组
Azure 资源组是一个逻辑组,用于部署和管理 Azure 资源。 创建资源组时,需要指定位置。 此位置是:
- 资源组元数据的存储位置。
- 在创建资源时未指定另一个区域时,资源在 Azure 中的运行位置。
若要在 eastus 区域中创建名为 testAzureLinuxResourceGroup 的资源组,请执行以下步骤:
使用 az group create 命令创建资源组。
az group create --name testAzureLinuxReourceGroup --location eastus
以下输出类似于已成功创建资源组:
{
  "id": "/subscriptions/<guid>/resourceGroups/testAzureLinuxResourceGroup",
  "location": "eastus",
  "managedBy": null,
  "name": "testAzureLinuxResourceGroup",
  "properties": {
    "provisioningState": "Succeeded"
  },
  "tags": null
}
备注
上述示例使用 eastus,但 Azure Linux 容器主机群集在所有区域中都可用。
创建 Azure Linux 容器主机群集
使用 az aks create 命令和 --os-sku 参数创建 AKS 群集,以便使用 Azure Linux 映像预配 AKS 群集。 以下示例使用一个节点创建名为 testAzureLinuxCluster 的 Azure Linux 群集:
az aks create --name testAzureLinuxCluster --resource-group testAzureLinuxResourceGroup --os-sku AzureLinux
片刻之后,该命令将会完成,并返回有关群集的 JSON 格式信息。
连接到群集
若要管理 Kubernetes 群集,请使用 Kubernetes 命令行客户端 kubectl。
- 使用
az aks get-credentials命令将kubectl配置为连接到你的 Kubernetes 群集。
az aks get-credentials --resource-group testAzureLinuxResourceGroup --name testAzureLinuxCluster
- 使用 kubectl get 命令验证与群集之间的连接。 该命令返回节点列表。
kubectl get pods --all-namespaces
部署应用程序
Kubernetes 清单文件定义群集的所需状态,例如,要运行哪些容器映像。
在本快速入门中,你将使用清单来创建运行 Azure Vote 应用程序所需的所有对象。 此清单包含两个 Kubernetes 部署:
- 示例 Azure Vote Python 应用程序。
- 一个 Redis 实例。
此外,还会创建两个 Kubernetes 服务:
- Redis 实例的内部服务。
- 用于通过 Internet 访问 Azure Vote 应用程序的外部服务。
创建名为
azure-vote.yaml的文件,并将其复制到以下清单中。- 如果使用 Azure Cloud Shell,则可以使用
code、vi或nano创建此文件,就像在虚拟或物理系统中操作一样。
apiVersion: apps/v1
kind: Deployment
metadata:
  name: azure-vote-back
spec:
  replicas: 1
  selector:
    matchLabels:
      app: azure-vote-back
  template:
    metadata:
      labels:
        app: azure-vote-back
    spec:
      nodeSelector:
        "kubernetes.io/os": linux
      containers:
      - name: azure-vote-back
        image: mcr.microsoft.com/oss/bitnami/redis:6.0.8
        env:
        - name: ALLOW_EMPTY_PASSWORD
          value: "yes"
        resources:
          requests:
            cpu: 100m
            memory: 128Mi
          limits:
            cpu: 250m
            memory: 256Mi
        ports:
        - containerPort: 6379
          name: redis
---
apiVersion: v1
kind: Service
metadata:
  name: azure-vote-back
spec:
  ports:
  - port: 6379
  selector:
    app: azure-vote-back
---
apiVersion: apps/v1
kind: Deployment
metadata:
  name: azure-vote-front
spec:
  replicas: 1
  selector:
    matchLabels:
      app: azure-vote-front
  template:
    metadata:
      labels:
        app: azure-vote-front
    spec:
      nodeSelector:
        "kubernetes.io/os": linux
      containers:
      - name: azure-vote-front
        image: mcr.microsoft.com/azuredocs/azure-vote-front:v1
        resources:
          requests:
            cpu: 100m
            memory: 128Mi
          limits:
            cpu: 250m
            memory: 256Mi
        ports:
        - containerPort: 80
        env:
        - name: REDIS
          value: "azure-vote-back"
---
apiVersion: v1
kind: Service
metadata:
  name: azure-vote-front
spec:
  type: LoadBalancer
  ports:
  - port: 80
  selector:
    app: azure-vote-front
有关 YAML 清单文件的明细,请参阅部署和 YAML 清单。
- 如果使用 Azure Cloud Shell,则可以使用
使用 kubectl apply 命令部署应用程序,并指定 YAML 清单的名称:
kubectl apply -f azure-vote.yaml以下示例类似于显示已成功创建部署和服务的输出:
deployment "azure-vote-back" created
service "azure-vote-back" created
deployment "azure-vote-front" created
service "azure-vote-front" created
测试应用程序
应用程序运行时,Kubernetes 服务将向 Internet 公开应用程序前端。 此过程可能需要几分钟才能完成。
使用带有 --watch 参数的 kubectl get service 命令来监视进度。
kubectl get service azure-vote-front --watch
azure-vote-front 服务的 EXTERNAL-IP 输出最初显示为 pending。
NAME               TYPE           CLUSTER-IP   EXTERNAL-IP   PORT(S)        AGE
azure-vote-front   LoadBalancer   10.0.37.27   <pending>     80:30572/TCP   6s
在 EXTERNAL-IP 地址从 pending 更改为实际公共 IP 地址后,请使用 CTRL-C 来停止 kubectl 监视进程。 以下示例输出显示向服务分配了有效的公共 IP 地址:
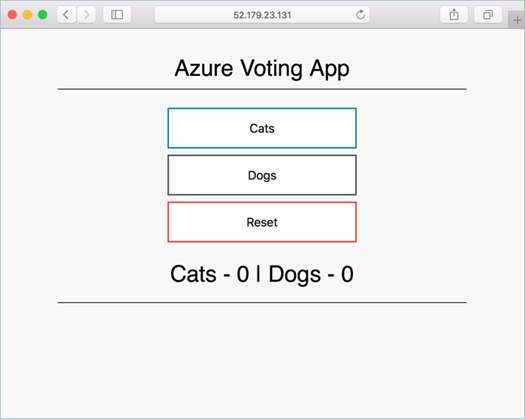
azure-vote-front LoadBalancer 10.0.37.27 52.179.23.131 80:30572/TCP 2m
若要查看 Azure Vote 应用的实际效果,请打开 Web 浏览器并转到服务的外部 IP 地址。
删除群集
如果不打算继续学习以下教程,为避免产生 Azure 费用,请清理任何不必要的资源。 使用 az group delete 命令移除资源组和所有相关资源。
az group delete --name testAzureLinuxCluster --yes --no-wait
后续步骤
在本快速入门中,你部署了 Azure Linux 容器主机群集。 若要详细了解 Azure Linux 容器主机,并演练完整的群集部署和管理示例,请继续学习 Azure Linux 容器主机教程。
反馈
即将发布:在整个 2024 年,我们将逐步淘汰作为内容反馈机制的“GitHub 问题”,并将其取代为新的反馈系统。 有关详细信息,请参阅:https://aka.ms/ContentUserFeedback。
提交和查看相关反馈