Email Phishing Protection Guide - Part 6: Deploy Outlook Add-in for Reporting Suspicious Emails
The Email Phishing Protection Guide is a multi-part blog series written to walk you through the setup of many security focused features you may already own in Microsoft Windows, Microsoft Office 365, and Microsoft Azure. By implementing some or all of these items, an organization will increase their security posture against phishing email attacks designed to steal user identities. This guide is written for system administrators with skills ranging from beginner to expert.
Email Phishing Protection Guide Index: Introduction: Email Phishing Protection Guide - Enhancing Your Organization's Security Posture Part 1: Customize the Office 365 Logon Portal Part 2: Training Users with the Office 365 Attack Simulator Part 3: Deploy Multi Factor Authentication (MFA) Part 4: Deploy Windows Hello Part 5: Define Country and Region Logon Restrictions for Office 365 and Azure Services Part 6: Deploy Outlook Plug-in to Report Suspicious Emails Part 7: Deploy ATP Anti-Phishing Policies Part 8: Deploy ATP Safe Link Policies Part 9: Deploy ATP Safe Attachment Policies Part 10: Deploy and Enforce Smart Screen for Microsoft Edge, Microsoft Internet Explorer and Google Chrome Part 11: Monitor Phishing and SPAM Attacks in Office 365 Part 12: Discover Who is Attacking Your Office 365 User Identities Part 13: Update Your User Identity Password Strategy Part 14: Prevent Brute Force and Spray Attacks in Office 365 Part 15: Implement the Microsoft Azure AD Password Protection Service (for On-Premises too!) Part 16: Disable Office 365 Legacy Email Authentication Protocols Part 17: Control Application Consent Registrations in Microsoft Office 365 and Microsoft Azure Part 18: Increase Security with Microsoft Secure Score Part 19: Email Phishing Protection Security Checklist Part 20: Recommended Security and Anti-Phishing Training from Microsoft Ignite 2018
Part 6: Deploy Outlook Plug-in to Report Suspicious Emails
This blog series highlights and explains how to setup the many features in Microsoft Office 365 to protect your users and environment from the constant onslaught of identity email phishing attacks. This is part six of the blog series where I review an option that enables users to help protect the environment. By providing a quick and easy way for users to report SPAM and malicious phishing emails they receive and identify, your users can become your best allies in security. By using the Outlook Add-In for reporting unsolicited or malicious emails your users can help enhance the filtering capabilities of the Office 365 systems. Thus, adding strength to another security lock to keep your organization safe.
The SPAM filtration along with the many other security services in Office 365 are unmatched in the industry, offering users the best protection available. But, from time to time a message may slip through that should have been identified as malicious, SPAM, etc. and blocked. As a system administrator, the question becomes how do you enable your users to easily report these emails to the Office 365 analysis services?
This blog describes how you can publish an Outlook add-in (no cost) to the Outlook ribbon for users to simply highlight the email, classify it as Junk, SPAM, or a phishing email, and submit. It doesn't get any easier than this! I recommend this add-in be installed with Outlook to each user along with how and why to use it. By submitting emails like this for analysis, the filtration system learns about new attacks and becomes much better to protect all of us. Below are instructions about how to install the add-in on a user workstation to test with, how to administratively install it across all accounts in your Office 365 tenant, as well as how to then monitor for Junk and Phishing messages that have been submitted.
Although this blog is focused on the Outlook Add-in for reporting SPAM, other useful Add-ins should also be considered for installation such as Translator and Weather. There are hundreds of additional add-ins available for Outlook to review and choose from that may be perfect to enhance the security and productivity for your organization!
Additional information about how to submit SPAM, non-spam, and phishing scam messages for analysis are available in this Link.
Install the Microsoft Junk E-Mail Reporting Add-in for Microsoft Outlook (Single Use/Testing):
Option One: Download and Install
- Download the Add-In from this site
- Choose the correct version to download (32-bit or 64-bit)
- Save the download and install it using a few quick steps in the wizard
Option Two: Install from Microsoft Office Store
- With Microsoft Outlook open, look in the ribbon bar at the top for an option called Store in the Add-ins category.

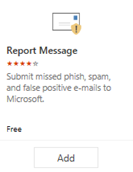
- Click on the Store icon. In the Search add-ins area, enter report message and press enter.
- Locate the Report Message add-in and click Add.
- This should take only a few seconds to install. When complete, you may click on the option to Get Started for a brief tutorial in how to use it, or click X to close this area.
Using the Outlook Add-in:
- The new Report Message Add-in will now be visible in the Outlook ribbon bar to begin using no matter what method of installation you chose above.

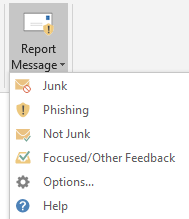
- Locate a SPAM message in your Inbox, highlight it, then click on the Report Message drop down option to select if it is Junk or a Phishing message.
- After the Junk or Phishing classification is chosen, you will see the message below indicating that the email submission is processing.

- Within a few seconds the email will be submitted and removed automatically from the Inbox.
- You may receive a notice with a definition of what Phishing email is and asking you if you "want to send a copy of this message to Microsoft to help the research and improvement of email protection technologies? " Click on Report to submit.
- To prevent the notice from appearing each time the user submits a SPAM message, the user can click the Report Message Add-in drop down option and select Options.
- Within the Options area, the user can select to Automatically send reports that will prevent a prompt for each submission.
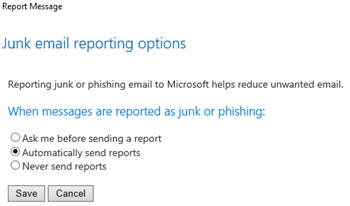
- Select Save to save the changes and exit.
Deploy to all Outlook users: How to administratively deploy the Report Message Add-in to all users
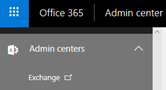
- Logon to the Office 365 Administrator portal at portal.office.com
- Under Admin Centers, open Exchange.
- In the Exchange Admin Center, select Organization on the left.
- Then, choose Add-ins.
- In the Add-ins area, you will see several pre-defined items already listed.
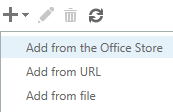
- To choose a new Add-in, click the + icon.
- Then select to Add from the Office Store
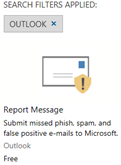
- In the new website that was just opened, the view is focused on only Add-ins for Outlook. In the upper right, locate the Search the Office Store area. Enter Report Message and press Enter.
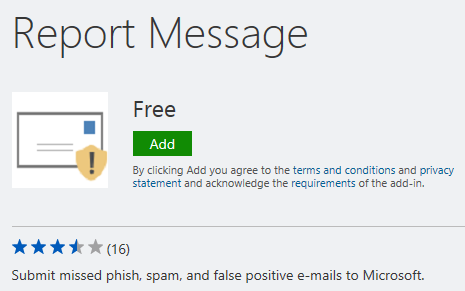
- The Report Message app is now displayed. Click on it to view the details.
- In the details of the Add-in, select Add to include it as an Administratively assigned Add-in for your tenant users.
- Confirm that you want to Add the Add-in by clicking Yes on the notice.
- Once you receive the message that You've added an Add-in for Outlook, open the tab with the Exchange Admin Add-ins area displayed you were just on.
- Select the Refresh icon (highlighted below) to verify that the Report Message add-in is now displayed.
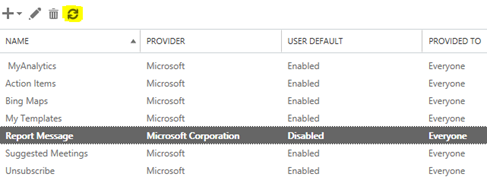
- You will now see that Report Message add-in is listed. But wait! It is Disabled by default. Let's correct that now so users will be able to see and begin using it.
- In the Add-in list, double click on the Report Message area to open the detailed configuration.
- Select the option to be Optional, enabled by default. Click Save to complete this step.
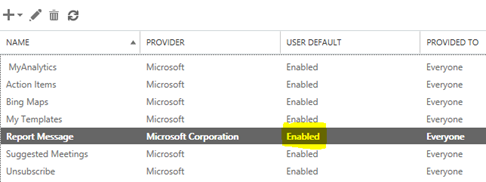
- The list of Add-ins will now show the Report Message Add-in displayed as Enabled under the User Default column.
- Once complete, the Report Message Add-in (or any other Add-in) may take a few hours to appear. In my test, it took about two hours for my Outlook client to show the Report Message Add-in. (deployed at 2:31pm 4/2)
Review User Reported Junk and Phishing Email
As a network administrator you always want to keep your finger on the pulse of your organization to understand just how users are utilizing the services. Now that you have enabled users to report their own junk and phishing emails, you will want to make sure they are using this option. Use the option below to access this area.
- Logon to https://portal.office.com
- Open the Security and Compliance dashboard
- Under Threat Management (left column area), choose the Dashboard option
- In this area, look for the section called User-Reported Messages. Click on it to see the number of messages submitted per day, who is submitting, the email subject, sender, sender IP and type of message reported (junk or phishing)
Communicate To Users About Self-Reporting
With this Outlook Add-in now enabled, be sure to communicate its existence and capabilities to your Outlook users. With a few simple steps in the instructions (and screen captures), your users will be able to report any Junk and Phishing emails they receive. The more SPAM, malicious, and phishing email messages submitted, the better the services become for everyone!
Conclusion: In this blog I reviewed the Outlook Add-in called Report Message that is available in all Office 365 organizations. We walked through several options to install it as a single instance as well as for all users in the organizations. Also included are steps about how to submit these unwanted emails and then monitor the submissions in the reporting area of the Office 365 portal.