Microsoft Bookings: How to Customize a Microsoft Bookings Site
Microsoft Bookings is an incredible new scheduling tool available with certain plans for Office 365. Simply put, this tool was built for businesses who depend on scheduling appointments with their customers. Examples of where this tool is a perfect fit is for an accounting office, a hair stylist, a dog groomer, an auto mechanic shop, a dentist office, etc. More information about the tool and additional applications is available here.
This article is part of a blog series created to help anyone setup a Microsoft Bookings company site. I have created these to offer step by step setup guidance complete with screen pictures of nearly every step. An index of these blogs is below:
Microsoft Bookings Blog Series: How to Setup A Microsoft Bookings Site
Microsoft Bookings Blog Series: Customize Your Site (this blog)
Many more to come….
In this blog, I show the steps to customize your Microsoft Bookings site. In a second section, I show steps to create and edit each of the services your company offers. When setup, customers can sign up for a service you define, during business hours you define, and receive multiple email reminders that you can setup.
How to Customize Your Microsoft Bookings Information
Once the Microsoft Bookings site is created, it is time to customize it for your business. Below is a step by step guide with examples to follow.
With your Microsoft Office 365 tenant now setup, you will need to logon to the administrative portal at https://portal.office.com. The administrator name and password is the unique Office 365 tenant you chose at the initial setup of Office 365:
Name: accountname@tenantname.onmicrosoft.com
Password: the password you chose for this administrator account
Once logged into the Office 365 portal, click on the application "waffle" area on the upper left screen.

In the applications area, locate the icon that looks like the one below called Bookings. Click on it to open the Microsoft Bookings.

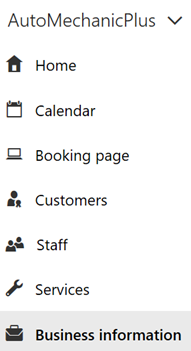
Let's begin by clicking on "Business Information"
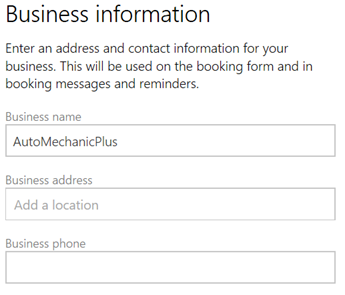
In Business Information, you can customize the following fields to get started:
- Business Name: If you need to change your business name, this is the location to do so.
- Business Address: Enter your business address
- Business Phone Number: Enter your business main telephone number
- Send Customer Replies: If you would like a different email address defined, change it here.
- Business Website: Enter the www.businesswebsite.com address of your company
- Currency: Change your local currency here
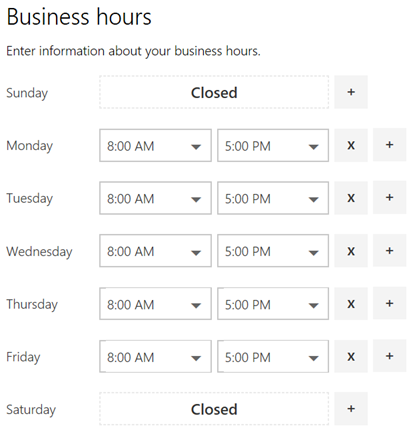
Adjust your Business Hours using this area. All hours are in your locally defined time zone.
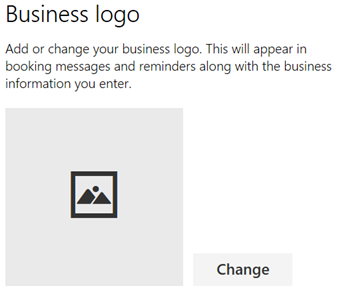
Give your business its own look by using your custom logo. One the bottom of the business information screen is an option to upload an image file.
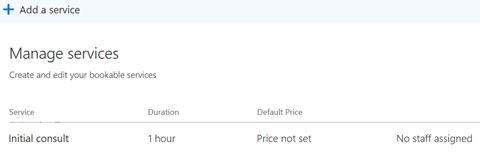
Define Business Services:
- Click on the Services area in the left side

2. Let's begin by editing the Initial Consult service that was automatically created. Click on the Initial Consult service to edit the details.
3. With the Initial Consult opened, let's turn this into our first service option for our Auto Mechanic Shop. Let's use a simple example of setting up our first service to be an Oil Change. This service will take 30 minutes to perform.
Change the Service Name to be: Oil Change
Edit the Description to be: This is a full oil change that includes an oil filter change. We offer regular oil, a synthetic blend, or full synthetic oil change option. Oil prices depend on type of oil requested.
Change the Default Location to read Our Office Location. Or, you can enter you own address. Notice when you enter Our Office location or your own street address that a map starts to appear. This is a great feature that will show customers your exact location.

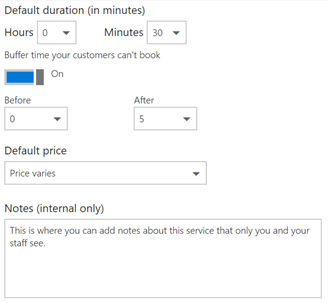
4. Let's continue to make changes to the Oil Change service as we scroll further down the screen.
- Leave Hours at 0 and change Minutes to be 30.
- Select the option to enable the Buffer time your customers can't book. We are going to enable this option because it takes us about five minutes to clean up our oil changing area after each oil change.
- Define the buffer time to be After 5 minutes.
- Set the default price to be Price Varies (depending on the type of oil requested)
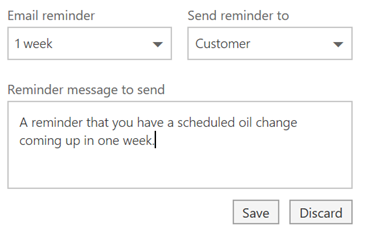
5. Now let's add an option to send your customer a reminder about their upcoming service. This is a great option to use to help remind your customers to come in for their appointment.
- Define the Email Reminder to be one week
- Send reminder to Customer
- Change the Reminder message to send to be: A reminder that you have a scheduled oil change coming up in one week.
- Click Save when done
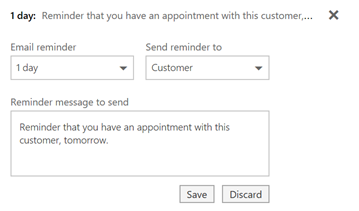
6. Let's now add another email reminder. Why not add another reminder the day before the appointment! Click on the option to add another email reminder.

- Define the Email Reminder to be one day
- Send reminder to Customer
- Keep the default Reminder message to send
- Click Save when done
Note: Additional reminders can be set for a variety of times to notify your customers of their upcoming appointments.
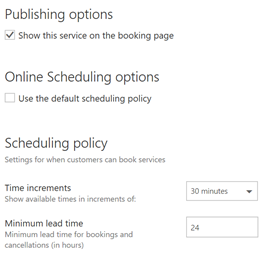
7. You can now define some additional settings of the service. By default the two checkboxes in the screen capture below are checked to enable both options. These both take default policy settings and apply them to this service. Or, you can uncheck the "Use the default scheduling policy" and then adjust options just for this service.
8. With the settings now defined for the Oil Change service, click on Save at the top of the options list.
9. Notice on the left side of the Oil Change service that you can assign specific staff personnel to this service. Choose your name as the Staff person assigned to perform this service in this example. In our case of the Auto Mechanic shop example, let's say this is for a large shop and you have a team of newer/learning employees assigned to do oil changes. In this field you can assign them to this specific task. This is important because as you get further into scheduling services and staff members, you can start running reports on popular/nonpopular services and who is available for other tasks. This data is very easy to research and will help you further refine your business and staff.
Conclusion:
In this blog, I have shown you how to define your business hours, upload a company logo, setup/define your company's services that a customer can schedule, define your company location, and setup reminder emails to send to customers of upcoming appointments. As you can see, Microsoft Bookings is an incredibly flexible service.