Installing Nano Server on a MinnowBoard Max (at scale)
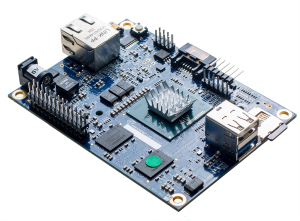 The MinnowBoard MAX is an open hardware embedded board with a relatively powerful 64-bit Intel Atom E38XX series System on a Chip at its core. This board has an enormous range of capabilities for hardware and software developers, it makes it a great platform for Nano Server in IoT.
Here I will deploy the Nano Server installation option of Windows Server 2016 on an embedded, non-removable SD Card. This solution offers the similar base functionality and capabilities of SATA, SAS, or NVMe – while being cost effective and offering adequate performance.
The PowerShell commands below can be integrated into a script and placed in a Windows PE to automate the deployment of Nano Server, either repeatedly on the same device or at scale in an unlimited number of devices. The same steps apply when deploying on traditional servers.
For more details about the MinnowBoard visit https://wiki.minnowboard.org
What you will need
Hardware list
MinnowBoard Max, 2Gb Memory version preferred
5V power supply
SD Card, UHS Speed Class I or II preferred
Peripherals: Micro HDMI cable and Monitor, USB Keyboard, Network Cable
Optional: USB Flash Drive, 8Gb, USB 3.0 or a Windows Deployment Services Server to boot a PowerShell enabled Windows PE
Software list
MinnowBoard Max latest x64 firmware
https://firmware.intel.com/projects/minnowboard-max, Visit https://wiki.minnowboard.org/UEFI for how to navigate the firmware
Windows Server 2016 ISO file (latest build available)
https://www.microsoft.com/en-us/evalcenter/evaluate-windows-server-technical-preview
Windows 10 ADK
https://go.microsoft.com/fwlink/p/?LinkId=526740
Intel Drivers for MinnowBoard Max, download each of the Driver packages and extract the CAB files to individual folders
https://catalog.update.microsoft.com/v7/site/ScopedViewInline.aspx?updateid=b454eb7e-0105-408d-a83f-75d450d5797a https://catalog.update.microsoft.com/v7/site/ScopedViewInline.aspx?updateid=e5234c03-6635-4171-bd63-8ab461bd1e2a https://catalog.update.microsoft.com/v7/site/ScopedViewInline.aspx?updateid=b54a9960-677e-49eb-b6dc-d36e0a32b14b https://catalog.update.microsoft.com/v7/site/ScopedViewInline.aspx?updateid=e1d3835c-4fe4-4ce7-9d11-d6822bfafefa https://catalog.update.microsoft.com/v7/site/ScopedViewInline.aspx?updateid=63b26746-3daf-45f5-8611-4bcb3b9fe17e (Opt. A/V)
you can also get the drivers from Intel, make sure the files are not in MSI format.
Custom Nano Server answer file, create an unattend.xml file on the nanoserver folder with the following XML content
 <?xml version='1.0' encoding='utf-8'?>
<unattend xmlns="urn:schemas-microsoft-com:unattend" xmlns:wcm="https://schemas.microsoft.com/WMIConfig/2002/State" xmlns:xsi="https://www.w3.org/2001/XMLSchema-instance">
  <settings pass="offlineServicing">
    <component name="Microsoft-Windows-UnattendedJoin" processorArchitecture="amd64" publicKeyToken="31bf3856ad364e35" language="neutral" versionScope="nonSxS">
        <OfflineIdentification>
           <Provisioning>
             <AccountData></AccountData>
           </Provisioning>
         </OfflineIdentification>
    </component>
  </settings>
  <settings pass="oobeSystem">
    <component name="Microsoft-Windows-Shell-Setup" processorArchitecture="amd64" publicKeyToken="31bf3856ad364e35" language="neutral" versionScope="nonSxS">
        <UserAccounts>
          <AdministratorPassword>
              <Value>Pass@word1</Value>
              <PlainText>True</PlainText>
          </AdministratorPassword>
        </UserAccounts>
        <TimeZone>Pacific Standard Time</TimeZone>
    </component>
  </settings>
</unattend>
Environment
To complete the steps described here, you should be familiar with SMB File Server, Active Directory, DHCP, Windows Deployment Services, Windows Pre-Installation Environment and Powershell.
In my example here I will be joining the Nano Servers to Active Directory domain, you will need one, a DNS and DHCP.
The actual installation will be done from a Windows PE, you can either use a USB flash drive or use a Windows Deployment Services server to boot WinPE over PXE. This WinPE will need to have PowerShell enabled, follow the steps here or any similar guide you prefer. Configure the WDS and load this WinPE into the boot images.
Create a shared folder on a Server where you will have the files. In my example, I will use the WDS server with a SMB share (DeployShare) with Nanoserver, Blobs and Drivers folders. Copy the content of the NanoServer folder from the Windows Server 2016 ISO, place the extracted drivers in the drivers folder, the Blobs folders will be used to place the generated AD blobs.
Update the MinnowBoard Max Firmware and configure
Connect the MinnowBoard to the monitor, the USB Keyboard to the upper white USB port, the Ethernet cable and as last the power connector.
To boot and run Nano Server we need a 64-bit UEFI firmware. It is highly probable that your MinnowBoard has a 32-bit UEFI firmware. Follow the instructions on the Wiki to identify which one is installed in you board. You will need to know it to run the correct version of the firmware update utility.
To update the firmware, follow the instructions on the Intel MinnowBoard MAX Binary Usage Release Notes.
Power off the board and insert the SD Card. The card will need to be set as non-removable for Windows to be able to boot from it. For that, power on the board and press F2 during POST and in the menu select (type exit if you got to the UEFI shell)
Device manager >> System Setup >> South Cluster Configuration >> LPSS & SCC Configuration !! ACPI Reporting MMC/SD Media As <Non-Removable> !!
Setup any other parameter you may need, like Intel VT. On boot manager set the first boot options to EFI Misc Device and the second to PXE over IPv4. Save the configuration and restart, the MinnowBoard should be booting to WinPE from the WDS Server.
Install Nano Server
The first step once WinPE start is to define some parameters that I will use throughout the deployment process.
I will need an account with permissions to create new AD computer accounts and also access the file share where I have my files. I will also define a server that I will use to generate the AD blob for my Nano server machine account, what packages to install on my Nano Server and the network location where I can find those files.
 $user = 'administrator'
$domain = 'ws2012r2domain'
$password = ConvertTo-SecureString -String 'Pass@word1' -AsPlainText -Force
$cred = New-Object -TypeName System.Management.Automation.PSCredential -ArgumentList $domain'\'$user, $password
$BlobSvr = 'ws2016wds'
$DShare = '\\'+$BlobSvr+'\DeployShare'
$Packages = 'NanoServer-Compute','NanoServer-DCB','NanoServer-Defender','NanoServer-DSC','NanoServer-FailoverCluster','NanoServer-Host','NanoServer-OEM-Drivers','NanoServer-SecureStartup','NanoServer-Storage'
### other Packages ###'NanoServer-Containers','NanoServer-DNS','NanoServer-Guest','NanoServer-IIS','NanoServer-SCVMM','NanoServer-ShieldedVM','NanoServer-SoftwareInventoryLogging'
Specific to my hardware configuration, my network takes a few seconds to come online. I added this loop to wait for the network to be ready by testing the connection against my WDS server.
 while ((Test-Connection -ComputerName $BlobSvr -Count 1 -Quiet) -ne 'true')
    {
    Write-Host "Waiting for network ..."
    sleep -Seconds 2
    }
Next I map a network drive to the WDS server, It will not be using the mapped drive, but it will help maintain an authenticated SMB session with the server.
New-PSDrive -Name "Y" -Root $DShare -PSProvider "FileSystem" -Credential $cred
Now is were the fun part begins. We will need a name for the Nano server to provision the Active Directory account and create a blob used to join the server to the Domain during first boot. In my example I will be using the NIC MAC address (for being unique) and will add a prefix to identify it as the Host OS.
The next set of commands read the MAC address and manipulate the string to a valid ComputerName and then connect to the domain joined WDS server to generate the AD blob. The AD blob is saved to a folder on the share.
 [string]$mac = (Get-WmiObject -Class win32_networkadapter).macaddress
$Computername = "HST" + $mac.TrimStart().Replace(":","").Substring(0,12)

$DJoin = "C:\windows\system32\djoin.exe /provision /reuse /domain $domain /machine $Computername /savefile $DShare\blobs\$Computername.blob"
$GetBlob = Invoke-WmiMethod -Class win32_process -Name create -ArgumentList $DJoin -ComputerName $BlobSvr -Credential $cred -Impersonation Delegate -Authority kerberos:$domain'\'$BlobSvr
It is good to perform these first, if it fails there is no point in continuing.
Next step is to identify the SD Card disk, clean it and create the system partitions
 $PDisk = Get-PhysicalDisk |? BusType -EQ SD |Get-Disk
$PDisk | Clear-Disk -RemoveData -RemoveOEM -Confirm:$false
$PDisk | Initialize-Disk -PartitionStyle GPT

New-Partition -DiskNumber $PDisk.Number -Size 128Mb -DriveLetter S -GptType "{ebd0a0a2-b9e5-4433-87c0-68b6b72699c7}" | Format-Volume -FileSystem FAT32 -NewFileSystemLabel System
New-Partition -DiskNumber $PDisk.Number -UseMaximumSize -DriveLetter W -GptType "{ebd0a0a2-b9e5-4433-87c0-68b6b72699c7}" | Format-Volume -FileSystem NTFS -NewFileSystemLabel Windows
With the partitions created it is time to apply the base Nano image and the Nano packages. WIM index 1 is Standard Edition and index 2 datacenter, the packages are identified as an array of strings defined earlier, modify these as needed. Other Windows features can also be enabled offline at this point.
 Expand-WindowsImage -ImagePath "$DShare\NanoServer\NanoServer.wim" -Index 2 -ApplyPath W:\

ForEach($Package in $Packages)
  {
   $Cabs = Get-ChildItem "$DShare\NanoServer\Packages\" -Recurse -Include *$Package*.cab | Sort-Object -Descending
   ForEach ($Cab in $Cabs)
     {
       Add-WindowsPackage -Path w:\ -PackagePath $Cab.FullName
       }
   }

Enable-WindowsOptionalFeature -FeatureName File-Services -Path W:\
Now that the image is applied to the SD card, we need to ensure the Nano Server has all the drivers to boot and operate the Hardware. In the next steps we will use the WinPE drivers for SD Card and USB storage devices and apply them to the image, similarly will apply all the MinnowBoard specific drivers from the drivers folder.
 Add-WindowsDriver -Path w:\ -driver (Get-Item -Path X:\Windows\System32\DriverStore\FileRepository\sdstor.inf_amd64_*) -Recurse -Verbose
Add-WindowsDriver -Path w:\ -driver (Get-Item -Path X:\Windows\System32\DriverStore\FileRepository\sdbus.inf_amd64_*) -Recurse -Verbose
Add-WindowsDriver -Path w:\ -driver (Get-Item -Path X:\Windows\System32\DriverStore\FileRepository\usbstor.inf_amd64_*) -Recurse -Verbose
Add-WindowsDriver -Path w:\ -driver (Get-Item -Path X:\Windows\System32\DriverStore\FileRepository\usbhub3.inf_amd64_*) -Recurse -Verbose
Add-WindowsDriver -Path w:\ -driver (Get-Item -Path X:\Windows\System32\DriverStore\FileRepository\usbxhci.inf_amd64_*) -Recurse -Verbose

Add-WindowsDriver -Path w:\ -Driver "$DShare\Drivers\Minnowboard" -Recurse -Verbose
As next step, create the Boot Configuration Database and the boot loader files to the S: partition and set it as a UEFI system partition
 Invoke-Command -ScriptBlock {Bcdboot w:\windows /s s: /f UEFI}

Set-Partition -DiskNumber $PDisk.DiskNumber -PartitionNumber 1 -GptType "{c12a7328-f81f-11d2-ba4b-00a0c93ec93b}"
The last step is to read the AD blob created previously, place it it in the unattend.xml file and apply the unattended to the image. During the first boot this blob will be read and the Nano server will join the domain without requiring user input.
 $unattendxml = [xml](Get-Content "$DShare\nanoserver\unattend.xml")
$blob = (Get-Content -Encoding ASCII -Path "$DShare\blobs\$Computername.blob").ToString()
$blob = $blob.Substring(0,$blob.Length -1)
$unattendxml.unattend.settings[0].component.OfflineIdentification.Provisioning.AccountData = $blob
$unattendxml.Save('X:\unattend.xml')

Apply-WindowsUnattend -Path W:\ -UnattendPath X:\unattend.xml
New-Item -Path W:\Windows\Panther -ItemType Directory -Force
Copy-Item -Path X:\unattend.xml -Destination W:\Windows\Panther\ -Force
And this will be all, once you reboot ensure the boot order has the UEFI Misc Device as first. Windows will create a new entry for the Windows Boot Manager to keep the BCD and the firmware info synchronized.
You can use the local recovery console and/or PowerShell remote to configure and manage your ano Servers.