在本教程中,你将生成 Web 应用,用于登录用户并获取调用 Microsoft Graph 的访问令牌。 构建的 Web 应用使用适用于 Node.js 的 Microsoft 身份验证库 (MSAL)。
请按照本教程中的步骤进行操作:
- 在 Azure 门户中注册应用程序
- 创建 Express web 应用项目
- 安装身份验证库包
- 添加应用注册详细信息
- 为用户登录添加代码
- 测试应用。有关详细信息,请参阅演示如何使用 MSAL Node 登录、退出登录和获取受保护资源(如 Microsoft Graph)的访问令牌的示例代码。
先决条件
- Node.js
- Visual Studio Code 或其他代码编辑器
注册应用程序
首先,请完成向 Microsoft 标识平台注册应用程序中的步骤来注册你的应用。
对于应用注册,请使用以下设置:
- 名称:
ExpressWebApp(建议) - 支持的帐户类型:仅限此组织目录中的帐户
- 平台类型:Web
- 重定向 URI:
http://localhost:3000/auth/redirect - 客户端机密:
*********(记录此值以便在后面的步骤中使用 - 它只显示一次)
创建项目
使用 Express 应用程序生成器工具创建应用程序框架。
- 首先,安装 express-generator 包:
npm install -g express-generator
- 然后,创建应用程序框架,如下所示:
    express --view=hbs /ExpressWebApp && cd /ExpressWebApp
    npm install
现在已有简单 Express Web 应用。 项目的文件和文件夹结构应类似于以下文件夹结构:
ExpressWebApp/
├── bin/
|    └── wwww
├── public/
|    ├── images/
|    ├── javascript/
|    └── stylesheets/
|        └── style.css
├── routes/
|    ├── index.js
|    └── users.js
├── views/
|    ├── error.hbs
|    ├── index.hbs
|    └── layout.hbs
├── app.js
└── package.json
安装身份验证库
在终端中找到项目的根目录,并通过 npm 安装 MSAL Node 包。
npm install --save @azure/msal-node
安装其他依赖项
本教程中的 Web 应用示例使用 包来进行会话管理、使用 dotenv 包在开发期间读取环境参数,使用 axios 来对 Microsoft Graph API 进行网络调用。 通过 npm 安装这些包:
npm install --save express-session dotenv axios
添加应用注册详细信息
- 在项目文件夹的根目录中创建 .env.dev 文件。 然后添加以下代码:
CLOUD_INSTANCE="Enter_the_Cloud_Instance_Id_Here" # cloud instance string should end with a trailing slash
TENANT_ID="Enter_the_Tenant_Info_Here"
CLIENT_ID="Enter_the_Application_Id_Here"
CLIENT_SECRET="Enter_the_Client_Secret_Here"

REDIRECT_URI="http://localhost:3000/auth/redirect"
POST_LOGOUT_REDIRECT_URI="http://localhost:3000"

GRAPH_API_ENDPOINT="Enter_the_Graph_Endpoint_Here" # graph api endpoint string should end with a trailing slash

EXPRESS_SESSION_SECRET="Enter_the_Express_Session_Secret_Here"
使用从 Azure 应用注册门户获取的值填写以下详细信息:
-
Enter_the_Cloud_Instance_Id_Here:在其中注册应用程序的 Azure 云实例。- 对于主(或全球)Azure 云,请输入 (包括尾随正斜杠)
https://login.microsoftonline.com/。 - 对于国家/地区云(例如中国云),可以在国家/地区云中找到相应值。
- 对于主(或全球)Azure 云,请输入 (包括尾随正斜杠)
-
Enter_the_Tenant_Info_here应是以下参数之一:- 如果应用程序支持“此组织目录中的帐户”,请将此值替换为“租户 ID”或“租户名称”。 例如,
contoso.microsoft.com。 - 如果应用程序支持任何组织目录中的帐户,请将该值替换为“”。
- 如果应用支持任何组织目录中的帐户和个人 Microsoft 帐户,请将此值替换为
common。 - 要限制对仅限个人 Microsoft 帐户的支持,请将此值替换为
consumers。
- 如果应用程序支持“此组织目录中的帐户”,请将此值替换为“租户 ID”或“租户名称”。 例如,
-
Enter_the_Application_Id_Here:已注册应用程序的应用程序(客户端)ID。 -
Enter_the_Client_secret:将此值替换为先前创建的客户端机密。 若要生成新密钥,请使用 Azure 门户中应用注册设置中的 证书和机密 。
警告
源代码中的任何纯文本机密都会增加安全风险。 本文使用纯文本客户端机密只是为了简单起见。 在机密客户端应用程序中使用证书凭据(而不是客户端机密),尤其是计划部署到生产环境的应用。
-
Enter_the_Graph_Endpoint_Here:应用将调用的 Microsoft Graph API 云实例。 对于主要或全局 Microsoft Graph API 服务,请输入https://graph.microsoft.com/(包括末尾的正斜杠)。 -
Enter_the_Express_Session_Secret_Here用于对 Express 会话 cookie 进行签署的密钥。 选择要用于替换此字符串的随机字符串(例如客户端机密)。
- 接下来,在项目的根目录中创建名为 authConfig.js 的文件,以读取这些参数。 创建后,在其中添加以下代码:
/*
 * Copyright (c) Microsoft Corporation. All rights reserved.
 * Licensed under the MIT License.
 */

require('dotenv').config({ path: '.env.dev' });

/**
 * Configuration object to be passed to MSAL instance on creation.
 * For a full list of MSAL Node configuration parameters, visit:
 * https://github.com/AzureAD/microsoft-authentication-library-for-js/blob/dev/lib/msal-node/docs/configuration.md
 */
const msalConfig = {
    auth: {
        clientId: process.env.CLIENT_ID, // 'Application (client) ID' of app registration in Azure portal - this value is a GUID
        authority: process.env.CLOUD_INSTANCE + process.env.TENANT_ID, // Full directory URL, in the form of https://login.microsoftonline.com/<tenant>
        clientSecret: process.env.CLIENT_SECRET // Client secret generated from the app registration in Azure portal
    },
    system: {
        loggerOptions: {
            loggerCallback(loglevel, message, containsPii) {
                console.log(message);
            },
            piiLoggingEnabled: false,
            logLevel: 3,
        }
    }
}

const REDIRECT_URI = process.env.REDIRECT_URI;
const POST_LOGOUT_REDIRECT_URI = process.env.POST_LOGOUT_REDIRECT_URI;
const GRAPH_ME_ENDPOINT = process.env.GRAPH_API_ENDPOINT + "v1.0/me";

module.exports = {
    msalConfig,
    REDIRECT_URI,
    POST_LOGOUT_REDIRECT_URI,
    GRAPH_ME_ENDPOINT
};
添加用于登录用户和获取令牌的代码
- 创建名为“auth”的新文件夹,并在其下添加名为“AuthProvider.js”的新文件。 这将包含 AuthProvider 类,其使用 MSAL Node 封装必要的身份验证逻辑。 在其中添加以下代码:
const msal = require('@azure/msal-node');
const axios = require('axios');

const { msalConfig } = require('../authConfig');

class AuthProvider {
    msalConfig;
    cryptoProvider;

    constructor(msalConfig) {
        this.msalConfig = msalConfig
        this.cryptoProvider = new msal.CryptoProvider();
    };

    login(options = {}) {
        return async (req, res, next) => {

            /**
             * MSAL Node library allows you to pass your custom state as state parameter in the Request object.
             * The state parameter can also be used to encode information of the app's state before redirect.
             * You can pass the user's state in the app, such as the page or view they were on, as input to this parameter.
             */
            const state = this.cryptoProvider.base64Encode(
                JSON.stringify({
                    successRedirect: options.successRedirect || '/',
                })
            );

            const authCodeUrlRequestParams = {
                state: state,

                /**
                 * By default, MSAL Node will add OIDC scopes to the auth code url request. For more information, visit:
                 * https://docs.microsoft.com/azure/active-directory/develop/v2-permissions-and-consent#openid-connect-scopes
                 */
                scopes: options.scopes || [],
                redirectUri: options.redirectUri,
            };

            const authCodeRequestParams = {
                state: state,

                /**
                 * By default, MSAL Node will add OIDC scopes to the auth code request. For more information, visit:
                 * https://docs.microsoft.com/azure/active-directory/develop/v2-permissions-and-consent#openid-connect-scopes
                 */
                scopes: options.scopes || [],
                redirectUri: options.redirectUri,
            };

            /**
             * If the current msal configuration does not have cloudDiscoveryMetadata or authorityMetadata, we will
             * make a request to the relevant endpoints to retrieve the metadata. This allows MSAL to avoid making
             * metadata discovery calls, thereby improving performance of token acquisition process. For more, see:
             * https://github.com/AzureAD/microsoft-authentication-library-for-js/blob/dev/lib/msal-node/docs/performance.md
             */
            if (!this.msalConfig.auth.cloudDiscoveryMetadata || !this.msalConfig.auth.authorityMetadata) {

                const [cloudDiscoveryMetadata, authorityMetadata] = await Promise.all([
                    this.getCloudDiscoveryMetadata(this.msalConfig.auth.authority),
                    this.getAuthorityMetadata(this.msalConfig.auth.authority)
                ]);

                this.msalConfig.auth.cloudDiscoveryMetadata = JSON.stringify(cloudDiscoveryMetadata);
                this.msalConfig.auth.authorityMetadata = JSON.stringify(authorityMetadata);
            }

            const msalInstance = this.getMsalInstance(this.msalConfig);

            // trigger the first leg of auth code flow
            return this.redirectToAuthCodeUrl(
                authCodeUrlRequestParams,
                authCodeRequestParams,
                msalInstance
            )(req, res, next);
        };
    }

    acquireToken(options = {}) {
        return async (req, res, next) => {
            try {
                const msalInstance = this.getMsalInstance(this.msalConfig);

                /**
                 * If a token cache exists in the session, deserialize it and set it as the
                 * cache for the new MSAL CCA instance. For more, see:
                 * https://github.com/AzureAD/microsoft-authentication-library-for-js/blob/dev/lib/msal-node/docs/caching.md
                 */
                if (req.session.tokenCache) {
                    msalInstance.getTokenCache().deserialize(req.session.tokenCache);
                }

                const tokenResponse = await msalInstance.acquireTokenSilent({
                    account: req.session.account,
                    scopes: options.scopes || [],
                });

                /**
                 * On successful token acquisition, write the updated token
                 * cache back to the session. For more, see:
                 * https://github.com/AzureAD/microsoft-authentication-library-for-js/blob/dev/lib/msal-node/docs/caching.md
                 */
                req.session.tokenCache = msalInstance.getTokenCache().serialize();
                req.session.accessToken = tokenResponse.accessToken;
                req.session.idToken = tokenResponse.idToken;
                req.session.account = tokenResponse.account;

                res.redirect(options.successRedirect);
            } catch (error) {
                if (error instanceof msal.InteractionRequiredAuthError) {
                    return this.login({
                        scopes: options.scopes || [],
                        redirectUri: options.redirectUri,
                        successRedirect: options.successRedirect || '/',
                    })(req, res, next);
                }

                next(error);
            }
        };
    }

    handleRedirect(options = {}) {
        return async (req, res, next) => {
            if (!req.body || !req.body.state) {
                return next(new Error('Error: response not found'));
            }

            const authCodeRequest = {
                ...req.session.authCodeRequest,
                code: req.body.code,
                codeVerifier: req.session.pkceCodes.verifier,
            };

            try {
                const msalInstance = this.getMsalInstance(this.msalConfig);

                if (req.session.tokenCache) {
                    msalInstance.getTokenCache().deserialize(req.session.tokenCache);
                }

                const tokenResponse = await msalInstance.acquireTokenByCode(authCodeRequest, req.body);

                req.session.tokenCache = msalInstance.getTokenCache().serialize();
                req.session.idToken = tokenResponse.idToken;
                req.session.account = tokenResponse.account;
                req.session.isAuthenticated = true;

                const state = JSON.parse(this.cryptoProvider.base64Decode(req.body.state));
                res.redirect(state.successRedirect);
            } catch (error) {
                next(error);
            }
        }
    }

    logout(options = {}) {
        return (req, res, next) => {

            /**
             * Construct a logout URI and redirect the user to end the
             * session with Azure AD. For more information, visit:
             * https://docs.microsoft.com/azure/active-directory/develop/v2-protocols-oidc#send-a-sign-out-request
             */
            let logoutUri = `${this.msalConfig.auth.authority}/oauth2/v2.0/`;

            if (options.postLogoutRedirectUri) {
                logoutUri += `logout?post_logout_redirect_uri=${options.postLogoutRedirectUri}`;
            }

            req.session.destroy(() => {
                res.redirect(logoutUri);
            });
        }
    }

    /**
     * Instantiates a new MSAL ConfidentialClientApplication object
     * @param msalConfig: MSAL Node Configuration object
     * @returns
     */
    getMsalInstance(msalConfig) {
        return new msal.ConfidentialClientApplication(msalConfig);
    }


    /**
     * Prepares the auth code request parameters and initiates the first leg of auth code flow
     * @param req: Express request object
     * @param res: Express response object
     * @param next: Express next function
     * @param authCodeUrlRequestParams: parameters for requesting an auth code url
     * @param authCodeRequestParams: parameters for requesting tokens using auth code
     */
    redirectToAuthCodeUrl(authCodeUrlRequestParams, authCodeRequestParams, msalInstance) {
        return async (req, res, next) => {
            // Generate PKCE Codes before starting the authorization flow
            const { verifier, challenge } = await this.cryptoProvider.generatePkceCodes();

            // Set generated PKCE codes and method as session vars
            req.session.pkceCodes = {
                challengeMethod: 'S256',
                verifier: verifier,
                challenge: challenge,
            };

            /**
             * By manipulating the request objects below before each request, we can obtain
             * auth artifacts with desired claims. For more information, visit:
             * https://azuread.github.io/microsoft-authentication-library-for-js/ref/modules/_azure_msal_node.html#authorizationurlrequest
             * https://azuread.github.io/microsoft-authentication-library-for-js/ref/modules/_azure_msal_node.html#authorizationcoderequest
             **/
            req.session.authCodeUrlRequest = {
                ...authCodeUrlRequestParams,
                responseMode: msal.ResponseMode.FORM_POST, // recommended for confidential clients
                codeChallenge: req.session.pkceCodes.challenge,
                codeChallengeMethod: req.session.pkceCodes.challengeMethod,
            };

            req.session.authCodeRequest = {
                ...authCodeRequestParams,
                code: '',
            };

            try {
                const authCodeUrlResponse = await msalInstance.getAuthCodeUrl(req.session.authCodeUrlRequest);
                res.redirect(authCodeUrlResponse);
            } catch (error) {
                next(error);
            }
        };
    }

    /**
     * Retrieves cloud discovery metadata from the /discovery/instance endpoint
     * @returns
     */
    async getCloudDiscoveryMetadata(authority) {
        const endpoint = 'https://login.microsoftonline.com/common/discovery/instance';

        try {
            const response = await axios.get(endpoint, {
                params: {
                    'api-version': '1.1',
                    'authorization_endpoint': `${authority}/oauth2/v2.0/authorize`
                }
            });

            return await response.data;
        } catch (error) {
            throw error;
        }
    }

    /**
     * Retrieves oidc metadata from the openid endpoint
     * @returns
     */
    async getAuthorityMetadata(authority) {
        const endpoint = `${authority}/v2.0/.well-known/openid-configuration`;

        try {
            const response = await axios.get(endpoint);
            return await response.data;
        } catch (error) {
            console.log(error);
        }
    }
}

const authProvider = new AuthProvider(msalConfig);

module.exports = authProvider;
- 接下来,在路由文件夹下创建名为“auth.js”的新文件,并在其中添加以下代码:
/*
 * Copyright (c) Microsoft Corporation. All rights reserved.
 * Licensed under the MIT License.
 */

var express = require('express');

const authProvider = require('../auth/AuthProvider');
const { REDIRECT_URI, POST_LOGOUT_REDIRECT_URI } = require('../authConfig');

const router = express.Router();

router.get('/signin', authProvider.login({
    scopes: [],
    redirectUri: REDIRECT_URI,
    successRedirect: '/'
}));

router.get('/acquireToken', authProvider.acquireToken({
    scopes: ['User.Read'],
    redirectUri: REDIRECT_URI,
    successRedirect: '/users/profile'
}));

router.post('/redirect', authProvider.handleRedirect());

router.get('/signout', authProvider.logout({
    postLogoutRedirectUri: POST_LOGOUT_REDIRECT_URI
}));

module.exports = router;
- 通过将现有代码替换为以下代码片段来更新“index.js”路由:
/*
 * Copyright (c) Microsoft Corporation. All rights reserved.
 * Licensed under the MIT License.
 */

var express = require('express');
var router = express.Router();

router.get('/', function (req, res, next) {
    res.render('index', {
        title: 'MSAL Node & Express Web App',
        isAuthenticated: req.session.isAuthenticated,
        username: req.session.account?.username,
    });
});

module.exports = router;
- 最后,通过将现有代码替换为以下代码片段来更新 users.js 路由:
/*
 * Copyright (c) Microsoft Corporation. All rights reserved.
 * Licensed under the MIT License.
 */

var express = require('express');
var router = express.Router();

var fetch = require('../fetch');

var { GRAPH_ME_ENDPOINT } = require('../authConfig');

// custom middleware to check auth state
function isAuthenticated(req, res, next) {
    if (!req.session.isAuthenticated) {
        return res.redirect('/auth/signin'); // redirect to sign-in route
    }

    next();
};

router.get('/id',
    isAuthenticated, // check if user is authenticated
    async function (req, res, next) {
        res.render('id', { idTokenClaims: req.session.account.idTokenClaims });
    }
);

router.get('/profile',
    isAuthenticated, // check if user is authenticated
    async function (req, res, next) {
        try {
            const graphResponse = await fetch(GRAPH_ME_ENDPOINT, req.session.accessToken);
            res.render('profile', { profile: graphResponse });
        } catch (error) {
            next(error);
        }
    }
);

module.exports = router;
添加用于调用 Microsoft Graph API 的代码
在项目的根目录中创建名为 fetch.js 的文件并添加以下代码:
/*
 * Copyright (c) Microsoft Corporation. All rights reserved.
 * Licensed under the MIT License.
 */

var axios = require('axios');

/**
 * Attaches a given access token to a MS Graph API call
 * @param endpoint: REST API endpoint to call
 * @param accessToken: raw access token string
 */
async function fetch(endpoint, accessToken) {
    const options = {
        headers: {
            Authorization: `Bearer ${accessToken}`
        }
    };

    console.log(`request made to ${endpoint} at: ` + new Date().toString());

    try {
        const response = await axios.get(endpoint, options);
        return await response.data;
    } catch (error) {
        throw new Error(error);
    }
}

module.exports = fetch;
添加用于显示数据的视图
- 在 views 文件夹中,通过将现有代码替换为以下内容来更新 index.hbs 文件:
<h1>{{title}}</h1>
{{#if isAuthenticated }}
<p>Hi {{username}}!</p>
<a href="/users/id">View ID token claims</a>
<br>
<a href="/auth/acquireToken">Acquire a token to call the Microsoft Graph API</a>
<br>
<a href="/auth/signout">Sign out</a>
{{else}}
<p>Welcome to {{title}}</p>
<a href="/auth/signin">Sign in</a>
{{/if}}
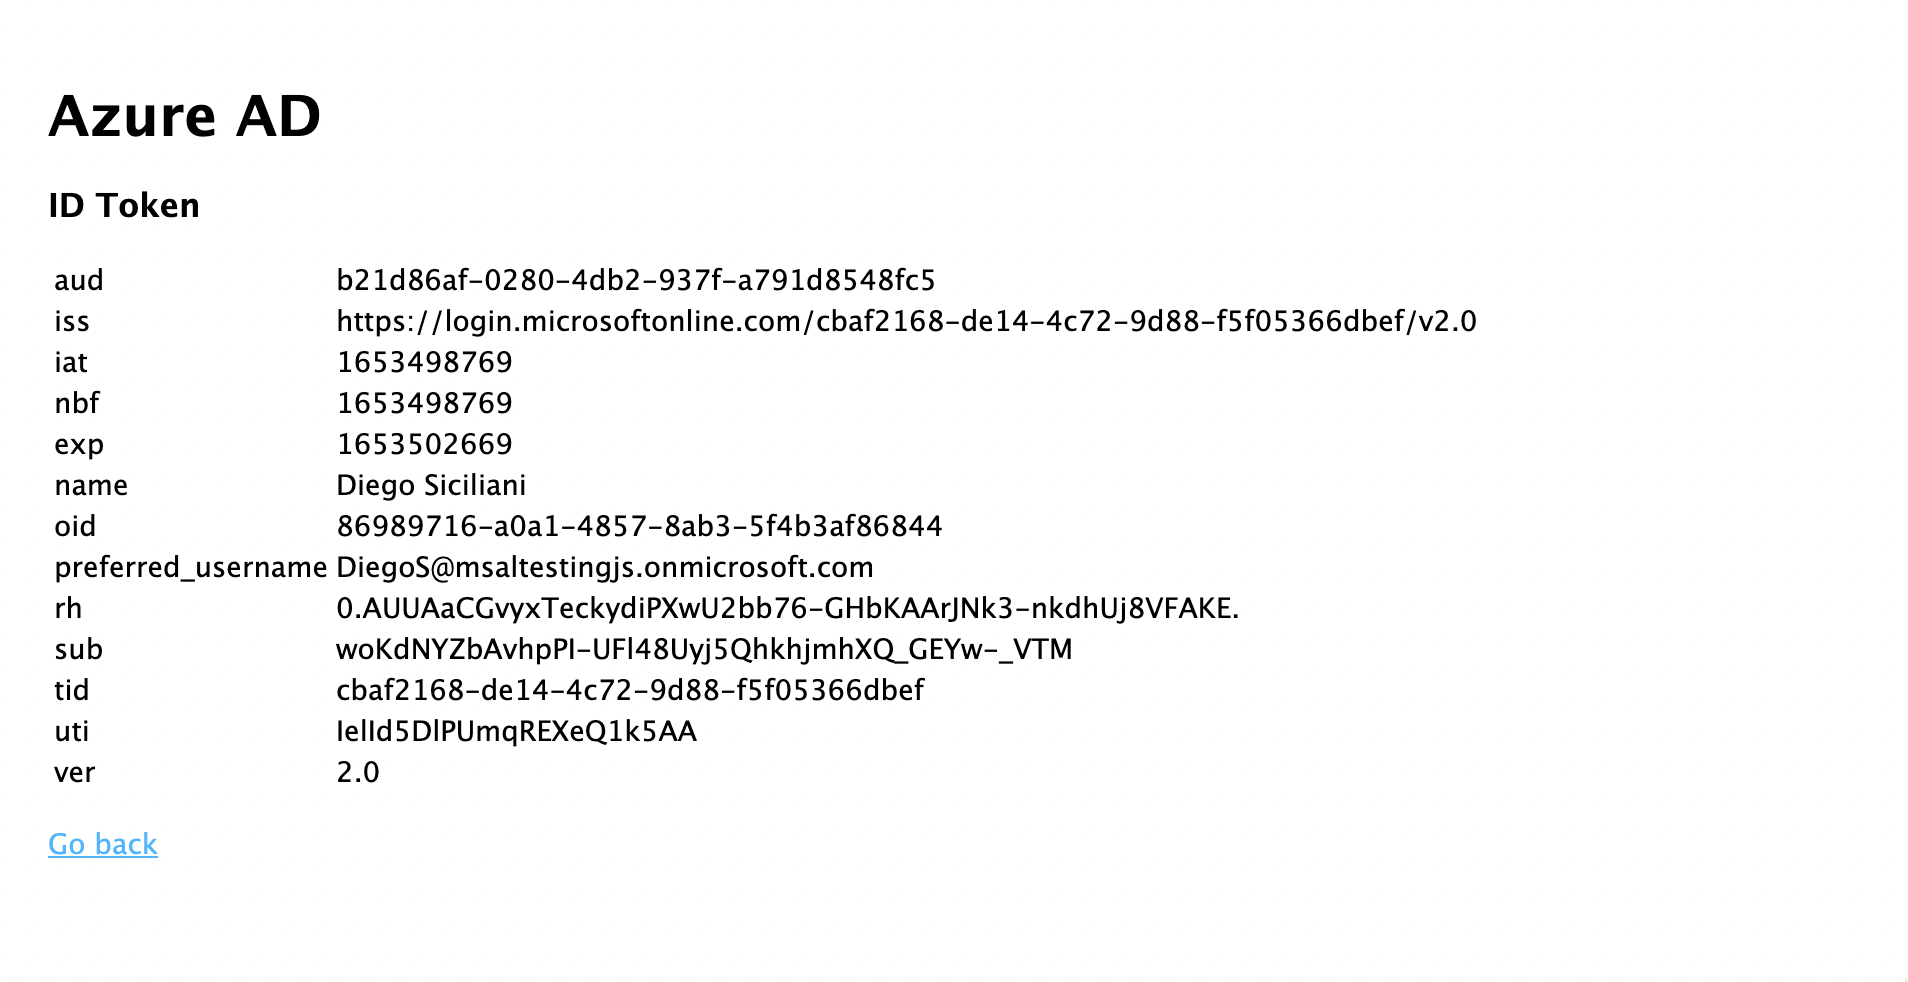
- 仍在同一文件夹中,创建另一个名为 id.hbs 的文件以显示用户 ID 令牌的内容:
<h1>Azure AD</h1>
<h3>ID Token</h3>
<table>
    <tbody>
        {{#each idTokenClaims}}
        <tr>
            <td>{{@key}}</td>
            <td>{{this}}</td>
        </tr>
        {{/each}}
    </tbody>
</table>
<br>
<a href="https://aka.ms/id-tokens" target="_blank">Learn about claims in this ID token</a>
<br>
<a href="/">Go back</a>
- 最后,创建另一个名为 profile.hbs 的文件以显示对 Microsoft Graph 的调用结果:
<h1>Microsoft Graph API</h1>
<h3>/me endpoint response</h3>
<table>
    <tbody>
        {{#each profile}}
        <tr>
            <td>{{@key}}</td>
            <td>{{this}}</td>
        </tr>
        {{/each}}
    </tbody>
</table>
<br>
<a href="/">Go back</a>
注册路由器并添加状态管理
在项目文件夹根目录的 app.js 文件中,注册之前创建的路由,并使用 express-session 包添加会话支持以跟踪身份验证状态。 将现有代码替换为以下代码片段:
/*
 * Copyright (c) Microsoft Corporation. All rights reserved.
 * Licensed under the MIT License.
 */

require('dotenv').config();

var path = require('path');
var express = require('express');
var session = require('express-session');
var createError = require('http-errors');
var cookieParser = require('cookie-parser');
var logger = require('morgan');

var indexRouter = require('./routes/index');
var usersRouter = require('./routes/users');
var authRouter = require('./routes/auth');

// initialize express
var app = express();

/**
 * Using express-session middleware for persistent user session. Be sure to
 * familiarize yourself with available options. Visit: https://www.npmjs.com/package/express-session
 */
 app.use(session({
    secret: process.env.EXPRESS_SESSION_SECRET,
    resave: false,
    saveUninitialized: false,
    cookie: {
        httpOnly: true,
        secure: false, // set this to true on production
    }
}));

// view engine setup
app.set('views', path.join(__dirname, 'views'));
app.set('view engine', 'hbs');

app.use(logger('dev'));
app.use(express.json());
app.use(cookieParser());
app.use(express.urlencoded({ extended: false }));
app.use(express.static(path.join(__dirname, 'public')));

app.use('/', indexRouter);
app.use('/users', usersRouter);
app.use('/auth', authRouter);

// catch 404 and forward to error handler
app.use(function (req, res, next) {
    next(createError(404));
});

// error handler
app.use(function (err, req, res, next) {
    // set locals, only providing error in development
    res.locals.message = err.message;
    res.locals.error = req.app.get('env') === 'development' ? err : {};

    // render the error page
    res.status(err.status || 500);
    res.render('error');
});

module.exports = app;
测试登录并调用 Microsoft Graph
你已完成应用程序的创建,现在即可测试应用的功能。
- 从项目文件夹的根目录中运行以下命令,启动 Node.js 控制台应用:
npm start
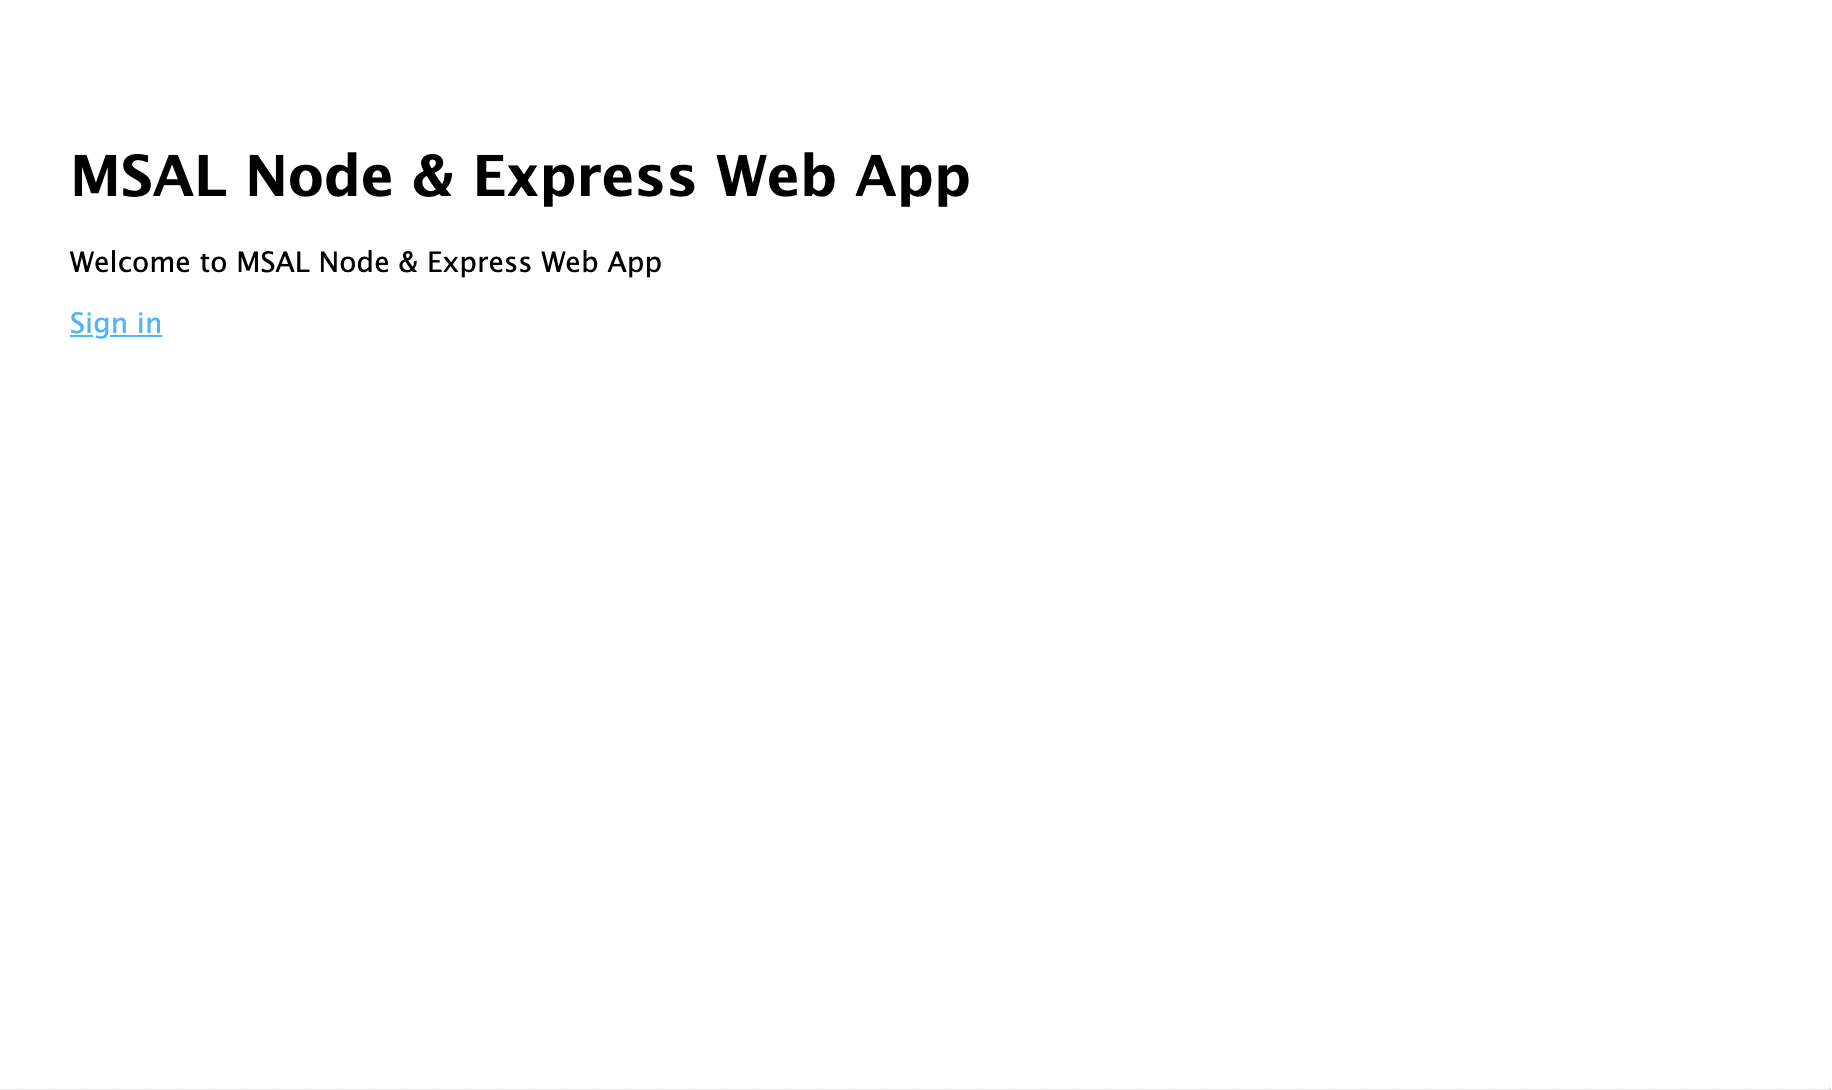
- 打开浏览器窗口并导航到
http://localhost:3000。 应该会出现欢迎页:
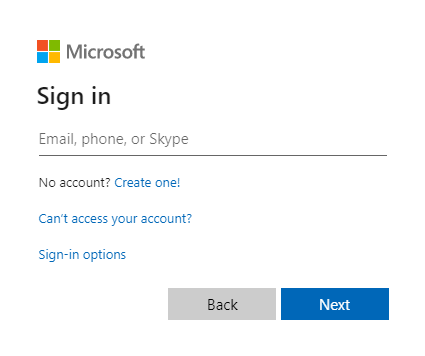
- 请选择“登录”链接。 应会看到 Microsoft Entra 登录屏幕:
- 输入凭据后,你应该会看到一个同意屏幕,要求你批准应用的权限。
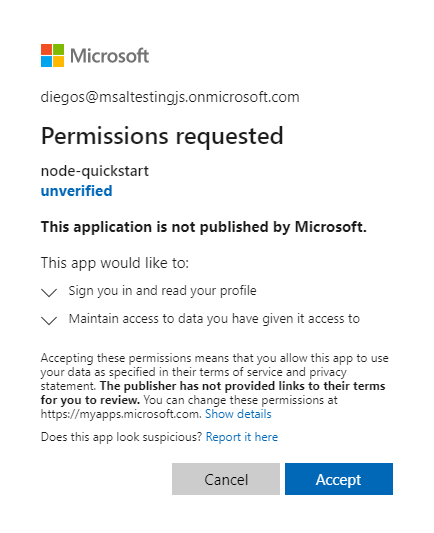
- 一旦您同意,系统将会将您重定向回应用程序主页。
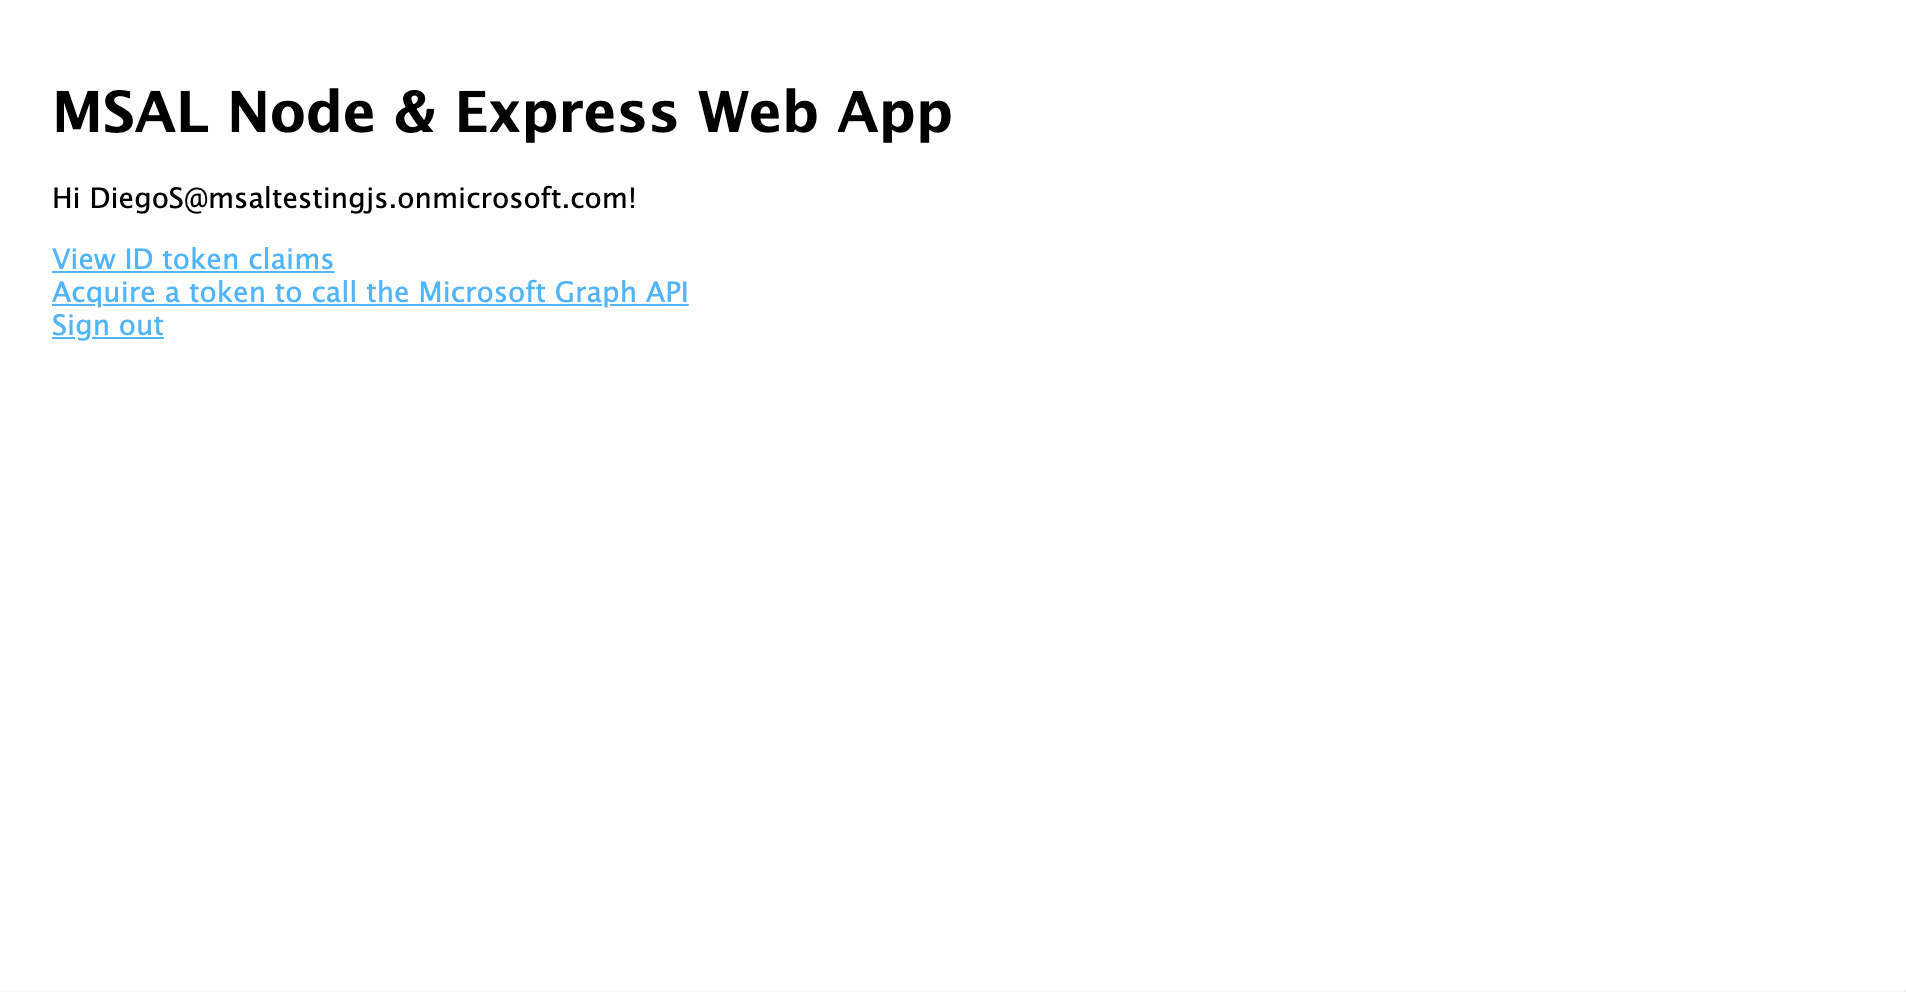
- 请选择“查看 ID 令牌”链接以显示已登录用户 ID 令牌的内容。
- 返回主页,然后选择“获取访问令牌并调用 Microsoft Graph API”链接。 完成后,应该会对已登录用户显示来自 Microsoft Graph /me 终结点的响应。

- 返回主页,然后选择“注销”链接。 您应该会看到 Microsoft Entra 注销屏幕。

应用程序的工作原理
在本教程中,你通过向 MSAL Node ConfidentialClientApplication 对象传递一个配置对象 (msalConfig)(其中包含从 Azure 门户上的 Microsoft Entra 应用注册获得的参数)对其进行了实例化。 你创建的 Web 应用使用 OpenID Connect 协议来登录用户,并使用 OAuth 2.0 授权代码流获取访问令牌。
后续步骤
若要深入了解 Microsoft 标识平台上的 Node.js 和 Express Web 应用程序开发,请参阅我们的多部分方案系列: