教程:Microsoft Entra 与 Akamai 的 SSO 集成
本教程介绍如何将 Akamai 与 Microsoft Entra ID 相集成。 将 Akamai 与 Microsoft Entra ID 集成后,可以:
- 在 Microsoft Entra ID 中控制谁有权访问 Akamai。
- 让用户能够使用其 Microsoft Entra 帐户自动登录到 Akamai。
- 在中心位置管理帐户。
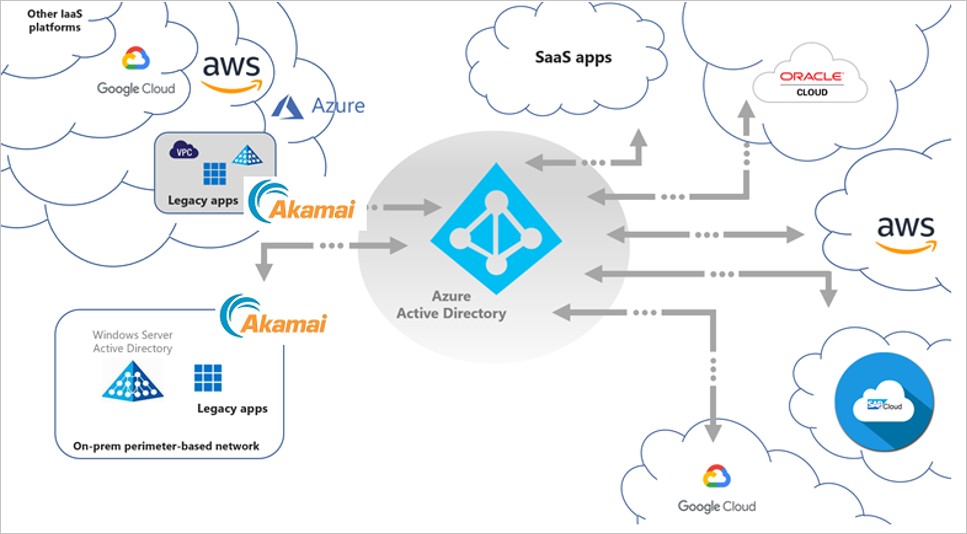
Microsoft Entra ID 和 Akamai Enterprise Application Access 相集成,让你能够无缝地访问云中或本地托管的旧版应用程序。 集成解决方案利用 Microsoft Entra ID 的所有新式功能,例如 Microsoft Entra 条件访问、Microsoft Entra ID 保护和 Microsoft Entra ID 治理,不修改应用或安装代理就可访问旧版应用程序。
下图描述了 Akamai EAA 在哪些方面适合更广泛的混合安全访问方案。
密钥身份验证方案
除了对新式验证协议(如 OpenID Connect、SAML 和 WS-Fed)的 Microsoft Entra 原生集成支持以外,Akamai EAA 还为基于传统身份验证的应用扩展了安全访问,使其可采用 Microsoft Entra ID 进行安全的内部和外部访问,从而让这些应用程序可实现无密码访问等新式方案。 这包括:
- 基于标头的身份验证应用
- 远程桌面
- SSH(安全外壳)
- Kerberos 身份验证应用
- VNC(虚拟网络计算)
- 匿名身份验证或非内置身份验证应用
- NTLM 身份验证应用(通过针对用户的双重提示进行保护)
- 基于窗体的应用程序(通过针对用户的双重提示进行保护)
集成方案
借助 Microsoft 与 Akamai EAA 的合作关系,可根据你的业务要求支持多个集成方案,灵活地满足业务要求。 这些方案可用于跨所有应用程序提供零时差覆盖,并逐步分类和配置适当的策略类别。
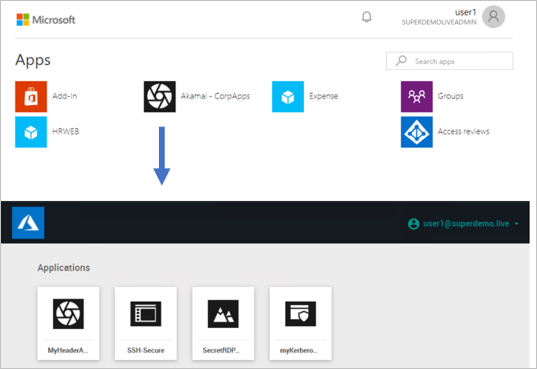
集成方案 1
Akamai EAA 被配置为 Microsoft Entra ID 上的单个应用程序。 管理员可在应用程序上配置条件访问策略;一旦满足条件,用户就可获取对 Akamai EAA 门户的访问权限。
优点:
- 只需配置 IDP 一次。
缺点:
用户最终会拥有两个应用程序门户。
单个通用条件访问策略覆盖所有应用程序。
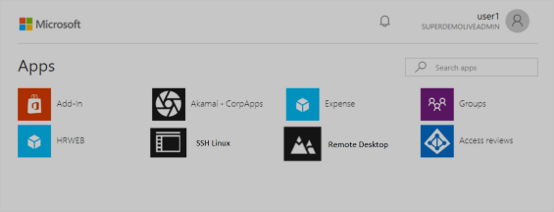
集成方案 2
Akamai EAA 应用程序在 Azure 门户上单独设置。 管理员可在应用程序上配置单独的条件访问策略;一旦满足条件,用户就可直接重定向到特定的应用程序。
优点:
可以定义单个条件访问策略。
所有应用都在 0365 Waffle 和 myApps.microsoft.com 面板上呈现。
缺点:
- 需要配置多个 IDP。
先决条件
若要开始操作,需备齐以下项目:
- 一个 Microsoft Entra 订阅。 如果你没有订阅,可以获取一个免费帐户。
- 已启用 Akamai 单一登录 (SSO) 的订阅。
方案描述
在本教程中,你将在测试环境中配置并测试 Microsoft Entra SSO。
- Akamai 支持 IDP 发起的 SSO。
重要说明
下面列出的所有设置对于集成方案 1 和方案 2 都相同 。 对于集成方案 2,你需要在 Akamai EAA 中设置单独的 IDP,并且需要修改 URL 属性,使其指向应用程序 URL。
从库添加 Akamai
若要配置 Akamai 与 Microsoft Entra ID 的集成,需要从库中将 Akamai 添加到托管 SaaS 应用列表。
- 至少以云应用程序管理员身份登录到 Microsoft Entra 管理中心。
- 浏览至“标识”>“应用程序”>“企业应用程序”>“新建应用程序”。
- 在“从库中添加”部分的搜索框中,键入 Akamai。
- 在结果面板中选择“Akamai”,然后添加该应用。 在该应用添加到租户时等待几秒钟。
或者,也可以使用企业应用配置向导。 在此向导中,可以将应用程序添加到租户、将用户/组添加到应用、分配角色,以及逐步完成 SSO 配置。 详细了解 Microsoft 365 向导。
配置并测试 Akamai 的 Microsoft Entra SSO
使用名为 B.Simon 的测试用户配置并测试 Akamai 的 Microsoft Entra SSO。 若要使 SSO 正常工作,需要在 Microsoft Entra 用户与 Akamai 中的相关用户之间建立关联。
若要配置并测试 Akamai 的 Microsoft Entra SSO,请执行以下步骤:
- 配置 Microsoft Entra SSO - 使用户能够使用此功能。
- 创建 Microsoft Entra 测试用户 - 使用 B.Simon 测试 Microsoft Entra 单一登录。
- 分配 Microsoft Entra 测试用户 - 使 B.Simon 能够使用 Microsoft Entra 单一登录。
- 配置 Akamai SSO - 在应用程序端配置单一登录设置。
- 设置 IDP
- 基于标头的身份验证
- 远程桌面
- SSH
- Kerberos 身份验证
- 创建 Akamai 测试用户 - 在 Akamai 中创建 B.Simon 的对应用户,并将其链接到该用户的 Microsoft Entra 表示形式。
- 测试 SSO - 验证配置是否正常工作。
配置 Microsoft Entra SSO
按照以下步骤启用 Microsoft Entra SSO。
至少以云应用程序管理员身份登录到 Microsoft Entra 管理中心。
浏览到“标识”>“应用程序”>“企业应用程序”>“Akamai”>“单一登录”。
在“选择单一登录方法”页上选择“SAML” 。
在“设置 SAML 单一登录”页面上,单击“基本 SAML 配置”旁边的铅笔图标以编辑设置 。
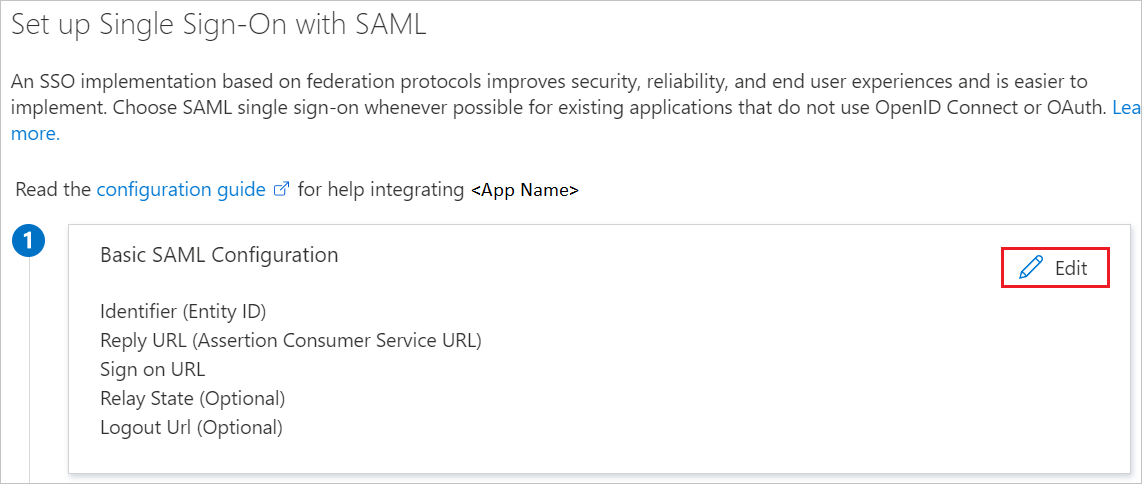
如果要在“IDP”发起的模式下配置应用程序,请在“基本 SAML 配置”部分中输入以下字段的值 :
a. 在“标识符”文本框中,使用以下模式键入 URL:
b. 在“回复 URL”文本框中,使用以下模式键入 URL:
https:// <Yourapp>.login.go.akamai-access.com/saml/sp/response注意
这些不是实际值。 请使用实际标识符和回复 URL 更新这些值。 请联系 Akamai 客户端支持团队获取这些值。 还可参考“基本 SAML 配置”部分中显示的模式。
在“使用 SAML 设置单一登录”页的“SAML 签名证书”部分中找到“联合元数据 XML”,选择“下载”以下载该证书并将其保存在计算机上 。

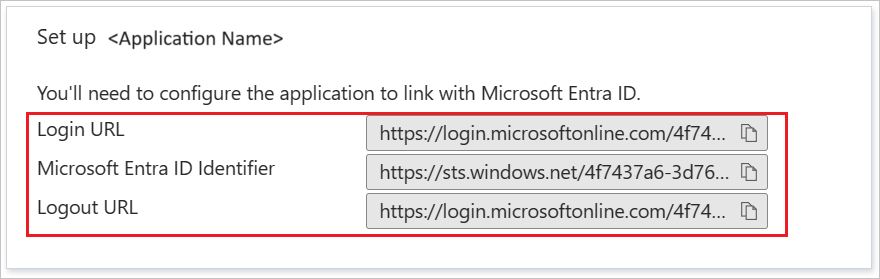
在“设置 Akamai”部分,根据要求复制相应的 URL。
创建 Microsoft Entra 测试用户
在本部分,你将创建名为 B.Simon 的测试用户。
- 至少以用户管理员身份登录到 Microsoft Entra 管理中心。
- 浏览到“标识”>“用户”>“所有用户”。
- 选择屏幕顶部的“新建用户”>“创建新用户”。
- 在“用户”属性中执行以下步骤:
- 在“显示名称”字段中输入
B.Simon。 - 在“用户主体名称”字段中,输入 username@companydomain.extension。 例如
B.Simon@contoso.com。 - 选中“显示密码”复选框,然后记下“密码”框中显示的值。
- 选择“查看 + 创建”。
- 在“显示名称”字段中输入
- 选择“创建”。
分配 Microsoft Entra 测试用户
在本部分,你将通过授予 B.Simon 访问 Akamai 的权限,使其能够使用单一登录。
- 至少以云应用程序管理员身份登录到 Microsoft Entra 管理中心。
- 浏览到“标识”>“应用程序”>“企业应用程序”>“Akamai”。
- 在应用的概述页面中,选择“用户和组”。
- 选择“添加用户/组”,然后在“添加分配”对话框中选择“用户和组” 。
- 在“用户和组”对话框中,从“用户”列表中选择“B.Simon”,然后单击屏幕底部的“选择”按钮。
- 如果你希望将某角色分配给用户,可以从“选择角色”下拉列表中选择该角色。 如果尚未为此应用设置任何角色,你将看到选择了“默认访问权限”角色。
- 在“添加分配”对话框中,单击“分配”按钮。
配置 Akamai SSO
设置 IDP
AKAMAI EAA IDP 配置
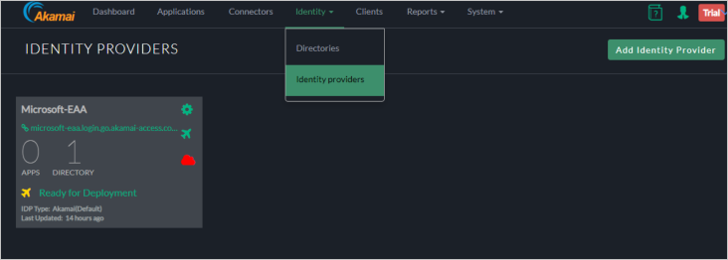
登录 Akamai Enterprise Application Access 控制台。
在 Akamai EAA 控制台上,选择“标识”>“标识提供者”,然后单击“添加标识提供者” 。
在“新建标识提供者”中执行以下步骤:
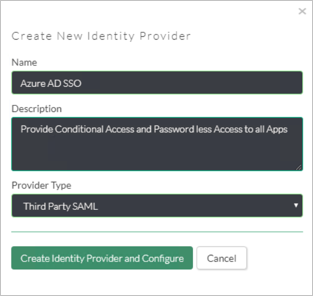
a. 指定“唯一名称”。
b. 选择“第三方 SAML”并单击“创建标识提供者并进行配置”。
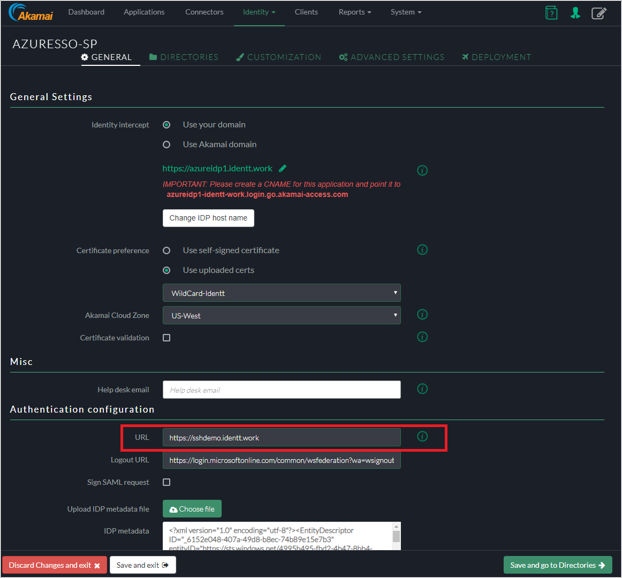
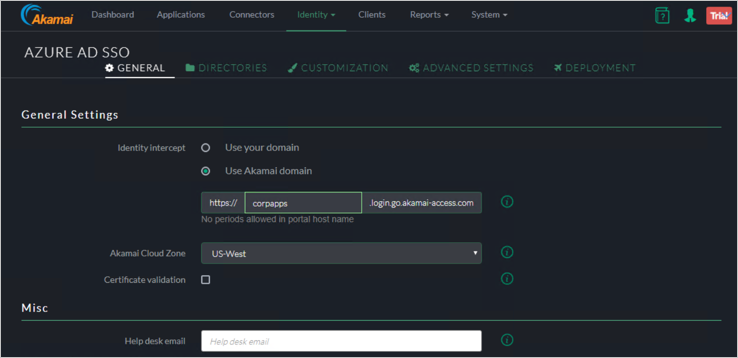
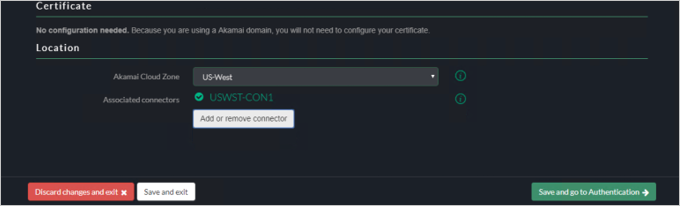
常规设置
标识截获 - 指定 SP 基 URL 的名称(将用于 Microsoft Entra 配置)。
注意
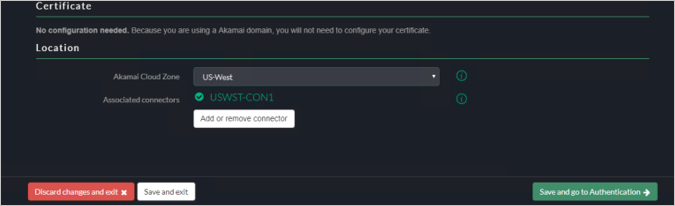
可以选择使用自己的自定义域(需要 DNS 条目和证书)。 本示例将使用 Akamai 域。
Akamai 云区域 - 选择适当的云区域。
证书验证 - 查看 Akamai 文档(可选)。
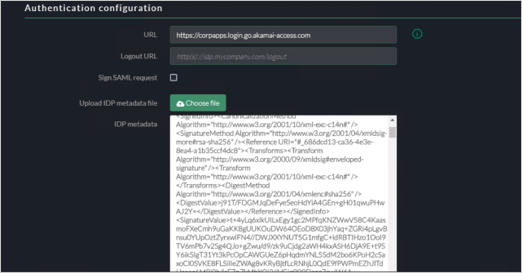
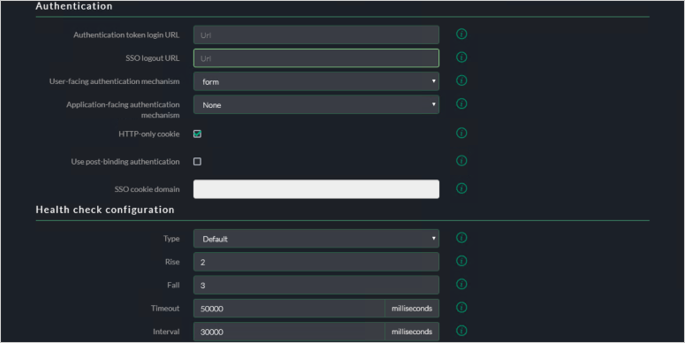
身份验证配置
URL – 指定与标识截获相同的 URL(身份验证后用户将重定向到此 URL)。
注销 URL:更新注销 URL。
签名 SAML 请求:默认未选中。
对于“IDP 元数据文件”,请添加 Microsoft Entra ID 控制台中的应用程序。
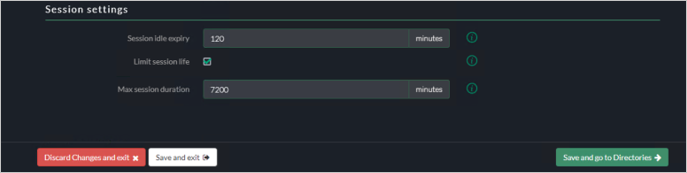
会话设置
将设置保留为默认值。
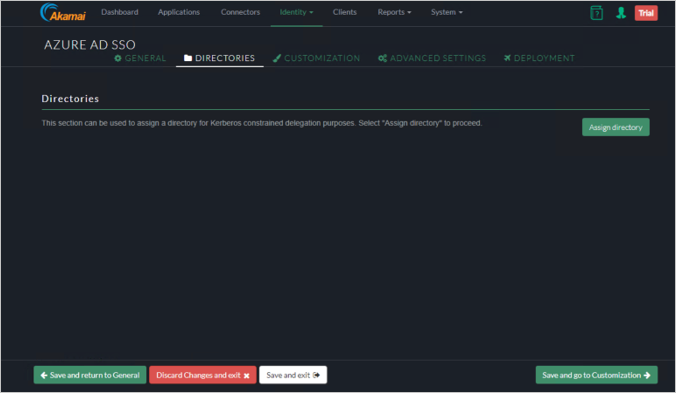
目录
跳过目录配置。
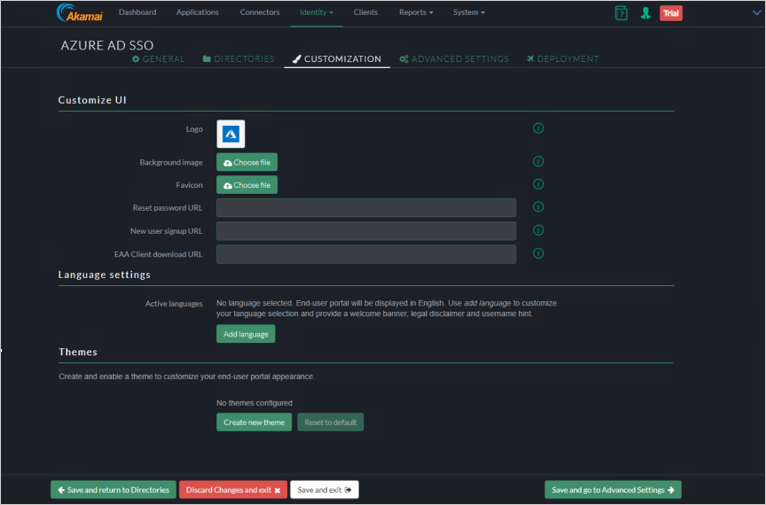
自定义 UI
可将自定义添加到 IDP。
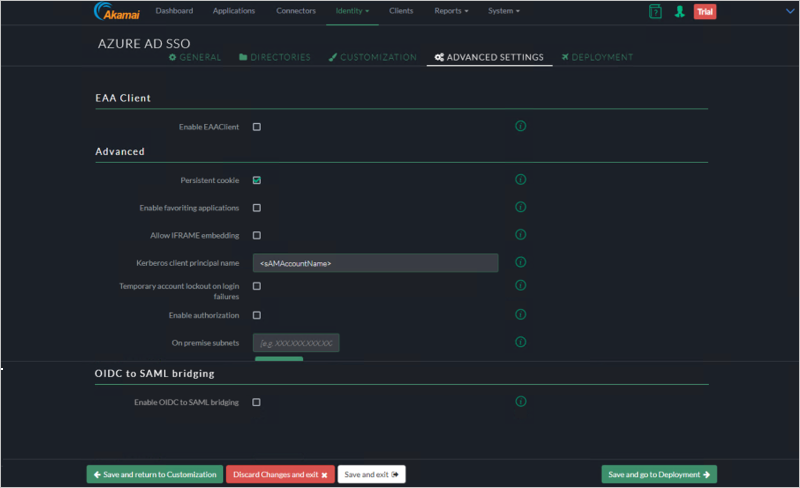
高级设置
跳过高级设置;有关更多详细信息,请参阅 Akamai 文档。
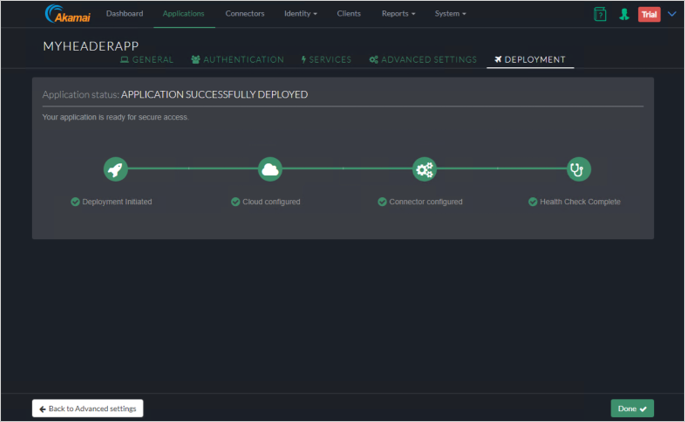
部署
单击“部署标识提供者”。
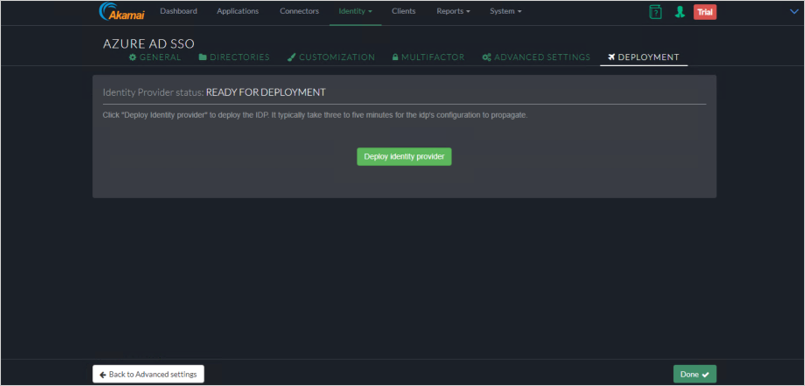
验证部署是否成功。
基于标头的身份验证
基于 Akamai 标头的身份验证
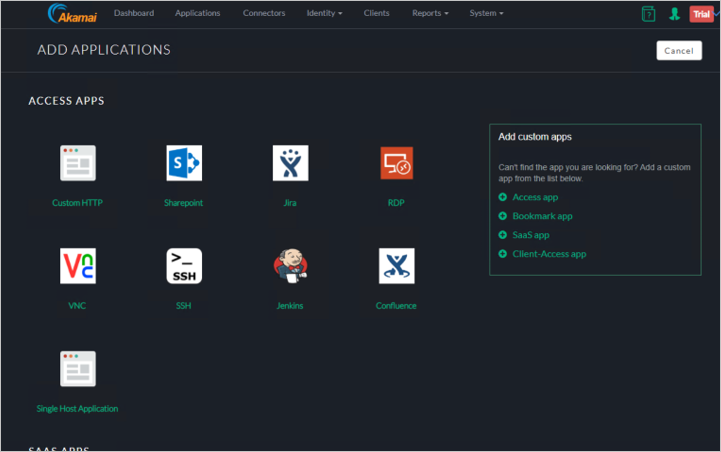
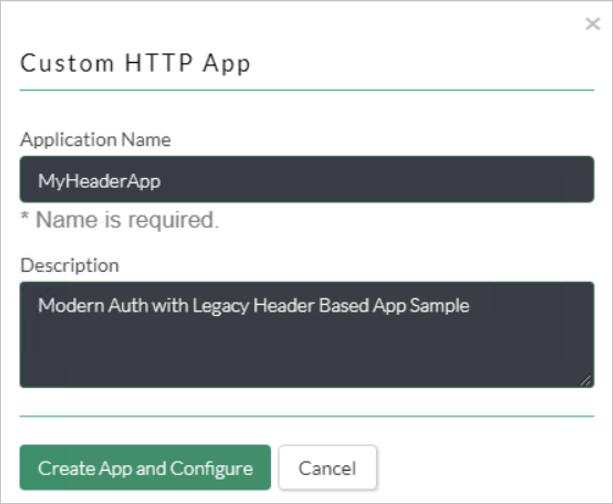
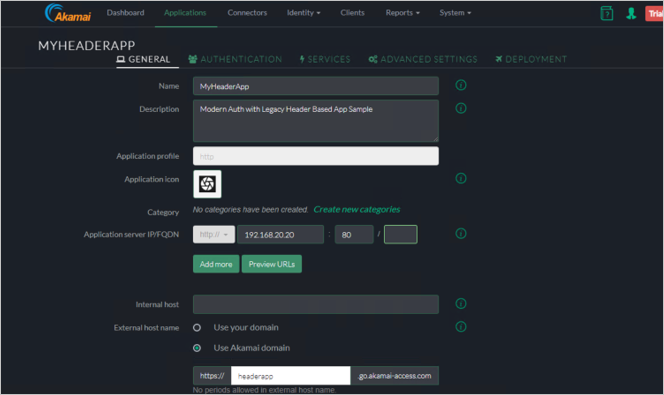
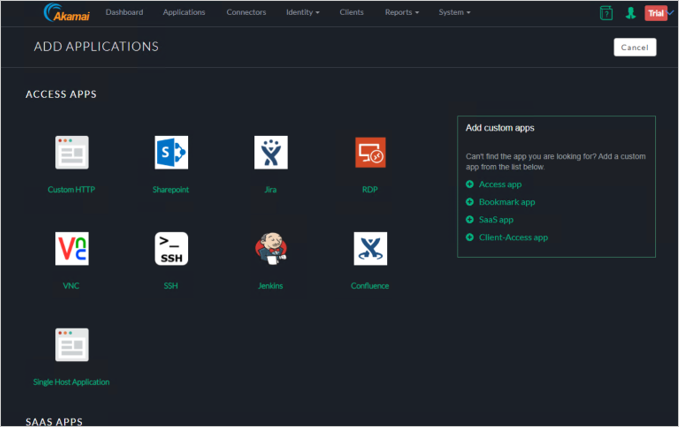
从“添加应用程序向导”中选择“自定义 HTTP”。
输入应用程序名称和描述 。
身份验证
选择“身份验证”选项卡。
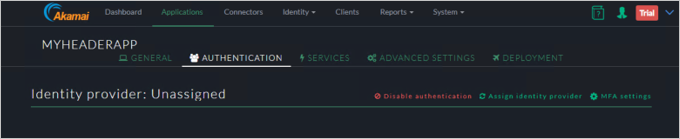
分配“标识提供者”。

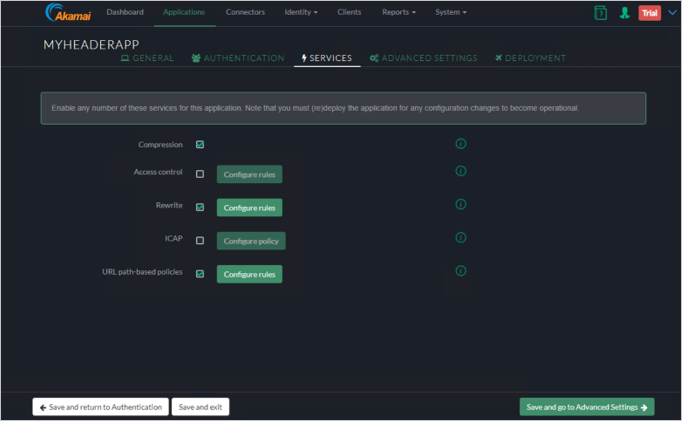
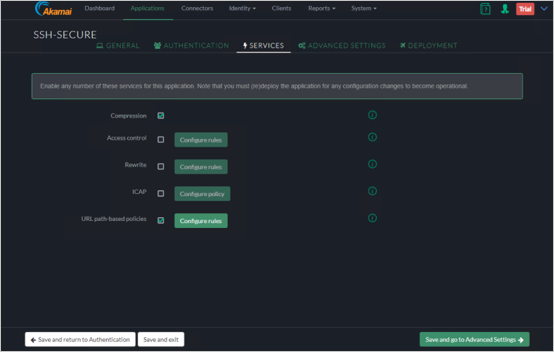
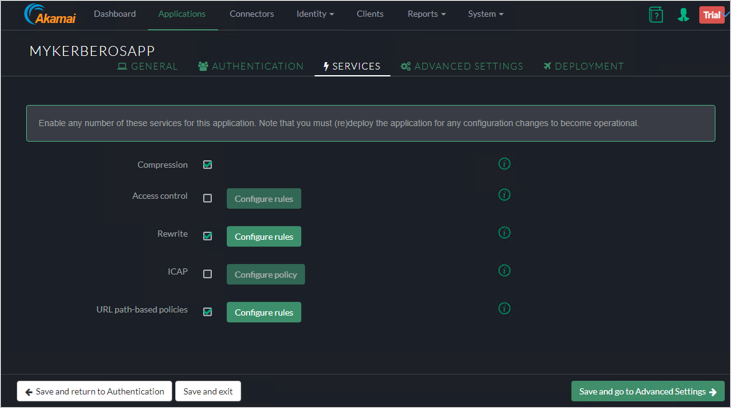
服务
单击“保存并转到‘身份验证’”。
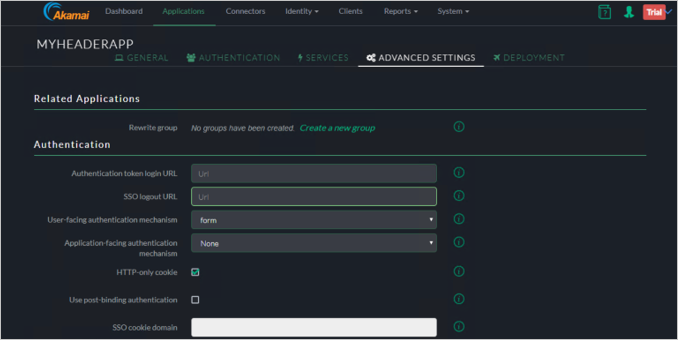
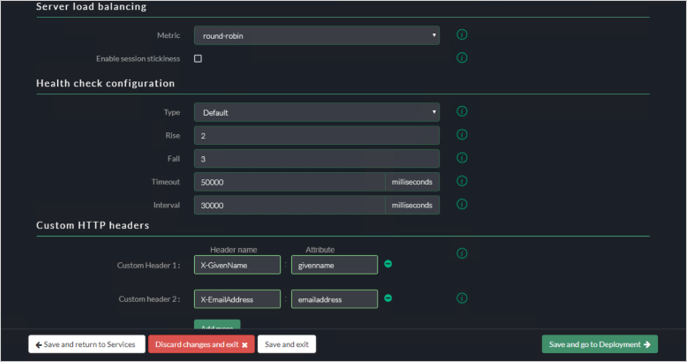
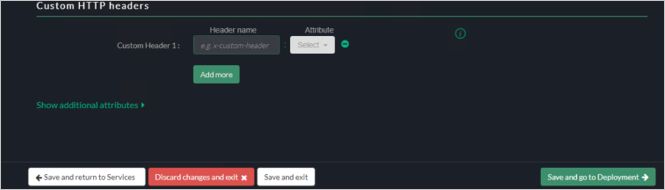
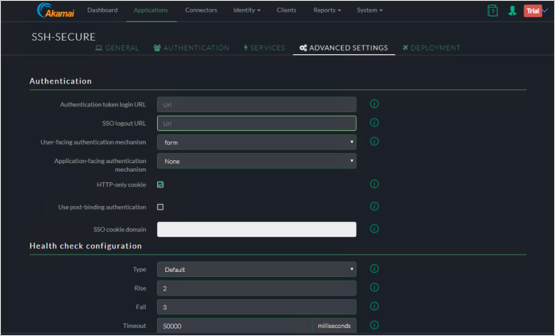
高级设置
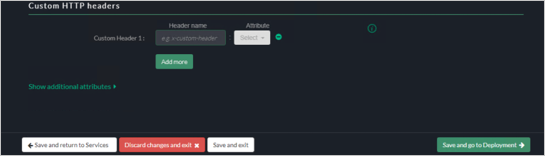
在“客户 HTTP 标头”下,指定“客户标头”和“SAML 属性”。
单击“保存并转到‘部署’”按钮。
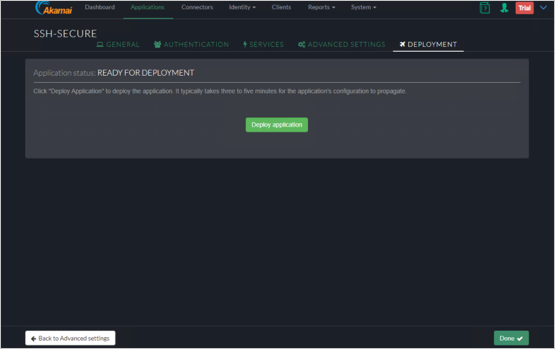
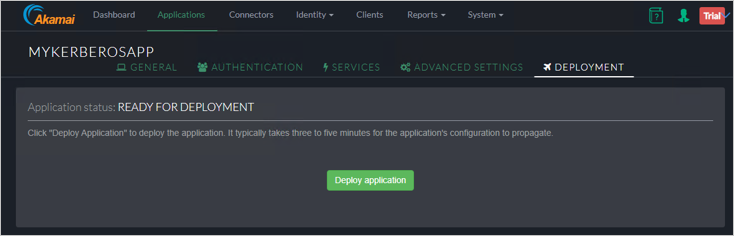
部署应用程序
单击“部署应用程序”按钮。
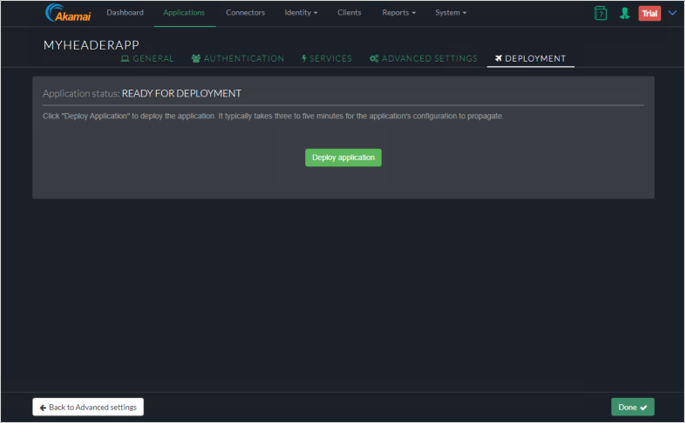
验证是否已成功部署应用程序。
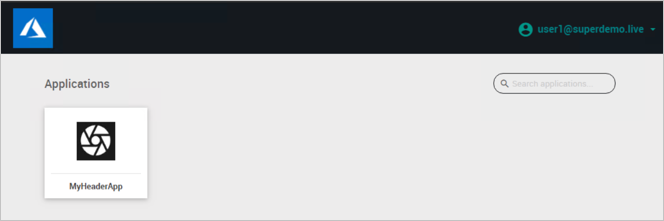
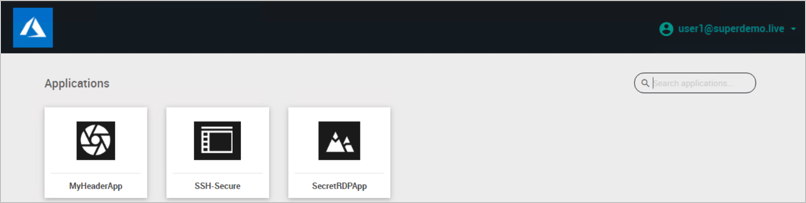
最终用户体验。
条件访问。
远程桌面
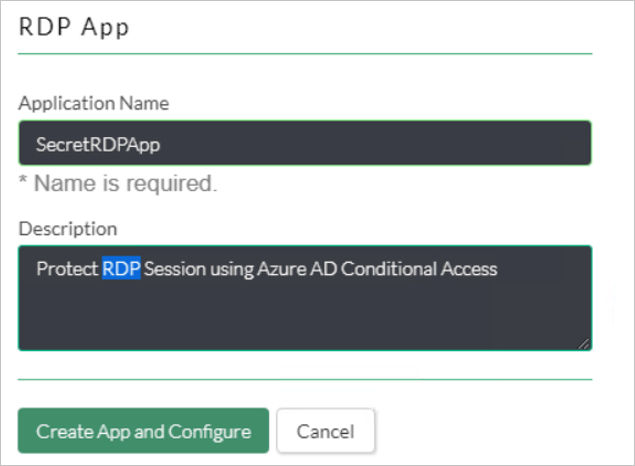
从“添加应用程序向导”中选择“RDP”。
输入应用程序名称和描述 。
指定提供服务的连接器。
身份验证
单击“保存并转到‘服务’”。

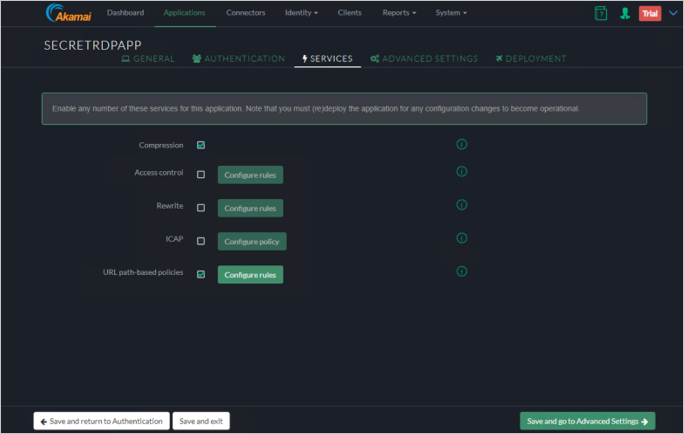
服务
单击“保存并转到‘高级设置’”。
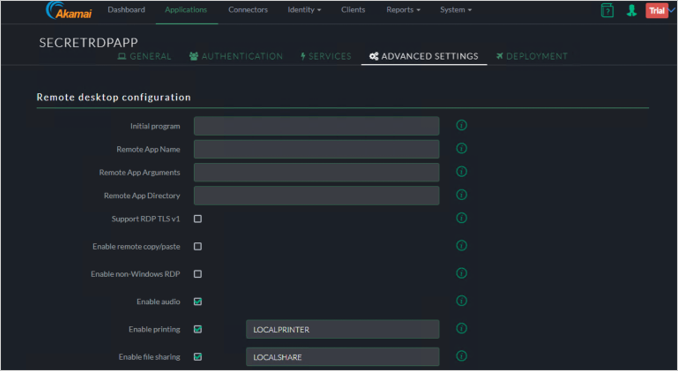
高级设置
单击“保存并转到‘部署’”。
最终用户体验
条件性访问
此外,也可直接键入 RDP 应用程序 URL。
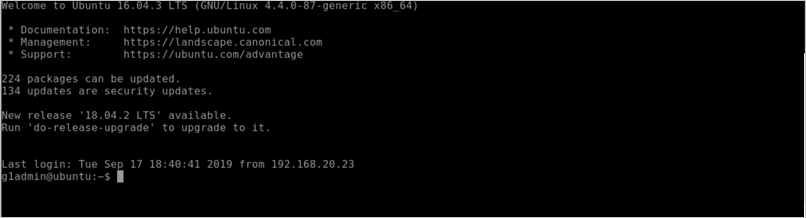
SSH
转到“添加应用程序”,然后选择“SSH”。
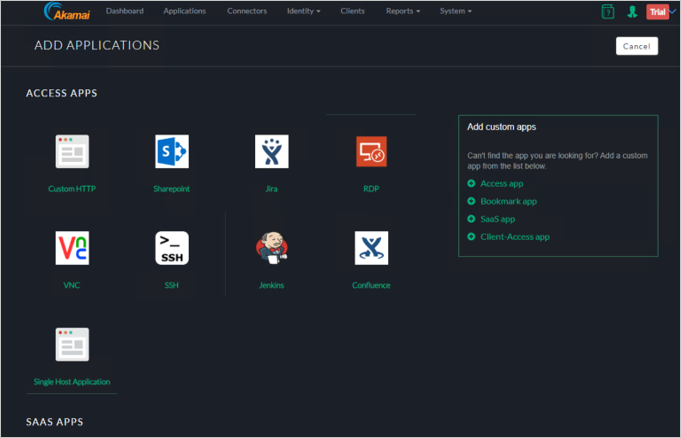
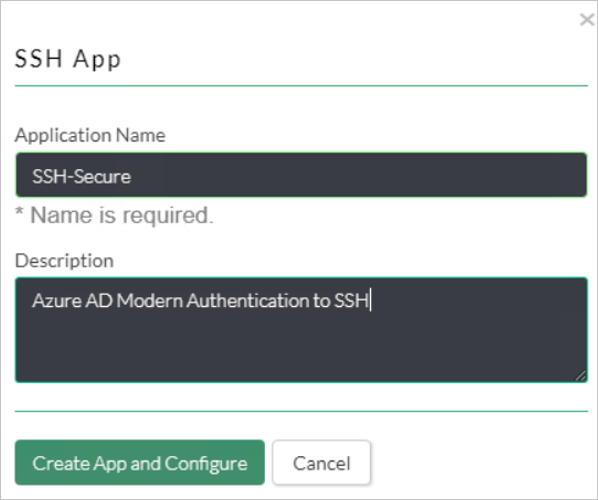
输入应用程序名称和描述 。
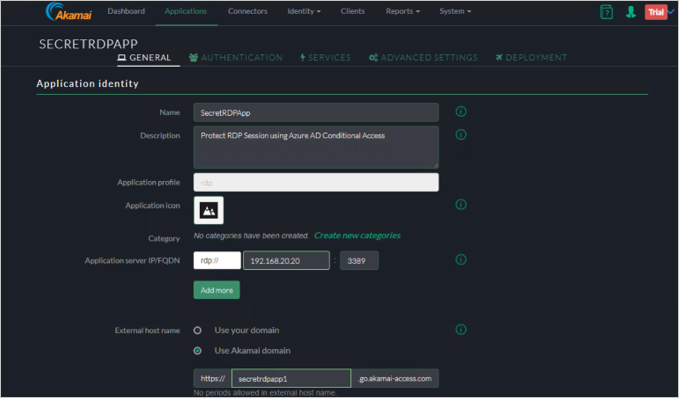
配置应用程序标识

a. 指定“名称”/“说明”。
b. 指定用于 SSH 连接的应用程序服务器 IP/FQDN 和端口。
c. 指定“SSH 用户名”/“通行短语”*请检查 Akamai EAA。
d. 指定“外部主机名”。
e. 指定“连接器位置”,并选择连接器。
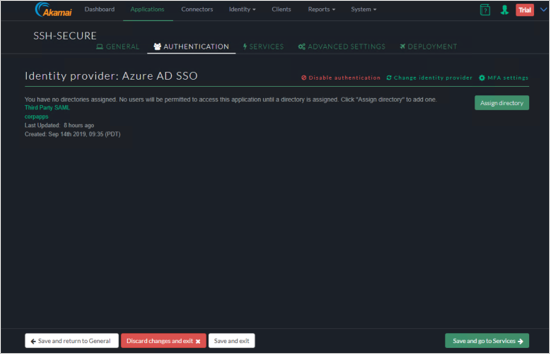
身份验证
单击“保存并转到‘服务’”。
服务
单击“保存并转到‘高级设置’”。
高级设置
单击“保存并转到‘部署’”。
部署
单击“部署应用程序”。
最终用户体验
条件性访问

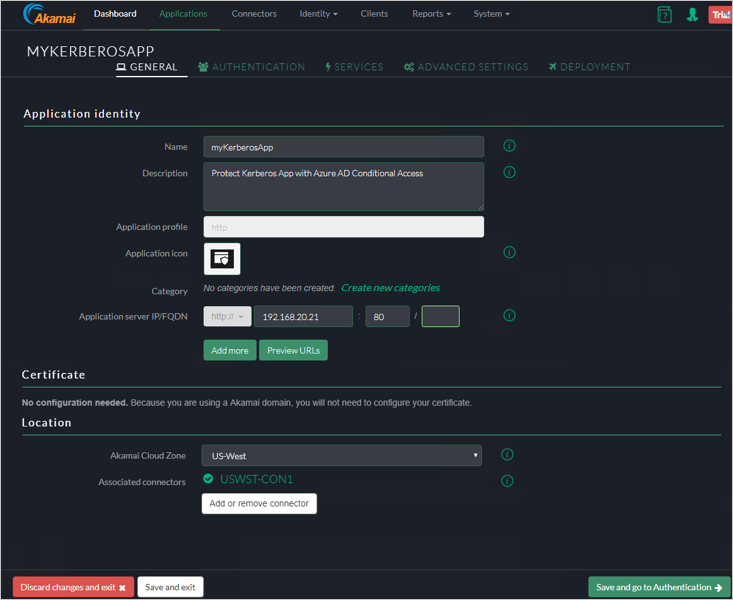
Kerberos 身份验证
在下面的示例中,我们将使用 KCD 在 http://frp-app1.superdemo.live 发布内部 Web 服务器并启用 SSO。
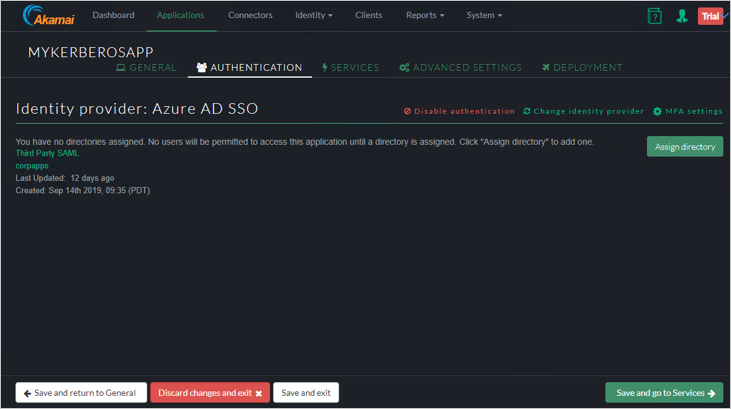
“常规”选项卡
“身份验证”标签页
分配“标识提供者”。
“服务”选项卡
高级设置
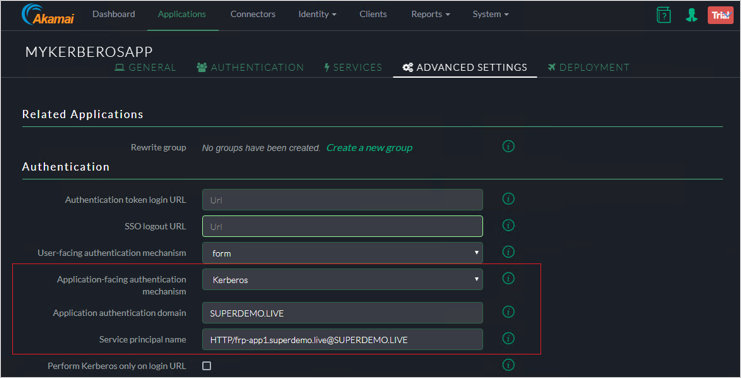
注意
Web 服务器的 SPN 的格式为 SPN@Domain,例如本演示中的 HTTP/frp-app1.superdemo.live@SUPERDEMO.LIVE。 将其余设置保留为默认值。
“部署”选项卡
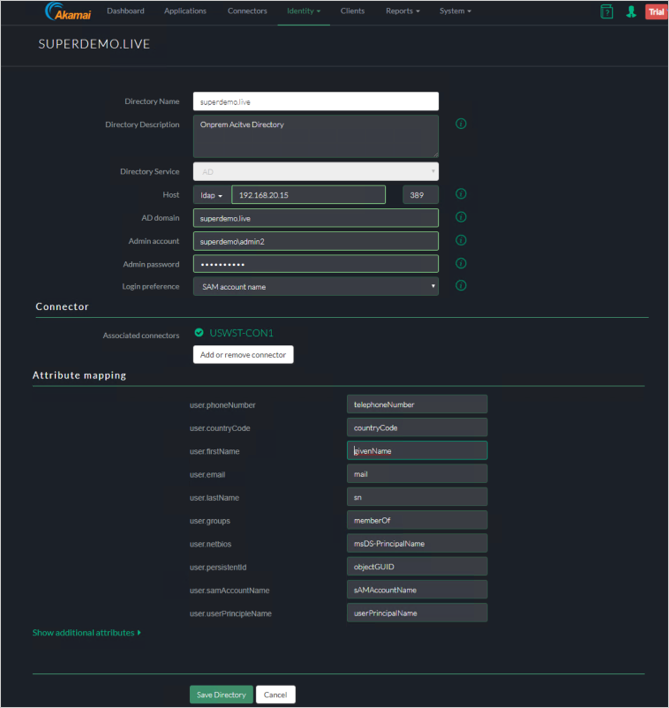
添加目录
从下拉列表中选择“AD”。
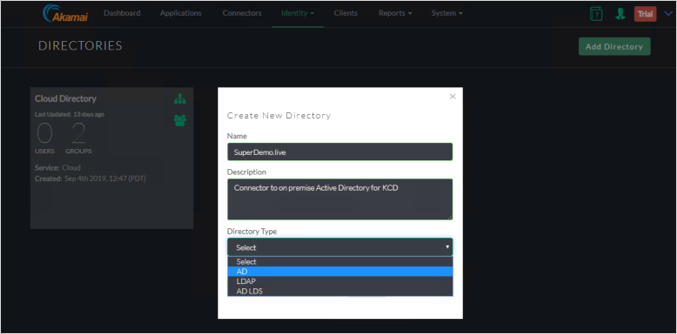
提供必要的数据。
验证目录创建情况。
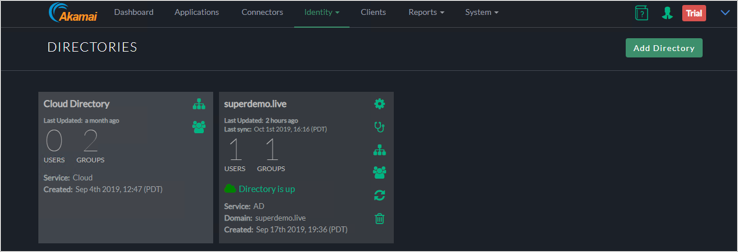
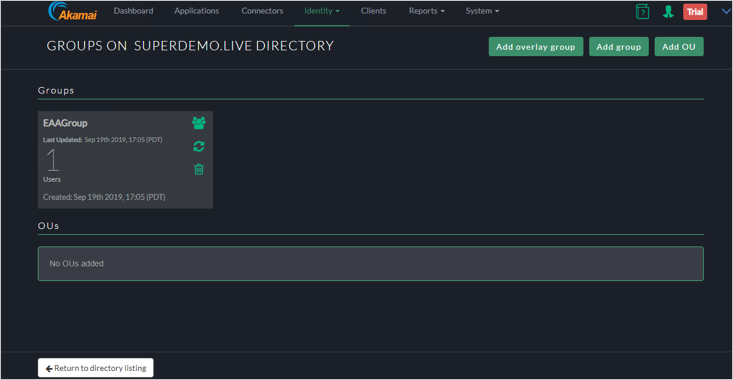
添加需要访问的组/OU。
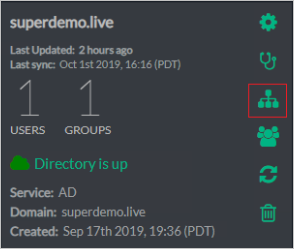
下面的组名为 EAAGroup,有 1 个成员。
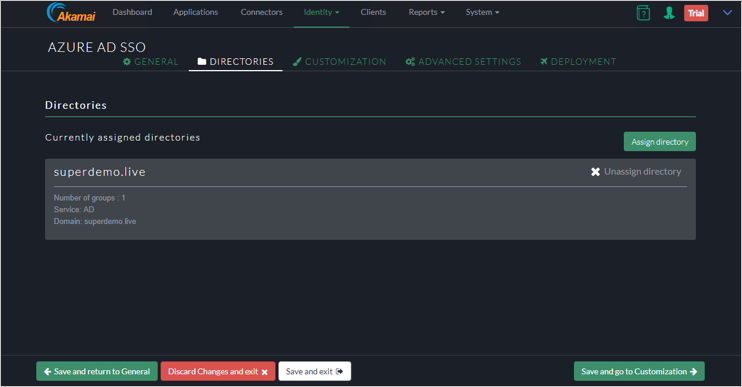
通过单击“标识”>“标识提供者”将目录添加到标识提供者,然后单击“目录”选项卡并单击“分配目录” 。
为 EAA 演练配置 KCD 委派
步骤 1:创建帐户
在本示例中,我们将使用名为 EAADelegation 的帐户。 可使用 Active Directory 用户和计算机管理单元执行此操作。
注意
用户名必须采用特定格式,根据标识截获名称而定。 从图 1 中可看出它是 corpapps.login.go.akamai-access.com
用户登录名将为:
HTTP/corpapps.login.go.akamai-access.com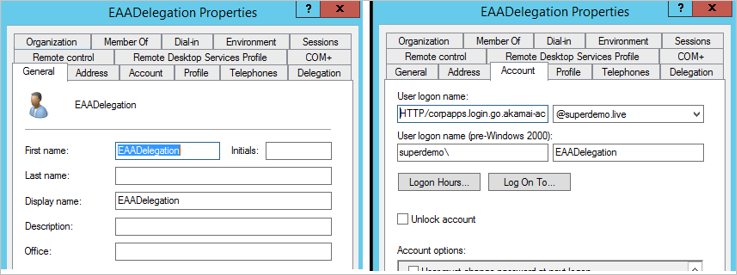
步骤 2:为此帐户配置 SPN
根据此示例,SPN 将如下所示。
setspn -s Http/corpapps.login.go.akamai-access.com eaadelegation

步骤 3:配置委派
对于 EAADelegation 帐户,请单击“委派”选项卡。
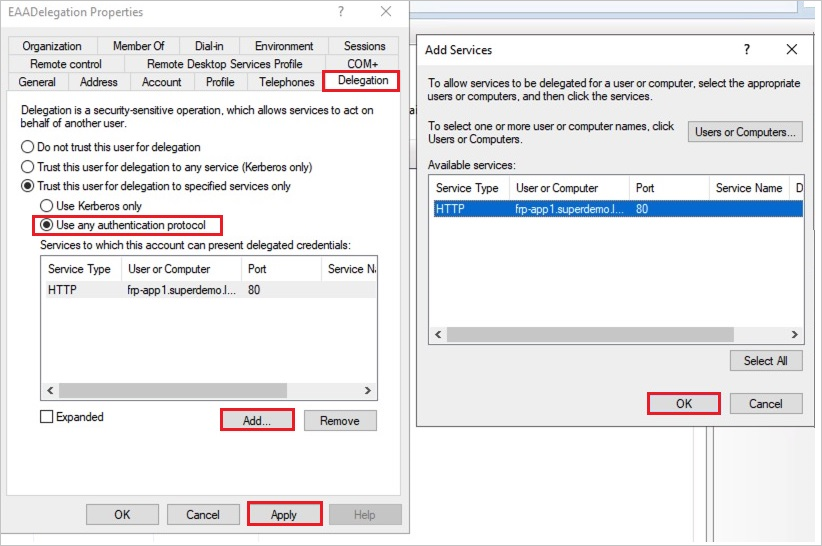
- 指定使用任意身份验证协议。
- 单击“添加”,然后添加 Kerberos 网站的应用池帐户。 如果配置正确,应自动解析为正确的 SPN。
步骤 4:为 AKAMAI EAA 创建 Keytab 文件
下面是通用语法。
ktpass /out ActiveDirectorydomain.keytab /princ
HTTP/yourloginportalurl@ADDomain.com/mapuser serviceaccount@ADdomain.com /pass +rdnPass /crypto All /ptype KRB5_NT_PRINCIPAL示例说明
片段 说明 Ktpass /out EAADemo.keytab // 输出 Keytab 文件的名称 /princ HTTP/corpapps.login.go.akamai-access.com@superdemo.live // HTTP/yourIDPName@YourdomainName /mapuser eaadelegation@superdemo.live // EAA 委派帐户 /pass RANDOMPASS // EAA 委派帐户密码 /crypto All ptype KRB5_NT_PRINCIPAL // 查阅 Akamai EAA 文档 Ktpass /out EAADemo.keytab /princ HTTP/corpapps.login.go.akamai-access.com@superdemo.live /mapuser eaadelegation@superdemo.live /pass RANDOMPASS /crypto All ptype KRB5_NT_PRINCIPAL

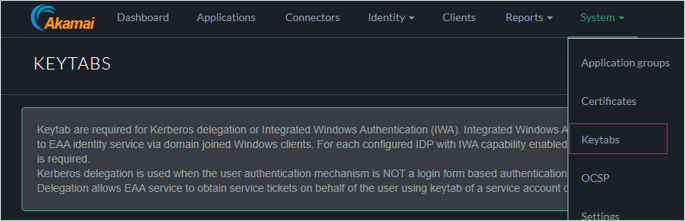
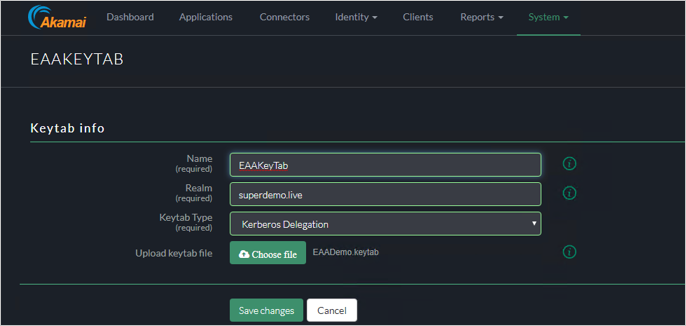
步骤 5:在 AKAMAI EAA 控制台中导入 Keytab
单击“系统”>“Keytab” 。
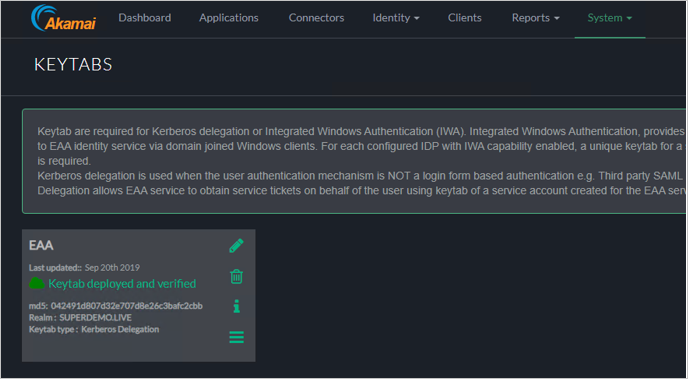
在 Keytab 类型中,选择“Kerberos 委派”。
确保 Keytab 显示为“已部署且已验证”。
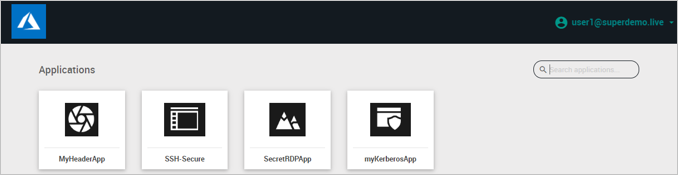
用户体验
条件性访问

创建 Akamai 测试用户
在本部分,你将在 Akamai 中创建名为 B.Simon 的用户。 请与 Akamai 客户端支持团队协作来在 Akamai 平台中添加用户。 使用单一登录前,必须先创建并激活用户。
测试 SSO
在本部分,你将使用以下选项测试 Microsoft Entra 单一登录配置。
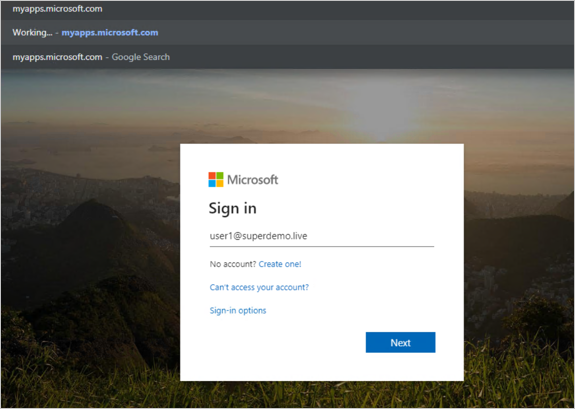
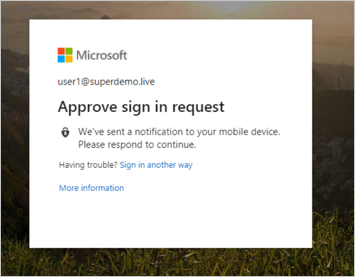
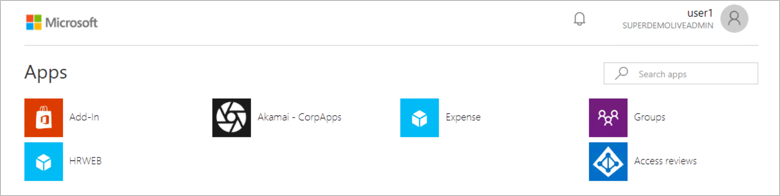
单击“测试此应用程序”,你应当会自动登录到为其设置了 SSO 的 Akamai。
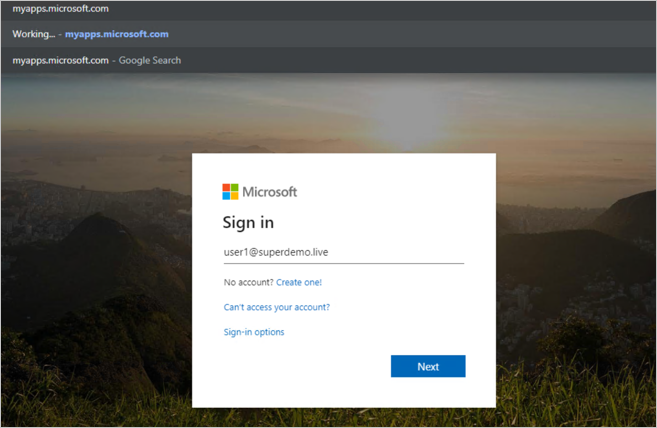
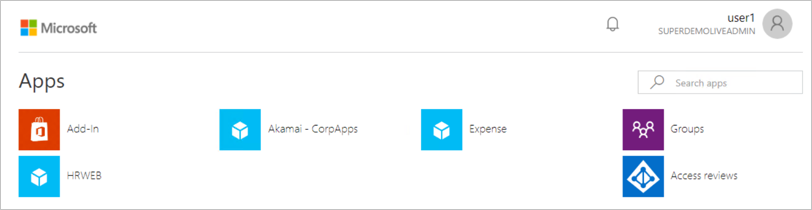
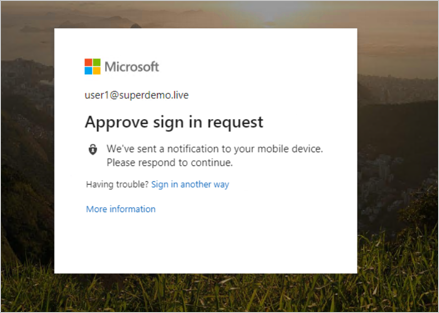
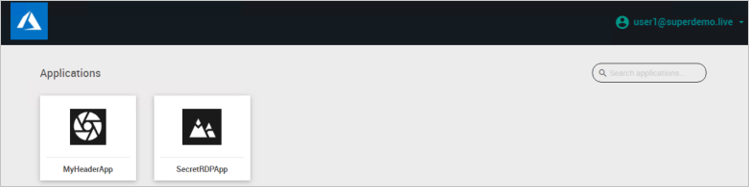
你可使用 Microsoft 的“我的应用”。 在“我的应用”中单击“Akamai”磁贴时,你应该会自动登录到为其设置了 SSO 的 Akamai。 有关“我的应用”的详细信息,请参阅“我的应用”简介。
后续步骤
在配置 Akamai 后,即可强制实施会话控制,从而实时防止组织的敏感数据遭到外泄和渗透。 会话控制从条件访问扩展而来。 了解如何通过 Microsoft Defender for Cloud Apps 强制实施会话控制。