培训
你当前正在访问 Microsoft Azure Global Edition 技术文档网站。 如果需要访问由世纪互联运营的 Microsoft Azure 中国技术文档网站,请访问 https://docs.azure.cn。
管理通话
了解如何使用 Azure 通信服务 SDK 管理通话。 我们将了解如何发起通话,如何管理其参与者和属性。
- 具有活动订阅的 Azure 帐户。 免费创建帐户。
- 已部署的通信服务资源。 创建通信服务资源。
- 用于启用呼叫客户端的
User Access Token。 详细了解如何获取User Access Token - 可选:完成开始向应用程序添加通话功能快速入门
下表定义了 Azure 通信服务中的分组讨论室支持。
下表显示了对特定通话类型和标识功能的支持。
| 标识 | Teams 会议 | 房间 | 1 对 1 通话 | 组呼叫 | 1:1 Teams 互操作通话 | 小组 Teams 互操作通话 |
|---|---|---|---|---|---|---|
| 通信服务用户 | ✔️ | ✔️ | ✔️ | ✔️ | ✔️ | ✔️ |
| Microsoft 365 用户 | ✔️ | ✔️ | ✔️ |
下表显示了与各个标识类型相关的通话 SDK 中对各个 API 的支持。
| Operations | 通信服务用户 | Microsoft 365 用户 |
|---|---|---|
| 发起对通信服务用户的呼叫 | ✔️ | |
| 发起对 Microsoft 365 用户的呼叫 | ✔️ | ✔️ |
| 发起对电话号码的呼叫 | ✔️ | ✔️ |
| 加入会议室 | ✔️ | |
| 加入 Teams 会议 | ✔️ | ✔️ |
| 基于 groupId 加入通话 | ✔️ | |
| 接受或拒绝传入呼叫 | ✔️ | ✔️ |
| 搁置和恢复通话 | ✔️ | ✔️ |
| 获取参与者 | ✔️ | ✔️ |
| 添加通信服务用户 | ✔️ | |
| 删除通信服务用户 | ✔️ | ✔️ |
| 添加或删除 Microsoft 365 用户 | ✔️ | ✔️ |
| 添加或删除电话号码 | ✔️ | ✔️ |
| 将远程参与者设为静音或取消静音 | ✔️[1] | ✔️[1] |
| 挂机 | ✔️ | ✔️ |
| 结束每个人的通话 | ✔️[2] | ✔️ |
[1] 仅群组通话、会议室和 Teams 会议支持此 API。 [2] 会议室不支持此 API。
下表显示了各个 Azure 通信服务 SDK 的功能支持。
| 支持状态 | Web | Web UI | iOS | iOS UI | Android | Android UI | Windows |
|---|---|---|---|---|---|---|---|
| 支持 | ✔️ | ✔️ | ✔️ | ✔️ | ✔️ | ✔️ | ✔️ |
使用 npm install 命令安装适用于 JavaScript 的 Azure 通信服务通用 SDK 和通话 SDK:
控制台
npm install @azure/communication-common --save
npm install @azure/communication-calling --save
大多数通话操作需要 CallClient 实例。 创建新的 CallClient 实例时,可以使用自定义选项(如 Logger 实例)对其进行配置。
有了 CallClient 实例后,可以通过调用 createCallAgent 创建 CallAgent 实例。 此方法将异步返回 CallAgent 实例对象。
createCallAgent 方法使用 CommunicationTokenCredential 作为参数。 它接受用户访问令牌。
可在 CallClient 实例上使用 getDeviceManager 方法来访问 deviceManager。
JavaScript
const { CallClient } = require('@azure/communication-calling');
const { AzureCommunicationTokenCredential} = require('@azure/communication-common');
const { AzureLogger, setLogLevel } = require("@azure/logger");

// Set the logger's log level
setLogLevel('verbose');

// Redirect log output to console, file, buffer, REST API, or whatever location you want
AzureLogger.log = (...args) => {
    console.log(...args); // Redirect log output to console
};

const userToken = '<USER_TOKEN>';
callClient = new CallClient(options);
const tokenCredential = new AzureCommunicationTokenCredential(userToken);
const callAgent = await callClient.createCallAgent(tokenCredential, {displayName: 'optional Azure Communication Services user name'});
const deviceManager = await callClient.getDeviceManager()
Call Agent 实例可帮助你管理通话(以加入或启动通话)。 通话 SDK 需要连接到 Microsoft 基础结构以获取传入通话通知并协调其他通话详细信息,否则无法工作。 你的 Call Agent 有两种可能的状态:
已连接 - Call Agent connectionStatue 值为 Connected 表示客户端 SDK 已连接,能够接收来自 Microsoft 基础结构的通知。
已断开连接 - Call Agent connectionStatue 值为 Disconnected 表示存在阻止 SDK 正确连接的问题。 应重新创建 Call Agent。
-
invalidToken:如果令牌已过期或无效,Call Agent实例会断开连接并出现此错误。 -
connectionIssue:如果客户端连接到 Microsoft 基础结构时出现问题,则在多次重试后,Call Agent会显示connectionIssue错误。
可以通过检查 connectionState 属性的当前值来检查本地 Call Agent 是否已连接到 Microsoft 基础结构。 在通话过程中,可以监听 connectionStateChanged 事件,以确定 Call Agent 是否从“已连接”状态更改为“已断开连接”状态。
JavaScript
const connectionState = callAgentInstance.connectionState;
console.log(connectionState); // it may return either of 'Connected' | 'Disconnected'

const connectionStateCallback = (args) => {
    console.log(args); // it will return an object with oldState and newState, each of having a value of either of 'Connected' | 'Disconnected'
    // it will also return reason, either of 'invalidToken' | 'connectionIssue'
}
callAgentInstance.on('connectionStateChanged', connectionStateCallback);
要创建并启动通话,请在callAgent上使用其中一个 API,并提供你通过通信服务标识 SDK 创建的用户。
创建和发起呼叫的操作是同步的。 可以通过 call 实例订阅通话事件。
若要呼叫另一个通信服务用户,请在 callAgent 上使用 startCall 方法,并传递你使用通信服务管理库创建的接收人的 CommunicationUserIdentifier。
对于与用户之间的一对一通话,请使用以下代码:
JavaScript
const userCallee = { communicationUserId: '<ACS_USER_ID>' }
const oneToOneCall = callAgent.startCall([userCallee]);
若要向公共交换电话网络 (PSTN) 发起通话,请在 callAgent 上使用 startCall 方法并传递接收方的 PhoneNumberIdentifier。 必须将通信服务资源配置为允许 PSTN 通话。
呼叫 PSTN 号码时,需要指定备用呼叫方 ID。 备用呼叫方 ID 是 PSTN 通话中用于标识呼叫方的电话号码(基于 E.164 标准)。 这是通话接收方看到的来电的电话号码。
备注
请查看 PSTN 通话产品/服务的详细信息。 若要进行预览计划访问,请申请早期采用者计划。
对于与 PSTN 号码之间的一对一通话,请使用以下代码:
JavaScript
const pstnCallee = { phoneNumber: '<ACS_USER_ID>' }
const alternateCallerId = {phoneNumber: '<ALTERNATE_CALLER_ID>'};
const oneToOneCall = callAgent.startCall([pstnCallee], { alternateCallerId });
对于与用户和 PSTN 号码之间的一对 N 通话,请使用以下代码:
JavaScript
const userCallee = { communicationUserId: '<ACS_USER_ID>' }
const pstnCallee = { phoneNumber: '<PHONE_NUMBER>'};
const alternateCallerId = {phoneNumber: '<ALTERNATE_CALLER_ID>'};
const groupCall = callAgent.startCall([userCallee, pstnCallee], { alternateCallerId });
若要联接 room 调用,可以实例化一个上下文对象,并以 roomId 属性作为 room 标识符。 若要加入通话,请使用 join 方法并传递上下文实例。
JavaScript
const context = { roomId: '<RoomId>' }
const call = callAgent.join(context);
通过 room,应用程序开发人员可以更好地控制谁可以加入通话、何时见面以及如何协作。 若要详细了解 rooms,可以阅读概念文档 或遵循快速入门指南。
备注
groupId 参数被视为系统元数据,Microsoft 可能会使用它来执行运行系统所需的操作。 不要在 groupId 值中包含个人数据。 Microsoft 不会将此参数视为个人数据,其内容可能会显示给 Microsoft 员工,也可能会被长期存储。
groupId 参数要求数据采用 GUID 格式。 建议使用随机生成的 GUID,这些 GUID 在系统中不会被视为个人数据。
若要发起新的群组通话或加入正在进行的群组通话,请使用 join 方法并传递带有 groupId 属性的对象。
groupId 值必须为 GUID。
JavaScript
const context = { groupId: '<GUID>'};
const call = callAgent.join(context);
当登录的标识收到来电时,callAgent 实例会发出 incomingCall 事件。 若要侦听此事件,请使用以下选项之一进行订阅:
JavaScript
const incomingCallHandler = async (args: { incomingCall: IncomingCall }) => {
    const incomingCall = args.incomingCall;

    // Get incoming call ID
    var incomingCallId = incomingCall.id

    // Get information about this Call. This API is provided as a preview for developers
    // and may change based on feedback that we receive. Do not use this API in a production environment.
    // To use this api please use 'beta' release of Azure Communication Services Calling Web SDK
    var callInfo = incomingCall.info;

    // Get information about caller
    var callerInfo = incomingCall.callerInfo

    // Accept the call
    var call = await incomingCall.accept();

    // Reject the call
    incomingCall.reject();

    // Subscribe to callEnded event and get the call end reason
     incomingCall.on('callEnded', args => {
        console.log(args.callEndReason);
    });

    // callEndReason is also a property of IncomingCall
    var callEndReason = incomingCall.callEndReason;
};
callAgentInstance.on('incomingCall', incomingCallHandler);
incomingCall 事件包括你可以接受或拒绝的一个 incomingCall 实例。
如果在启动、接受或加入启用了视频功能的通话时摄像头不可用,Azure Communication Calling SDK 会引发 cameraStartFailed: true 通话诊断。 在这种情况下,通话开始时视频是关闭的。 摄像头可能不可用,因为它正被另一个进程使用,或者在操作系统中被禁用了。
备注
在任何给定的时刻,应只有 1 个活动通话(处于 Connected 状态,具有活动媒体)。 所有其他通话都应由用户搁置,或者由应用程序以编程方式搁置。 这种情况在联系中心等场景中很常见,用户可能需要处理多个出站和入站呼叫,所有非活动通话都应搁置,并且用户应仅在活动通话中与其他人交互
若要搁置或恢复通话,可以使用 hold 和 resume 异步 API:
若要搁置通话
JavaScript
await call.hold();
当 hold API 解析时,通话状态将设置为 LocalHold。 在一对一通话中,另一个参与者也会被置于保持通话状态,从该参与者的角度来看,该通话状态设置为“RemoteHold”。 稍后,另一个参与者可能会将其通话置于保持通话状态,这将导致状态变为 LocalHold。
在群组通话或会议中,hold 是本地操作,不会为其他通话参与者保持通话。
要恢复通话,所有发起保持通话的用户都必须恢复通话。
若要从搁置恢复通话:
await call.resume();
当 resume API 解析时,通话状态将再次设置为 Connected。
若要使本地终结点静音或取消静音,可使用 mute 和 unmute 异步 API:
JavaScript
//mute local device (microphone / sent audio)
await call.mute();

//unmute local device (microphone / sent audio)
await call.unmute();
如果将传入的音频设置为静音,这会将通话音量设置为 0。 若要将传入的视频设置为静音或取消静音,可使用 muteIncomingAudio 和 unmuteIncomingAudio 异步 API:
JavaScript
//mute local device (speaker)
await call.muteIncomingAudio();

//unmute local device (speaker)
await call.unmuteIncomingAudio();
当传入的音频被静音时,参与者客户端 SDK 仍将收到呼叫音频(远程参与者的音频)。 调用“call.unmuteIncomingAudio()”后,才会在扬声器中听到通话音频,参与者才能听到。 但是,可以对呼叫音频应用筛选器并播放筛选后的音频。
所有远程参与者都在 RemoteParticipant 对象中有详细说明,并可通过通话实例上的 remoteParticipants 集合获取。
remoteParticipants 可以从 Call 实例访问。
remoteParticipants 集合返回通话中远程参与者的列表:
JavaScript
call.remoteParticipants; // [remoteParticipant, remoteParticipant....]
要向通话添加参与者(用户或电话号码),可以使用addParticipant API。 提供 Identifier 类型之一。 它将同步返回 remoteParticipant 实例。 当参与者成功添加到通话中时,通话中将引发 remoteParticipantsUpdated 事件。
JavaScript
const userIdentifier = { communicationUserId: '<ACS_USER_ID>' };
const pstnIdentifier = { phoneNumber: '<PHONE_NUMBER>' }
const remoteParticipant = call.addParticipant(userIdentifier);
const alternateCallerId = {  phoneNumber: '<ALTERNATE_CALLER_ID>' };
const remoteParticipant = call.addParticipant(pstnIdentifier, { alternateCallerId });
若要从通话中删除参与者(用户或电话号码),可以调用 removeParticipant。 你必须传递 Identifier 类型之一。 从通话中删除参与者后,此方法异步进行解析。 还将从 remoteParticipants 集合中删除该参与者。
JavaScript
const userIdentifier = { communicationUserId: '<ACS_USER_ID>' };
const pstnIdentifier = { phoneNumber: '<PHONE_NUMBER>' }
await call.removeParticipant(userIdentifier);
await call.removeParticipant(pstnIdentifier);
远程参与者有一组关联的属性和集合:
-
CommunicationIdentifier:获取远程参与者的标识符。 标识是CommunicationIdentifier类型之一:
JavaScript
const identifier = remoteParticipant.identifier;
它可能是下列
CommunicationIdentifier类型之一:-
{ communicationUserId: '<ACS_USER_ID'> }:表示 Azure 通信服务用户的对象。 -
{ phoneNumber: '<E.164>' }:一个对象,表示采用 E.164 格式的电话号码。 -
{ microsoftTeamsUserId: '<TEAMS_USER_ID>', isAnonymous?: boolean; cloud?: "public" | "dod" | "gcch" }:一个对象,表示 Teams 用户。 -
{ id: string }:一个对象,表示不属于其他标识符类型的标识符
-
state:获取远程参与者的状态。
JavaScript
const state = remoteParticipant.state;
此状态可能是:
-
Idle:初始状态。 -
Connecting:参与者正在连接到通话时的过渡状态。 -
Ringing:参与者电话正在响铃。 -
Connected:参与者已连接到通话。 -
Hold:参与者已暂停通话。 -
EarlyMedia:在参与者连接到通话之前播放的通知。 -
InLobby:指示远程参与者位于会议厅中。 -
Disconnected:最终状态。 参与者已断开通话连接。 如果远程参与者断开了其网络连接,则两分钟后其状态将变为Disconnected。
-
callEndReason:若要了解参与者退出通话的原因,请检查callEndReason属性:JavaScriptconst callEndReason = remoteParticipant.callEndReason; const callEndReasonCode = callEndReason.code // (number) code associated with the reason const callEndReasonSubCode = callEndReason.subCode // (number) subCode associated with the reason注意:
- 仅当通过 Call.addParticipant() API 添加远程参与者且远程参与者拒绝时,才会设置此属性。
- 如果 UserB 将 UserC 移出通话,从 UserA 的角度来看,UserA 不会看到 UserC 的此标志被设置。 换句话说,UserA 根本看不到 UserC 的 callEndReason 属性被设置。
isMuted状态:若要了解远程参与者是否已静音,请检查isMuted属性。 它将返回Boolean。JavaScriptconst isMuted = remoteParticipant.isMuted;isSpeaking状态:若要了解远程参与者是否正在讲话,请检查isSpeaking属性。 它将返回Boolean。JavaScriptconst isSpeaking = remoteParticipant.isSpeaking;videoStreams:若要检查给定参与者在此通话中发送的所有视频流,请检查videoStreams集合。 它包含RemoteVideoStream对象。JavaScriptconst videoStreams = remoteParticipant.videoStreams; // [RemoteVideoStream, ...]displayName:若要获取此远程参与者的显示名称,请检查displayName属性。它将返回字符串。JavaScriptconst displayName = remoteParticipant.displayName;endpointDetails:获取此远程参与者的所有终结点的详细信息JavaScriptconst endpointDetails: EndpointDetails[] = remoteParticipant.endpointDetails;注意:远程参与者可以处于来自多个终结点的通话中,每个终结点都有自己的唯一的
participantId。participantId不同于 RemoteParticipant.identifier 的原始 ID。
备注
若要使用此 API,请使用 Azure 通信服务通话 Web SDK 1.26.1 版或更高版本。
若要将连接到通话的所有其他参与者或特定参与者静音,可对通话使用异步 API muteAllRemoteParticipants,对远程参与者使用 mute。 当本地参与者被其他人静音时,将引发通话中的 mutedByOthers 事件。
注意:不支持将 PSTN(电话号码)参与者或 1:1 通话参与者静音的场景。
JavaScript
//mute all participants except yourself
await call.muteAllRemoteParticipants();

//mute a specific participant
await call.remoteParticipants[0].mute();
获取通话的唯一 ID(字符串):
JavaScript
const callId: string = call.id;
获取本地参与者 ID:
JavaScript
const participantId: string = call.info.participantId;
注意:Azure 通信服务标识可以使用许多终结点中的 Web 通话 SDK,每个终结点都有自己的唯一 participantId。
participantId 不同于 Azure 通信服务标识原始 ID。
如果加入 Teams 会议,请检索线程 ID:
JavaScript
const threadId: string | undefined = call.info.threadId;
获取通话信息:
JavaScript
const callInfo = call.info;
通过检查“call”实例上的 remoteParticipants 集合了解通话中的其他参与者:
JavaScript
const remoteParticipants = call.remoteParticipants;
识别来电的呼叫方:
JavaScript
const callerIdentity = call.callerInfo.identifier;
identifier 是 CommunicationIdentifier 类型之一。
获取通话状态:
JavaScript
const callState = call.state;
这会返回一个表示当前通话状态的字符串:
-
None:初始通话状态。 -
Connecting:拨打或接听电话后的初始过渡状态。 -
Ringing:对于去电,表示远程参与者的电话正在响铃。 在远程参与者端,它是Incoming。 -
EarlyMedia:表示在接通电话前播放通知的状态。 -
Connected:指示通话已连接。 -
LocalHold:表示通话中的本地参与者已将通话置于保持状态。 本地终结点与远程参与者之间没有媒体流动。 -
RemoteHold:表示通话中的远程参与者已将通话置于保持状态。 本地终结点与远程参与者之间没有媒体流动。 -
InLobby:指示用户位于会议厅中。 -
Disconnecting:在通话进入Disconnected状态之前的过渡状态。 -
Disconnected:最终通话状态。 如果网络连接断开,则两分钟后状态将变为Disconnected。
检查 callEndReason 属性来查明通话结束的原因:
JavaScript
const callEndReason = call.callEndReason;
const callEndReasonMessage = callEndReason.message // (string) user friendly message
const callEndReasonCode = callEndReason.code // (number) code associated with the reason
const callEndReasonSubCode = callEndReason.subCode // (number) subCode associated with the reason
通过检查 direction 属性了解当前通话是来电还是去电。 它将返回 CallDirection。
JavaScript
const isIncoming = call.direction == 'Incoming';
const isOutgoing = call.direction == 'Outgoing';
通过检查localVideoStreams集合来检查活动视频流和活动屏幕共享流。
localVideoStreams API 返回类型为 Video、ScreenSharing 或 RawMedia 的 LocalVideoStream 对象。
JavaScript
const localVideoStreams = call.localVideoStreams;
检查当前麦克风是否已静音。 它将返回 Boolean。
JavaScript
const muted = call.isMuted;
检查当前传入的音频(扬声器)是否被静音。 它将返回 Boolean。
JavaScript
const incomingAudioMuted = call.isIncomingAudioMuted;
检查视频是否打开。 它将返回 Boolean。
JavaScript
const isLocalVideoStarted = call.isLocalVideoStarted;
检查屏幕共享是否打开。 它将返回 Boolean。
JavaScript
const isScreenSharingOn = call.isScreenSharingOn;
有两种方法可以挂断通话。 你可以退出通话并让其他参与者留在通话中,或终止所有参与者通话。 如果要退出通话,只需使用
JavaScript
call.hangUp();
如果提供 HangUpOptions,也可以结束所有参与者的通话。
备注
此 API 在会议室中不可用。
JavaScript
call.hangUp( forEveryone: true);
找到项目级 build.gradle 文件,并将 mavenCentral() 添加到 buildscript 和 allprojects 下的存储库列表中:
groovy
buildscript {
    repositories {
    ...
        mavenCentral()
    ...
    }
}
groovy
allprojects {
    repositories {
    ...
        mavenCentral()
    ...
    }
}
然后,在模块级 build.gradle 文件中,将以下行添加到 dependencies 部分:
groovy
dependencies {
    ...
    implementation 'com.azure.android:azure-communication-calling:1.0.0'
    ...
}
若要创建 CallAgent 实例,必须对 CallClient 实例调用 createCallAgent 方法。 此调用将异步返回 CallAgent 实例对象。
createCallAgent 方法采用 CommunicationUserCredential 作为参数来封装访问令牌。
若要访问 DeviceManager,必须先创建 callAgent 实例。 然后,可以使用 CallClient.getDeviceManager 方法获取 DeviceManager。
Java
String userToken = '<user token>';
CallClient callClient = new CallClient();
CommunicationTokenCredential tokenCredential = new CommunicationTokenCredential(userToken);
android.content.Context appContext = this.getApplicationContext(); // From within an activity, for instance
CallAgent callAgent = callClient.createCallAgent(appContext, tokenCredential).get();
DeviceManager deviceManager = callClient.getDeviceManager(appContext).get();
若要为主叫方设置显示名称,请使用以下替代方法:
Java
String userToken = '<user token>';
CallClient callClient = new CallClient();
CommunicationTokenCredential tokenCredential = new CommunicationTokenCredential(userToken);
android.content.Context appContext = this.getApplicationContext(); // From within an activity, for instance
CallAgentOptions callAgentOptions = new CallAgentOptions();
callAgentOptions.setDisplayName("Alice Bob");
DeviceManager deviceManager = callClient.getDeviceManager(appContext).get();
CallAgent callAgent = callClient.createCallAgent(appContext, tokenCredential, callAgentOptions).get();
若要创建和发起呼叫,需要调用 CallAgent.startCall() 方法并为被叫方提供 Identifier。
若要加入群组通话,需要调用 CallAgent.join() 方法并提供 groupId。 组 ID 必须采用 GUID 或 UUID 格式。
创建和发起呼叫的操作是同步的。 通过呼叫实例,可订阅呼叫中的所有事件。
若要向另一位通信服务用户发出呼叫,请对 callAgent 调用 call 方法,并传递带有 communicationUserId 键的对象。
Java
StartCallOptions startCallOptions = new StartCallOptions();
Context appContext = this.getApplicationContext();
CommunicationUserIdentifier acsUserId = new CommunicationUserIdentifier(<USER_ID>);
CommunicationUserIdentifier participants[] = new CommunicationUserIdentifier[]{ acsUserId };
call oneToOneCall = callAgent.startCall(appContext, participants, startCallOptions);
备注
请查看 PSTN 通话产品/服务的详细信息。 若要进行预览计划访问,请申请早期采用者计划。
若要对用户和 PSTN 号码发出一对多呼叫,必须指定被叫方的电话号码。 必须将通信服务资源配置为允许 PSTN 呼叫:
Java
CommunicationUserIdentifier acsUser1 = new CommunicationUserIdentifier(<USER_ID>);
PhoneNumberIdentifier acsUser2 = new PhoneNumberIdentifier("<PHONE_NUMBER>");
CommunicationIdentifier participants[] = new CommunicationIdentifier[]{ acsUser1, acsUser2 };
StartCallOptions startCallOptions = new StartCallOptions();
Context appContext = this.getApplicationContext();
Call groupCall = callAgent.startCall(participants, startCallOptions);
若要接听来电,请对呼叫对象调用“accept”方法。
Java
Context appContext = this.getApplicationContext();
IncomingCall incomingCall = retrieveIncomingCall();
Call call = incomingCall.accept(context).get();
若要接受启用了摄像机的呼叫:
Java
Context appContext = this.getApplicationContext();
IncomingCall incomingCall = retrieveIncomingCall();
AcceptCallOptions acceptCallOptions = new AcceptCallOptions();
VideoDeviceInfo desiredCamera = callClient.getDeviceManager().get().getCameraList().get(0);
acceptCallOptions.setVideoOptions(new VideoOptions(new LocalVideoStream(desiredCamera, appContext)));
Call call = incomingCall.accept(context, acceptCallOptions).get();
可订阅 callAgent 对象上的 onIncomingCall 事件来获取来电:
Java
// Assuming "callAgent" is an instance property obtained by calling the 'createCallAgent' method on CallClient instance
public Call retrieveIncomingCall() {
    IncomingCall incomingCall;
    callAgent.addOnIncomingCallListener(new IncomingCallListener() {
        void onIncomingCall(IncomingCall inboundCall) {
            // Look for incoming call
            incomingCall = inboundCall;
        }
    });
    return incomingCall;
}
使用 CallAgent 和 RoomCallLocator,通过指定 roomId 来加入聊天室通话。
CallAgent.join 方法将返回一个 Call 对象:
Java
val roomCallLocator = RoomCallLocator(roomId)
call = callAgent.join(applicationContext, roomCallLocator, joinCallOptions)
通过 room,应用程序开发人员可以更好地控制谁可以加入通话、何时见面以及如何协作。 若要详细了解 rooms,可以阅读概念文档 或遵循快速入门指南。
若要发起新的群组通话或加入正在进行的群组通话,必须调用“join”方法并传递带有 groupId 属性的对象。 该值必须为 GUID。
Java
Context appContext = this.getApplicationContext();
GroupCallLocator groupCallLocator = new GroupCallLocator("<GUID>");
JoinCallOptions joinCallOptions = new JoinCallOptions();

call = callAgent.join(context, groupCallLocator, joinCallOptions);
获取此呼叫的唯一 ID:
Java
String callId = call.getId();
若要了解呼叫中的其他参与者,请检查 call 实例上的 remoteParticipant 集合:
Java
List<RemoteParticipant> remoteParticipants = call.getRemoteParticipants();
主叫方的标识(如果是来电):
Java
CommunicationIdentifier callerId = call.getCallerInfo().getIdentifier();
获取呼叫的状态:
Java
CallState callState = call.getState();
它会返回一个表示当前呼叫状态的字符串:
- “NONE”- 初始通话状态
- “EARLY_MEDIA”- 表示在接通电话前播放通知的状态
- “CONNECTING”- 拨打或接听电话后的初始过渡状态
- “RINGING”- 对于去电,表示远程参与者的电话正在响铃
- “CONNECTED”- 已接通电话
- “LOCAL_HOLD”- 本地参与者暂停通话,本地终结点与远程参与者之间没有媒体传输
- “REMOTE_HOLD”- 远程参与者暂停通话,本地终结点与远程参与者之间没有媒体传输
- “DISCONNECTING”- 通话进入“Disconnected”状态前的过渡状态
- “DISCONNECTED”- 最终通话状态
- “IN_LOBBY”- 在大厅中,为了实现 Teams 会议互操作性
若要了解呼叫结束的原因,请检查 callEndReason 属性。 它包含代码/子代码:
Java
CallEndReason callEndReason = call.getCallEndReason();
int code = callEndReason.getCode();
int subCode = callEndReason.getSubCode();
若要查看当前呼叫是来电还是去电,请检查 callDirection 属性:
Java
CallDirection callDirection = call.getCallDirection();
// callDirection == CallDirection.INCOMING for incoming call
// callDirection == CallDirection.OUTGOING for outgoing call
若要查看当前麦克风是否静音,请检查 muted 属性:
Java
boolean muted = call.isMuted();
若要检查活动视频流,请查看 localVideoStreams 集合:
Java
List<LocalVideoStream> localVideoStreams = call.getLocalVideoStreams();
若要使本地终结点静音或取消静音,可使用 mute 和 unmute 异步 API:
Java
Context appContext = this.getApplicationContext();
call.mute(appContext).get();
call.unmute(appContext).get();
在进行通话时,手机上的硬件音量键应允许用户更改通话音量。
为此,通过在通话所在的活动上使用具有流类型 AudioManager.STREAM_VOICE_CALL 的方法 setVolumeControlStream 来完成。
这允许硬件音量键更改通话音量(由电话图标或音量滑块上的类似图标表示),并防止更改其他声音配置文件的音量,如警报、媒体或系统范围的音量。 有关详细信息,可以查看处理音频输出中的更改 | Android 开发人员。
Java
@Override
protected void onCreate(Bundle savedInstanceState) {
    ...
    setVolumeControlStream(AudioManager.STREAM_VOICE_CALL);
}
所有远程参与者均以 RemoteParticipant 类型表示,可通过呼叫实例上的 remoteParticipants 集合获得。
remoteParticipants 集合会返回给定通话中远程参与者的列表:
Java
List<RemoteParticipant> remoteParticipants = call.getRemoteParticipants(); // [remoteParticipant, remoteParticipant....]
若要向通话添加参与者(用户或电话号码),可调用 addParticipant。
这会以同步方式返回远程参与者实例。
Java
const acsUser = new CommunicationUserIdentifier("<acs user id>");
const acsPhone = new PhoneNumberIdentifier("<phone number>");
RemoteParticipant remoteParticipant1 = call.addParticipant(acsUser);
AddPhoneNumberOptions addPhoneNumberOptions = new AddPhoneNumberOptions(new PhoneNumberIdentifier("<alternate phone number>"));
RemoteParticipant remoteParticipant2 = call.addParticipant(acsPhone, addPhoneNumberOptions);
若要删除通话参与者(用户或电话号码),可调用 removeParticipant。
一旦从呼叫中删除参与者,就会异步解决此问题。
这还将从 remoteParticipants 集合中删除该参与者。
Java
RemoteParticipant acsUserRemoteParticipant = call.getParticipants().get(0);
RemoteParticipant acsPhoneRemoteParticipant = call.getParticipants().get(1);
call.removeParticipant(acsUserRemoteParticipant).get();
call.removeParticipant(acsPhoneRemoteParticipant).get();
任何给定的远程参与者都具有与之关联的一组属性和集合:
获取此远程参与者的标识符。 标识其中一种“标识符”类型
JavaCommunicationIdentifier participantIdentifier = remoteParticipant.getIdentifier();获取此远程参与者的状态。
JavaParticipantState state = remoteParticipant.getState();
状态可以是下列其中一项
“IDLE”- 初始状态
“EARLY_MEDIA”- 在参与者接通电话前播放通知
“RINGING”- 参与者电话正在响铃
“CONNECTING”- 参与者正在连接到通话时的过渡状态
“CONNECTED”- 参与者已接通电话
“HOLD”- 参与者已暂停通话
“IN_LOBBY”- 参与者正在大厅中等待许可。 当前仅在 Teams 互操作方案中使用
“DISCONNECTED”- 最终状态,参与者已与通话断开连接
若要了解参与者退出通话的原因,请检查
callEndReason属性:JavaCallEndReason callEndReason = remoteParticipant.getCallEndReason();若要检查此远程参与者是否已静音,请检查
isMuted属性:Javaboolean isParticipantMuted = remoteParticipant.isMuted();若要检查此远程参与者是否正在讲话,请检查
isSpeaking属性:Javaboolean isParticipantSpeaking = remoteParticipant.isSpeaking();若要检查给定参与者在此呼叫中发送的所有视频流,请检查
videoStreams集合:JavaList<RemoteVideoStream> videoStreams = remoteParticipant.getVideoStreams(); // [RemoteVideoStream, RemoteVideoStream, ...]
备注
要使用此 API,请使用 Azure 通信服务通话 Android SDK 2.11.0 版或更高版本。
若要在通话中将所有其他参与者设为静音,请对通话使用 muteAllRemoteParticipants API。
Java
call.muteAllRemoteParticipants();
若要将特定远程参与者设为静音,请对给定的远程参与者使用 mute API。
Java
remoteParticipant.mute();
若要通知本地参与者他们已被其他人静音,请订阅 onMutedByOthers 事件。
当应用程序正在后台运行时,如果要运行用户可见任务,则可以使用前台服务。
例如,通过前台服务,可以在应用程序有通话时,使用户持续看到通知。 这样,即使用户转到主屏幕或从最近的屏幕中删除了应用程序,该通话仍将继续。
如果在通话中没有使用前台服务,则导航到主屏幕时,可保持通话,但如果从最近的屏幕中删除了应用程序且 Android OS 终止了应用程序进程,则会停止通话。
应在启动/加入通话时启动前台服务,例如:
Java
call = callAgent.startCall(context, participants, options);
startService(yourForegroundServiceIntent);
挂断通话或通话状态为“已断开连接”时,停止前台服务,例如:
Java
call.hangUp(new HangUpOptions()).get();
stopService(yourForegroundServiceIntent);
请记住,如果从最近的列表中删除了应用,则停止已运行的前台服务将删除用户可见的通知,但 Android OS 可使应用程序进程在接下来的一段时间内处于活动状态,这意味着在此期间仍可保持通话。
例如,如果应用程序使用服务 onTaskRemoved 方法停止前台服务,则应用程序可根据活动生命周期启动/停止音频和视频,例如,替代 onDestroy 方法销毁活动时停止音频和视频。
按照以下步骤设置系统。
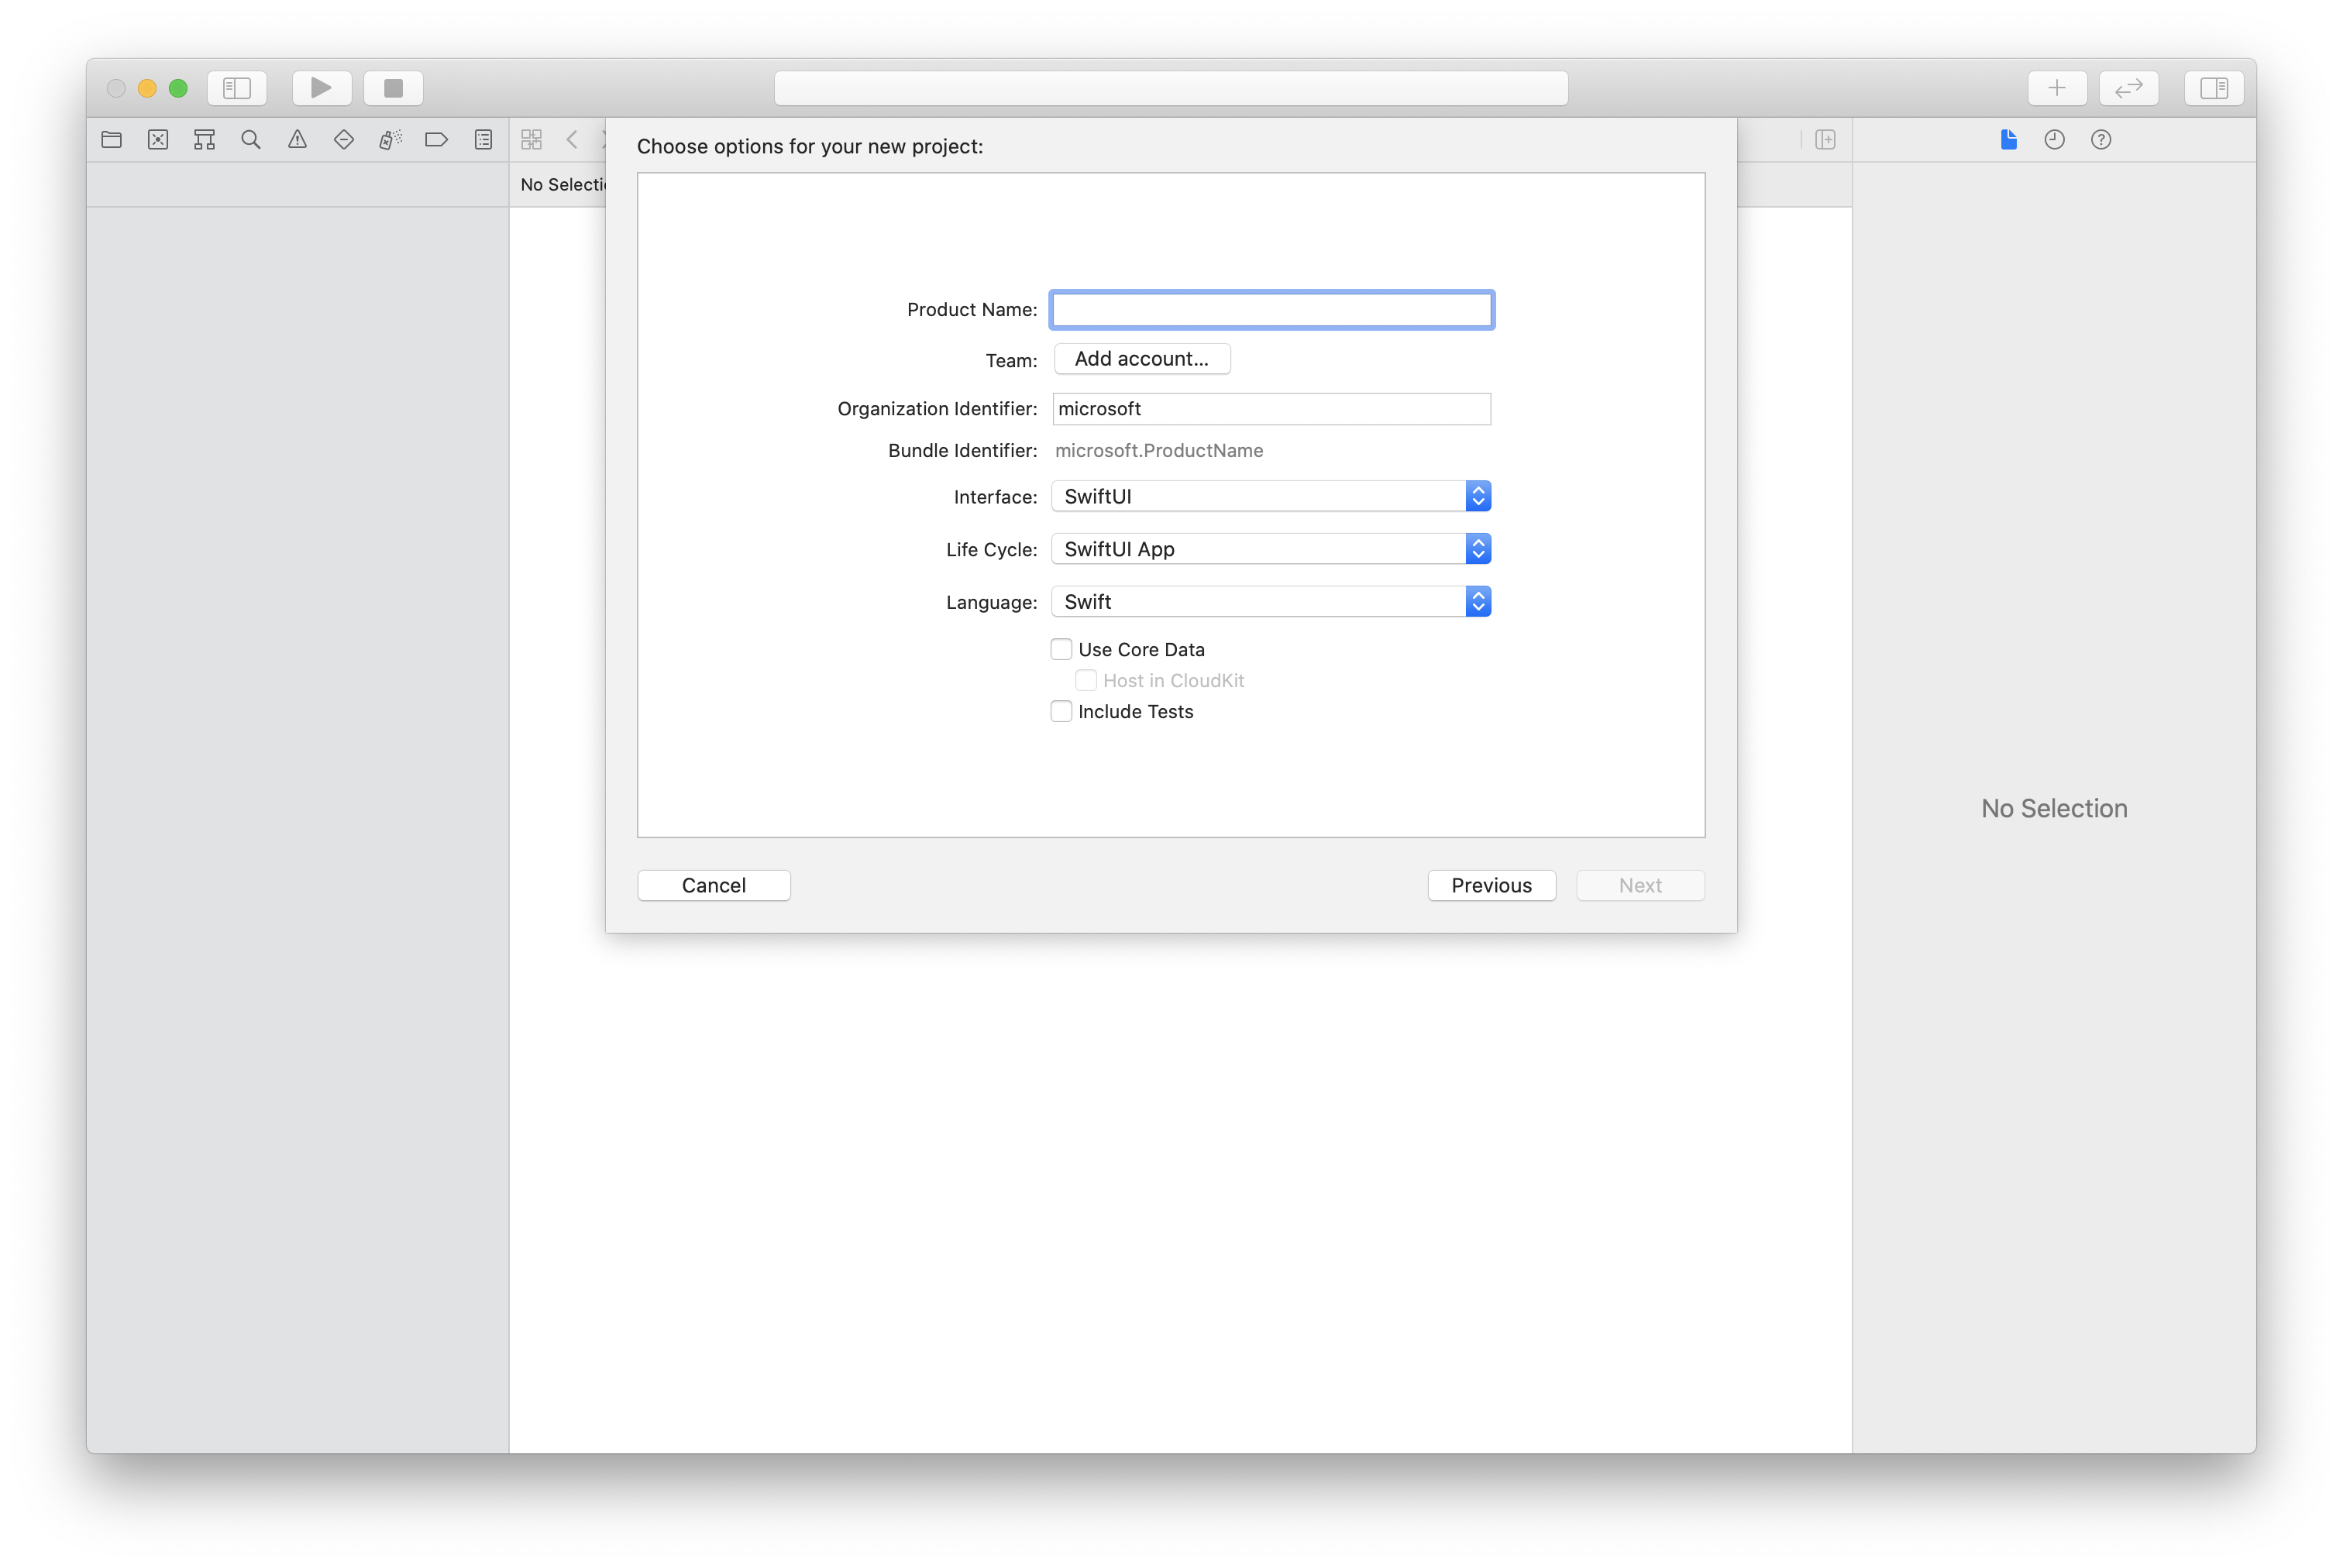
在 Xcode 中,创建新的 iOS 项目,并选择“单视图应用”模板。 本文使用 SwiftUI 框架,因此应将“语言”设置为“Swift”,并将“界面”设置为“SwiftUI”。
在本文中,无需创建测试。 请随意清除“包括测试”复选框。
为应用程序创建 Podfile,如此示例所示:
platform :ios, '13.0'
use_frameworks!
target 'AzureCommunicationCallingSample' do
    pod 'AzureCommunicationCalling', '~> 1.0.0'
end
运行
pod install。使用 Xcode 打开
.xcworkspace。
若要访问设备的麦克风,需要使用 NSMicrophoneUsageDescription 更新应用的信息属性列表。 将关联的值设置为一个字符串,该字符串将包含在系统用于向用户请求访问权限的对话框中。
右键单击项目树的 Info.plist 条目,然后选择“打开为...”>“源代码”。 将以下代码行添加到顶层 <dict> 节,然后保存文件。
XML
<key>NSMicrophoneUsageDescription</key>
<string>Need microphone access for VOIP calling.</string>
打开项目的 ContentView.swift 文件。 将 import 声明添加到文件顶部以导入 AzureCommunicationCalling 库。 此外,导入 AVFoundation。 你需要用它来处理代码中的音频权限请求。
Swift
import AzureCommunicationCalling
import AVFoundation
若要从 CallClient 创建 CallAgent 实例,必须使用 callClient.createCallAgent 方法,该方法在初始化后异步返回 CallAgent 对象。
若要创建通话客户端,请传递 CommunicationTokenCredential 对象:
Swift
import AzureCommunication

let tokenString = "token_string"
var userCredential: CommunicationTokenCredential?
do {
    let options = CommunicationTokenRefreshOptions(initialToken: token, refreshProactively: true, tokenRefresher: self.fetchTokenSync)
    userCredential = try CommunicationTokenCredential(withOptions: options)
} catch {
    updates("Couldn't created Credential object", false)
    initializationDispatchGroup!.leave()
    return
}

// tokenProvider needs to be implemented by Contoso, which fetches a new token
public func fetchTokenSync(then onCompletion: TokenRefreshOnCompletion) {
    let newToken = self.tokenProvider!.fetchNewToken()
    onCompletion(newToken, nil)
}
将创建的 CommunicationTokenCredential 对象传递给 CallClient 并设置显示名称:
Swift
self.callClient = CallClient()
let callAgentOptions = CallAgentOptions()
options.displayName = " iOS Azure Communication Services User"

self.callClient!.createCallAgent(userCredential: userCredential!,
    options: callAgentOptions) { (callAgent, error) in
        if error == nil {
            print("Create agent succeeded")
            self.callAgent = callAgent
        } else {
            print("Create agent failed")
        }
})
备注
应用程序在实现事件委托时,必须持有对需要事件订阅的对象的强引用。 例如,如果在调用方法 call.addParticipant 时返回 RemoteParticipant 对象,并且应用程序将委托设置为侦听 RemoteParticipantDelegate,应用程序必须持有对 RemoteParticipant 对象的强引用。 否则,如果收集了此对象,则当呼叫 SDK 尝试调用对象时,委托将引发严重异常。
若要创建并发起通话,需要在 CallAgent 上调用其中一个 API,并提供已使用通信服务管理 SDK 预配的用户的通信服务标识。
创建和发起呼叫的操作是同步的。 你将收到通话实例,可通过该实例订阅通话中的所有事件。
Swift
let callees = [CommunicationUser(identifier: 'UserId')]
self.callAgent?.startCall(participants: callees, options: StartCallOptions()) { (call, error) in
     if error == nil {
         print("Successfully started outgoing call")
         self.call = call
     } else {
         print("Failed to start outgoing call")
     }
}
备注
请查看 PSTN 通话产品/服务的详细信息。 若要进行预览计划访问,请申请早期采用者计划。
若要向 PSTN 发起通话,必须指定通过通信服务获取的电话号码。
Swift
let pstnCallee = PhoneNumberIdentifier(phoneNumber: '+1999999999')
let callee = CommunicationUserIdentifier('UserId')
self.callAgent?.startCall(participants: [pstnCallee, callee], options: StartCallOptions()) { (groupCall, error) in
     if error == nil {
         print("Successfully started outgoing call to multiple participants")
         self.call = groupCall
     } else {
         print("Failed to start outgoing call to multiple participants")
     }
}
若要加入 room 通话,请将 roomId 属性指定为 room 标识符。 若要加入通话,请使用 join 方法并传递 roomCallLocator。
Swift
func joinRoomCall() {
    if self.callAgent == nil {
        print("CallAgent not initialized")
        return
    }

    if (self.roomId.isEmpty) {
        print("Room ID not set")
        return
    }

    // Join a call with a Room ID
    let options = JoinCallOptions()
    let audioOptions = AudioOptions()
    audioOptions.muted = self.muted

    options.audioOptions = audioOptions

    let roomCallLocator = RoomCallLocator(roomId: roomId)
    self.callAgent!.join(with: roomCallLocator, joinCallOptions: options) { (call, error) in
        self.setCallAndObserver(call: call, error: error)
    }
}
通过 room,应用程序开发人员可以更好地控制谁可以加入通话、何时见面以及如何协作。 若要详细了解 rooms,可以阅读概念文档 或遵循快速入门指南。
若要加入通话,需要在 CallAgent 上调用其中一个 API。
Swift
let groupCallLocator = GroupCallLocator(groupId: UUID(uuidString: "uuid_string")!)
self.callAgent?.join(with: groupCallLocator, joinCallOptions: JoinCallOptions()) { (call, error) in
    if error == nil {
        print("Successfully joined group call")
        self.call = call
    } else {
        print("Failed to join group call")
    }
}
订阅来电事件。
Swift
final class IncomingCallHandler: NSObject, CallAgentDelegate, IncomingCallDelegate
{
    // Event raised when there is an incoming call
    public func callAgent(_ callAgent: CallAgent, didReceiveIncomingCall incomingcall: IncomingCall) {
        self.incomingCall = incomingcall
        // Subscribe to get OnCallEnded event
        self.incomingCall?.delegate = self
    }

    // Event raised when incoming call was not answered
    public func incomingCall(_ incomingCall: IncomingCall, didEnd args: PropertyChangedEventArgs) {
        print("Incoming call was not answered")
        self.incomingCall = nil
    }
}
若要接听来电,请对 IncomingCall 对象调用 accept 方法。
Swift
self.incomingCall!.accept(options: AcceptCallOptions()) { (call, error) in
   if (error == nil) {
       print("Successfully accepted incoming call")
       self.call = call
   } else {
       print("Failed to accept incoming call")
   }
}

let firstCamera: VideoDeviceInfo? = self.deviceManager!.cameras.first
localVideoStreams = [LocalVideoStream]()
localVideoStreams!.append(LocalVideoStream(camera: firstCamera!))
let acceptCallOptions = AcceptCallOptions()
acceptCallOptions.videoOptions = VideoOptions(localVideoStreams: localVideoStreams!)
if let incomingCall = self.incomingCall {
    incomingCall.accept(options: acceptCallOptions) { (call, error) in
        if error == nil {
            print("Incoming call accepted")
        } else {
            print("Failed to accept incoming call")
        }
    }
} else {
  print("No incoming call found to accept")
}
可在通话过程中执行各种操作来管理与视频和音频相关的设置。
若要将本地终结点静音或取消静音,可使用 mute 和 unmute 异步 API。
Swift
call!.mute { (error) in
    if error == nil {
        print("Successfully muted")
    } else {
        print("Failed to mute")
    }
}
使用以下代码以异步方式将本地终结点取消静音。
Swift
call!.unmute { (error) in
    if error == nil {
        print("Successfully un-muted")
    } else {
        print("Failed to unmute")
    }
}
所有远程参与者均以 RemoteParticipant 类型表示,可通过通话实例上的 remoteParticipants 集合获得。
Swift
call.remoteParticipants
若要向通话添加参与者(用户或电话号码),可调用 addParticipant。 此命令会同步返回一个远程参与者实例。
Swift
let remoteParticipantAdded: RemoteParticipant = call.add(participant: CommunicationUserIdentifier(identifier: "userId"))
若要删除通话参与者(用户或电话号码),可调用 removeParticipant API。 这会异步解析。
Swift
call!.remove(participant: remoteParticipantAdded) { (error) in
    if (error == nil) {
        print("Successfully removed participant")
    } else {
        print("Failed to remove participant")
    }
}
Swift
// [RemoteParticipantDelegate] delegate - an object you provide to receive events from this RemoteParticipant instance
var remoteParticipantDelegate = remoteParticipant.delegate

// [CommunicationIdentifier] identity - same as the one used to provision a token for another user
var identity = remoteParticipant.identifier

// ParticipantStateIdle = 0, ParticipantStateEarlyMedia = 1, ParticipantStateConnecting = 2, ParticipantStateConnected = 3, ParticipantStateOnHold = 4, ParticipantStateInLobby = 5, ParticipantStateDisconnected = 6
var state = remoteParticipant.state

// [Error] callEndReason - reason why participant left the call, contains code/subcode/message
var callEndReason = remoteParticipant.callEndReason

// [Bool] isMuted - indicating if participant is muted
var isMuted = remoteParticipant.isMuted

// [Bool] isSpeaking - indicating if participant is currently speaking
var isSpeaking = remoteParticipant.isSpeaking

// RemoteVideoStream[] - collection of video streams this participants has
var videoStreams = remoteParticipant.videoStreams // [RemoteVideoStream, RemoteVideoStream, ...]
备注
要使用此 API,请使用 Azure 通信服务通话 iOS SDK 2.13.0 版或更高版本。
若要在通话中将所有其他参与者设为静音,请对通话使用 muteAllRemoteParticipants API。
Swift
call!.muteAllRemoteParticipants { (error) in
    if error == nil {
        print("Successfully muted all remote participants.")
    } else {
        print("Failed to mute remote participants.")
    }
}
若要将特定远程参与者设为静音,请对给定的远程参与者使用 mute API。
Swift
remoteParticipant.mute { (error) in
    if error == nil {
        print("Successfully muted participant.")
    } else {
        print("Failed to mute participant.")
    }
}
若要通知本地参与者他们已被其他人静音,请订阅 onMutedByOthers 事件。
按照以下步骤设置系统。
对于通用 Windows 平台应用,请在 Visual Studio 2022 中创建新的“空白应用(通用 Windows)”项目。 输入项目名称后,可随意选择任何版本高于 10.0.17763.0 的 Windows SDK。
对于 WinUI 3 应用,请使用“已打包空白应用(桌面中的 WinUI 3)”模板创建新项目,以设置单页 WinUI 3 应用。 需要 Windows App SDK 版本 1.3 或更高版本。
可通过 NuGet 包公开提供通话 SDK API 和库。
要查找、下载和安装通话 SDK NuGet 包,请执行以下操作:
- 选择“工具”>“NuGet 包管理器”>“管理解决方案的 NuGet 包”,以打开 NuGet 包管理器。
- 选择“浏览”,然后在搜索框中输入 Azure.Communication.Calling.WindowsClient。
- 确保已选中“包括预发行版”复选框。
- 选择 Azure.Communication.Calling.WindowsClient 包,然后选择 Azure.Communication.Calling.WindowsClient1.4.0-beta.1 或更新版本。
- 在右侧窗格中选中与 Azure 通信服务项目对应的复选框。
- 选择“安装” 。
应用需要访问麦克风才能正常运行。 在 UWP 应用中,应在应用清单文件中声明麦克风功能。
以下步骤举例说明了如何实现此操作。
- 在
Solution Explorer面板中,双击扩展名为.appxmanifest的文件。 - 单击
Capabilities选项卡。 - 从功能列表中选中
Microphone复选框。
这个简单的示例应用包含两个按钮。 一个用于发起通话,另一个用于挂起已发起的通话。 以下步骤将举例说明如何将这些按钮添加到应用。
- 在
Solution Explorer面板中,对于 UWP,双击名为MainPage.xaml的文件;对于 WinUI 3,双击名为MainWindows.xaml的文件。 - 在中央面板中的 UI 预览下查找 XAML 代码。
- 修改 XAML 代码,摘录如下:
XML
<TextBox x:Name="CalleeTextBox" PlaceholderText="Who would you like to call?" />
<StackPanel>
    <Button x:Name="CallButton" Content="Start/Join call" Click="CallButton_Click" />
    <Button x:Name="HangupButton" Content="Hang up" Click="HangupButton_Click" />
</StackPanel>
通话 SDK API 在两个不同的命名空间中。 以下步骤告知 C# 编译器关于这些命名空间的信息,以便 Visual Studio Intellisense 帮助进行代码开发。
- 在
Solution Explorer面板中,对于 UWP,单击名为MainPage.xaml的文件左侧的箭头;对于 WinUI 3,单击名为MainWindows.xaml的文件左侧的箭头。 - 双击名为
MainPage.xaml.cs或MainWindows.xaml.cs的文件。 - 在当前
using语句的底部添加以下命令。
C#
using Azure.Communication.Calling.WindowsClient;
保持 MainPage.xaml.cs 或 MainWindows.xaml.cs 打开。 接下来的步骤将添加更多代码。
先前添加的 UI 按钮需基于发起的 CommunicationCall 才能正常工作。 这意味着,CommunicationCall 数据成员应被添加到 MainPage 或 MainWindow 类。
此外,若要使创建 CallAgent 的异步操作成功,还应将 CallAgent 数据成员添加到同一类。
将以下数据成员添加到 MainPage 或 MainWindow 类:
C#
CallAgent callAgent;
CommunicationCall call;
之前向 XAML 代码添加了两个 UI 按钮。 以下代码添加了在用户选择按钮时要执行的处理程序。 应在上一部分的数据成员之后添加以下代码。
C#
private async void CallButton_Click(object sender, RoutedEventArgs e)
{
    // Start call
}

private async void HangupButton_Click(object sender, RoutedEventArgs e)
{
    // End the current call
}
以下类和接口处理适用于 UWP 的 Azure 通信服务通话客户端库的某些主要功能。
| 名称 | 说明 |
|---|---|
CallClient |
CallClient 是通话客户端库的主入口点。 |
CallAgent |
CallAgent 用于启动和加入通话。 |
CommunicationCall |
CommunicationCall 用于管理已发起或已加入的通话。 |
CommunicationTokenCredential |
CommunicationTokenCredential 用作实例化 CallAgent 的令牌凭据。 |
CallAgentOptions |
CallAgentOptions 包含用于标识呼叫方的信息。 |
HangupOptions |
HangupOptions 告知是否应终止其所有参与者的通话。 |
若要从 CallClient 创建 CallAgent 实例,必须使用 CallClient.CreateCallAgentAsync 方法,该方法在初始化后异步返回 CallAgent 对象。
若要创建 CallAgent,必须传递 CallTokenCredential 对象和 CallAgentOptions 对象。 请记住,如果传递了格式错误的令牌,则会引发 CallTokenCredential。
应在要在应用初始化过程中调用的帮助程序函数中添加以下代码。
C#
var callClient = new CallClient();
this.deviceManager = await callClient.GetDeviceManagerAsync();

var tokenCredential = new CallTokenCredential("<AUTHENTICATION_TOKEN>");
var callAgentOptions = new CallAgentOptions()
{
    DisplayName = "<DISPLAY_NAME>"
};

this.callAgent = await callClient.CreateCallAgentAsync(tokenCredential, callAgentOptions);
为你的资源将 <AUTHENTICATION_TOKEN> 更改为有效凭据令牌。 如果必须获取凭据令牌,请参阅用户访问令牌文档。
创建 CallAgent 所需的对象现已准备就绪。 现在,可以异步创建 CallAgent 并发起通话。
处理完上一步骤中的异常后,应添加以下代码。
C#
var startCallOptions = new StartCallOptions();
var callees = new [] { new UserCallIdentifier(CalleeTextBox.Text.Trim()) };

this.call = await this.callAgent.StartCallAsync(callees, startCallOptions);
this.call.OnStateChanged += Call_OnStateChangedAsync;
可以随时使用 8:echo123 与 Azure 通信服务回显机器人对话。
若要将传出的视频设置为静音或取消静音,可使用 MuteOutgoingAudioAsync 和 UnmuteOutgoingAudioAsync 异步 API:
C#
// mute outgoing audio
await this.call.MuteOutgoingAudioAsync();

// unmute outgoing audio
await this.call.UnmuteOutgoingAudioAsync();
备注
要使用此 API,请使用 Azure 通信服务通话 Windows SDK 1.9.0 版或更高版本。
若要将所有其他参与者静音或将特定参与者静音,可以对通话使用异步 API MuteAllRemoteParticipantsAsync,对远程参与者使用 MuteAsync:
C#
// mute all participants except yourself
await this.call.MuteAllRemoteParticipantsAsync();

// mute specific participant in the call
await this.call.RemoteParticipants.FirstOrDefault().MuteAsync();
若要通知本地参与者他们已被其他人静音,请订阅 MutedByOthers 事件。
发起通话后,应使用 CommunicationCall 对象的 HangupAsync 方法挂起通话。
还应使用 HangupOptions 的实例来通知是否必须终止所有参与者的通话。
应在 HangupButton_Click 中添加以下代码。
C#
this.call.OnStateChanged -= Call_OnStateChangedAsync;
await this.call.HangUpAsync(new HangUpOptions() { ForEveryone = false });
请确保 Visual Studio 生成适用于 x64、x86 或 ARM64 的应用,然后按 F5 开始运行应用。 然后,单击 Call 按钮,向定义的被呼叫者发起通话。
请注意,应用首次运行时,系统会提示用户授予对麦克风的访问权限。