你当前正在访问 Microsoft Azure Global Edition 技术文档网站。 如果需要访问由世纪互联运营的 Microsoft Azure 中国技术文档网站,请访问 https://docs.azure.cn

使用 Azure 专用链接限制对托管磁盘的导入/导出访问

适用于:✔️ Linux VM ✔️ Windows VM ✔️ 灵活规模集 ✔️ 统一规模集

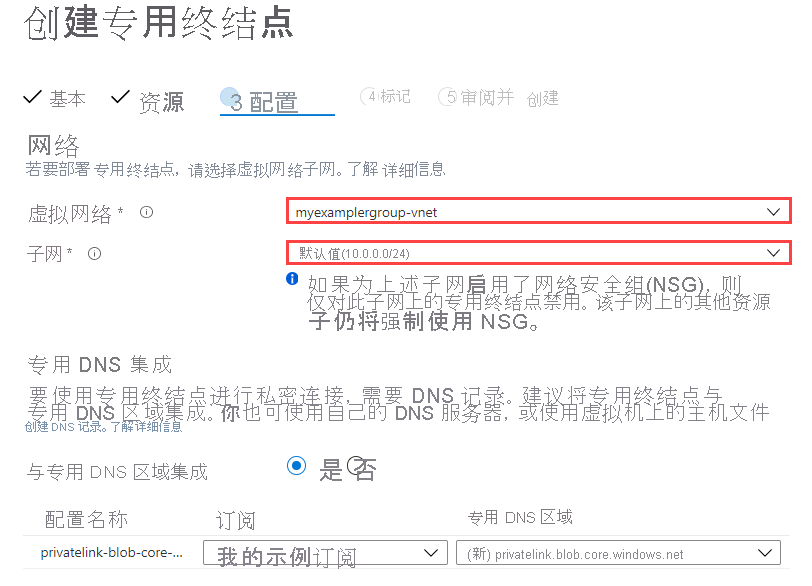
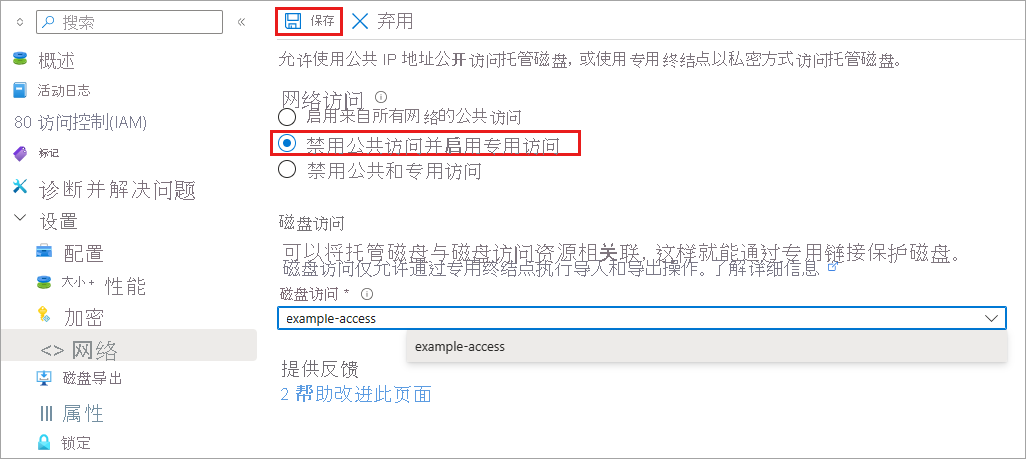
可以使用专用终结点来限制托管磁盘的导出和导入,并通过专用链接从 Azure 虚拟网络上的客户端更安全地访问数据。 专用终结点将虚拟网络地址空间中的 IP 地址用于托管磁盘。 虚拟网络上客户端与托管磁盘之间的网络流量仅穿过虚拟网络以及 Microsoft 主干网络上的专用链接,因此不会从公共 Internet 公开。

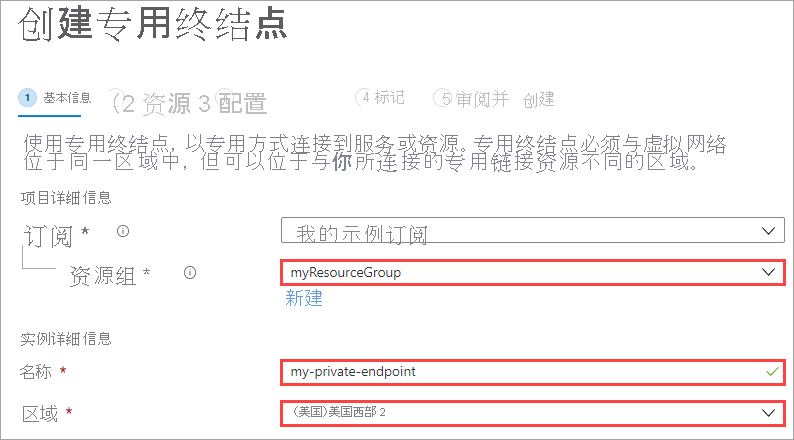
若要使用专用链接导出和导入托管磁盘,首先要创建磁盘访问资源,并通过创建专用终结点将其链接到同一订阅中的虚拟网络。 然后,将磁盘或快照与磁盘访问实例相关联。

限制

  • 同一磁盘访问对象不能同时导入或导出超过 5 个磁盘或快照。
  • 不能上传到同时具有磁盘访问对象和磁盘加密集的磁盘。

创建磁盘访问资源

  1. 登录到 Azure 门户并导航到“磁盘访问”。

  2. 选择“+ 创建”创建新的磁盘访问资源。

  3. 在“创建磁盘访问”窗格中,选择订阅和资源组。 在“实例详细信息”中,输入名称并选择区域。

    Screenshot of disk access creation pane. Fill in the desired name, select a region, select a resource group, and proceed

  4. 选择“查看 + 创建”。

  5. 创建资源后,直接导航到该资源。

    Screenshot of the Go to resource button in the portal

创建专用终结点

接下来,你需要创建专用终结点并将其配置为用于磁盘访问。

  1. 从磁盘访问资源中,在“设置”下,选择“专用终结点连接接” 。

  2. 选择 “+ 专用终结点”。

    Screenshot of the overview pane for your disk access resource. Private endpoint connections is highlighted.

  3. 在“创建专用终结点”窗格中,选择资源组。

  4. 提供名称并选择创建磁盘访问资源时所在的同一区域。

    Screenshot of the private endpoint creation workflow, first pane. If you do not select the appropriate region then you may encounter issues later on.

  5. 在完成时选择“下一步:资源”。

  6. 在“资源”窗格中,选择“连接到我的目录中的 Azure 资源” 。

  7. 对于“资源类型”,请选择“Microsoft.Compute/diskAccesses” 。

  8. 为“资源”选择先前创建的磁盘访问资源。

  9. 将“目标子资源”保留为“磁盘” 。

    Screenshot of the private endpoint creation workflow, second pane. With all the values highlighted (Resource type, Resource, Target sub-resource)

  10. 选择“下一步: 配置”。

  11. 选择要限制磁盘导入和导出的虚拟网络。 这可防止将磁盘导入和导出到其他虚拟网络。

    注意

    如果为所选子网启用了网络安全组,则仅在此子网上对专用终结点禁用它。 此子网中的其他资源仍会强制使用网络安全组。

  12. 选择相应的子网。

    Screenshot of the private endpoint creation workflow, third pane. Virtual network and subnet emphasized.

  13. 选择“查看 + 创建”。

启用磁盘上的专用终结点

  1. 导航到要配置的磁盘。

  2. 在“设置”下选择“网络” 。

  3. 选择“专用终结点(通过磁盘访问)”并选择之前创建的磁盘访问权限。

    Screenshot of the managed disk networking pane. Highlighting the private endpoint selection as well as the selected disk access. Saving this configures your disk for this access.

  4. 选择“保存”。

现已配置了可用于导入和导出托管磁盘的专用链接。

后续步骤