Create Bing Search resource through Azure Marketplace
Here are the steps to create a Bing Search Service resource through Azure Marketplace and get your key.
- Go to Azure Portal and sign in with your Microsoft account. If you don't have a Microsoft account, click Create one!.
- From the portal, type Bing in the search box.
- Under Marketplace in the search results, select the Bing service you're interested in (for example, Bing Search or Bing Custom Search).
- If you have a free trial or pay account, skip to Create your Bing resource.
- On the Create a free account splash screen, click Start free.
- Next, you have the option of continuing with the free trial (click Start free again) or paying for an Azure subscription (click Or buy now). You can always start with the free trial and pay for a subscription later.
If you clicked Start free, simply follow the sign up process.
- Provide your name and phone number. The process includes this step only if your Microsoft account profile doesn't include your name and phone number.
- Next, verify your identify and phone number. Enter a phone number, if it's not already set. Choose to verify the phone number by using a text verification code or by receiving a phone call.
- Add your credit card information and click Next. Don't worry, you won't be charged during the trial period. Read the No automatic charges section in the right pane.
- Click the check box if you agree to the subscription agreement, offer details, and privacy statement.
- Finally, click Sign up.
You should be redirected back to Azure Portal where you can create a resource and get your key. If Azure wasn't able to redirect you, go to Azure Portal and sign in with your Microsoft account. Back in the portal, type Bing in the search box. Under Marketplace in the search results, select the Bing service you're interested in (for example, Bing Search or Bing Custom Search).
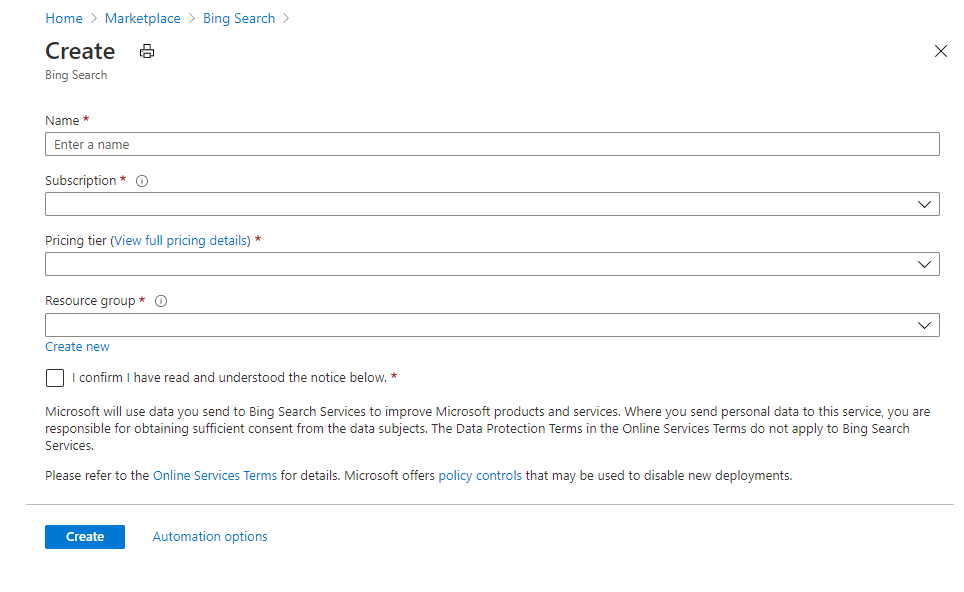
The following steps walk you through creating a Bing Search resource:
备注
While creating Bing Custom Search resource ensure Bing Custom Search is selected as top level service and not "Bing Search".
- Enter a resource name. Names may contain alphanumeric characters and dashes (-) only.
- The Subscription field could be set to Free Trial or select your appropriate subscription.
- In the Pricing tier dropdown, select Free F1 package. The other packages are for the pay model. To view package options and pricing for the pay model, click View full pricing details.
- If you have an existing resource group that you want to add this resource to, select it from the Resource group dropdown list. Otherwise, click Create new to create a resource group.
- Select a location from the Resource group location dropdown. The location is where the metadata associated with your account resides and has no impact on runtime availability.
- Click the check the box to indicate that you have read and understood the notice.
- Click Create. This starts the deployment process, which can take several minutes.
- When the deployment process completes, click Go to resource.
- To get your subscription key to use in API calls, click Keys and Endpoint in the left pane.
- Learn about calling the Bing Web Search API.
- Learn about the quickstarts and samples that are available to help you get up and running fast.
- Review Web Search API v7 reference documentation.