使用 Office 365 Outlook 日历 适配器创建日历事件 - BizTalk Server
使用 BizTalk Server 中的 Office 365 Outlook 日历 适配器从Office 365 Outlook 日历创建和接收日历事件。
使用发送端口创建事件
在BizTalk Server管理控制台中,右键单击“发送端口”,选择“新建”,然后选择“静态单向发送端口”。
创建发送端口 提供了一些指导。
输入“名称”。 在“传输”中,将“类型”设置为“Office 365 Outlook 日历”,然后选择“配置”。
选择“[登录 ...”,然后登录到 Office 365 帐户。 帐户会自动填充你的电子邮件地址。
允许BizTalk Server审批访问权限:
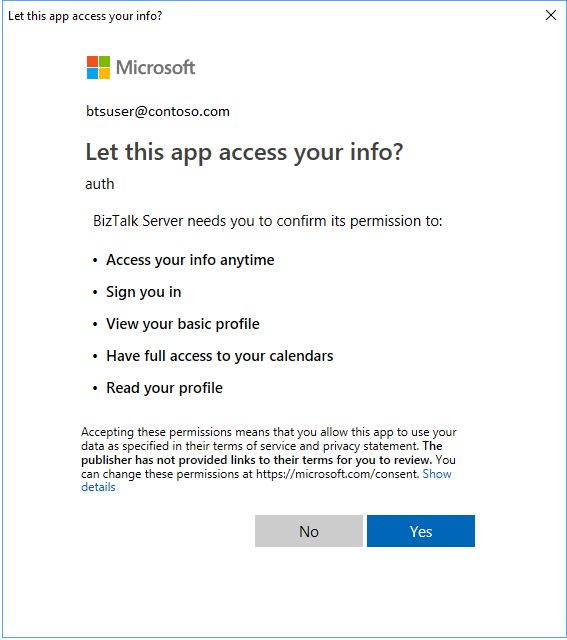
配置 Office365 Outlook 日历默认属性:
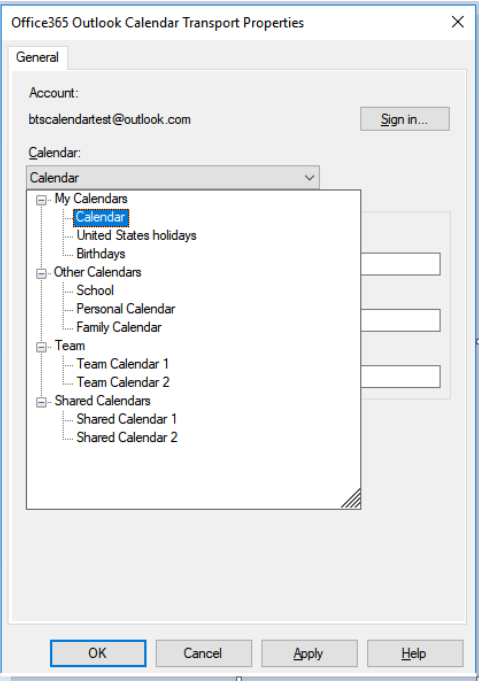
使用此选项 要执行此操作 日历 选择要在其中创建事件的日历。 主题 设置所创建事件的默认主题。 (最多 256 个字符) 所需与会者 输入默认的必需与会者电子邮件地址,以“;”分隔。 (最多 256 个字符) 可选与会者 输入以“;”分隔的默认可选与会者电子邮件地址。 (最多 256 个字符) 选择日历:
完成后,属性如下所示:
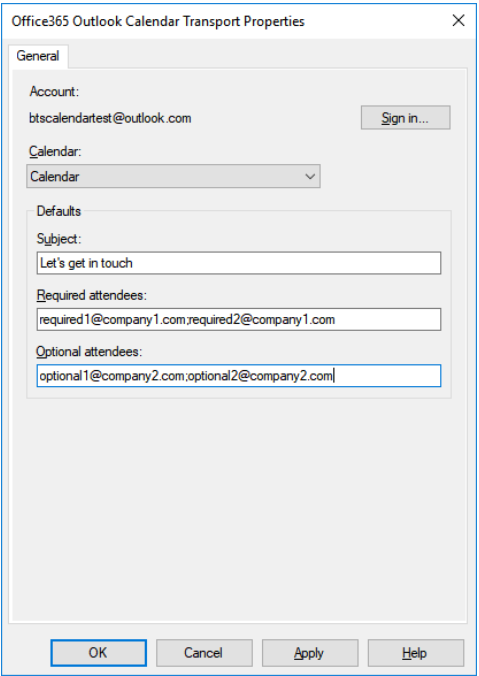
选择“ 确定” 保存更改。
测试发送端口
可以使用简单的文件接收端口和位置在Office 365 Outlook 日历上创建事件。
使用文件适配器创建接收端口。 在接收位置中,将 Receive 文件夹 设置为 C:\Temp\In\,并将文件掩码设置为 *.xml。
在Office 365 Outlook 日历适配器发送端口属性中,将“筛选器”设置为
BTS.ReceivePortName == <Receive Port Name>。将以下内容粘贴到文本编辑器中,并将文件另存为 Office365Calendar.xml。 这是你的示例消息。
<Event xmlns="http://schemas.microsoft.com/BizTalk/Office365OutlookCalendar/Send"> <subject>Test event 1</subject> <body> <contentType>html</contentType> <content><html> <head> <meta http-equiv="Content-Type" content="text/html; charset=utf-8"> <meta content="text/html; charset=us-ascii"> </head> <body> Test body for event Test event 1 </body> </html> </content> </body> </Event>XML 架构作为 BizTalk 安装文件夹\SDK\Schemas 中的 < SDK 的一部分提供 >
启动文件接收位置和Office 365 Outlook 日历适配器发送端口。
将Office365Calendar.xml 示例邮件复制到接收文件夹中 (C:\Temp\In) 。 发送端口基于 xml 在Office 365 Outlook 日历中创建事件。
使用接收端口接收事件
在BizTalk Server管理控制台中,右键单击“接收端口”,选择“新建”,然后选择“单向接收端口”。
创建接收端口 提供了一些指导。
输入名称,然后选择“ 接收位置”。
选择“ 新建”,并为接收位置 命名 。 在“传输”中,从“类型”下拉列表中选择“Office 365 Outlook 日历”,然后选择“配置”。
选择“登录...”,然后登录到Office 365帐户。 帐户会自动填充你的电子邮件地址。
允许BizTalk Server审批访问权限:
配置 终结点 属性:
使用此选项 要执行此操作 日历 选择要从中提取事件的日历。 从 选择日历事件必须启动才能由 BizTalk 接收的时间间隔 (默认值为 15 分钟) 。 选择日历:
完成后,属性如下所示:
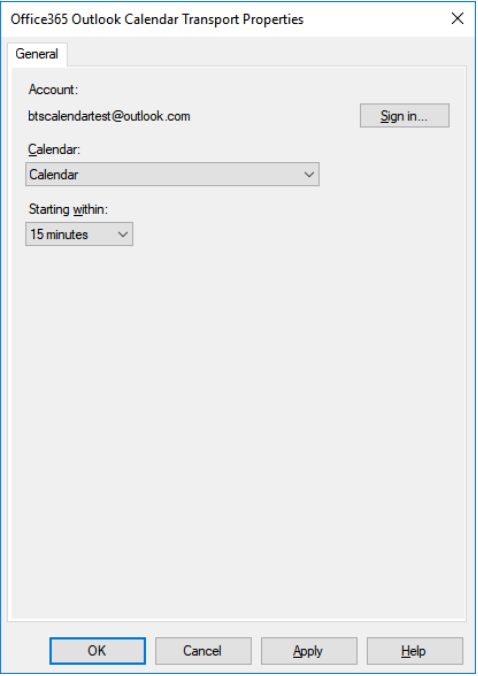
选择“ 确定” 保存更改。
测试接收设置
可以使用简单的文件发送端口从Office 365 Outlook 日历接收消息。
- 使用文件适配器创建发送端口。 在发送端口属性中,将 Destination 文件夹 设置为 C:\Temp\Out\,并将 和 文件名 设置为 %MessageID%.xml。
- 在“文件发送端口”属性中,将 “筛选器” 设置为
BTS.ReceivePortName == <Receive Port Name>。 - 启动Office 365 Outlook 日历接收位置和文件发送端口。
- 在目标文件夹中查找 (c:\temp\out) 的邮件。
XML 架构包含在 的 SDK 中
\Program Files (x86)\Microsoft BizTalk Server <your version>\SDK\Schemas。
接收的日历事件 xml 示例
<ns0:Event xmlns:ns0="http://schemas.microsoft.com/BizTalk/Office365OutlookCalendar/Receive">
<reminderMinutesBeforeStart>20160</reminderMinutesBeforeStart>
<importance>normal</importance>
<subject>Let's meet</subject>
<id>AQMkADAwATNiZmYAZC0xMQBlOC0yODQ1LTA</id>
<body>
<contentType>html</contentType>
<content><html>
<head>
<meta http-equiv="Content-Type" content="text/html; charset=utf-8">
<meta content="text/html; charset=us-ascii">
<meta name="ProgId" content="Word.Document">
<meta name="Generator" content="Microsoft Word 15">
<meta name="Originator" content="Microsoft Word 15">
<link rel="File-List" href="cid:filelist.xml@01D40724.27036CE0"><style>
<!--
@font-face
{font-family:"Cambria Math"}
@font-face
{font-family:Calibri}
p.MsoNormal, li.MsoNormal, div.MsoNormal
{margin:0in;
margin-bottom:.0001pt;
font-size:11.0pt;
font-family:"Calibri",sans-serif}
a:link, span.MsoHyperlink
{color:#0563C1;
text-decoration:underline}
a:visited, span.MsoHyperlinkFollowed
{color:#954F72;
text-decoration:underline}
span.EmailStyle17
{font-family:"Calibri",sans-serif;
color:windowtext}
.MsoChpDefault
{font-family:"Calibri",sans-serif}
@page WordSection1
{margin:1.0in 1.0in 1.0in 1.0in}
div.WordSection1
{}
-->
</style>
</head>
<body lang="EN-US" link="#0563C1" vlink="#954F72" style="">
<div class="WordSection1">
<p class="MsoNormal">Let’s sync up.</p>
</div>
</body>
</html>
</content>
</body>
<bodyPreview>Let’s sync up.</bodyPreview>
<attendees>
<type>required</type>
<status>
<response>none</response>
<time>0001-01-01T00:00:00Z</time>
</status>
<emailAddress>
<name>someone@contoso.com</name>
<address>someone@contoso.com</address>
</emailAddress>
</attendees>
<start>
<dateTime>2018-06-25T17:00:00</dateTime>
<timeZone>UTC</timeZone>
</start>
<end>
<dateTime>2018-06-25T17:30:00</dateTime>
<timeZone>UTC</timeZone>
</end>
<location>
<displayName>Your office</displayName>
<locationType>default</locationType>
<uniqueId>Your office</uniqueId>
<uniqueIdType>private</uniqueIdType>
</location>
<responseRequested>true</responseRequested>
<seriesMasterId />
<isCancelled>false</isCancelled>
<isOrganizer>true</isOrganizer>
<createdDateTime>2018-06-18T23:48:35.0164728Z</createdDateTime>
<lastModifiedDateTime>2018-06-18T23:48:22.178Z</lastModifiedDateTime>
<hasAttachments>false</hasAttachments>
<responseStatus>
<response>none</response>
<time>0001-01-01T00:00:00Z</time>
</responseStatus>
<changeKey>SFa3sLJfdiDEIpfwAAIAU=</changeKey>
<originalStartTimeZone>Pacific Standard Time</originalStartTimeZone>
<originalEndTimeZone>Pacific Standard Time</originalEndTimeZone>
<isReminderOn>false</isReminderOn>
<sensitivity>normal</sensitivity>
<isAllDay>false</isAllDay>
<showAs>busy</showAs>
<type>singleInstance</type>
<onlineMeetingUrl />
<recurrence />
<locations>
<displayName>Your office</displayName>
<locationType>default</locationType>
<uniqueId>Your office</uniqueId>
<uniqueIdType>private</uniqueIdType>
</locations>
<organizer>
<emailAddress>
<name>someone@contoso.com</name>
<address>/O=FIRST ORGANIZATION/OU=EXCHANGE ADMINISTRATIVE GROUP(FYDIBOH3SPDLT)/CN=RECIPIENTS/CN=0003B11E8245</address>
</emailAddress>
</organizer>
</ns0:Event>
后续步骤
查看所有Office 365适配器。
反馈
即将发布:在整个 2024 年,我们将逐步淘汰作为内容反馈机制的“GitHub 问题”,并将其取代为新的反馈系统。 有关详细信息,请参阅:https://aka.ms/ContentUserFeedback。
提交和查看相关反馈