如何:对 Windows 窗体 ListView 控件中的项进行分组
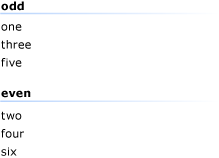
使用 ListView 控件的分组功能,可以按组显示相关的项集。 这些组在屏幕上由包含组标题的水平组标头分隔。 可以使用 ListView 组,通过按字母顺序、日期或任何其他逻辑分组对项进行分组,从而更轻松地导航大型列表。 下图显示了一些分组项。
若要启用分组,必须先在设计器或以编程方式创建一个或多个组。 定义组后,可以将 ListView 项分配给组。 还可以编程方式将项从一个组移动到另一个组。
添加组
-
// Adds a new group that has a left-aligned header
listView1.Groups.Add(new ListViewGroup("List item text",
    HorizontalAlignment.Left));
' Adds a new group that has a left-aligned header ListView1.Groups.Add(New ListViewGroup("Group 1", _ HorizontalAlignment.Left))
删除组
使用 Groups 集合的 RemoveAt 或 Clear 方法。
RemoveAt 方法删除单个组;Clear 方法从列表中删除所有组。
注意
删除组不会删除该组中的项。
// Removes the first group in the collection.
listView1.Groups.RemoveAt(0);
// Clears all groups.
listView1.Groups.Clear();
' Removes the first group in the collection. ListView1.Groups.RemoveAt(0) ' Clears all groups: ListView1.Groups.Clear()
将项分配给组或在组之间移动项
设置单个项的 ListViewItem.Group 属性。
// Adds the first item to the first group
listView1.Items[0].Group = listView1.Groups[0];
' Adds the first item to the first group ListView1.Items.Item(0).Group = ListView1.Groups(0)
另请参阅
反馈
即将发布:在整个 2024 年,我们将逐步淘汰作为内容反馈机制的“GitHub 问题”,并将其取代为新的反馈系统。 有关详细信息,请参阅:https://aka.ms/ContentUserFeedback。
提交和查看相关反馈