在 Azure Functions 中为令牌颁发启动事件创建 REST API
本文介绍如何在 Azure 门户中使用 Azure Functions 创建具有令牌颁发启动事件的 REST API。 创建一个 Azure 函数应用和一个 HTTP 触发器函数,此函数可以返回令牌的额外声明。
先决条件
- 基本了解自定义身份验证扩展概述中介绍的概念。
- 能够创建 Azure Functions 的 Azure 订阅。 如果你没有现有的 Azure 帐户,请注册免费试用帐户,或者在创建帐户时使用 Visual Studio 订阅权益。
- Microsoft Entra ID 租户。 可以使用客户或员工租户来利用此操作指南。
本文介绍如何使用 Microsoft.Azure.WebJobs.Extensions.AuthenticationEvents NuGet 库,为令牌颁发启动事件创建并设置 REST API,以便进行身份验证。 在 Visual Studio 或 Visual Studio Code 中创建并配置 HTTP 触发器函数,以便进行身份验证,并将其部署到 Azure 门户,你可以通过 Azure Functions 在 Azure 门户中访问它。
先决条件
- 基本了解自定义身份验证扩展概述中介绍的概念。
- 能够创建 Azure Functions 的 Azure 订阅。 如果你没有现有的 Azure 帐户,请注册免费试用帐户,或者在创建帐户时使用 Visual Studio 订阅权益。
- Microsoft Entra ID 租户。 可以使用客户或员工租户来利用此操作指南。
- 以下 IDE 和配置之一:
- 配置了用于 Visual Studio 的 Azure 开发工作负载的 Visual Studio。
- 启用了 Azure Functions 扩展的 Visual Studio Code。
注意
Microsoft.Azure.WebJobs.Extensions.AuthenticationEvents NuGet 库目前处于预览版。 本文中的步骤未来可能会更改。 若要在正式发布版本中实现令牌颁发启动事件,可以使用 Azure 门户执行此操作。
创建 Azure 函数应用
在 Azure 门户中,在继续创建 HTTP 触发器函数之前,先创建 Azure Function 应用及其关联的资源。
在 Azure 门户菜单上或在门户主页中,选择“创建资源”。
搜索并选择“函数应用”,然后选择“创建”。
在“基本信息”页面上,使用下表指定的设置创建函数应用:
设置 建议值 描述 订阅 你的订阅 要在其中创建新函数应用的订阅。 资源组 myResourceGroup 选择现有的资源组或创建新资源组,以便在其中创建函数应用。 函数应用名称 全局唯一名称 用于标识新函数应用的名称。 有效字符为 a-z(不区分大小写)、0-9和-。部署代码或容器映像 代码 用于发布代码文件或 Docker 容器的选项。 对于本教程,请选择“代码”。 运行时堆栈 .NET 你的首选编程语言。 对于本教程,请选择“.NET”。 版本 6 (LTS) 进程内 .NET 运行时的版本。 进程内表示可以在门户中创建和修改函数,这是本指南建议的操作 区域 首选区域 选择与你靠近或者与函数可以访问的其他服务靠近的区域。 操作系统 Windows 系统会根据你选择的运行时堆栈预先选择操作系统。 计划类型 消耗(无服务器) 定义如何将资源分配给 Function App 的托管计划。 选择“查看 + 创建”以查看应用配置选择,然后选择“创建”。 部署需要几分钟时间。
部署后,选择“转到资源”查看新函数应用。
创建 HTTP 触发器函数
创建完 Azure 函数应用后,在该应用内创建一个 HTTP 触发器函数。 HTTP 触发器让你可以使用 HTTP 请求调用函数,并由你的 Microsoft Entra 自定义身份验证扩展引用。
- 在函数应用的“概述”页中,选择“函数”窗格,然后选择“在 Azure 门户中创建”下的“创建函数”。
- 在“创建函数”窗口中,将“开发环境”属性保留为“在门户中开发”。 在“模板”下,选择“HTTP 触发器”。
- 在“模板详细信息”下,为“新函数”属性输入 CustomAuthenticationExtensionsAPI。
- 对于“授权级别”,请选择“函数”。
- 选择创建。


编辑此函数
该代码会读取传入的 JSON 对象,而 Microsoft Entra ID 会将 JSON 对象发送到你的 API。 在此示例中,它读取相关 ID 值。 然后,该代码返回自定义声明的集合,包括原始 CorrelationId、Azure 函数的 ApiVersion,以及返回到 Microsoft Entra ID 的 DateOfBirth 和 CustomRoles。
在菜单的“开发人员”下,选择“代码 + 测试”。
将整个代码替换为以下代码片段,然后选择“保存”。
#r "Newtonsoft.Json"
using System.Net;
using Microsoft.AspNetCore.Mvc;
using Microsoft.Extensions.Primitives;
using Newtonsoft.Json;
public static async Task<IActionResult> Run(HttpRequest req, ILogger log)
{
    log.LogInformation("C# HTTP trigger function processed a request.");
    string requestBody = await new StreamReader(req.Body).ReadToEndAsync();
    dynamic data = JsonConvert.DeserializeObject(requestBody);

    // Read the correlation ID from the Microsoft Entra request
    string correlationId = data?.data.authenticationContext.correlationId;

    // Claims to return to Microsoft Entra
    ResponseContent r = new ResponseContent();
    r.data.actions[0].claims.CorrelationId = correlationId;
    r.data.actions[0].claims.ApiVersion = "1.0.0";
    r.data.actions[0].claims.DateOfBirth = "01/01/2000";
    r.data.actions[0].claims.CustomRoles.Add("Writer");
    r.data.actions[0].claims.CustomRoles.Add("Editor");
    return new OkObjectResult(r);
}
public class ResponseContent{
    [JsonProperty("data")]
    public Data data { get; set; }
    public ResponseContent()
    {
        data = new Data();
    }
}
public class Data{
    [JsonProperty("@odata.type")]
    public string odatatype { get; set; }
    public List<Action> actions { get; set; }
    public Data()
    {
        odatatype = "microsoft.graph.onTokenIssuanceStartResponseData";
        actions = new List<Action>();
        actions.Add(new Action());
    }
}
public class Action{
    [JsonProperty("@odata.type")]
    public string odatatype { get; set; }
    public Claims claims { get; set; }
    public Action()
    {
        odatatype = "microsoft.graph.tokenIssuanceStart.provideClaimsForToken";
        claims = new Claims();
    }
}
public class Claims{
    [JsonProperty(NullValueHandling = NullValueHandling.Ignore)]
    public string CorrelationId { get; set; }
    [JsonProperty(NullValueHandling = NullValueHandling.Ignore)]
    public string DateOfBirth { get; set; }
    public string ApiVersion { get; set; }
    public List<string> CustomRoles { get; set; }
    public Claims()
    {
        CustomRoles = new List<string>();
    }
}
在顶部菜单中选择“获取函数 URL”,然后复制 URL 值。 设置自定义身份验证扩展时,可以使用此函数 URL。
创建和生成 Azure 函数应用
在此步骤中,你将使用 IDE 创建一个 HTTP 触发器函数 API,安装所需的 NuGet 包并在示例代码中复制。 生成项目并运行函数以提取本地函数 URL。
创建应用程序
要创建 Azure 函数应用,请按照以下步骤操作:
- 打开 Visual Studio,选择“新建项目”。
- 搜索并选择“Azure Functions”,然后选择“下一步”。
- 为项目命名,例如“AuthEventsTrigger”。 最好将解决方案名称与项目名称匹配。
- 选择项目的位置。 选择下一步。
- 选择“.NET 6.0 (长期支持)”作为目标框架。
- 选择“Http 触发器”作为“函数”类型,并将“授权级别”设置为“函数”。 选择创建。
- 在解决方案资源管理器中,将 Function1.cs 文件重命名为 AuthEventsTrigger.cs,并接受重命名更改建议。
安装 NuGet 包并生成项目
创建完项目后,需要安装所需的 NuGet 包并生成项目。
- 在 Visual Studio 的顶部菜单中,选择“项目”,然后选择“管理 NuGet 包”。
- 选择“浏览”选项卡,然后在右侧窗格中搜索并选择“Microsoft.Azure.WebJobs.Extensions.AuthenticationEvents”。 选择“安装” 。
- 应用并接受显示的弹出窗口中的更改。
添加示例代码
该函数 API 是令牌的附加声明的源。 在本文中,我们将对示例应用的值进行硬编码。 在生产中,你可以从外部数据存储提取有关用户的信息。 有关现有属性,请参阅 WebJobsAuthenticationEventsContext 类。
在 AuthEventsTrigger.cs 文件中,将全部内容替换为以下代码:
using System;
using Microsoft.Azure.WebJobs;
using Microsoft.Extensions.Logging;
using Microsoft.Azure.WebJobs.Extensions.AuthenticationEvents.TokenIssuanceStart;
using Microsoft.Azure.WebJobs.Extensions.AuthenticationEvents;

namespace AuthEventsTrigger
{
    public static class AuthEventsTrigger
    {
        [FunctionName("onTokenIssuanceStart")]
        public static WebJobsAuthenticationEventResponse Run(
            [WebJobsAuthenticationEventsTrigger] WebJobsTokenIssuanceStartRequest request, ILogger log)
        {
            try
            {
                // Checks if the request is successful and did the token validation pass
                if (request.RequestStatus == WebJobsAuthenticationEventsRequestStatusType.Successful)
                {
                    // Fetches information about the user from external data store
                    // Add new claims to the token's response
                    request.Response.Actions.Add(
                        new WebJobsProvideClaimsForToken(
                            new WebJobsAuthenticationEventsTokenClaim("dateOfBirth", "01/01/2000"),
                            new WebJobsAuthenticationEventsTokenClaim("customRoles", "Writer", "Editor"),
                            new WebJobsAuthenticationEventsTokenClaim("apiVersion", "1.0.0"),
                            new WebJobsAuthenticationEventsTokenClaim(
                                "correlationId",
                                request.Data.AuthenticationContext.CorrelationId.ToString())));
                }
                else
                {
                    // If the request fails, such as in token validation, output the failed request status,
                    // such as in token validation or response validation.
                    log.LogInformation(request.StatusMessage);
                }
                return request.Completed();
            }
            catch (Exception ex)
            {
                return request.Failed(ex);
            }
        }
    }
}
在本地生成并运行项目
项目已创建,且示例代码已添加。 使用你的 IDE 时,我们需要在本地生成并运行项目,以提取本地函数 URL。
- 导航到顶部菜单中的“生成”,然后选择“生成解决方案”。
- 按 F5 或从顶部菜单中选择“AuthEventsTrigger”以运行函数。
- 从运行函数时弹出的终端复制“函数 URL”。 设置自定义身份验证扩展时可以使用它。
在本地运行函数(建议)
最好先在本地测试函数,然后再将其部署到 Azure。 我们可以使用虚拟 JSON 正文,其中模拟 Microsoft Entra ID 发送到 REST API 的请求。 使用首选的 API 测试工具直接调用函数。
在 IDE 中,打开 local.settings.json,并将代码替换为以下 JSON。 对于本地测试,我们可以将
"AuthenticationEvents__BypassTokenValidation"设置为true。{ "IsEncrypted": false, "Values": { "AzureWebJobsStorage": "", "AzureWebJobsSecretStorageType": "files", "FUNCTIONS_WORKER_RUNTIME": "dotnet", "AuthenticationEvents__BypassTokenValidation" : true } }使用首选的 API 测试工具创建新的 HTTP 请求,并将 HTTP 方法设置为
POST。使用以下 JSON 正文来模仿 Microsoft Entra ID 发送到 REST API 的请求。
{ "type": "microsoft.graph.authenticationEvent.tokenIssuanceStart", "source": "/tenants/aaaabbbb-0000-cccc-1111-dddd2222eeee/applications/00001111-aaaa-2222-bbbb-3333cccc4444", "data": { "@odata.type": "microsoft.graph.onTokenIssuanceStartCalloutData", "tenantId": "aaaabbbb-0000-cccc-1111-dddd2222eeee", "authenticationEventListenerId": "11112222-bbbb-3333-cccc-4444dddd5555", "customAuthenticationExtensionId": "22223333-cccc-4444-dddd-5555eeee6666", "authenticationContext": { "correlationId": "aaaa0000-bb11-2222-33cc-444444dddddd", "client": { "ip": "127.0.0.1", "locale": "en-us", "market": "en-us" }, "protocol": "OAUTH2.0", "clientServicePrincipal": { "id": "aaaaaaaa-0000-1111-2222-bbbbbbbbbbbb", "appId": "00001111-aaaa-2222-bbbb-3333cccc4444", "appDisplayName": "My Test application", "displayName": "My Test application" }, "resourceServicePrincipal": { "id": "aaaaaaaa-0000-1111-2222-bbbbbbbbbbbb", "appId": "00001111-aaaa-2222-bbbb-3333cccc4444", "appDisplayName": "My Test application", "displayName": "My Test application" }, "user": { "companyName": "Casey Jensen", "createdDateTime": "2023-08-16T00:00:00Z", "displayName": "Casey Jensen", "givenName": "Casey", "id": "00aa00aa-bb11-cc22-dd33-44ee44ee44ee", "mail": "casey@contoso.com", "onPremisesSamAccountName": "Casey Jensen", "onPremisesSecurityIdentifier": "<Enter Security Identifier>", "onPremisesUserPrincipalName": "Casey Jensen", "preferredLanguage": "en-us", "surname": "Jensen", "userPrincipalName": "casey@contoso.com", "userType": "Member" } } } }选择“发送”,应收到如下所示的 JSON 响应:
{
    "data": {
        "@odata.type": "microsoft.graph.onTokenIssuanceStartResponseData",
        "actions": [
            {
                "@odata.type": "microsoft.graph.tokenIssuanceStart.provideClaimsForToken",
                "claims": {
                    "customClaim1": "customClaimValue1",
                    "customClaim2": [
                        "customClaimString1",
                        "customClaimString2"
                    ]
                }
            }

        ]
    }
}
部署函数并发布到 Azure
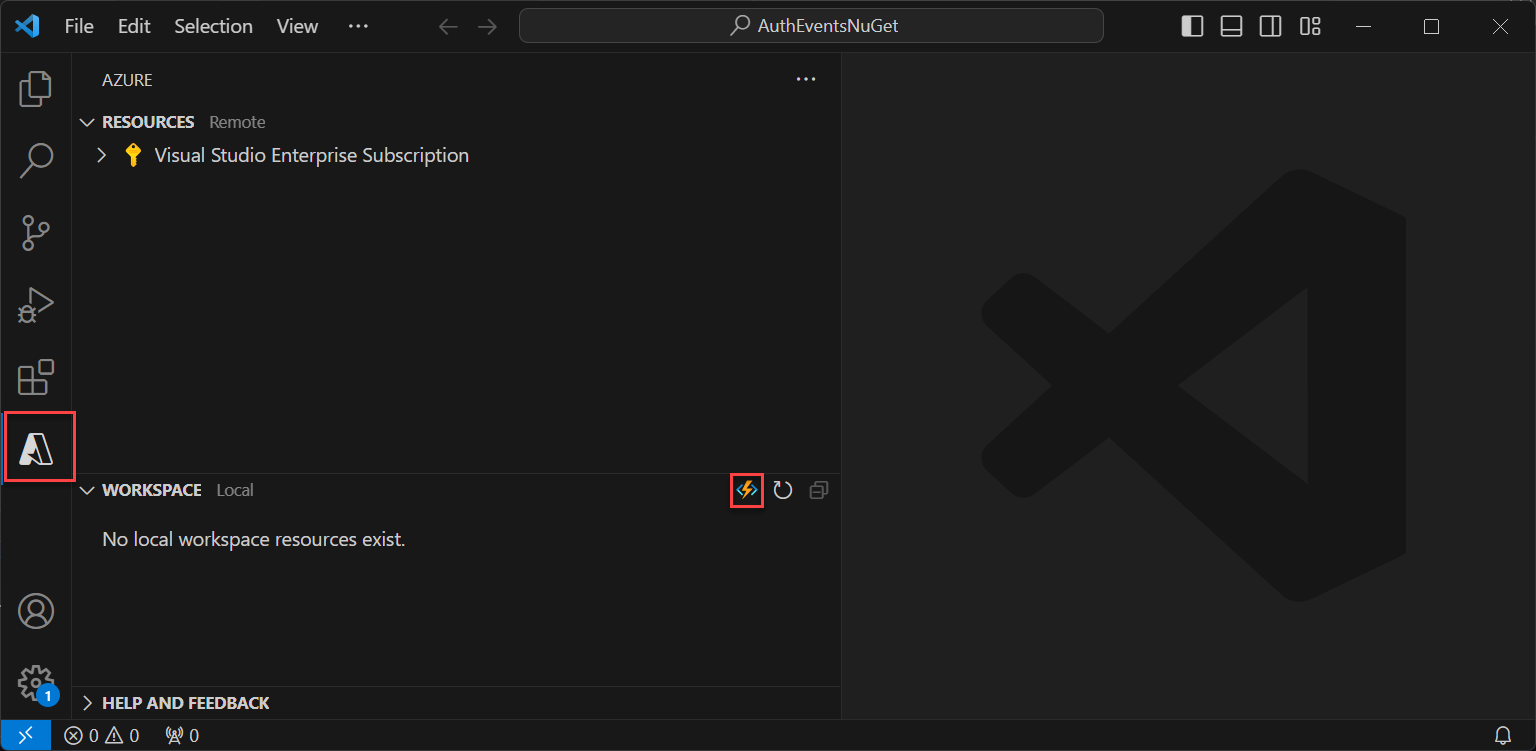
需要使用我们的 IDE 将函数部署到 Azure。 检查你是否已正确登录到 Azure 帐户,以便可以发布函数。
在解决方案资源管理器中,右键单击项目并选择“发布”。
在“目标”中选择“Azure”,然后选择“下一步”。
为“特定目标”选择“Azure 函数应用(Windows)”,选择“Azure 函数应用(Windows)”,然后选择“下一步”。
在“函数实例”中,使用“订阅名称”下拉列表选择要在其中创建新函数应用的订阅。
选择要发布新函数应用的位置,然后选择“新建”。
在“函数应用(Windows)”页上,使用下表中指定的函数应用设置,然后选择“创建”。
设置 建议值 说明 名称 全局唯一名称 用于标识新函数应用的名称。 有效字符为 a-z(不区分大小写)、0-9和-。订阅 你的订阅 在其下创建此新函数应用的订阅。 资源组 myResourceGroup 选择现有的资源组,或命名一个新组以便在其中创建函数应用。 计划类型 消耗(无服务器) 定义如何将资源分配给 Function App 的托管计划。 位置 首选区域 选择与你靠近或者与函数可以访问的其他服务靠近的区域。 Azure 存储 你的存储帐户 Functions 运行时需要 Azure 存储帐户。 选择“新建”即可配置常规用途存储帐户。 Application Insights 默认值 Azure Monitor 的一项功能。 这是自动选择的,请选择你要使用的项或配置新的。 等待片刻,让函数应用完成部署。 窗口关闭后,选择“完成”。
此时会打开新的“发布”窗格。 在顶部,选择“发布”。 等待几分钟,让函数应用完成部署并在 Azure 门户中显示。
为 Azure 函数配置身份验证
有三种方法可以为 Azure 函数设置身份验证:
- 使用环境变量在 Azure 门户中设置身份验证(推荐)
- 使用
WebJobsAuthenticationEventsTriggerAttribute在代码中设置身份验证 - Azure 应用服务身份验证和授权
默认情况下,代码已设置为使用环境变量在 Azure 门户中进行身份验证。 使用以下选项卡选择实现环境变量的首选方法,或者参考内置的 Azure 应用服务身份验证和授权。 若要设置环境变量,请使用以下值:
| 名称 | 值 |
|---|---|
| AuthenticationEvents__AudienceAppId | 在配置令牌颁发事件的自定义声明提供程序中设置的自定义身份验证扩展应用 ID |
| AuthenticationEvents__AuthorityUrl | • 工作人员租户 https://login.microsoftonline.com/<tenantID> • 外部租户 https://<mydomain>.ciamlogin.com/<tenantID> |
| AuthenticationEvents__AuthorizedPartyAppId | 99045fe1-7639-4a75-9d4a-577b6ca3810f 或其他授权方 |