Drive Git development from a work item in Azure Boards
TFS 2017
One of the ways your team can drive their development and stay in sync is to link your work items to the objects created during development, such as branches, commits, pull requests, and builds. You can begin that linking by creating a branch from one or more work items. Later, you can create pull requests, quickly open commits, and maintain a record of development operations performed to complete specific work.
Review this article to learn:
- How to create a new branch or pull request from a work item
- Complete the pull request
- Perform a squash merge
- Create a branch for several work items
- Link a work item to existing development and build objects
Tip
You can set up automatic linking and other settings that link work items to Git commits, pull requests, builds, and more. To learn how, see the following resources:
Development control
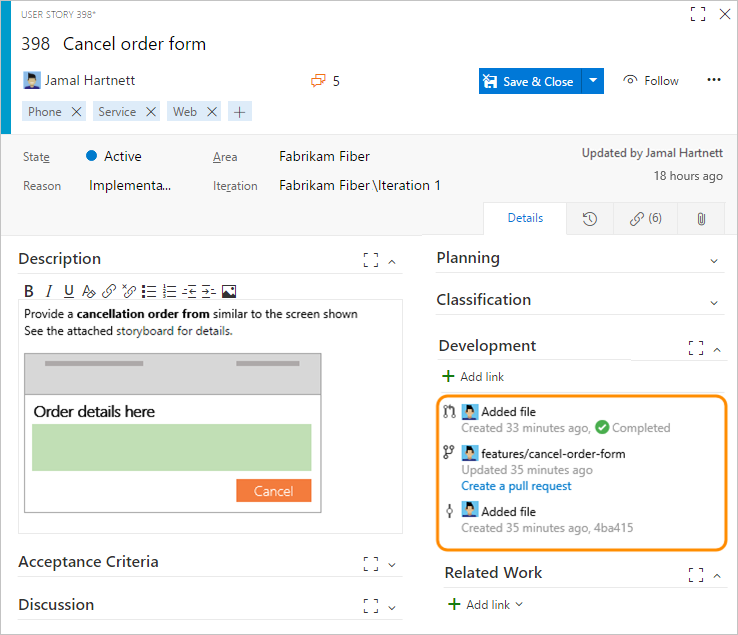
The Development control records all Git development processes that support completion of the work item. This control can show your team information needed to take the next development step and minimize navigational steps to accomplish common development tasks. It also supports traceability, providing visibility into all the branches, commits, pull requests, and builds related to the work item.
Note
The Development control within the work item form is not supported in TFS 2015 and earlier versions. Consider upgrading to a later Azure DevOps Server version.
From it, you can quickly access branches, pull requests, and commits which are linked to the work item. Also, you can start a pull request for a branch you've created or linked to from the work item.
Keep in mind that the Development control only appears within the web portal work item form. The work item tracking experience and forms that appear in Visual Studio or other supported clients don't display several of the features that are available from the web portal.
Prerequisites
- Connect to a project. If you don't have a project yet, create one.
- You must be added to a project as a member of the Contributors or Project Administrators security group. To get added, Add users to a project or team.
- To view or modify work items, you must have your View work items in this node and Edit work items in this node permissions set to Allow. By default, the Contributors group has this permission set. To learn more, see Set permissions and access for work tracking.
Workflow process
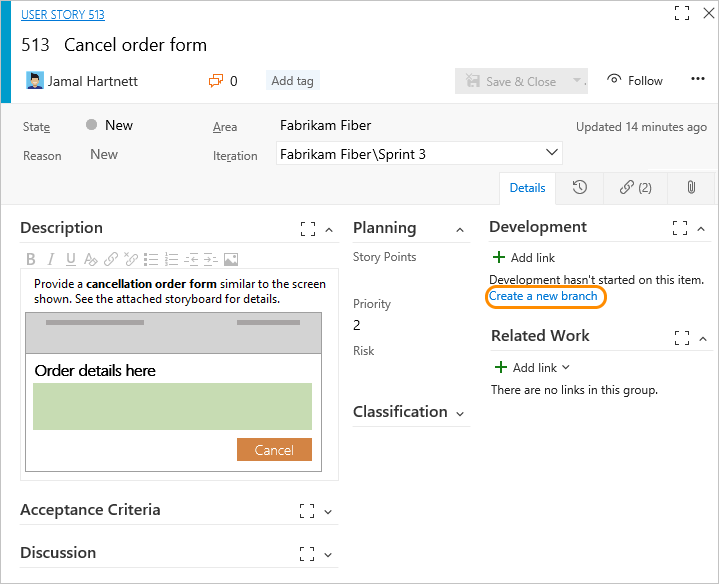
Consider creating a new branch when there are no linked code artifacts. If a branch exists, but no pull requests, consider creating a pull request. Here's a typical workflow sequence when working with a Git repository.
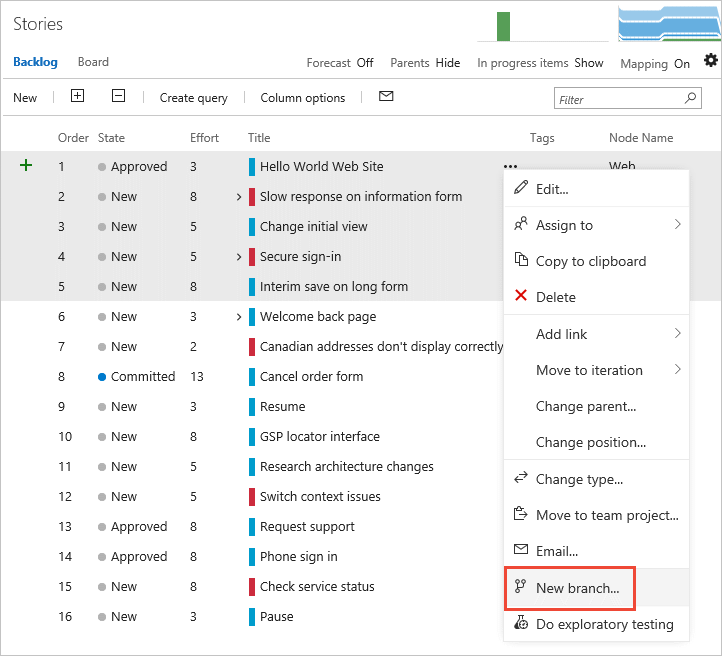
Start work on the work item by creating a branch. You can add a new Git branch from within the Development section...
... or, from the form's
 Actions menu.
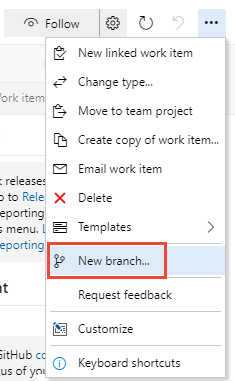
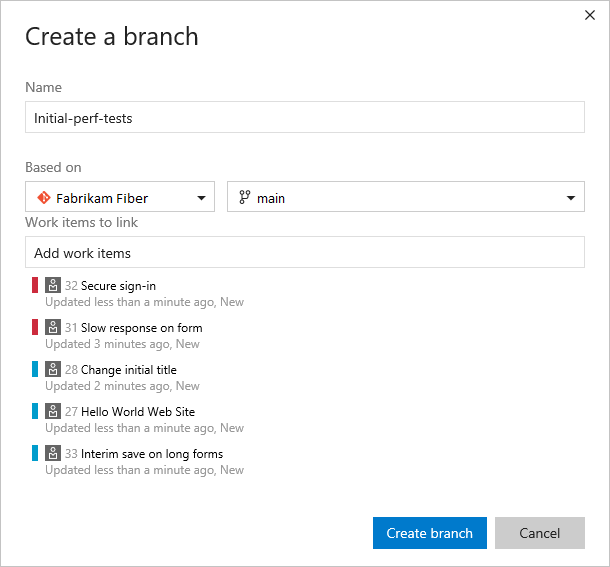
Name the branch and select the repository on which it's based.
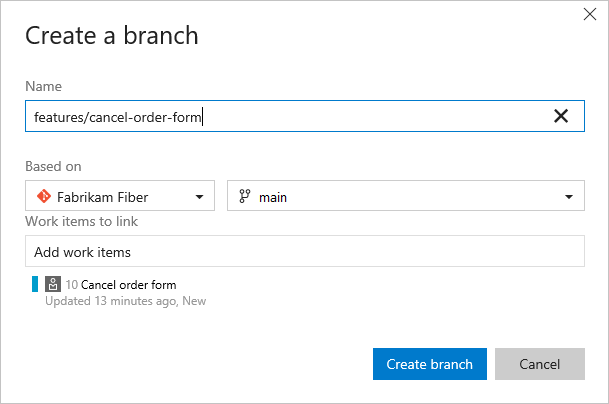
Branches you create are automatically linked to the work item.
Note
You can only create a branch once you've added files to the main branch, which we recommend you label
mainor other distinctive label. The system automatically adds a README file to the initial repo created with each new project.The system will open to the repository and branch that you created.
You can edit a file within the web portal.
Or, if you have extensive file edits or need to add files, then you'll need to work from Visual Studio or other supported IDE. You'll want to add a new local branch from the branch you created. For details, see Update code with fetch and pull, Download changes with fetch. (While any code editing and committing process will work, we work best with an edition of Visual Studio.)
Add or modify files in the branch that you created.
From Visual Studio or other supported IDE, commit and push changes from your local branch to the repository.
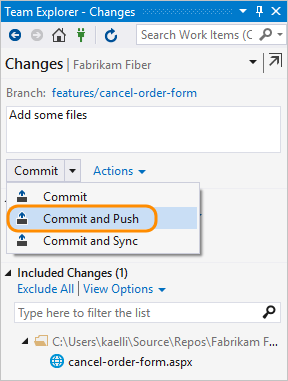
If this is the first time pushing changes from a new branch, you'll need to publish the branch before pushing your changes. For more information, see Share code with push.
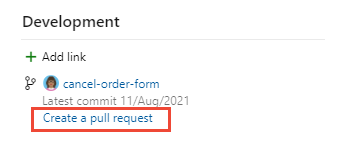
Create a pull request from the work item form.
You create a pull request to merge the changes you made to a main branch and get your changes reviewed by other members of your team.
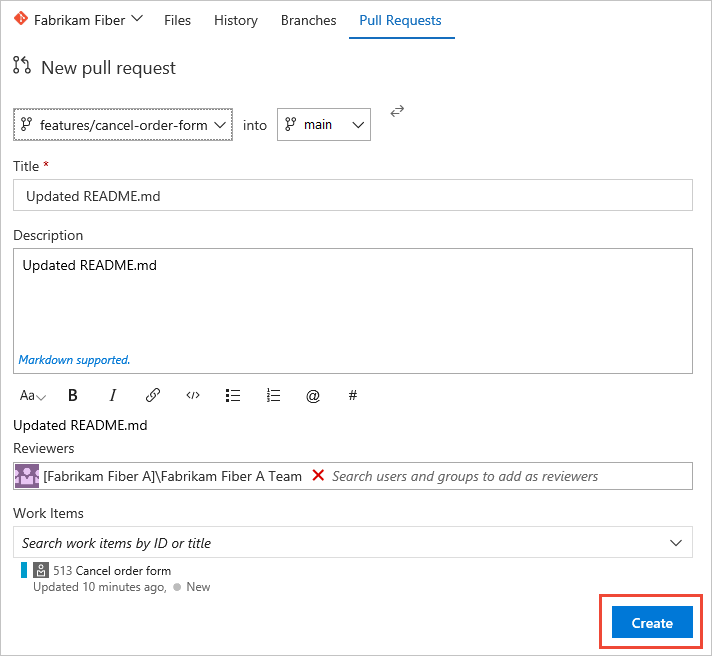
Your view will switch to Code, Pull Requests page. Complete creating the pull request as shown.
Note
Once you've created a pull request, you can't create a new pull request for the same branch until you complete the previous pull request.
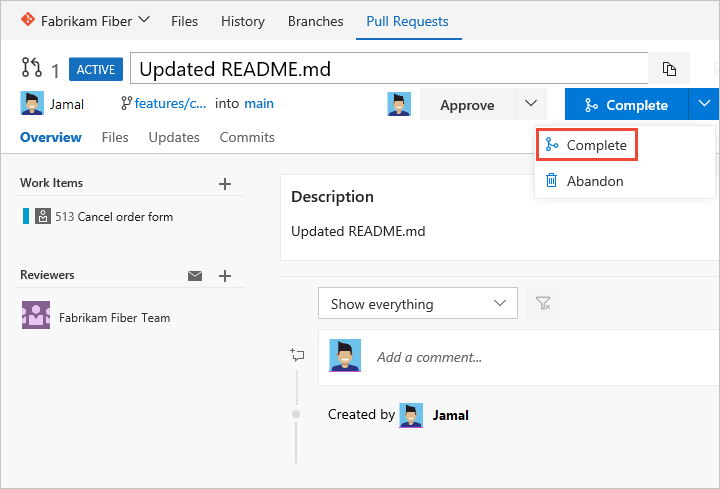
Check the box for Squash changes when merging and then complete the merge.

Upon completion, you should see a similar screen as follows.

Open the work item form or refresh the form, expand the Development section (choose Maximize Development
 ), and you'll see the links that have been added to support the operations you completed.
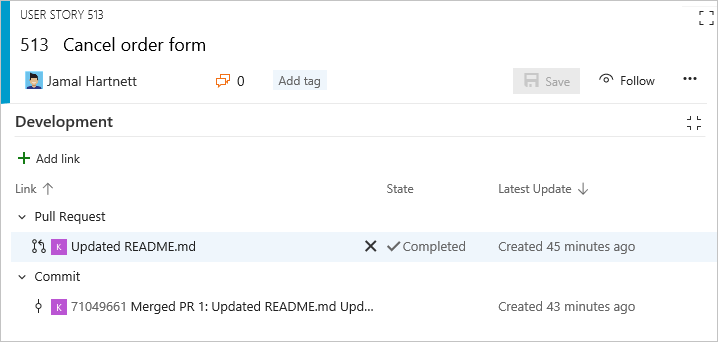
Create a branch for several work items
You can also add a new branch from the work item listed on the backlog or Kanban board without having to open the work item. Using multi-select, you can select several work items and create a new branch where they're all linked to the branch.
For example, here we select the first five items to link to a new branch.
And, we specify the name of the branch.
Link to existing development and build objects
All items listed under the Development section also appear under the Links ![]() tab. All development actions started from the Development section are also recorded under the History
tab. All development actions started from the Development section are also recorded under the History ![]() tab.
tab.
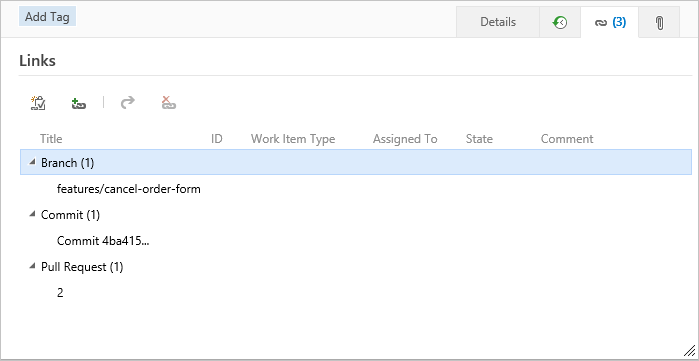
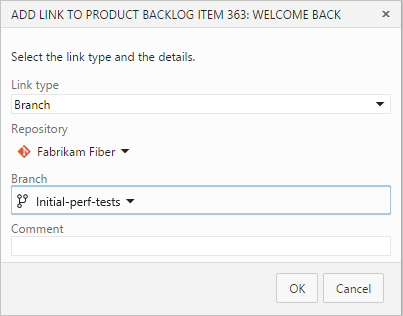
To link a work item to an existing object, choose the ![]() Add links icon and then choose the link type.
Add links icon and then choose the link type.
Linking, traceability, and managing dependencies.
Remove a link
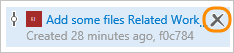
If you want to remove a link, you can do so from the Development section by highlighting it first and then choose Remove link ![]() .
.
Or, you can select it from the Links ![]() tab and choose Actions
tab and choose Actions ![]() for the link and then choose the Remove link
for the link and then choose the Remove link ![]() option.
option.
Related articles
- Configure repositories and branches to integrate with work tracking
- Configure pipelines to support work tracking
- Add work items
- Git overview
- Link GitHub commits and pull requests to work items
- Link to work items from other objects
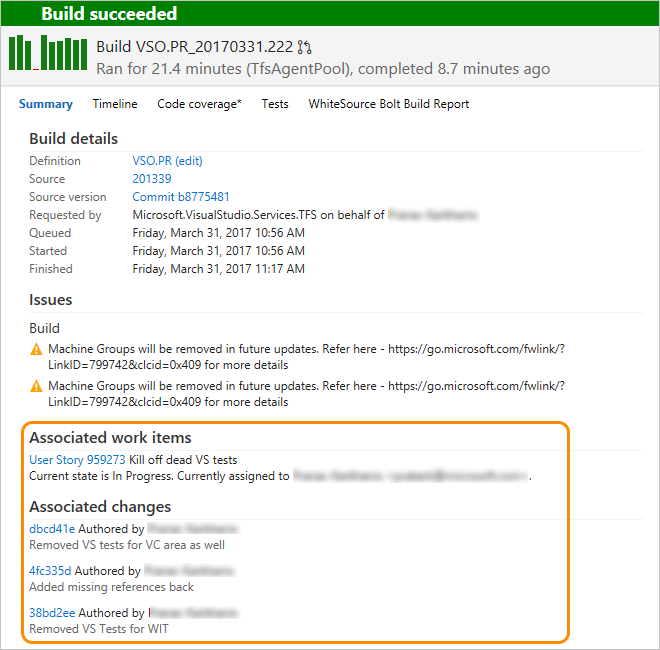
Associated work items in build
With Git commits, any work items that have been linked to a commit are listed under the Associated work items in the build summary page.
Link types showing in the Development section
Links shown in this section appear because of these actions:
- Creating a branch, commit, or pull request from the work item
- Specifying the work item ID during a commit, pull request, or other supported Git or TFVC operation
- Specifically linking the work item from the Development section or Links
 tab to a source code branch, build, or other supported Git or TFVC operation.
Hovering over any entry listed under the Development section activates the hyperlink to the associated object.
The link types you can add within the development section are Branch, Build, Changeset, Commit, Pull Request, and Versioned Item.
To learn more about the links control or to customize the Development links control, see LinksControlOptions elements, Development links control.