Customize the work tracking web form
TFS 2017 | TFS 2015 | TFS 2013
Important
Feature availability: This topic applies to customizations you can make when you use the Hosted XML process model, or you've update your application-tier server to Team Foundation Server 2017 or later version (which uses the On-premises XML process model). For the Inheritance process model, see Customize a process.
For an overview of process models, see Customize your work tracking experience.
Just as you have been able to customize the form layout for your work item types, you can continue to do so with the new web form. The new form makes available several features that are not available with the old form. Your account or project collection administrator manages the switch to the new form. When the new form is enabled for the account or project collection, the WebLayout section is added to the XML definition for each WIT defined in the collection.
Note
Prior to customizing the web form, your administrator must have enabled the new form.
You customize transformed WITs in much the same way as you have previously. The path is slightly different depending on your platform and previous customization choices.
Import/export XML definition files
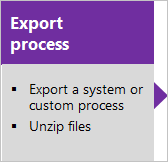
Use this sequence when you use the On-premises XML process model, i.e., you manage your TFS work tracking customization through import of individual XML definition files.
Import/export process zip files
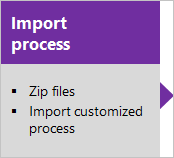
Use this sequence when you use the Hosted XML process model, i.e., when you manage your work tracking customization by importing a process or process template.
The main difference is that there are now two main layout sections within the FORM node. The first section, contained within the Layout element, defines the form layout when viewed through a client such as Visual Studio. The second section, contained within the WebLayout element, defines the form layout when viewed through a web browser.
<FORM>
   <Layout HideReadOnlyEmptyFields="true" HideControlBorders="true">
       . . .
   </Layout>
   <WebLayout>
       . . .
   </WebLayout>
</FORM>
See the following topics to make the indicated customizations:
- To customize the form for the web portal (WebLayout node), see WebLayout and Control XML elements
- To add a scoped links control to the form for the web portal (LinksControlOptions), see LinksControlOptions XML elements
- To customize the client form (Layout node), see Layout XML elements.
Import and export WIT definition files
Note
The witadmin command-line tool is not supported on Azure DevOps Services. Instead, you use inherited processes to modify the work item type.
If you don't have administration permissions for your project, get them.
Open a Command Prompt window according to the instructions provided in witAdmin: Customize and manage objects for tracking work.
For example:
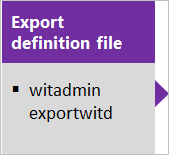
%programfiles(x86)%\Microsoft Visual Studio\2017\Community\Common7\IDE\CommonExtensions\Microsoft\TeamFoundation\Team ExplorerExport the WIT definition file where you want to modify or add a field. Specify the name of the WIT and a name for the file.
witadmin exportwitd /collection:CollectionURL /p:ProjectName /n:TypeName /f:"DirectoryPath/FileName.xml"An example of a CollectionURL for an organization is https://dev.azure.com/OrganizationName.
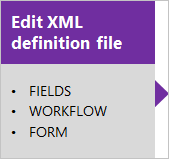
Edit the file. For details, see WebLayout XML elements.
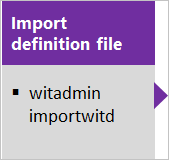
Import the WIT definition file.
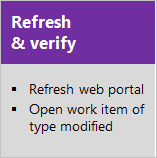
witadmin importwitd /collection:CollectionURL /p:ProjectName /f:"DirectoryPath/FileName.xml"Open either the web portal to view the changes. If the client is already open, refresh the page.
The latest updates are downloaded from the server, including the changes that you just imported. Wait several seconds until the refresh completes.
For more information about using witadmin, see Import, export, and manage work item types.
Tip
With witadmin, you can import and export definition files. Other tools you can use include the Process Editor (requires that you have installed a version of Visual Studio). Install the TFS Process Template editor from the Visual Studio Marketplace. You can use this version of the Process Editor to modify the old-style work item forms. You can't use it to edit forms associated with the new web forms.
Or, you can use the TFS Team Project Manager, an open-source client available from GitHub.
Layout and resizing
The new web form resizes depending on the width available and the number of sections defined. At maximum width, in most web browsers, each section within a page will display within its own column. As the display width decreases, each section resizes proportionally as follows:
- For four sections: 40%, 20%, 20%, and 20%
- For three sections: 50%, 25%, and 25%
- For two Sections: 66% and 33%
- For one Section: 100%.
When the display width won't accommodate the columnar display of each section, sections appear stacked within a column.
Global lists
Global lists are managed differently in Hosted XML than they are on Azure DevOps Server (and TFS). For starters, witadmin is not supported, so a seperate global list file does not exist. In Hosted XML they are attached to an existing work item type. Here is an example...
<?xml version="1.0" encoding="utf-8"?>
<witd:WITD xmlns:witd="http://schemas.microsoft.com/VisualStudio/2008/workitemtracking/typedef" application="Work item type editor" version="1.0">
  <WORKITEMTYPE name="Shared Steps" refname="Custom.SharedSteps">
    <DESCRIPTION>Server-side data for reusable set of test steps. Version: B.02</DESCRIPTION>
    <GLOBALLISTS>
      <GLOBALLIST name="Foo">
        <LISTITEM value="No" />
        <LISTITEM value="Yes" />
        <LISTITEM value="Maybe" />
        <LISTITEM value="Not Sure" />
      </GLOBALLIST>
      <GLOBALLIST name="Bar">
        <LISTITEM value="Open" />
        <LISTITEM value="Closed" />
      </GLOBALLIST>
     </GLOBALLISTS>
     ...
By default the global lists will be attached to the Shared Steps work item type.
Related articles
If you're new to WIT customization, see Add and modify a WIT.
Import warnings and errors
You'll receive a warning when you import a modified WIT definition if you add a Control element for a required field in only the WebLayout or Layout node, but not the other.
You'll receive an error if you enable the new form, and then modify a WIT definition in which you delete the WebLayout node.