Assign tests for user acceptance testing
TFS 2017 | TFS 2015
Today's faster development pace requires tools that enable test teams to more easily verify value based on business requirements, and the high quality software demanded by customers. This type of testing is often referred to as user acceptance testing.
Typically you create a Test Suite using a formal requirement work item type. However, today's agile teams often prefer to work from User Stories or Product Backlog items as their requirements.
Prerequisites
- You must connect to a project. If you don't have a project yet, create one.
- You must be added to a project. To get added, Add users to a project or team.
- To request or provide feedback, you must have Stakeholder access or higher.
- To add or modify bugs or other work item types, you must have the Edit work items in this node permission set to Allow under the corresponding Area Path.
- To add new tags, you must have the Create tag definition permission set to Allow.
To learn more, see Set permissions and access for testing.
In addition, you must have already created work items and a test plan. If not, follow the steps provided in the following articles:
Assign and invite testers
For user acceptance testing, you can assign multiple testers to a set of tests. You can even assign the stakeholders who created the business requirements as testers.
Select Test plans to see your test suites. You can select Mine to see your favorites or All to see all test plans. Select a test plan to open it.
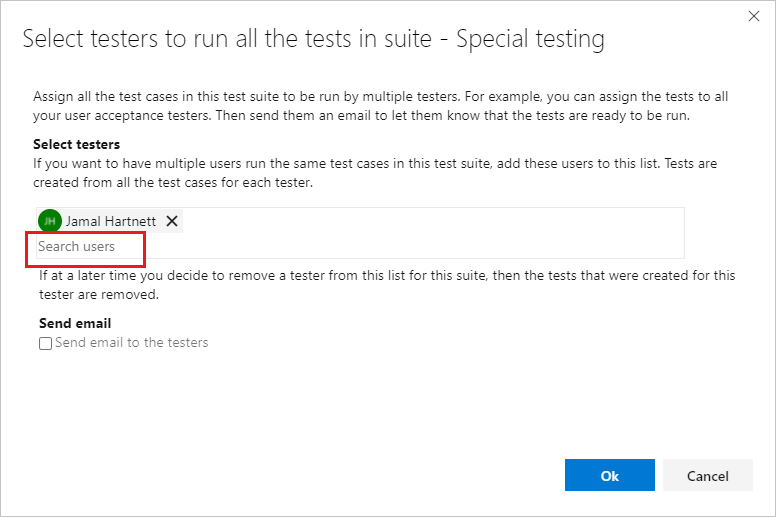
Select a test suite and then select More options or right-click to view the context menu. Select Assign testers to run all tests.
In Search users, enter a name or partial name to find the testers you want. You can select multiple testers.
Tip
You can select individual users who are a members of the Project Valid Users group. You can't select user groups.
To notify testers, select Send email.
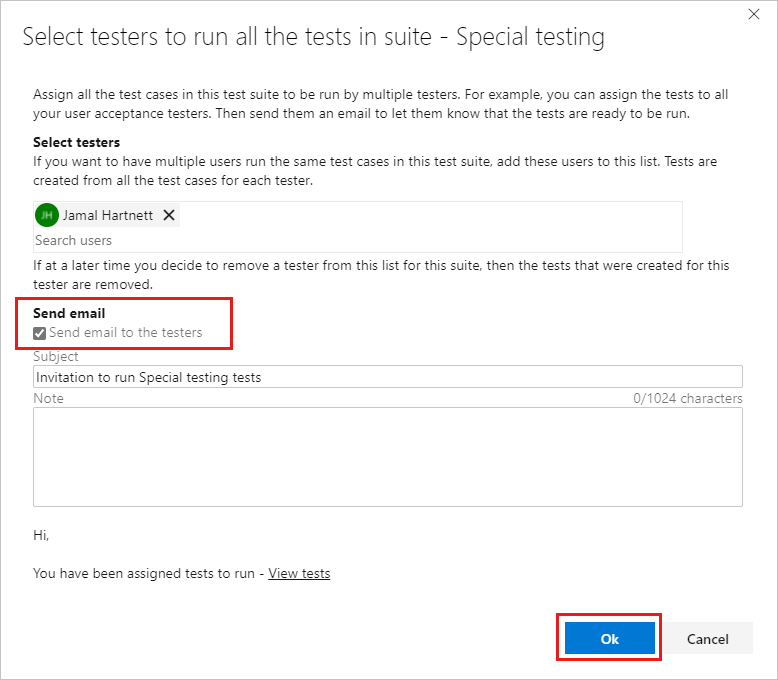
Enter a message subject and note, as needed, and select Ok.
Note
For on-premises Azure DevOps, you must have an SMTP server configured for your deployment. For more information, see Configure an SMTP server
If you have a large pool of potential testers, you might need to search for testers, as described above.
If you're assigning a tester to an individual test case, the search option appears in the context menu. Select the Execute tab, then select a test case, and select More options or right-click to open the context menu.
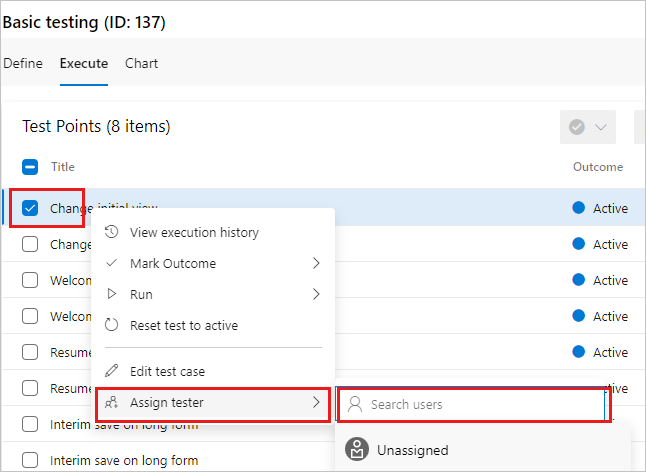
When you select Assign tester, use the search option to find a tester.
Easily track results
A key principle of good user acceptance testing practice is to minimize the effort required to determine whether a requirement has been achieved. There are two ways you can do this: you can focus on individual test runs and tests to see which failed, or you can use the chart views that make it much easier to track your test results. These views are accessible by all members of your team.
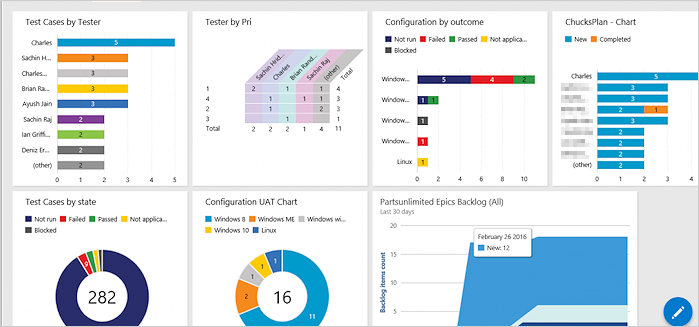
Note: The dashboard display shown here is also used for other types of testing such as continuous testing.
If you don't see the data or information you expect in the dashboard charts, verify that the columns in your data have been added to the Tests view. For details see this blog post.