练习 - 直接从 Azure Cosmos DB for PostgreSQL 处理 Azure Blob 存储中的数据文件
在本练习中,你将使用 pg_azure_storage 扩展从安全地存储在 Azure Blob 存储的专用容器中的文件引入数据。
重要
本练习依赖于 Azure Cosmos DB for PostgreSQL 数据库和在第 3 单元中创建的分布式表。
创建 Azure Blob 存储帐户
若要完成本练习,必须创建 Azure 存储帐户、检索其访问密钥、创建容器,并将 Woodgrove Bank 的历史数据文件复制到容器中。 在此任务中,你将创建存储帐户。
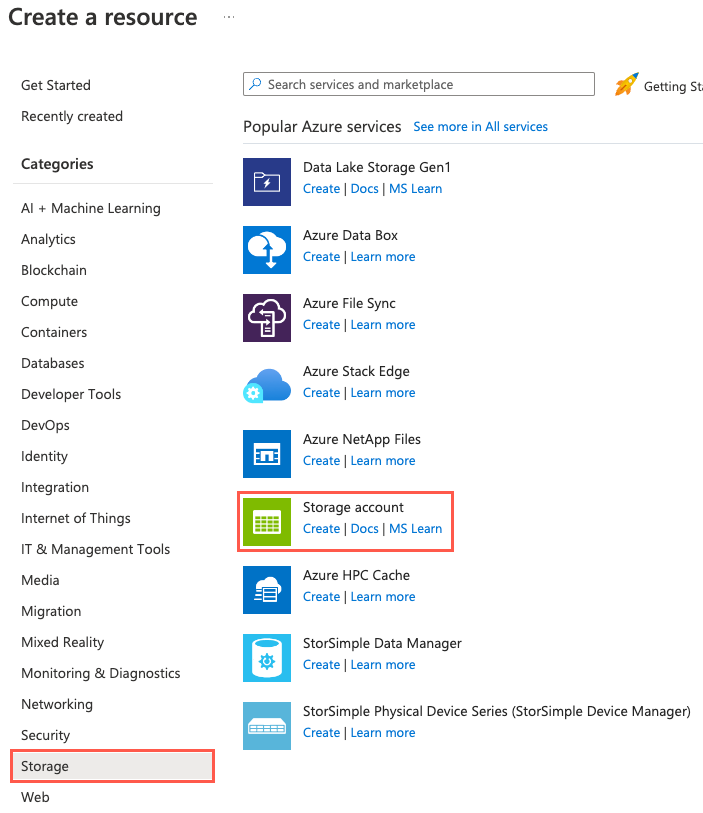
打开 Web 浏览器,导航到 Azure 门户。
选择“创建资源”、“存储”和“存储帐户”。 也可以使用“搜索”功能来查找资源。
在“基本”选项卡上,输入下列信息:
参数 值 项目详细信息 订阅 选择自己的 Azure 订阅。 资源组 选择在上一个练习中创建的 learn-cosmosdb-postgresql资源组。实例详细信息 存储帐户名称 输入全局唯一名称,例如 stlearnpostgresql。区域 选择为 Azure Cosmos DB for PostgreSQL 数据库群集选择的相同区域。 性能 选择“标准”。 冗余 选择“本地冗余存储(LRS)”。 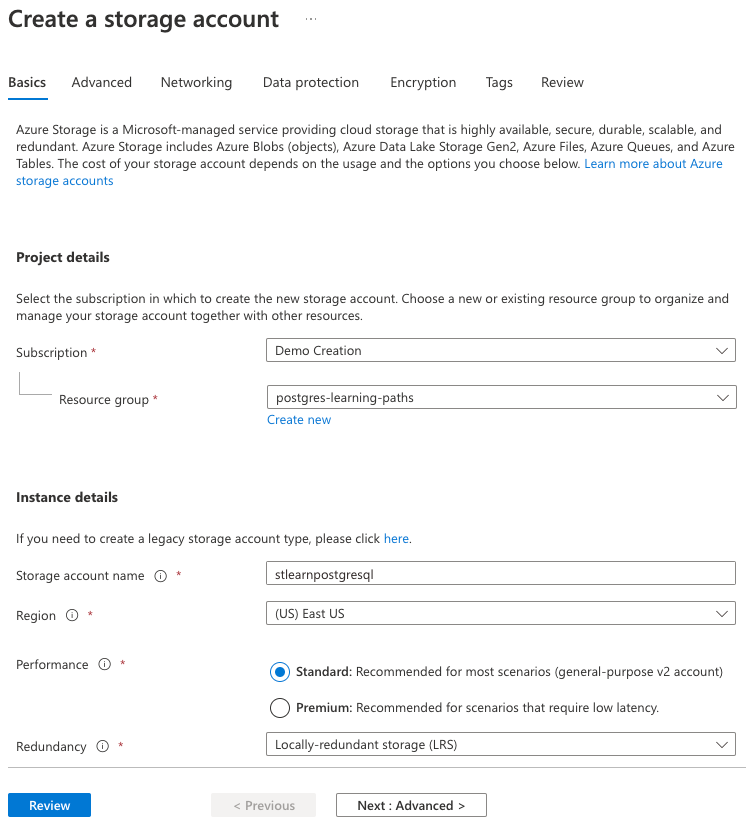
默认设置将用于存储帐户配置的剩余选项卡,因此请选择“审阅”按钮。
选择“审阅”选项卡上的“创建”按钮以创建存储帐户。
创建 Blob 存储容器并上传数据文件
Woodgrove Bank 以 CSV 格式提供其历史数据文件。 在新存储帐户中创建名为 historical-data 的容器,然后使用 Azure CLI 将这些文件上传到该容器中。
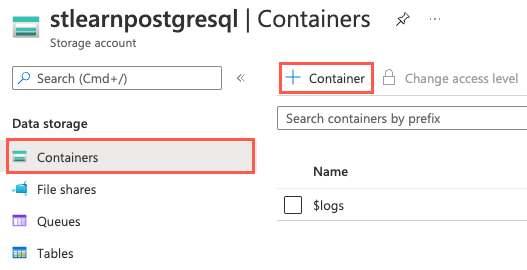
在 Azure 门户中导航到新存储帐户。
在左侧导航菜单中,选择“数据存储”下的“容器”,然后选择工具栏上的“+ 容器”。
在“新建容器”对话框的“名称”字段中输入
historical-data,为“公共访问级别”设置选择“专用(禁止匿名访问)”,然后选择“创建”。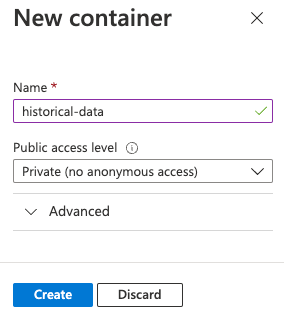
通过将容器的访问级别设置为“专用(无匿名访问)”,将阻止对容器及其内容的公共访问。 下面,你将为
pg_azure_storage扩展提供帐户名称和访问密钥,使其能够安全地访问文件。需要与存储帐户关联的名称和密钥才能使用 Azure CLI 上传数据文件。 在左侧导航菜单中,选择“安全性 + 网络”下的“访问密钥”。
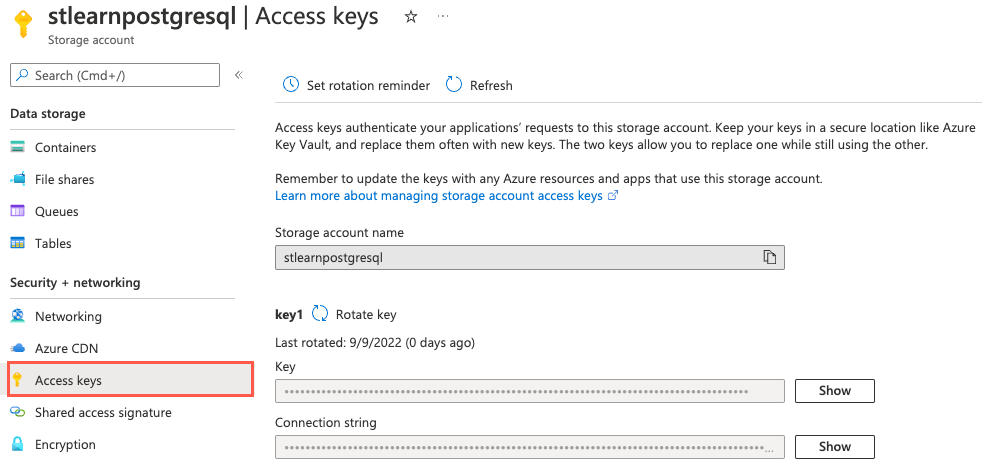
打开“访问密钥”页后,选择 Azure 门户工具栏中的“Cloud Shell”图标,以打开浏览器窗口底部的新“Cloud Shell”窗格。
在 Azure Cloud Shell 提示符下,执行以下
curl命令以下载 Woodgrove Bank 提供的文件。curl -O https://raw.githubusercontent.com/MicrosoftDocs/mslearn-create-connect-postgresHyperscale/main/users.csv curl -O https://raw.githubusercontent.com/MicrosoftDocs/mslearn-create-connect-postgresHyperscale/main/events.csv文件将添加到 Cloud Shell 存储帐户。
接下来,你将使用 Azure CLI 将文件上传到在存储帐户中创建的
historical-data容器中。 首先创建变量来保存存储帐户名称和密钥值,以简化操作。在 Cloud Shell 上方的“访问密钥”页上,选择存储帐户名称旁边的“复制到剪贴板”按钮,以复制存储帐户名称:
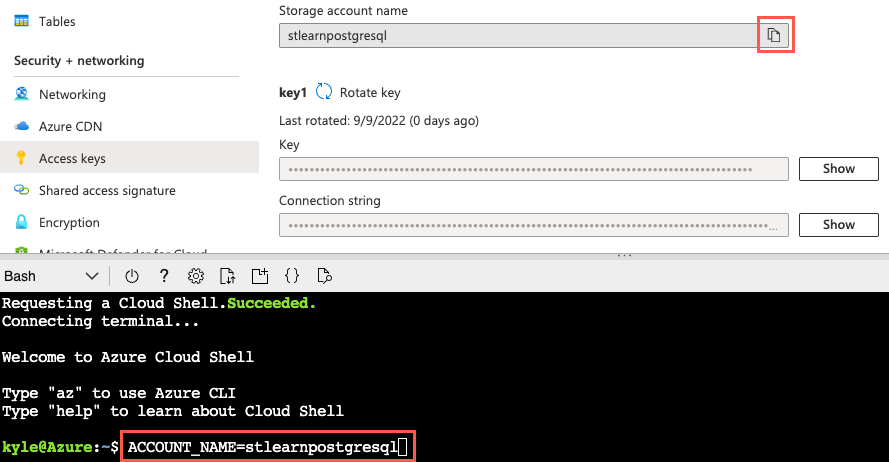
现在,执行以下命令来为存储帐户名称创建变量,将
{your_storage_account_name}令牌替换为存储帐户名称:ACCOUNT_NAME={your_storage_account_name}接下来,选择 key1“密钥”旁边的“显示”按钮,然后选择该密钥值旁边的“复制到剪贴板”按钮。
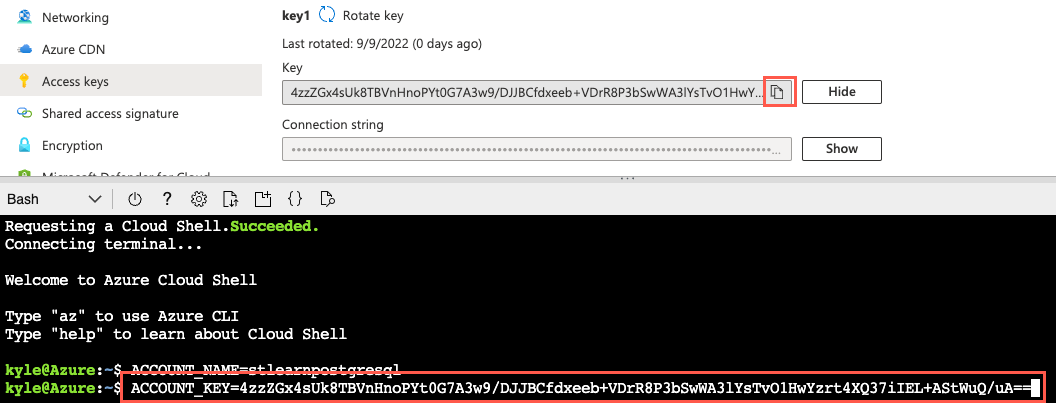
然后运行以下命令,将
{your_storage_account_key}令牌替换为复制的密钥值:ACCOUNT_KEY={your_storage_account_key}若要上传文件,将使用 Azure CLI 中的
az storage blob upload命令。 运行以下命令,将文件上传到存储帐户的historical-data容器:az storage blob upload --account-name $ACCOUNT_NAME --account-key $ACCOUNT_KEY --container-name historical-data --file users.csv --name users.csv --overwrite az storage blob upload --account-name $ACCOUNT_NAME --account-key $ACCOUNT_KEY --container-name historical-data --file events.csv --name events.csv --overwrite在本练习中,你将处理几个文件。 在实际场景中,你很可能要处理更多文件。 在这些情况下,你可以查看用于将文件迁移到 Azure 存储帐户的不同方法,并选择最适合你的情况的方法。
若要验证成功上传的文件,可以从左侧导航菜单中选择“容器”,以导航到存储帐户的“容器”页。 从容器列表中选择
historical-data容器,并观察容器现在包含名为events.csv和users.csv的文件。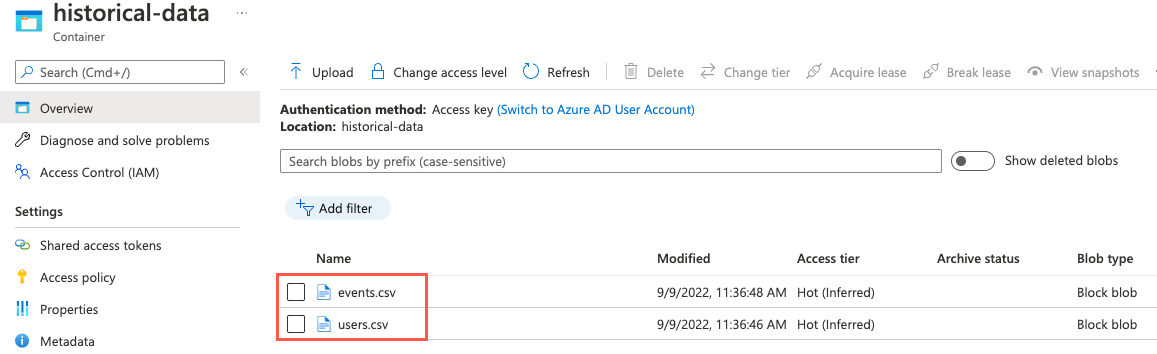
在 Azure Cloud Shell 中使用 psql 连接到数据库
现在,文件安全地存储在 Blob 存储中,是时候在数据库中设置 pg_azure_storage 扩展了。 你将使用 Azure Cloud Shell 中的 psql 命令行实用工具来完成此任务。
使用 Cloud Shell 处于打开状态的同一浏览器选项卡,导航到 Azure 门户中的 Azure Cosmos DB for PostgreSQL 资源。
在数据库的左侧导航菜单中,选择“设置”下的“连接字符串”,并复制标记为“psql”的连接字符串。
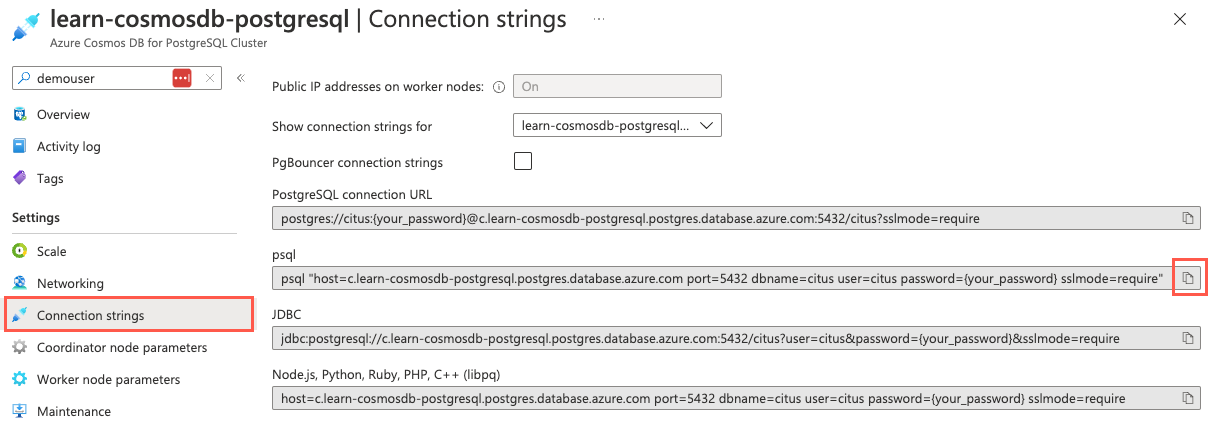
将连接字符串粘贴到文本编辑器(如记事本)中,并将
{your_password}令牌替换为在创建群集时分配给citus用户的密码。 复制更新的连接字符串,以供后面使用。在打开的“Cloud Shell”窗格中,确保为环境选择了“Bash”,然后使用 psql 命令行实用工具连接到数据库。 在 Cloud Shell 的提示符处粘贴更新后的连接字符串(包含正确密码的连接字符串),然后运行命令,该命令应类似于以下命令:
psql "host=c.learn-cosmosdb-postgresql.postgres.database.azure.com port=5432 dbname=citus user=citus password=P@ssword.123! sslmode=require"
安装 pg_azure_storage 扩展
连接到数据库后,现在即可安装 pg_azure_storage 扩展。
在 Cloud Shell Citus 提示符下,运行以下 SQL 命令将扩展加载到数据库中:
SELECT create_extension('azure_storage');在数据库中创建和使用扩展时,扩展的名称缩写为
azure_storage。
授予对 Blob 存储帐户的访问权限
下一步是在安装 pg_azure_storage 扩展后授予对存储帐户的访问权限。 回想一下,historical-data 容器以“专用(无匿名访问)”访问级别创建,因此必须提供与存储帐户关联的名称和密钥,才能授权扩展访问容器中的文件。
使用 Cloud Shell 处于打开状态的同一浏览器选项卡,导航到 Azure 门户中的存储帐户资源。
在左侧导航菜单中,选择“安全性 + 网络”下的“访问密钥”。
执行以下查询,为
pg_azure_storage扩展提供对存储帐户的访问权限,将{storage_account_name}和{storage_account_key}令牌替换为可从存储帐户的“访问密钥”页复制的值。SELECT azure_storage.account_add('{storage_account_name}', '{storage_account_key}');如果想要查看已添加到数据库的帐户列表,可以使用
account_list()函数,如下所示:SELECT azure_storage.account_list();此查询将提供以下输出:
      account_list
------------------------
(stlearnpostgresql,{})
请注意,可以使用
account_remove('ACCOUNT_NAME')函数从数据库中删除帐户,但不要在这里进行此操作,因为需要连接帐户来完成练习的剩余部分。
列出 Blob 存储容器中的文件
安全连接到存储帐户后,现在即可使用 blob_list() 函数在命名容器中生成 Blob 列表。
若要查看
historical-data容器中的文件,请运行以下查询:SELECT path, content_type, pg_size_pretty(bytes) FROM azure_storage.blob_list('stlearnpostgresql', 'historical-data');blob_list()函数输出指定容器中的所有 Blob:path | content_type | pg_size_pretty ------------+--------------+---------------- events.csv | text/csv | 17 MB users.csv | text/csv | 29 MB
检查 users.csv 文件
在尝试从任何文件引入数据之前,必须了解文件中的数据结构。 了解该结构的最简单方法是在 Azure 门户中预览文件,但此功能仅限于小于 2.1 MB 的文件。 blob_list() 函数的输出表明,Woodgrove Bank 提供的两个文件都大于限制。 若要查看这些文件,需要下载并在本地打开它们。
在 Azure 门户中,导航到存储帐户资源,从左侧导航菜单中选择“存储浏览器”,然后在“存储浏览器”页上选择“Blob 容器”。

从容器列表中选择“historical-data”。
选择
users.csv文件右侧的省略号 (...) 按钮,然后从上下文菜单中选择“下载”。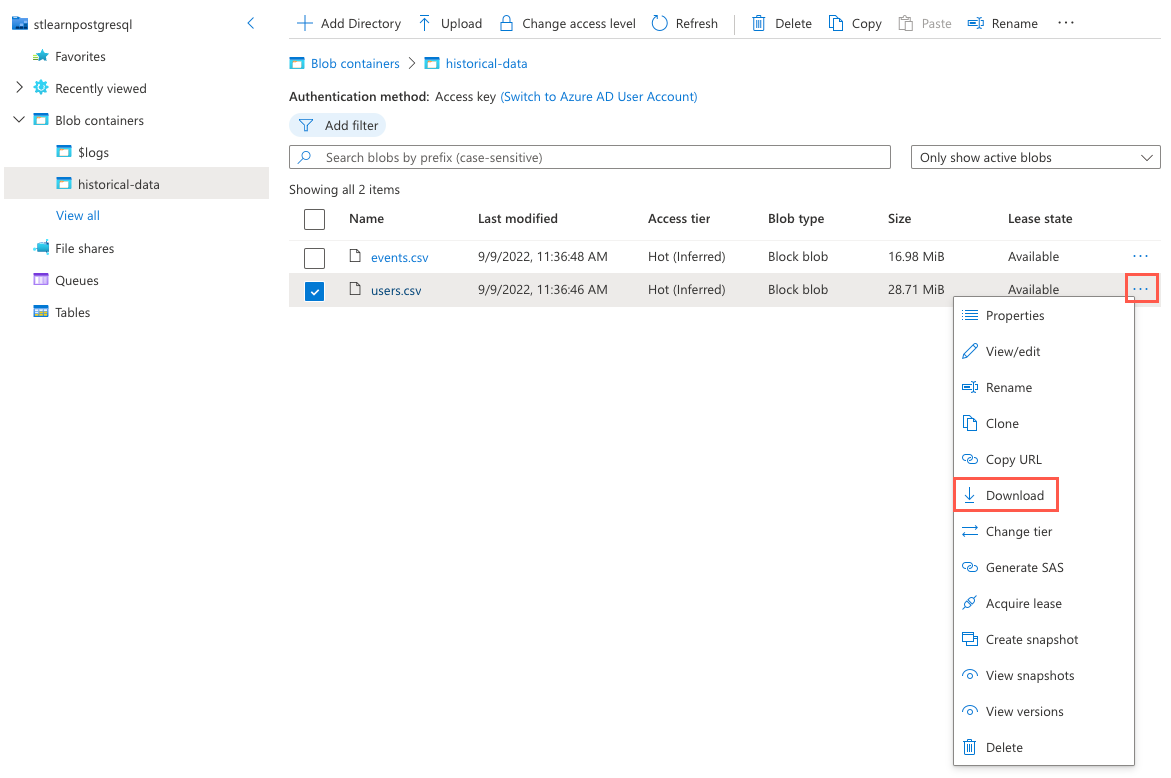
下载完成后,使用 Microsoft Excel(或可以打开 CSV 文件的其他文本编辑器)打开文件,并观察文件中包含的数据的结构,这类似于下面的
users.csv文件前 10 行的示例。user_idurlloginavatar_url21https://api.woodgrove.com/users/technoweenietechnoweeniehttps://avatars.woodgroveusercontent.com/u/21?22https://api.woodgrove.com/users/macournoyermacournoyerhttps://avatars.woodgroveusercontent.com/u/22?38https://api.woodgrove.com/users/atmosatmoshttps://avatars.woodgroveusercontent.com/u/38?45https://api.woodgrove.com/users/mojodnamojodnahttps://avatars.woodgroveusercontent.com/u/45?69https://api.woodgrove.com/users/rsanheimrsanheimhttps://avatars.woodgroveusercontent.com/u/69?78https://api.woodgrove.com/users/indirectindirecthttps://avatars.woodgroveusercontent.com/u/78?81https://api.woodgrove.com/users/engineyardengineyardhttps://avatars.woodgroveusercontent.com/u/81?82https://api.woodgrove.com/users/jsierlesjsierleshttps://avatars.woodgroveusercontent.com/u/82?85https://api.woodgrove.com/users/brixenbrixenhttps://avatars.woodgroveusercontent.com/u/85?87https://api.woodgrove.com/users/tmorninitmorninihttps://avatars.woodgroveusercontent.com/u/87?请注意,该文件包含四个列。 第一列包含整数值,其余列包含文本。 还需要注意的是,该文件不包含标题行。 此信息将更改你设置
COPY命令以将文件数据引入到数据库中的方式。你在第 3 单元中创建了
payment_users表。 提醒一下,该表的结构如下:/* -- Table structure and distribution details provided for reference CREATE TABLE payment_users ( user_id bigint PRIMARY KEY, url text, login text, avatar_url text ); SELECT created_distributed_table('payment_users', 'user_id'); */根据观察到的
users.csv文件的结构,数据看起来与预期一致,你应该能够加载payment_users表而不出现问题。
从 Blob 存储中的文件中提取数据
了解了文件中包含的数据后,现在即可满足 Woodgrove Bank 的请求,从 Azure Blob 存储帐户中的文件大容量加载其历史数据。 pg_azure_storage 扩展扩展了本机 PostgreSQL COPY 命令,使其能够处理 Azure Blob 存储资源 URL,从而提供了大容量加载功能。 此功能默认处于启用状态,你可以使用 azure_storage.enable_copy_command 设置来管理它。
使用扩展的
COPY命令,运行以下命令来将数据从users.csv引入到payment_users表中,确保将{STORAGE_ACCOUNT_NAME}令牌替换为上面创建的存储帐户的唯一名称。-- Bulk load data from the user.csv file in Blob Storage into the payment_users table copy payment_users FROM 'https://{STORAGE_ACCOUNT_NAME}.blob.core.windows.net/historical-data/users.csv';COPY命令的输出将指定复制到表中的行数。 应会看到users.csv文件的结果:COPY 264197。假设
users.csv文件包含一个标题行。 若要使用COPY命令和pg_azure_storage扩展处理该行,需要在资源 URL 后面指定WITH (header)选项。 例如copy payment_users FROM 'https://{STORAGE_ACCOUNT_NAME}.blob.core.windows.net/historical-data/users.csv' WITH (header);。接下来,对
payment_users表运行COUNT查询,以验证复制到表中的记录数:SELECT COUNT(*) FROM payment_users;应会看到以下结果,这些结果与
COPY命令的结果匹配:count -------- 264197祝贺你! 你已成功扩展 Azure Cosmos DB for PostgreSQL 数据库,并使用
pg_azure_storage扩展将文件数据从 Azure Blob 存储中的安全容器引入到分布式表中。在 Cloud Shell 中运行以下命令,断开与数据库的连接:
\q
清理
请务必清理任何未使用的资源。 你需要为配置的容量(而不是数据库的使用量)付费。 按照以下过程删除资源组以及为此模块创建的资源。
打开 Web 浏览器,导航到 Azure 门户。
在左侧导航菜单中,选择“资源组”,然后选择在第 4 单元的练习中创建的资源组。
在“概述”窗格中,选择“删除资源组”。
输入已创建的资源组名称进行确认,然后选择“删除”。
再次选择“删除”以确认删除。