创建自定义 Azure Stack Hub 市场项
发布到 Azure Stack Hub 市场的每个项都使用 Azure 库包 (.azpkg) 格式。 使用 Azure Gallery Packager 工具可以创建自定义 Azure 库包,然后可将此包上传到 Azure Stack Hub 市场供用户下载。 部署过程使用 Azure 资源管理器模板。
创建市场项
若要创建自定义市场项,请执行以下操作:
下载 Azure Gallery Packager 工具和示例 Azure Stack Hub 库包。 此下载包括自定义虚拟机模板。 提取 .zip 文件,在文件夹“自定义虚拟机”下,可以使用 Linux 或可用的 Windows 模板。 可以决定重复使用预制的模板,并使用要显示在 Azure Stack Hub 门户中的项的产品详细信息修改相应的参数。
创建 Azure 资源管理器模板,或使用适用于 Windows/Linux 的示例模板。 在步骤 1 下载的打包器工具 .zip 文件中已提供这些示例模板。
库包应包含以下结构:
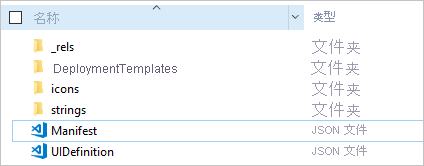
将以下 Manifest.json 模板中突出显示的值(包含数字)替换为上传自定义映像时提供的值。
建议在发布自己的自定义模板之前,尝试按原样发布示例,确保示例在你的环境中正常工作。 验证此步骤有效后,请从库中删除该示例,并进行迭代更改,直到对结果满意为止。
以下模板是 Manifest.json 文件的示例:
{
  "$schema": "https://gallery.azure.com/schemas/2015-10-01/manifest.json#",
  "name": "Test", (1)
  "publisher": "<Publisher name>", (2)
  "version": "<Version number>", (3)
  "displayName": "ms-resource:displayName", (4)
  "publisherDisplayName": "ms-resource:publisherDisplayName", (5)
  "publisherLegalName": "ms-resource:publisherDisplayName", (6)
  "summary": "ms-resource:summary",
  "longSummary": "ms-resource:longSummary",
  "description": "ms-resource:description",
  "longDescription": "ms-resource:description",
  "links": [
    { "displayName": "ms-resource:documentationLink", "uri": "http://go.microsoft.com/fwlink/?LinkId=532898" }
    ],
  "artifacts": [
      {
        "isDefault": true
      }
  ],
  "images": [{
      "context": "ibiza",
      "items": [{
        "id": "small",
        "path": "icons\\Small.png", (7)
        "type": "icon"
        },
        {
            "id": "medium",
            "path": "icons\\Medium.png",
            "type": "icon"
        },
        {
            "id": "large",
            "path": "icons\\Large.png",
            "type": "icon"
        },
        {
            "id": "wide",
            "path": "icons\\Wide.png",
            "type": "icon"
        }]
    }]
}
以下列表解释了示例模板中的上述带有编号的值:
The name of the offerThe version of your template, without a spaceThe name that customers seeThe publisher name that customers seeThe name of the publisher, without a spaceThe publisher legal nameThe path and name for each icon
- 对于引用 ms-resource 的所有字段,必须在 strings/resources.json 文件中更改相应的值:
{
"displayName": "<OfferName.PublisherName.Version>",
"publisherDisplayName": "<Publisher name>",
"summary": "Create a VM",
"longSummary": "Create a virtual machine and use it",
"description": "<p>This is just a sample of the type of description you could create for your gallery item!</p><p>This is a second paragraph.</p>",
"documentationLink": "Documentation"
}
- 为确保资源可以成功部署,请使用 Azure Stack Hub API 测试该模板。
- 如果模板依赖于虚拟机映像,请遵循将虚拟机映像添加到 Azure Stack Hub 的说明。
- 将 Azure Resource Manager 模板保存在 /Contoso.TodoList/DeploymentTemplates/ 文件夹中。
- 为市场项选择图标和文本。 将图标添加到“图标”文件夹,并将文本添加到“字符创”文件夹中的资源文件。 为图标使用 small、medium、large 和 wide 命名约定。
- 修改完文件后,请将其转换为 .azpkg 文件。 可以使用 AzureGallery.exe 工具以及前面下载的示例库包来执行转换。 运行以下命令:
.\AzureGallery.exe package -m c:\<path>\<gallery package name>\manifest.json -o c:\Temp