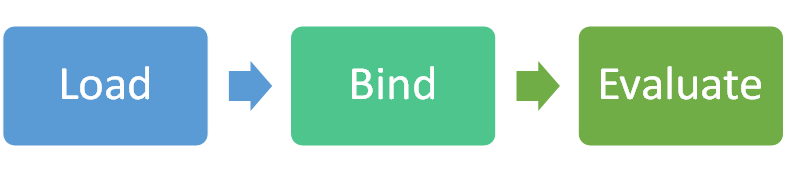
可以利用 Windows ML API 轻松与C++桌面(Win32)应用程序中的机器学习模型进行交互。 使用加载、绑定和评估的三个步骤,应用程序可以从机器学习的强大功能中获益。
我们将创建一个稍微简化版本的 SqueezeNet 对象检测示例,该示例在 GitHub 上可用。 如果想要查看完成时的外观,可以下载完整的示例。
我们将使用 C++/WinRT 访问 WinML API。 有关详细信息 ,请参阅 C++/WinRT 。
本教程介绍以下操作:
- 加载机器学习模型
- 将图像加载为 视频帧
- 绑定模型的输入和输出
- 评估模型并打印有意义的结果
先决条件
- Visual Studio 2019 (或 Visual Studio 2017 版本 15.7.4 或更高版本)
- Windows 10 版本 1809 或更高版本
- Windows SDK 版本 17763 或更高版本
- 适用于 C++/WinRT 的 Visual Studio 扩展
- 在 Visual Studio 中,选择 “工具 > 扩展和更新”。
- 在左窗格中选择 “联机 ”,然后使用右侧的搜索框搜索“WinRT”。
- 选择 C++/WinRT,单击“ 下载”,然后关闭 Visual Studio。
- 按照安装说明作,然后重新打开 Visual Studio。
- Windows -Machine-Learning Github 存储库 (你可以将其下载为 ZIP 文件或克隆到计算机)
创建项目
首先,我们将在 Visual Studio 中创建项目:
- 选择 “文件 > 新建 > 项目 ”以打开 “新建项目” 窗口。
- 在左窗格中,选择“已安装>的 Visual C++ > Windows 桌面”,然后在中间选择“Windows 控制台应用程序”(C++/WinRT)。
- 为项目指定名称和位置,然后单击“确定”。
- 在“新建通用 Windows 平台项目”窗口中,将“目标”和“最低版本”都设置为版本 17763 或更高版本,然后单击“确定”。
- 请确保顶部工具栏中的下拉菜单设置为 “调试 ”,并根据计算机的体系结构选择 x64 或 x86 。
- 按 Ctrl+F5 在不调试的情况下运行程序。 应当会打开一个终端,其中显示“Hello world”文本。 按任意键将其关闭。
加载模型
接下来,我们将使用 LearningModel.LoadFromFilePath 将 ONNX 模型加载到程序中:
在 pch.h ( 在头文件 文件夹中),添加以下
include语句(这些语句允许我们访问我们需要的所有 API):#include <winrt/Windows.AI.MachineLearning.h> #include <winrt/Windows.Foundation.Collections.h> #include <winrt/Windows.Graphics.Imaging.h> #include <winrt/Windows.Media.h> #include <winrt/Windows.Storage.h> #include <string> #include <fstream> #include <Windows.h>在 main.cpp (在 源文件 文件夹中),添加以下
using语句:using namespace Windows::AI::MachineLearning; using namespace Windows::Foundation::Collections; using namespace Windows::Graphics::Imaging; using namespace Windows::Media; using namespace Windows::Storage; using namespace std;在语句后面
using添加以下变量声明:// Global variables hstring modelPath; string deviceName = "default"; hstring imagePath; LearningModel model = nullptr; LearningModelDeviceKind deviceKind = LearningModelDeviceKind::Default; LearningModelSession session = nullptr; LearningModelBinding binding = nullptr; VideoFrame imageFrame = nullptr; string labelsFilePath; vector<string> labels;在全局变量后面添加以下向前声明:
// Forward declarations void LoadModel(); VideoFrame LoadImageFile(hstring filePath); void BindModel(); void EvaluateModel(); void PrintResults(IVectorView<float> results); void LoadLabels();在main.cpp中,删除“Hello world”代码(函数后面的
maininit_apartment所有内容)。在本地 Windows-Machine-Learning 存储库克隆中找到 SqueezeNet.onnx 文件。 它应位于 \Windows-Machine-Learning\SharedContent\models 中。
复制文件路径,并将其指定给我们在顶部定义的
modelPath变量。 记得要使用L作为字符串前缀,使其成为宽字符串,以便它能够正常用于hstring,并使用额外的反斜杠来对任何反斜杠 (\) 进行转义。 例如:hstring modelPath = L"C:\\Repos\\Windows-Machine-Learning\\SharedContent\\models\\SqueezeNet.onnx";首先,我们将实现该方法
LoadModel。 在main方法后添加以下方法。 此方法加载模型并输出花费的时间:void LoadModel() { // load the model printf("Loading modelfile '%ws' on the '%s' device\n", modelPath.c_str(), deviceName.c_str()); DWORD ticks = GetTickCount(); model = LearningModel::LoadFromFilePath(modelPath); ticks = GetTickCount() - ticks; printf("model file loaded in %d ticks\n", ticks); }最后,从
main方法调用此方法:LoadModel();在不调试的情况下运行程序。 你应该会看到模型已成功加载!
加载映像
接下来,我们将图像文件加载到程序中:
添加以下方法。 此方法将从给定路径加载图像并从中创建 VideoFrame :
VideoFrame LoadImageFile(hstring filePath)
{
    printf("Loading the image...\n");
    DWORD ticks = GetTickCount();
    VideoFrame inputImage = nullptr;

    try
    {
        // open the file
        StorageFile file = StorageFile::GetFileFromPathAsync(filePath).get();
        // get a stream on it
        auto stream = file.OpenAsync(FileAccessMode::Read).get();
        // Create the decoder from the stream
        BitmapDecoder decoder = BitmapDecoder::CreateAsync(stream).get();
        // get the bitmap
        SoftwareBitmap softwareBitmap = decoder.GetSoftwareBitmapAsync().get();
        // load a videoframe from it
        inputImage = VideoFrame::CreateWithSoftwareBitmap(softwareBitmap);
    }
    catch (...)
    {
        printf("failed to load the image file, make sure you are using fully qualified paths\r\n");
        exit(EXIT_FAILURE);
    }

    ticks = GetTickCount() - ticks;
    printf("image file loaded in %d ticks\n", ticks);
    // all done
    return inputImage;
}
在
main方法中添加对此方法的调用:imageFrame = LoadImageFile(imagePath);在本地 Windows-Machine-Learning 存储库克隆中找到媒体文件夹。 它应位于 \Windows-Machine-Learning\SharedContent\media。
在该文件夹中选择一个图像,并将它的文件路径分配给我们在顶部定义的
imagePath变量。 记得要使用L作为其前缀,使其成为宽字符串,并使用另一个反斜杠来对任何反斜杠进行转义。 例如:hstring imagePath = L"C:\\Repos\\Windows-Machine-Learning\\SharedContent\\media\\kitten_224.png";在不调试的情况下运行程序。 应会看到已成功加载的图像!
绑定输入和输出
接下来,我们将基于模型创建会话,并使用 LearningModelBinding.Bind 绑定会话中的输入和输出。 有关绑定的详细信息,请参阅 绑定模型。
实现
BindModel方法。 这会创建一个基于模型和设备的会话,并在该会话基础上创建一个绑定。 然后,我们将输入和输出绑定到使用它们的名称创建的变量。 我们事先知道输入功能名为“data_0”,输出功能名为“softmaxout_1”。 可以通过在 Netron(联机模型可视化工具)中打开这些属性来查看任何模型的这些属性。void BindModel() { printf("Binding the model...\n"); DWORD ticks = GetTickCount(); // now create a session and binding session = LearningModelSession{ model, LearningModelDevice(deviceKind) }; binding = LearningModelBinding{ session }; // bind the intput image binding.Bind(L"data_0", ImageFeatureValue::CreateFromVideoFrame(imageFrame)); // bind the output vector<int64_t> shape({ 1, 1000, 1, 1 }); binding.Bind(L"softmaxout_1", TensorFloat::Create(shape)); ticks = GetTickCount() - ticks; printf("Model bound in %d ticks\n", ticks); }从
BindModel方法添加对main的调用:BindModel();在不调试的情况下运行程序。 应成功绑定模型的输入和输出。 我们快到了!
评估模型
现在,我们处于本教程开头图表的最后一步:评估。 我们将使用 LearningModelSession.Evaluate 评估模型:
实现
EvaluateModel方法。 此方法获取我们的会话,并使用我们的绑定和相关 ID 对其进行评估。 关联 ID 是我们以后可能会用来匹配特定评估调用与输出结果的工具。 同样,我们提前知道输出的名称为“softmaxout_1”。void EvaluateModel() { // now run the model printf("Running the model...\n"); DWORD ticks = GetTickCount(); auto results = session.Evaluate(binding, L"RunId"); ticks = GetTickCount() - ticks; printf("model run took %d ticks\n", ticks); // get the output auto resultTensor = results.Outputs().Lookup(L"softmaxout_1").as<TensorFloat>(); auto resultVector = resultTensor.GetAsVectorView(); PrintResults(resultVector); }现在,让我们实现
PrintResults。 此方法获取图像中对象可能的前三个概率,并输出它们:void PrintResults(IVectorView<float> results) { // load the labels LoadLabels(); // Find the top 3 probabilities vector<float> topProbabilities(3); vector<int> topProbabilityLabelIndexes(3); // SqueezeNet returns a list of 1000 options, with probabilities for each, loop through all for (uint32_t i = 0; i < results.Size(); i++) { // is it one of the top 3? for (int j = 0; j < 3; j++) { if (results.GetAt(i) > topProbabilities[j]) { topProbabilityLabelIndexes[j] = i; topProbabilities[j] = results.GetAt(i); break; } } } // Display the result for (int i = 0; i < 3; i++) { printf("%s with confidence of %f\n", labels[topProbabilityLabelIndexes[i]].c_str(), topProbabilities[i]); } }我们还需要实现
LoadLabels。 此方法打开标签文件,其中包含模型可以识别的所有不同对象,并对其进行分析:void LoadLabels() { // Parse labels from labels file. We know the file's entries are already sorted in order. ifstream labelFile{ labelsFilePath, ifstream::in }; if (labelFile.fail()) { printf("failed to load the %s file. Make sure it exists in the same folder as the app\r\n", labelsFilePath.c_str()); exit(EXIT_FAILURE); } std::string s; while (std::getline(labelFile, s, ',')) { int labelValue = atoi(s.c_str()); if (labelValue >= labels.size()) { labels.resize(labelValue + 1); } std::getline(labelFile, s); labels[labelValue] = s; } }在 Windows-Machine-Learning 存储库的本地克隆中找到 Labels.txt 文件。 它应位于 \Windows-Machine-Learning\Samples\SqueezeNetObjectDetection\Desktop\cpp 中。
将此文件路径指定给我们在顶部定义的
labelsFilePath变量。 请确保用另一反斜杠来对任何反斜杠进行转义。 例如:string labelsFilePath = "C:\\Repos\\Windows-Machine-Learning\\Samples\\SqueezeNetObjectDetection\\Desktop\\cpp\\Labels.txt";在
EvaluateModel方法中添加对main的调用:EvaluateModel();在不调试的情况下运行程序。 它现在应该能够正确识别图像中的内容! 下面是它可能输出的示例:
Loading modelfile 'C:\Repos\Windows-Machine-Learning\SharedContent\models\SqueezeNet.onnx' on the 'default' device
model file loaded in 250 ticks
Loading the image...
image file loaded in 78 ticks
Binding the model...Model bound in 15 ticks
Running the model...
model run took 16 ticks
tabby, tabby cat with confidence of 0.931461
Egyptian cat with confidence of 0.065307
Persian cat with confidence of 0.000193
后续步骤
太好了,你在C++桌面应用程序中成功实现了对象检测! 接下来,可以尝试使用命令行参数来输入模型和图像文件,而不是对其进行硬编码,这类似于 GitHub 上的示例。 还可以尝试在不同的设备(如 GPU)上运行评估,以了解性能的差异。
琢磨 GitHub 上的其他示例并任意扩展它们!
另请参阅
注释
使用以下资源获取有关 Windows ML 的帮助:
- 若要询问或回答有关 Windows ML 的技术问题,请使用 Stack Overflow上的 windows-machine-learning 标记。
- 若要报告 bug,请在 gitHub 提交问题。