演练:绑定 iOS Objective-C 库
重要
我们当前正在调查 Xamarin 平台上的自定义绑定使用情况。 请参与此调查,告诉我们将来应该进行哪些开发工作。
本文提供了为现有 Objective-C 库 InfColorPicker 创建 Xamarin.iOS 绑定的实践演练。 它介绍了一些主题,如编译静态 Objective-C 库、将其绑定和在 Xamarin.iOS 应用程序中使用绑定。
在使用 iOS 时,可能会遇到需要使用第三方 Objective-C 库的情况。 在这些情况下,可以使用 Xamarin.iOS 绑定项目创建一个 C# 绑定,这样就可以在 Xamarin.iOS 应用程序中使用该库。
通常,在 iOS 生态系统中,可以找到 3 种风格的库:
- 作为具有
.a扩展名的预编译静态库文件及其标头(.h 文件)。 例如,Google 的分析库 - 作为预编译框架。 这只是一个文件夹,包含静态库、头文件,有时还包含扩展名为
.framework的其他资源。 例如,Google 的 AdMob 库。 - 仅作为源代码文件。 例如,仅包含
.m和.hObjective C 文件的库。
在第一个和第二个方案中,已经有预编译的 CocoaTouch 静态库,因此在本文中,我们将重点介绍第三种方案。 请记住,在开始创建绑定之前,请始终检查库提供的许可证,以确保你可以自由绑定它。
本文以开放源代码 InfColorPickerObjective-C 项目为例,提供了创建绑定项目的分步演练,但是本指南中的所有信息都可以用于任何第三方 Objective-C 库。 InfColorPicker 库提供了一个可重用的视图控制器,允许用户根据 HSB 表示形式选择颜色,使颜色选择对用户更加友好。

我们将介绍在 Xamarin.iOS 中使用此特定 Objective-C API 的所有必要步骤:
- 首先,我们将使用 Xcode 创建 Objective-C 静态库。
- 然后,我们将将此静态库与 Xamarin.iOS 绑定。
- 接下来,展示 Objective Sharpie 如何通过自动生成 Xamarin.iOS 绑定所需的部分(但并非全部)必要 API 定义来减少工作负载。
- 最后,我们将创建一个使用绑定的 Xamarin.iOS 应用程序。
示例应用程序将演示如何使用强委托在 InfColorPicker API 和 C# 代码之间进行通信。 在了解如何使用强委托后,我们将介绍如何使用弱委托来执行相同的任务。
要求
本文假设你熟悉 Xcode 和 Objective-C 语言,并且已阅读我们的绑定 Objective-C 文档。 此外,完成演示的步骤需要满足以下条件:
- Xcode 和 iOS SDK - 需要在开发人员的计算机上安装和配置 Apple 的 Xcode 和最新的 iOS API。
- Xcode 命令行工具 - 必须为当前安装的 Xcode 版本安装 Xcode 命令行工具(有关安装详细信息,请参阅下文)。
- Visual Studio for Mac 或 Visual Studio - 应在开发计算机上安装和配置最新版本的 Visual Studio for Mac 或 Visual Studio。 开发 Xamarin.iOS 应用程序需要 Apple Mac,在使用 Visual Studio 时,必须连接到 Xamarin.iOS 生成主机
- 最新版本的 Objective Sharpie - 从此处下载的 Objective Sharpie 工具的当前副本。 如果已安装 Objective Sharpie,则可以使用
sharpie update将其更新到最新版本
安装 Xcode 命令行工具
如上所述,我们将在本演练中使用 Xcode 命令行工具(特别是 make 和 lipo)。 make 命令是一个非常常见的 Unix 实用工具,它将使用指定如何生成程序的 makefile 自动编译可执行程序和库。 lipo 命令是用于创建多体系结构文件的 OS X 命令行实用工具;它将多个 .a 文件合并为一个文件,可供所有硬件体系结构使用。
根据 Apple 的有关使用 Xcode 从命令行进行生成的常见问题解答文档,在 OS X 10.9 及更高版本中,Xcode“首选项”的“下载”窗格不再支持下载命令行工具。
需要使用以下方法之一来安装工具:
安装 Xcode - 安装 Xcode 时,它将与所有命令行工具捆绑在一起。 在 OS X 10.9 填充码(安装在
/usr/bin中)中,可以将/usr/bin中包含的任何工具映射到 Xcode 中的相应工具。 例如,使用xcrun命令,可以从命令行查找或运行 Xcode 中的任何工具。终端应用程序 - 在终端应用程序中,可以通过运行
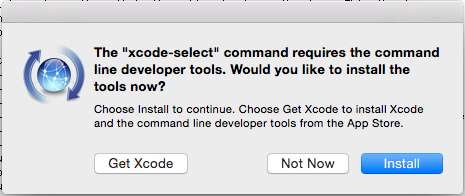
xcode-select --install命令来安装命令行工具:- 启动终端应用程序。
- 键入
xcode-select --install并按 Enter,例如:
Europa:~ kmullins$ xcode-select --install系统将要求安装命令行工具,单击“安装”按钮:
这些工具将从 Apple 的服务器下载并安装:

Apple 开发人员下载 - 命令行工具包可在 Apple 开发人员下载网页上下载。 使用 Apple ID 登录,然后搜索并下载命令行工具:


安装命令行工具后,即可继续演练。
演练
在本演练中,我们将介绍以下步骤:
- 创建静态库 - 此步骤涉及创建 InfColorPickerObjective-C 代码的静态库。 静态库将具有
.a文件扩展名,并嵌入到库项目的 .NET 程序集中。 - 创建 Xamarin.iOS 绑定项目 - 有了静态库后,我们将使用它来创建 Xamarin.iOS 绑定项目。 绑定项目由我们刚刚创建的静态库和 C# 代码形式的元数据组成,这些代码说明了如何使用 Objective-C API。 此元数据通常称为 API 定义。 我们将使用 Objective Sharpie 来帮助我们创建 API 定义。
- 规范化 API 定义 - Objective Sharpie 在帮助我们方面做得非常出色,但它不能做到所有事情。 我们将讨论在使用 API 定义之前需要对其进行的一些更改。
- 使用绑定库 - 最后,我们将创建一个 Xamarin.iOS 应用程序,以显示如何使用新创建的绑定项目。
现在,我们已经了解了涉及哪些步骤,接下来让我们继续执行本演练的其余部分。
创建静态库
如果我们在 Github 中检查 InfColorPicker 的代码:

可以在项目中看到以下三个目录:
- InfColorPicker - 此目录包含项目的 Objective-C 代码。
- PickerSamplePad - 此目录包含示例 iPad 项目。
- PickerSamplePhone - 此目录包含示例 iPhone 项目。
让我们从 GitHub 下载 InfColorPicker 项目,并将其解压缩到所选目录中。 打开 PickerSamplePhone 项目的 Xcode 目标,我们将在 Xcode 导航器中看到以下项目结构:

此项目通过将 InfColorPicker 源代码(在红色框中)直接添加到每个示例项目中来实现代码重用。 示例项目的代码位于蓝色框中。 由于此特定项目不提供静态库,因此有必要创建 Xcode 项目来编译静态库。
第一步是将 InfoColorPicker 源代码添加到静态库中。 为此,让我们执行以下操作:
启动 Xcode。
从“文件”菜单中,选择“新建”>“项目...”:

选择“框架和库”、“Cocoa Touch 静态库”模板,然后单击“下一步”按钮:

对“项目名称”输入
InfColorPicker,然后单击“下一步”按钮:
选择一个位置以保存项目,然后单击“确定”按钮。
现在,我们需要将来自 InfColorPicker 项目的源添加到静态库项目中。 由于 InfColorPicker.h 文件已存在于静态库中(默认情况下),因此 Xcode 不允许我们覆盖它。 在 Finder中,导航到从 GitHub 解压缩的原始项目中的 InfColorPicker 源代码,复制所有 InfColorPicker 文件并将其粘贴到新的静态库项目中:

返回到 Xcode,右键单击 InfColorPicker 文件夹,然后选择“将文件添加到‘InfColorPicker...’”:

在“添加文件”对话框中,导航到刚刚复制的 InfColorPicker 源代码文件,选择全部文件,然后单击“添加”按钮:

源代码将复制到项目中:

从 Xcode 项目导航器中,选择 InfColorPicker.m 文件并注释掉最后两行(由于编写此库的方式,此文件未使用):

现在,我们需要检查库是否需要任何框架。 可以在 README 中找到此信息,也可以通过打开提供的其中一个示例项目来查找此信息。 此示例使用
Foundation.framework、UIKit.framework和CoreGraphics.framework,所以我们来添加它们。选择“InfColorPicker 目标”>“生成阶段”,然后展开“将二进制文件链接到库”部分:

使用 + 按钮打开对话框,可以添加上面列出的所需框架:

“将二进制文件链接到库”部分现在应如下图所示:


在这一点上,我们已经接近了,但我们还没有完全完成。 静态库已经创建,但我们需要生成它来创建一个 Fat 二进制文件,其中包括 iOS 设备和 iOS 模拟器所需的所有体系结构。
创建 Fat 二进制文件
所有 iOS 设备都具有由 ARM 体系结构提供支持的处理器,这些处理器是随时间推移而开发的。 每个新体系结构都添加了新的说明和其他改进,同时仍保持后向兼容性。 iOS 设备具有 armv6、armv7、armv7s 和 arm64 指令集,尽管不再使用 armv6。 iOS 模拟器不由 ARM 提供支持,而是由 x86 和 x86_64 提供支持的模拟器。 这意味着必须为每个指令集提供库。
Fat 库是包含所有受支持体系结构的 .a 文件。
创建 fat 二进制文件的过程有三个步骤:
- 编译静态库的 ARM 7 和 ARM64 版本。
- 编译静态库的 x86 和 x84_64 版本。
- 使用
lipo命令行工具将两个静态库合并为一个库。
虽然这三个步骤相当简单,但将来当 Objective-C 库收到更新或我们需要修复 bug 时,可能有必要重复这些步骤。 如果决定自动执行这些步骤,它将简化 iOS 绑定项目的未来维护和支持。
有许多工具可用于自动执行此类任务:shell 脚本、rake、xbuild 和 make。 安装 Xcode 命令行工具时,还会安装 make,这就是将用于本演练的生成系统。 下面是可用于创建多体系结构共享库的 Makefile,适用于 iOS 设备和任何库的模拟器:
XBUILD=/Applications/Xcode.app/Contents/Developer/usr/bin/xcodebuild
PROJECT_ROOT=./YOUR-PROJECT-NAME
PROJECT=$(PROJECT_ROOT)/YOUR-PROJECT-NAME.xcodeproj
TARGET=YOUR-PROJECT-NAME

all: lib$(TARGET).a

lib$(TARGET)-i386.a:
	$(XBUILD) -project $(PROJECT) -target $(TARGET) -sdk iphonesimulator -configuration Release clean build
	-mv $(PROJECT_ROOT)/build/Release-iphonesimulator/lib$(TARGET).a $@

lib$(TARGET)-armv7.a:
	$(XBUILD) -project $(PROJECT) -target $(TARGET) -sdk iphoneos -arch armv7 -configuration Release clean build
	-mv $(PROJECT_ROOT)/build/Release-iphoneos/lib$(TARGET).a $@

lib$(TARGET)-arm64.a:
	$(XBUILD) -project $(PROJECT) -target $(TARGET) -sdk iphoneos -arch arm64 -configuration Release clean build
	-mv $(PROJECT_ROOT)/build/Release-iphoneos/lib$(TARGET).a $@

lib$(TARGET).a: lib$(TARGET)-i386.a lib$(TARGET)-armv7.a lib$(TARGET)-arm64.a
	xcrun -sdk iphoneos lipo -create -output $@ $^

clean:
	-rm -f *.a *.dll
在所选的纯文本编辑器中输入 Makefile 命令,并使用 YOUR-PROJECT-NAME(你的项目名称)更新部分。 此外,请务必确保准确粘贴上述说明,并保留说明中的选项卡。
将名为 Makefile 的文件保存到与我们在上面创建的 InfColorPicker Xcode 静态库相同的位置:

在 Mac 上打开终端应用程序并导航到 Makefile 的位置。 在终端中键入 make,按 Enter,将执行 Makefile:

运行 Make 时,你将看到大量文本滚动。 如果一切正常,则将看到文字 BUILD SUCCEEDED 和 libInfColorPicker-armv7.a,libInfColorPicker-i386.a 和 libInfColorPickerSDK.a 文件将复制到与 Makefile 相同的位置:

可以使用以下命令确认 Fat 二进制文件中的体系结构:
xcrun -sdk iphoneos lipo -info libInfColorPicker.a
这应显示以下内容:
Architectures in the fat file: libInfColorPicker.a are: i386 armv7 x86_64 arm64
目前,我们已经完成了 iOS 绑定的第一步,使用 Xcode 和 Xcode 命令行工具 make 和 lipo 创建了一个静态库。 让我们进入下一步,使用 Objective-Sharpie 自动创建 API 绑定。
创建 Xamarin.iOS 绑定项目
在可以使用 Objective-Sharpie 自动执行绑定过程之前,我们需要创建一个 Xamarin.iOS 绑定项目来容纳 API 定义(我们将使用 Objective-Sharpie 来帮助我们生成),并创建 C# 绑定。
让我们执行以下操作:
启动 Visual Studio for Mac。
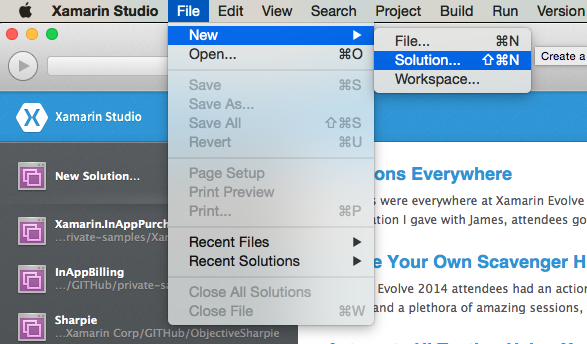
从“文件”菜单中,选择“新建”>“解决方案...”:
从“新建解决方案”对话框中,选择“库”>”iOS 绑定项目”:
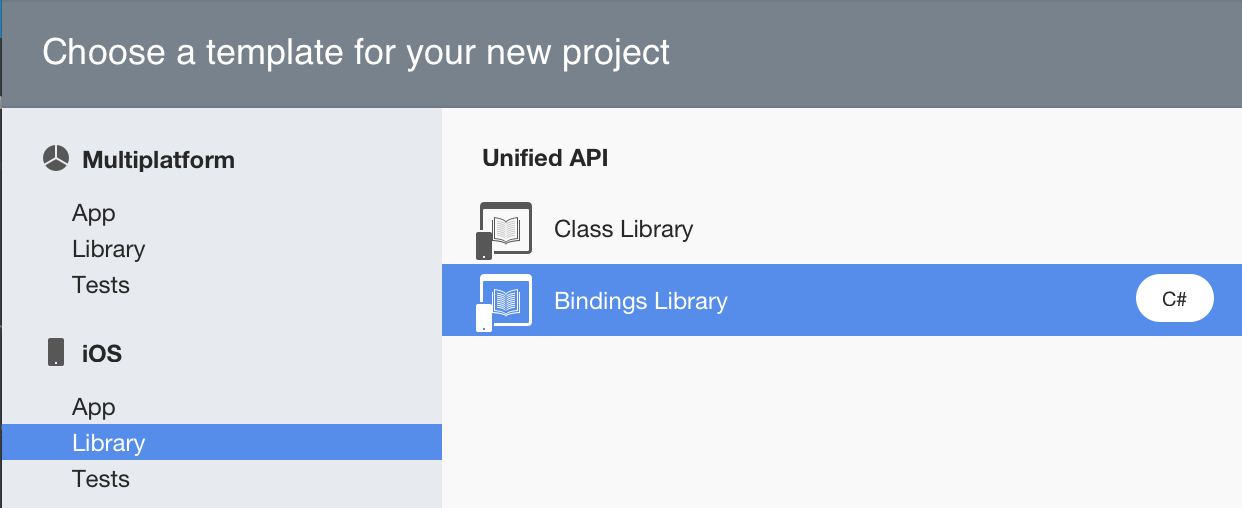
单击“下一步”按钮。
输入“InfColorPickerBinding”作为项目名称,然后单击“创建”按钮以创建解决方案:
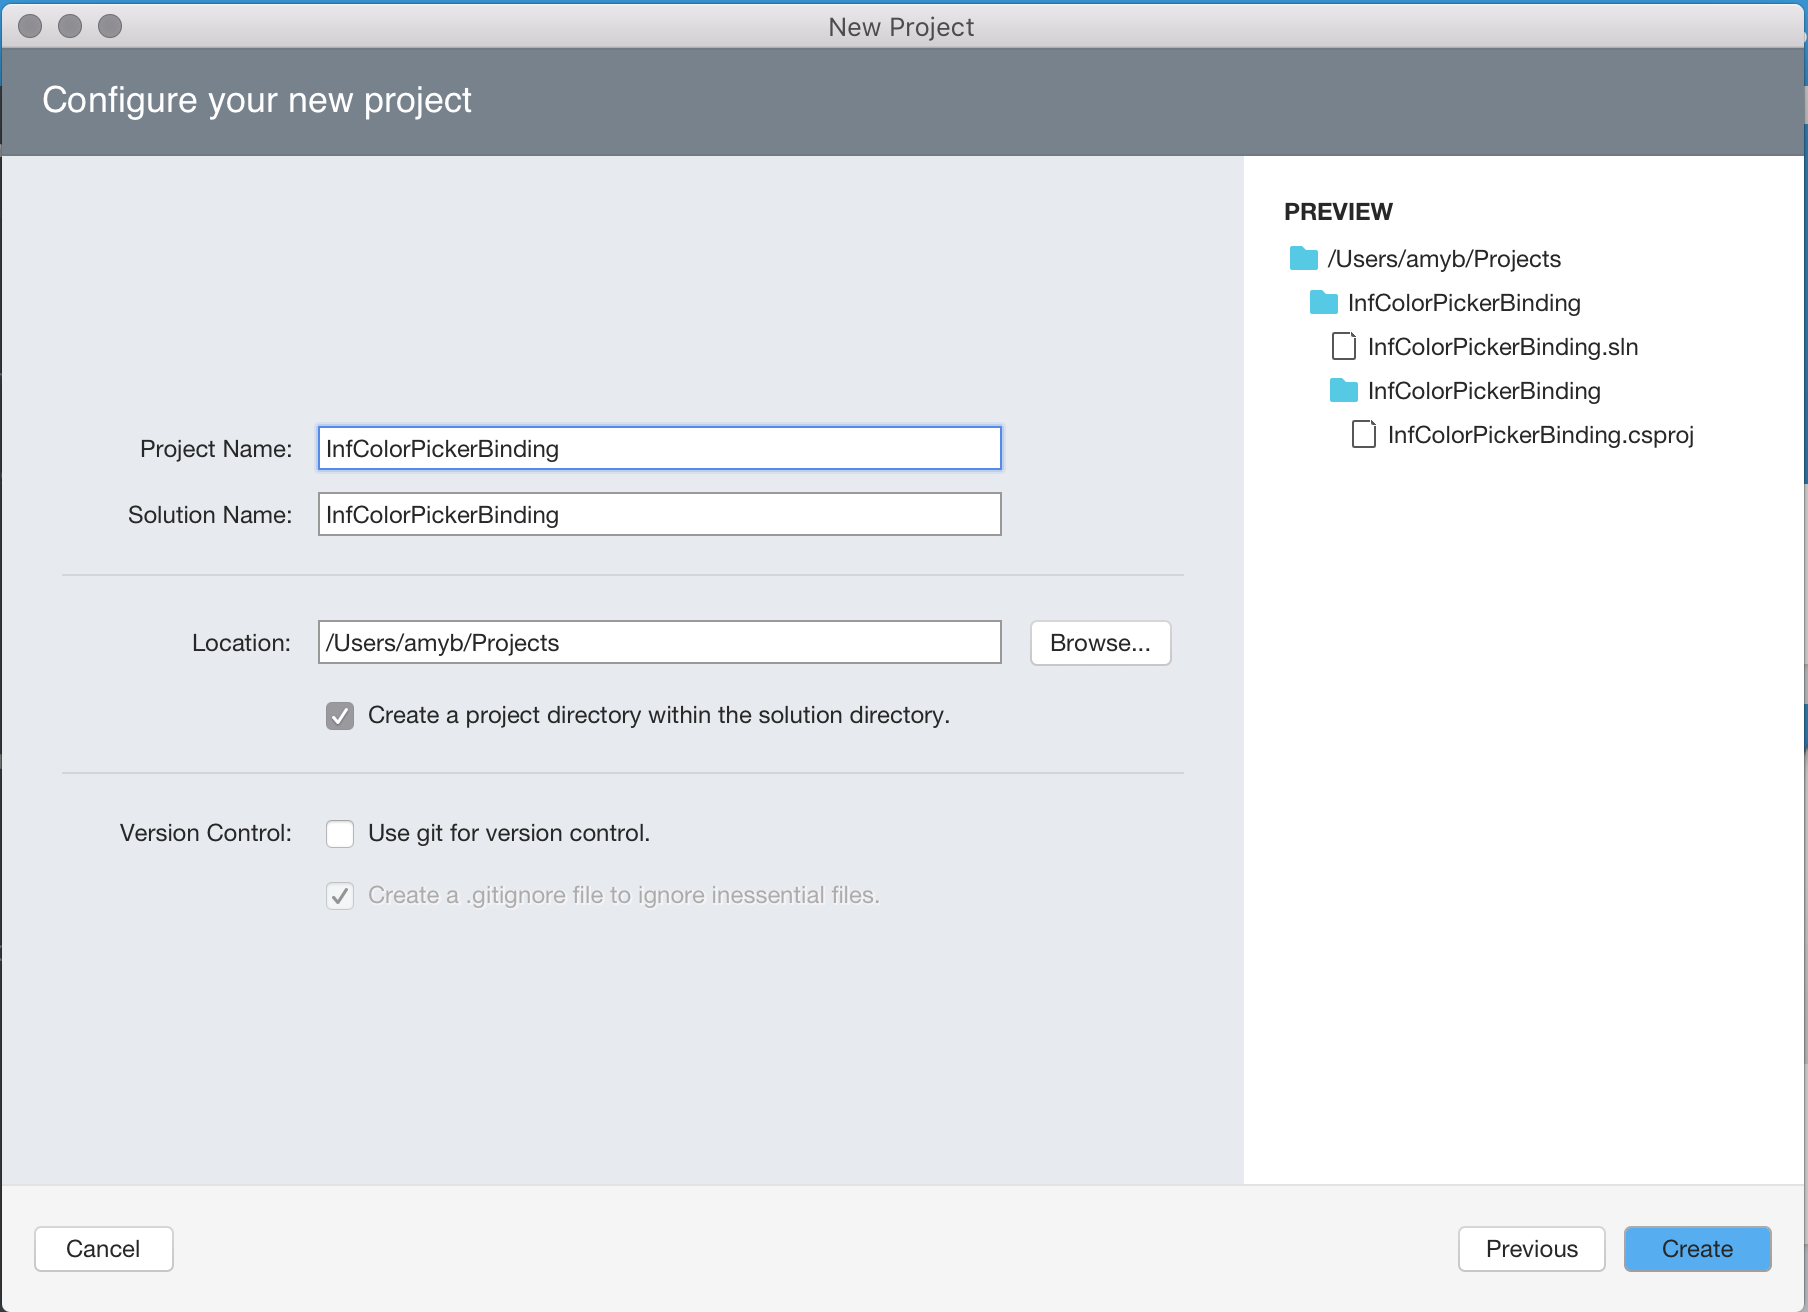
将创建解决方案,并包含两个默认文件:
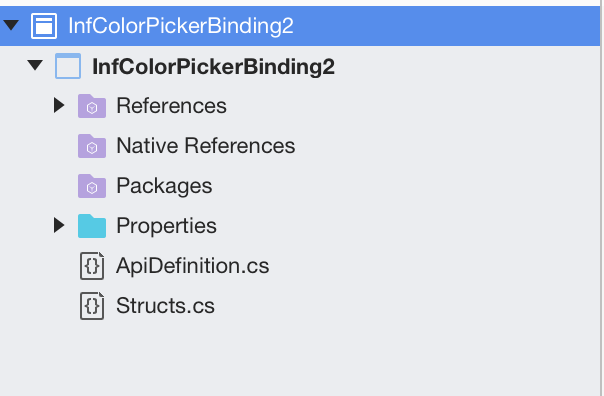


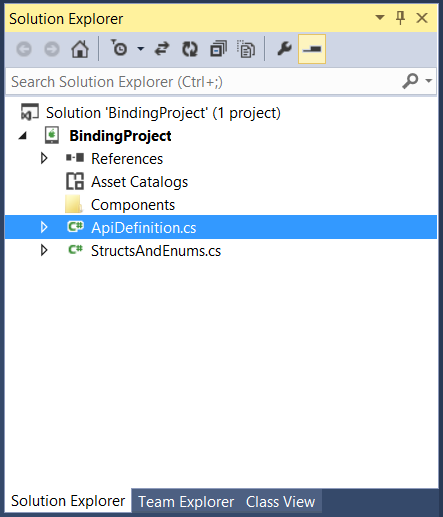
- ApiDefinition.cs - 此文件将包含用于定义如何将 Objective-C API 包装在 C# 中的协定。
- Structs.cs - 此文件将保存接口和委托所需的任何结构或枚举值。
我们稍后将在演练中使用这两个文件。 首先,我们需要将 InfColorPicker 库添加到绑定项目。
在绑定项目中包括静态库
现在,我们已经准备好了基本绑定项目,需要为 InfColorPicker 库添加上面创建的 Fat Binary 库。
按照以下步骤添加库:
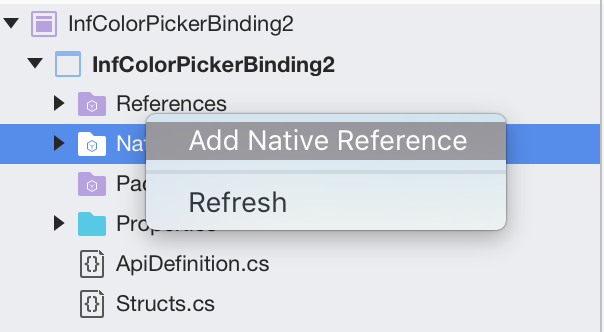
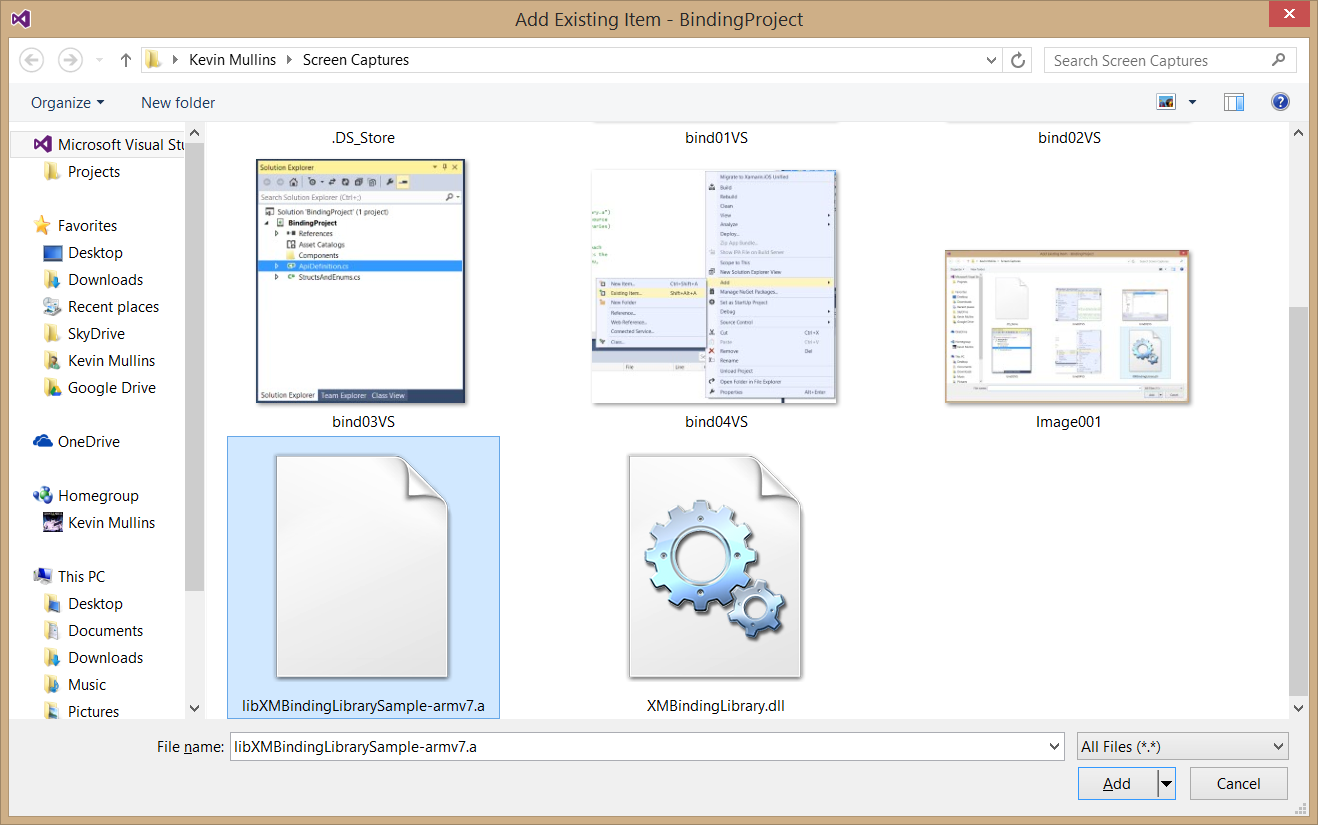
右键单击 Solution Pad 中的 Native References 文件夹,然后选择“添加本机引用”:
导航到之前创建的 Fat 二进制文件 (
libInfColorPickerSDK.a),然后按“打开”按钮: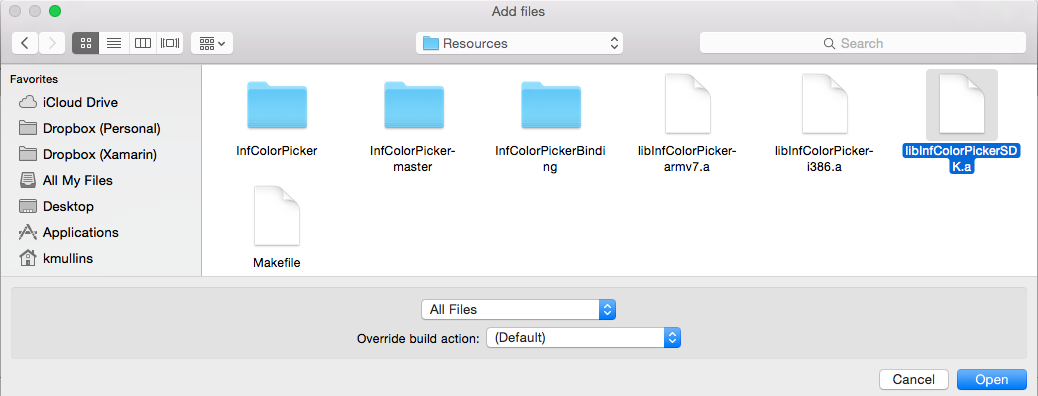
该文件将包含在项目中:
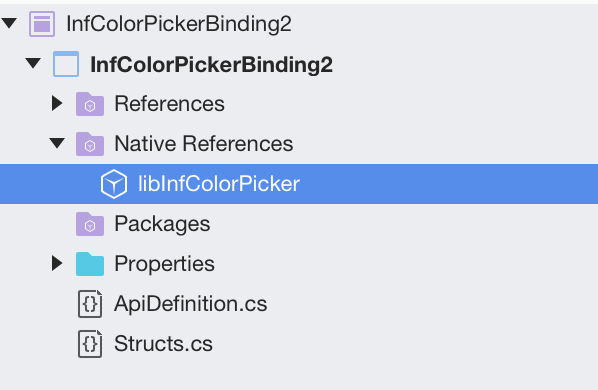
将 .a 文件添加到项目中时,Xamarin.iOS 会自动将文件的生成操作设置为 ObjcBindingNativeLibrary,并创建名为 libInfColorPickerSDK.linkwith.cs 的特殊文件。
此文件包含 LinkWith 属性,其告知 Xamarin.iOS 如何处理刚刚添加的静态库。 此文件的内容显示在以下代码片段中:
using ObjCRuntime;

[assembly: LinkWith ("libInfColorPickerSDK.a", SmartLink = true, ForceLoad = true)]
LinkWith 属性标识项目的静态库和一些重要的链接器标志。
接下来,我们需要做的是创建 InfColorPicker 项目的 API 定义。 在本演练中,我们将使用 Objective Sharpie 生成文件 ApiDefinition.cs。
使用 Objective Sharpie
Objective Sharpie 是一种命令行工具(由 Xamarin 提供),可帮助创建将第三方 Objective-C 库绑定到 C# 所需的定义。 在本部分中,我们将使用 Objective Sharpie 为 InfColorPicker 项目创建初始 ApiDefinition.cs。
首先,让我们下载本指南中详细介绍的 ObjectiveSharpie 安装程序文件。 运行安装程序,并按照安装向导中的所有屏幕提示操作,在开发计算机上安装 Objective Sharpie。
成功安装 Objective Sharpie 后,让我们启动终端应用并输入以下命令,获取它提供的所有工具的帮助,以帮助绑定:
sharpie -help
如果执行上述命令,将生成以下输出:
Europa:Resources kmullins$ sharpie -help
usage: sharpie [OPTIONS] TOOL [TOOL_OPTIONS]

Options:
  -h, --helpShow detailed help
  -v, --versionShow version information

Available Tools:
  xcode              Get information about Xcode installations and available SDKs.
  pod                Create a Xamarin C# binding to Objective-C CocoaPods
  bind               Create a Xamarin C# binding to Objective-C APIs
  update             Update to the latest release of Objective Sharpie
  verify-docs        Show cross reference documentation for [Verify] attributes
  docs               Open the Objective Sharpie online documentation
在本演练中,我们将使用以下 Objective Sharpie 工具:
- xcode - 此工具提供有关当前 Xcode 安装以及已安装的 iOS 和 Mac API 版本的信息。 稍后在生成绑定时,我们将使用此信息。
- bind -我们将使用此工具将 InfColorPicker 项目中的 .h 文件分析为初始 ApiDefinition.cs 和 StructsAndEnums.cs 文件。
若要获取有关特定 Objective Sharpie 工具的帮助,请输入该工具的名称和 -help 选项。 例如,sharpie xcode -help 返回以下输出:
Europa:Resources kmullins$ sharpie xcode -help
usage: sharpie xcode [OPTIONS]+

Options:
  -h, -help           Show detailed help
  -v, -verbose        Be verbose with output

Xcode Options:
  -sdks               List all available Xcode SDKs. Pass -verbose for more
                        details.
  -sdkpath SDK        Output the path of the SDK
  -frameworks SDK     List all available framework directories in a given SDK.
在开始绑定之前,需要通过在终端 sharpie xcode -sdks 中输入以下命令来获取有关当前安装的 SDK 的信息:
amyb:Desktop amyb$ sharpie xcode -sdks
sdk: appletvos9.2    arch: arm64
sdk: iphoneos9.3     arch: arm64   armv7
sdk: macosx10.11     arch: x86_64  i386
sdk: watchos2.2      arch: armv7
从上面可以看到,计算机上已安装 iphoneos9.3 SDK。 有了这些信息,我们就可以将 InfColorPicker 项目 .h 文件分析为 InfColorPickers 项目的初始 ApiDefinition.cs 和 StructsAndEnums.cs。
在终端应用中输入以下命令:
sharpie bind --output=InfColorPicker --namespace=InfColorPicker --sdk=[iphone-os] -scope [full-path-to-project]/InfColorPicker/InfColorPicker [full-path-to-project]/InfColorPicker/InfColorPicker/*.h
其中,[full-path-to-project] 是 InfColorPicker Xcode 项目文件在我们的计算机上所在目录的完整路径,而 [iphone os] 是我们已经安装的 iOS SDK,如 sharpie xcode -sdks 命令所述。 请注意,在本例中,我们传递了 *.h 作为参数,它包括该目录中的所有头文件 - 通常不应该这样做,而是仔细阅读头文件,找到引用所有其他相关文件的顶级 .h 文件,然后将其传递给 Objective Sharpie。
提示
对于 -scope 自变量,传入包含要绑定的标头的文件夹。
如果没有 -scope 自变量,Objective Sharpie 将尝试为导入的任何 iOS SDK 标头(例如 #import <UIKit.h>)生成绑定,从而生成一个巨大的定义文件,在编译绑定项目时可能会生成错误。 设置了 -scope 自变量后,Objective Sharpie 不会为范围内文件夹之外的任何标头生成绑定。
将在终端中生成以下输出:
Europa:Resources kmullins$ sharpie bind -output InfColorPicker -namespace InfColorPicker -sdk iphoneos8.1 /Users/kmullins/Projects/InfColorPicker/InfColorPicker/InfColorPicker.h -unified
Compiler configuration:
    -isysroot /Applications/Xcode.app/Contents/Developer/Platforms/iPhoneOS.platform/Developer/SDKs/iPhoneOS.sdk -miphoneos-version-min=8.1 -resource-dir /Library/Frameworks/ObjectiveSharpie.framework/Versions/1.1.1/clang-resources -arch armv7 -ObjC

[  0%] parsing /Users/kmullins/Projects/InfColorPicker/InfColorPicker/InfColorPicker.h
In file included from /Users/kmullins/Projects/InfColorPicker/InfColorPicker/InfColorPicker.h:60:
/Users/kmullins/Projects/InfColorPicker/InfColorPicker/InfColorPickerController.h:28:1: warning: no 'assign',
      'retain', or 'copy' attribute is specified - 'assign' is assumed [-Wobjc-property-no-attribute]
@property (nonatomic) UIColor* sourceColor;
^
/Users/kmullins/Projects/InfColorPicker/InfColorPicker/InfColorPickerController.h:28:1: warning: default property
      attribute 'assign' not appropriate for non-GC object [-Wobjc-property-no-attribute]
/Users/kmullins/Projects/InfColorPicker/InfColorPicker/InfColorPickerController.h:29:1: warning: no 'assign',
      'retain', or 'copy' attribute is specified - 'assign' is assumed [-Wobjc-property-no-attribute]
@property (nonatomic) UIColor* resultColor;
^
/Users/kmullins/Projects/InfColorPicker/InfColorPicker/InfColorPickerController.h:29:1: warning: default property
      attribute 'assign' not appropriate for non-GC object [-Wobjc-property-no-attribute]
4 warnings generated.
[100%] parsing complete
[bind] InfColorPicker.cs
Europa:Resources kmullins$
将在目录中创建 InfColorPicker.enums.cs 和 InfColorPicker.cs 文件:

在上面创建的绑定项目中打开这两个文件。 复制 InfColorPicker.cs 文件的内容并将其粘贴到 ApiDefinition.cs 文件中,将现有 namespace ... 代码块替换为 InfColorPicker.cs 文件的内容(使 using 语句保持不变):
规范化 API 定义
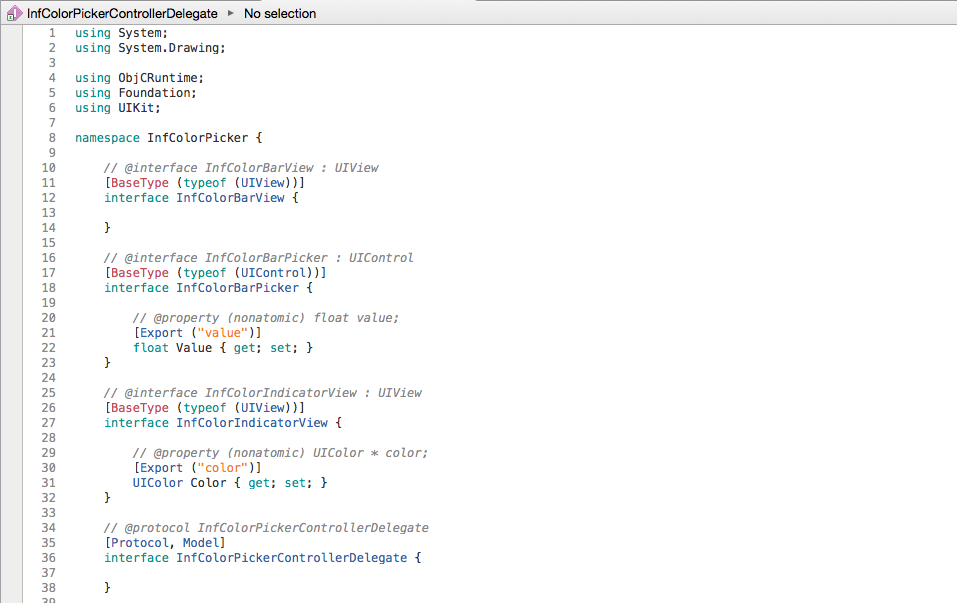
Objective Sharpie 有时在转换 Delegates 时会出现问题,因此我们需要修改 InfColorPickerControllerDelegate 接口的定义,并将 [Protocol, Model] 行替换为以下内容:
[BaseType(typeof(NSObject))]
[Model]
因此,定义如下所示:

接下来,我们对 InfColorPicker.enums.cs 文件的内容执行相同的操作,在 StructsAndEnums.cs 文件中复制和粘贴它们,使 using 语句保持不变:

还可能发现 Objective Sharpie 已使用 [Verify] 属性对绑定进行了注释。 这些属性指示应通过将绑定与原始 C/Objective-C 声明进行比较(将在绑定声明上方的注释中提供)来验证 Objective Sharpie 是否执行了正确的操作。 验证绑定后,应删除 verify 属性。 有关详细信息,请参阅 Verify 指南。
此时,绑定项目应已完成并准备好生成。 让我们生成绑定项目,并确保最终没有错误:
使用绑定
按照以下步骤创建示例 iPhone 应用程序,以使用上面创建的 iOS 绑定库:
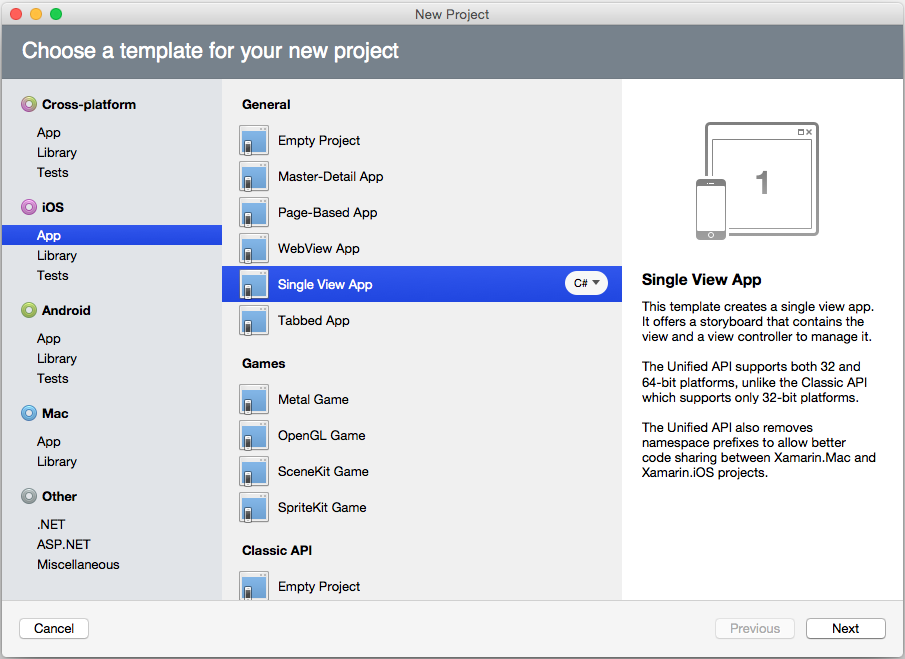
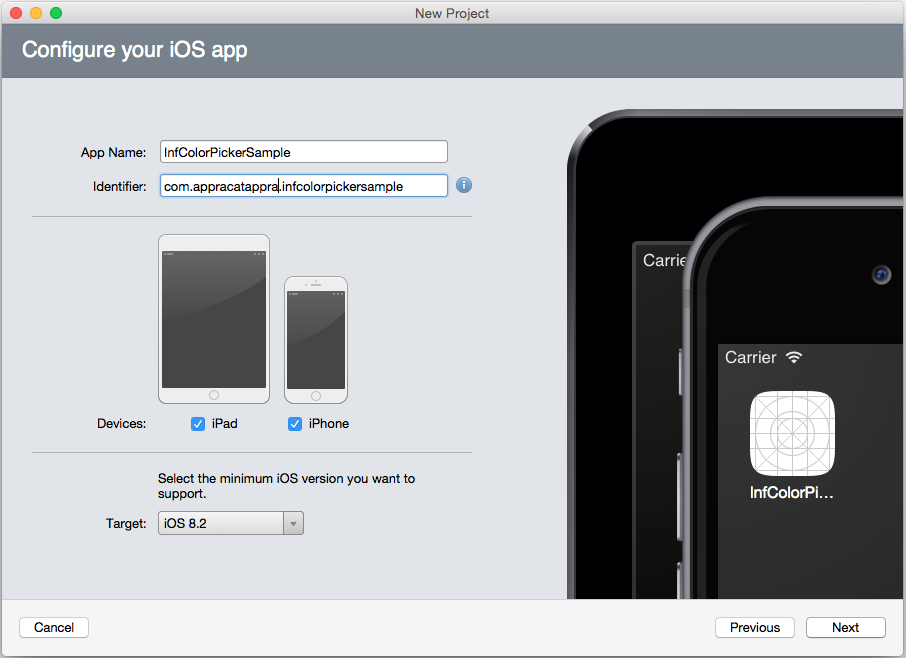
创建 Xamarin.iOS 项目 - 将名为 InfColorPickerSample 的新 Xamarin.iOS 项目添加到解决方案,如以下屏幕截图所示:
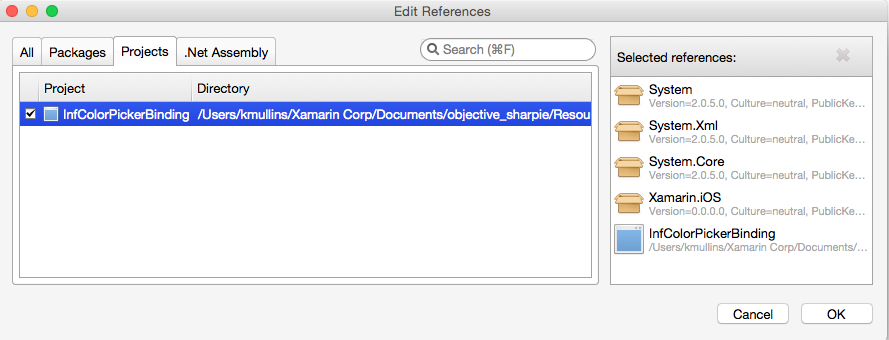
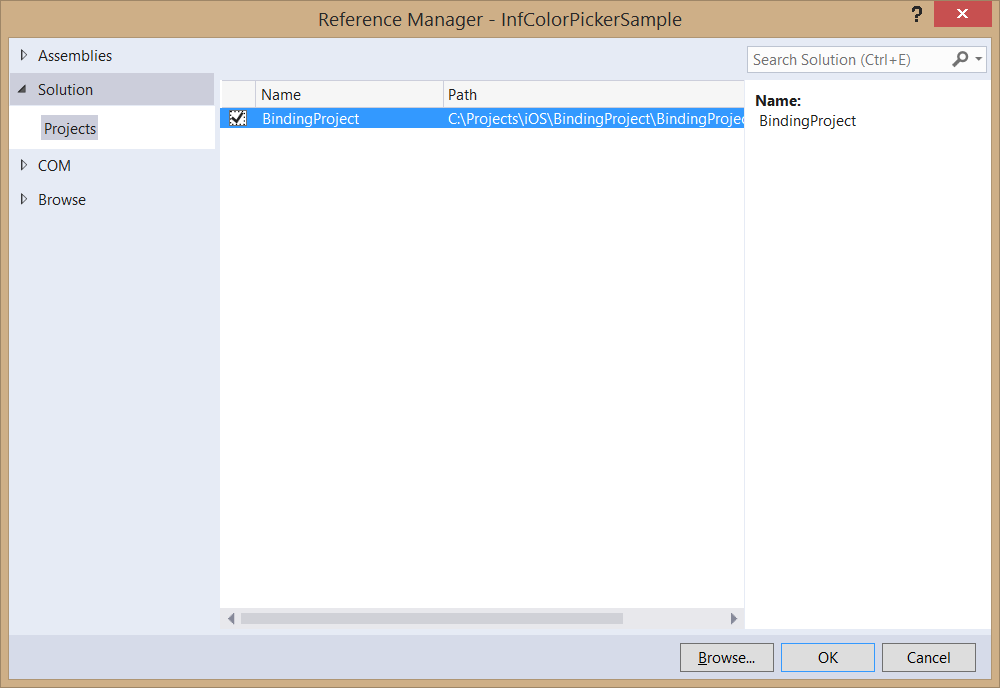
添加对绑定项目的引用 - 更新 InfColorPickerSample 项目,使其具有对 InfColorPickerBinding 项目的引用:
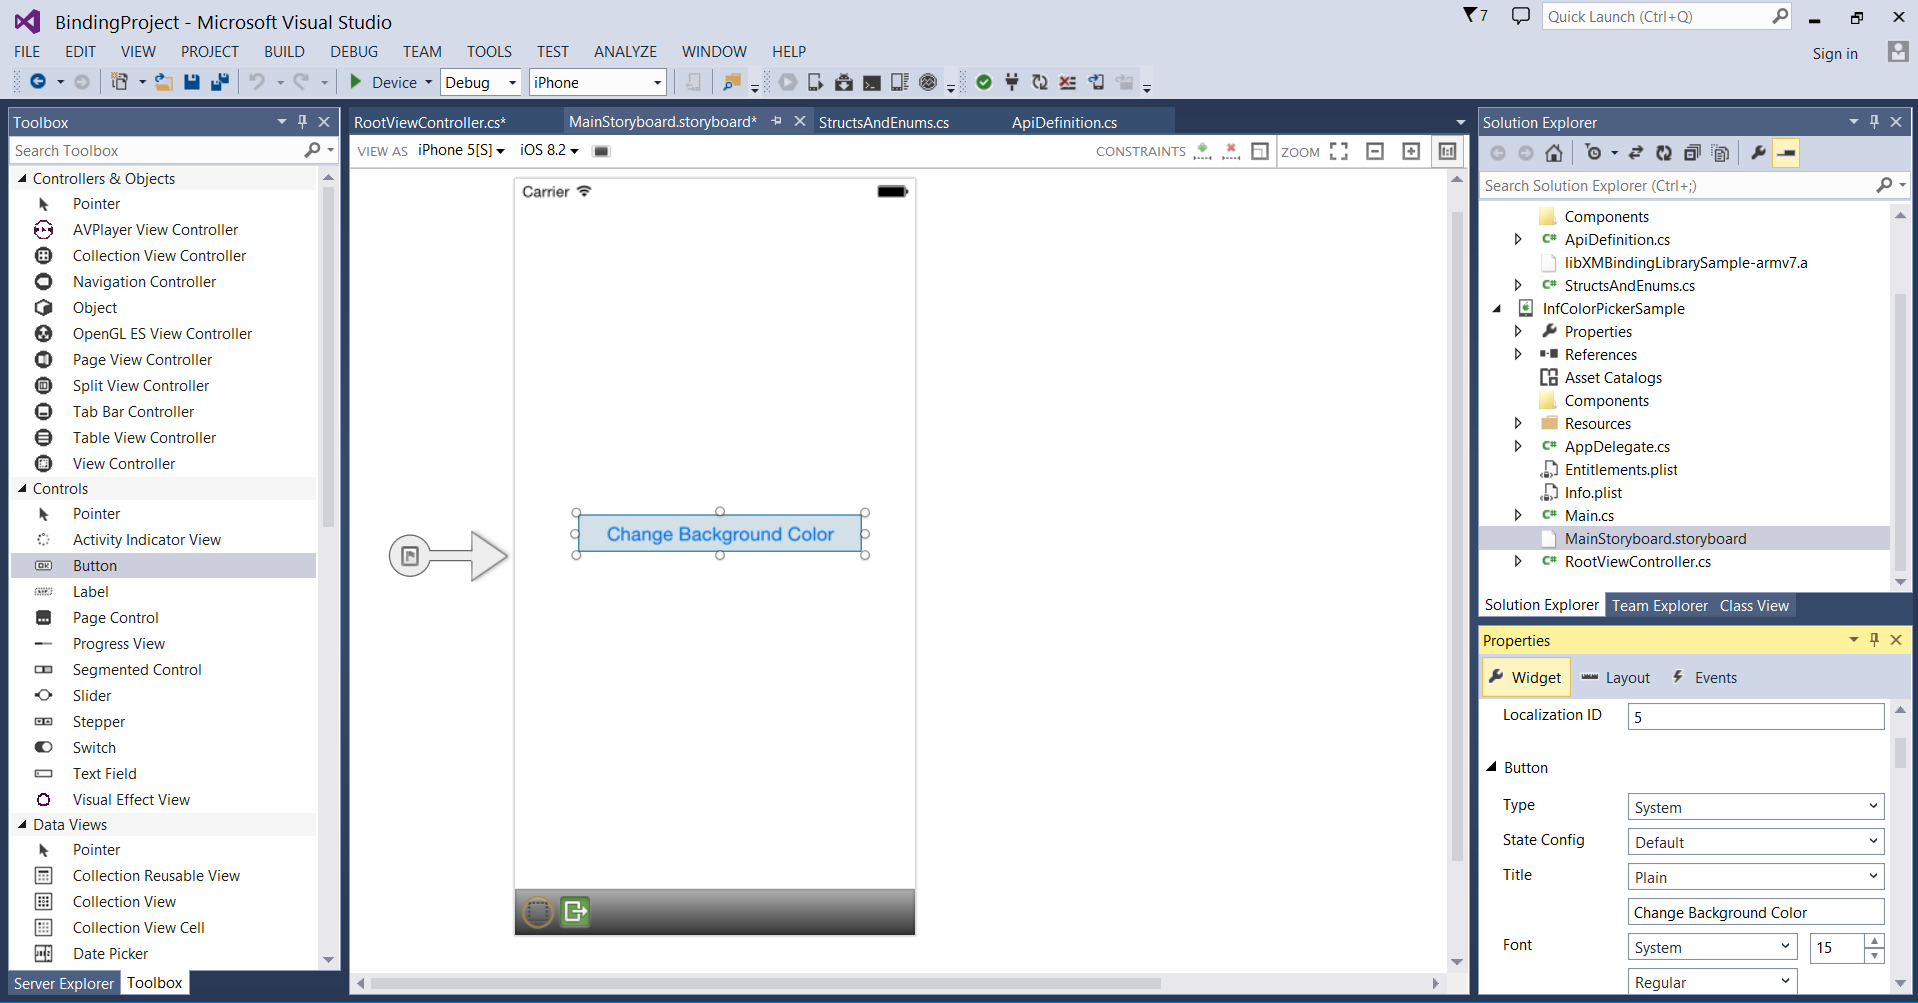
创建 iPhone 用户界面 - 双击 InfColorPickerSample 项目中的 MainStoryboard.storyboard 文件,在 iOS 设计器中对其进行编辑。 向视图添加 Button 并将其称为
ChangeColorButton,如下所示: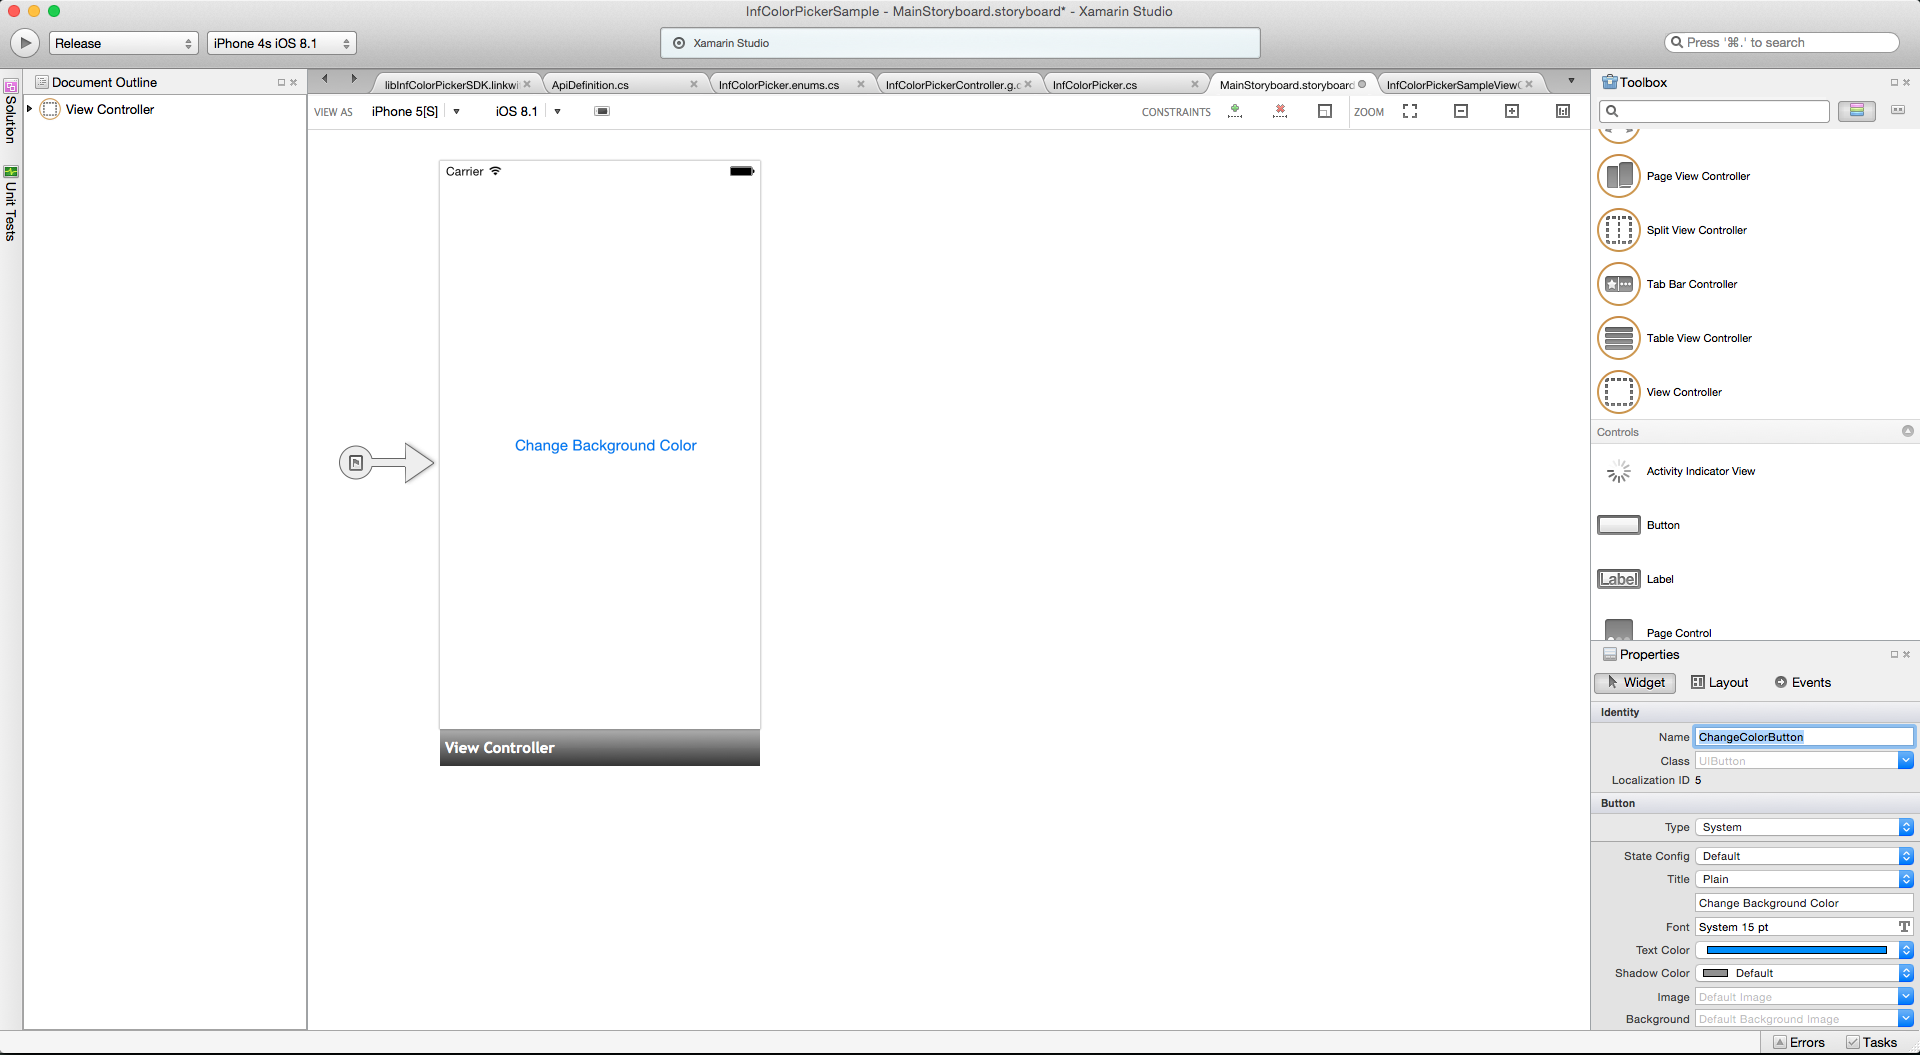
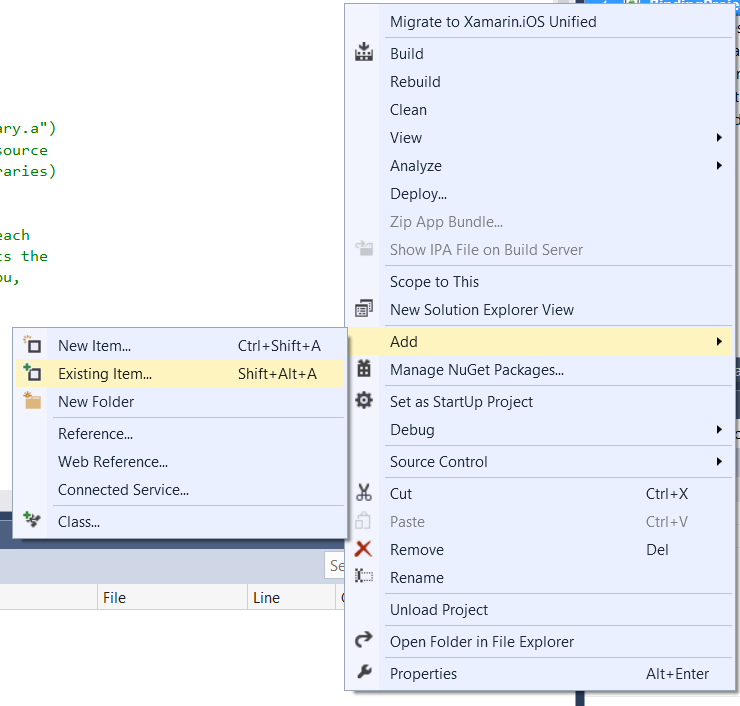
添加 InfColorPickerView.xib - InfColorPicker Objective-C 库包含 .xib 文件。 Xamarin.iOS 不会在绑定项目中包括此 .xib,这将导致示例应用程序中出现运行时错误。 此问题的解决方法是将 .xib 文件添加到 Xamarin.iOS 项目。 选择 Xamarin.iOS 项目,右键单击并选择“添加”>“添加文件”,然后添加 .xib 文件,如以下屏幕截图所示:
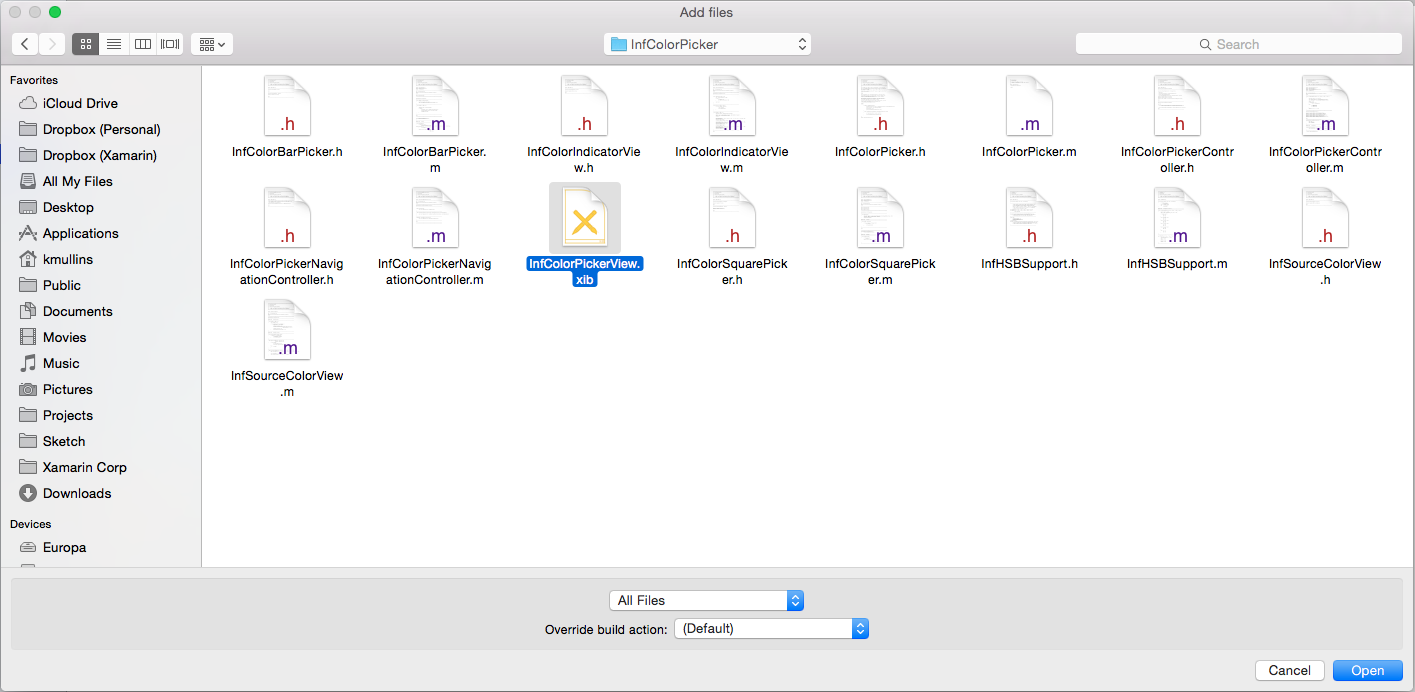
当系统询问时,请将 .xib 文件复制到项目中。


接下来,让我们快速了解 Objective-C 中的协议,以及如何在绑定和 C# 代码中处理协议。
协议和 Xamarin.iOS
在 Objective-C 中,协议定义在某些情况下可以使用的方法(或消息)。 从概念上讲,它们与 C# 中的接口非常相似。 Objective-C 协议和 C# 接口之间的一个主要区别是,协议可以具有可选方法 - 类不需要实现的方法。 Objective-C 使用 @optional 关键字来指示哪些方法是可选的。 有关协议的详细信息,请参阅事件、协议和委托。
InfColorPickerController 有一种此类协议,如以下代码片段所示:
@protocol InfColorPickerControllerDelegate

@optional

- (void) colorPickerControllerDidFinish: (InfColorPickerController*) controller;
// This is only called when the color picker is presented modally.

- (void) colorPickerControllerDidChangeColor: (InfColorPickerController*) controller;

@end
InfColorPickerController 使用此协议来通知客户端用户已选取新颜色以及 InfColorPickerController 已完成。 Objective Sharpie 映射了此协议,如以下代码片段所示:
[BaseType(typeof(NSObject))]
[Model]
public partial interface InfColorPickerControllerDelegate {

    [Export ("colorPickerControllerDidFinish:")]
    void ColorPickerControllerDidFinish (InfColorPickerController controller);

    [Export ("colorPickerControllerDidChangeColor:")]
    void ColorPickerControllerDidChangeColor (InfColorPickerController controller);
}
编译绑定库时,Xamarin.iOS 将创建一个名为 InfColorPickerControllerDelegate 的抽象基类,该基类使用虚拟方法实现此接口。
可通过两种方式在 Xamarin.iOS 应用程序中实现此接口:
- 强委托 - 使用强委托涉及创建一个 C# 类,其子类化
InfColorPickerControllerDelegate并替代适当的方法。 InfColorPickerController 将使用此类的实例与其客户端进行通信。 - 弱委托 - 弱委托是一种略有不同的技术,涉及在某些类(如
InfColorPickerSampleViewController)上创建公共方法,然后通过Export特性向InfColorPickerDelegate协议公开该方法。
强委托提供 Intellisense、类型安全性以及更好的封装。 出于这些原因,应使用强委托,而不是弱委托。
在本演练中,我们将讨论这两种技术:首先实现强委托,然后说明如何实现弱委托。
实现强委托
通过使用强委托响应 colorPickerControllerDidFinish: 消息来完成 Xamarin.iOS 应用程序:
子类化 InfColorPickerControllerDelegate - 向名为 ColorSelectedDelegate 的项目添加新类。 编辑类,使其具有以下代码:
using InfColorPickerBinding;
using UIKit;

namespace InfColorPickerSample
{
  public class ColorSelectedDelegate:InfColorPickerControllerDelegate
  {
    readonly UIViewController parent;

    public ColorSelectedDelegate (UIViewController parent)
    {
      this.parent = parent;
    }

    public override void ColorPickerControllerDidFinish (InfColorPickerController controller)
    {
      parent.View.BackgroundColor = controller.ResultColor;
      parent.DismissViewController (false, null);
    }
  }
}
Xamarin.iOS 将通过创建名为 InfColorPickerControllerDelegate 的抽象基类来绑定 Objective-C 委托。 子类化此类型,并替代 ColorPickerControllerDidFinish 方法来访问 InfColorPickerController 的 ResultColor 属性的值。
创建 ColorSelectedDelegate 实例 - 事件处理程序将需要我们在上一步中创建的 ColorSelectedDelegate 类型的实例。 编辑类 InfColorPickerSampleViewController,并将以下实例变量添加到该类:
ColorSelectedDelegate selector;
初始化 ColorSelectedDelegate 变量 - 若要确保 selector 是有效的实例,请更新 ViewController 中的方法 ViewDidLoad,以匹配以下代码片段:
public override void ViewDidLoad ()
{
  base.ViewDidLoad ();
  ChangeColorButton.TouchUpInside += HandleTouchUpInsideWithStrongDelegate;
  selector = new ColorSelectedDelegate (this);
}
实现方法 HandleTouchUpInsideWithStrongDelegate - 接下来实现当用户触摸 ColorChangeButton 时的事件处理程序。 编辑 ViewController,并添加以下方法:
using InfColorPicker;
...

private void HandleTouchUpInsideWithStrongDelegate (object sender, EventArgs e)
{
    InfColorPickerController picker = InfColorPickerController.ColorPickerViewController();
    picker.Delegate = selector;
    picker.PresentModallyOverViewController (this);
}
我们首先通过静态方法获得 InfColorPickerController 的一个实例,并通过属性 InfColorPickerController.Delegate 使该实例知道我们的强委托。 此属性是由 Objective Sharpie 自动为我们生成的。 最后,我们调用 PresentModallyOverViewController 来显示视图 InfColorPickerSampleViewController.xib,以便用户可以选择颜色。
运行应用程序 - 此时,我们完成了所有代码。 如果运行应用程序,则应能够更改 InfColorColorPickerSampleView 的背景色,如以下屏幕截图所示:
祝贺你! 目前,你已经成功创建并绑定了一个 Objective-C 库,以便在 Xamarin.iOS 应用程序中使用。 接下来,让我们了解如何使用弱委托。
实现弱委托
Xamarin.iOS 还允许在派生自 NSObject 的任何类中实现协议方法,使用 ExportAttribute 修饰方法,然后提供适当的选择器,而不是为特定委托子类化绑定到 Objective-C 协议的类。 采用此方法时,请将类的实例分配给 WeakDelegate 属性而不是 Delegate 属性。 弱委托使你可以灵活地将委托类向下放到不同的继承层次结构。 让我们看看如何在 Xamarin.iOS 应用程序中实现和使用弱委托。
为 TouchUpInside 创建事件处理程序 - 让我们为“更改背景色”按钮的 TouchUpInside 事件创建新的事件处理程序。 此处理程序将填充与我们在上一部分中创建的 HandleTouchUpInsideWithStrongDelegate 处理程序相同的角色,但将使用弱委托而不是强委托。 编辑类 ViewController,并添加以下方法:
private void HandleTouchUpInsideWithWeakDelegate (object sender, EventArgs e)
{
    InfColorPickerController picker = InfColorPickerController.ColorPickerViewController();
    picker.WeakDelegate = this;
    picker.SourceColor = this.View.BackgroundColor;
    picker.PresentModallyOverViewController (this);
}
更新 ViewDidLoad - 我们必须更改 ViewDidLoad,以便它使用刚刚创建的事件处理程序。 编辑 ViewController 并更改 ViewDidLoad,使其类似于以下代码片段:
public override void ViewDidLoad ()
{
    base.ViewDidLoad ();
    ChangeColorButton.TouchUpInside += HandleTouchUpInsideWithWeakDelegate;
}
处理 colorPickerControllerDidFinish: 消息 - ViewController 完成后,iOS 会将消息 colorPickerControllerDidFinish: 发送到 WeakDelegate。 我们需要创建可以处理此消息的 C# 方法。 为此,我们将创建一个 C# 方法,然后使用 ExportAttribute 对其进行装饰。 编辑 ViewController,并将以下方法添加到类:
[Export("colorPickerControllerDidFinish:")]
public void ColorPickerControllerDidFinish (InfColorPickerController controller)
{
    View.BackgroundColor = controller.ResultColor;
    DismissViewController (false, null);
}
运行该应用程序。 它现在的行为应该与以前完全相同,但它使用弱委托而不是强委托。 此时,你已成功完成本演练。 现在,你应该了解了如何创建和使用 Xamarin.iOS 绑定项目。
总结
本文介绍了创建和使用 Xamarin.iOS 绑定项目的过程。 首先,我们讨论了如何将现有 Objective-C 库编译为静态库。 然后,我们介绍了如何创建 Xamarin.iOS 绑定项目,以及如何使用 Objective Sharpie 生成 Objective-C 库的 API 定义。 我们讨论了如何更新和调整生成的 API 定义,使其适合公共使用。 在 Xamarin.iOS 绑定项目完成后,我们继续在 Xamari.iOS 应用程序中使用该绑定,重点是使用强委托和弱委托。