快速入門:使用 ARM 範本部署容器執行個體
使用 Azure 容器執行個體在 Azure 中簡潔且快速地執行無伺服器 Docker 容器。 當您不需要像 Azure Kubernetes Service 的完整容器協調流程平台時,請視需要將應用程式部署至容器執行個體。 在本快速入門中,您會使用 Azure Resource Manager 範本 (ARM 範本) 部署隔離的 Docker 容器,並讓其 Web 應用程式可透過公用 IP 位址使用。
Azure Resource Manager 範本是一個 JavaScript 物件標記法 (JSON) 檔案,會定義專案的基礎結構和設定。 範本使用宣告式語法。 您可以描述預期的部署,而不需要撰寫程式設計命令順序來建立部署。
如果您的環境符合必要條件,而且您很熟悉 ARM 範本,請選取 [部署至 Azure] 按鈕。 範本會在 Azure 入口網站中開啟。

必要條件
如果您沒有 Azure 訂用帳戶,請在開始前建立免費帳戶。
檢閱範本
本快速入門中使用的範本是來自 Azure 快速入門範本。
{
  "$schema": "https://schema.management.azure.com/schemas/2019-04-01/deploymentTemplate.json#",
  "contentVersion": "1.0.0.0",
  "metadata": {
    "_generator": {
      "name": "bicep",
      "version": "0.26.54.24096",
      "templateHash": "15999594271314721416"
    }
  },
  "parameters": {
    "name": {
      "type": "string",
      "defaultValue": "acilinuxpublicipcontainergroup",
      "metadata": {
        "description": "Name for the container group"
      }
    },
    "location": {
      "type": "string",
      "defaultValue": "[resourceGroup().location]",
      "metadata": {
        "description": "Location for all resources."
      }
    },
    "image": {
      "type": "string",
      "defaultValue": "mcr.microsoft.com/azuredocs/aci-helloworld",
      "metadata": {
        "description": "Container image to deploy. Should be of the form repoName/imagename:tag for images stored in public Docker Hub, or a fully qualified URI for other registries. Images from private registries require additional registry credentials."
      }
    },
    "port": {
      "type": "int",
      "defaultValue": 80,
      "metadata": {
        "description": "Port to open on the container and the public IP address."
      }
    },
    "cpuCores": {
      "type": "int",
      "defaultValue": 1,
      "metadata": {
        "description": "The number of CPU cores to allocate to the container."
      }
    },
    "memoryInGb": {
      "type": "int",
      "defaultValue": 2,
      "metadata": {
        "description": "The amount of memory to allocate to the container in gigabytes."
      }
    },
    "restartPolicy": {
      "type": "string",
      "defaultValue": "Always",
      "allowedValues": [
        "Always",
        "Never",
        "OnFailure"
      ],
      "metadata": {
        "description": "The behavior of Azure runtime if container has stopped."
      }
    }
  },
  "resources": [
    {
      "type": "Microsoft.ContainerInstance/containerGroups",
      "apiVersion": "2023-05-01",
      "name": "[parameters('name')]",
      "location": "[parameters('location')]",
      "properties": {
        "containers": [
          {
            "name": "[parameters('name')]",
            "properties": {
              "image": "[parameters('image')]",
              "ports": [
                {
                  "port": "[parameters('port')]",
                  "protocol": "TCP"
                }
              ],
              "resources": {
                "requests": {
                  "cpu": "[parameters('cpuCores')]",
                  "memoryInGB": "[parameters('memoryInGb')]"
                }
              }
            }
          }
        ],
        "osType": "Linux",
        "restartPolicy": "[parameters('restartPolicy')]",
        "ipAddress": {
          "type": "Public",
          "ports": [
            {
              "port": "[parameters('port')]",
              "protocol": "TCP"
            }
          ]
        }
      }
    }
  ],
  "outputs": {
    "name": {
      "type": "string",
      "value": "[parameters('name')]"
    },
    "resourceGroupName": {
      "type": "string",
      "value": "[resourceGroup().name]"
    },
    "resourceId": {
      "type": "string",
      "value": "[resourceId('Microsoft.ContainerInstance/containerGroups', parameters('name'))]"
    },
    "containerIPv4Address": {
      "type": "string",
      "value": "[reference(resourceId('Microsoft.ContainerInstance/containerGroups', parameters('name')), '2023-05-01').ipAddress.ip]"
    },
    "location": {
      "type": "string",
      "value": "[parameters('location')]"
    }
  }
}
範本中已定義下列資源:
- Microsoft.ContainerInstance/containerGroups:建立 Azure 容器群組。 此範本會定義由單一容器執行個體組成的群組。
您可以在快速入門範本資源庫中找到更多 Azure 容器執行個體範本的範例。
部署範本
選取以下影像來登入 Azure 並開啟範本。 此範本會在另一個位置建立登錄和複本。
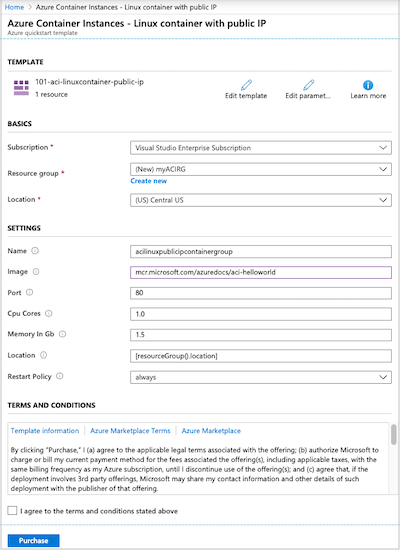
選取或輸入下列值。
- 訂用帳戶:選取 Azure 訂用帳戶。
- 資源群組:選取 [新建],輸入資源群組的唯一名稱,然後選取 [確認]。
- 位置:選取資源群組的位置。 範例:美國中部。
- 名稱:接受為執行個體產生的名稱,或輸入名稱。
- 映像:接受預設映像名稱。 此範例 Linux 映像會封裝以 Node.js 撰寫並提供靜態 HTML 網頁的小型 Web 應用程式。
接受其餘屬性的預設值。
檢閱條款及條件。 若同意,請選取 [我同意上方所述的條款及條件]。
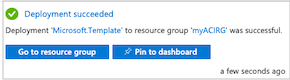
成功部署執行個體之後,您會收到通知:
Azure 入口網站用於部署範本。 除了 Azure 入口網站,您可以使用 Azure PowerShell、Azure CLI 和 REST API。 若要了解其他部署方法,請參閱部署範本。
檢閱已部署的資源
使用 Azure 入口網站或 Azure CLI 之類的工具來檢閱容器執行個體的內容。
在入口網站中,搜尋容器執行個體,然後選取您建立的容器執行個體。
在 [概觀] 頁面上,注意執行個體的狀態及其 IP 位址。
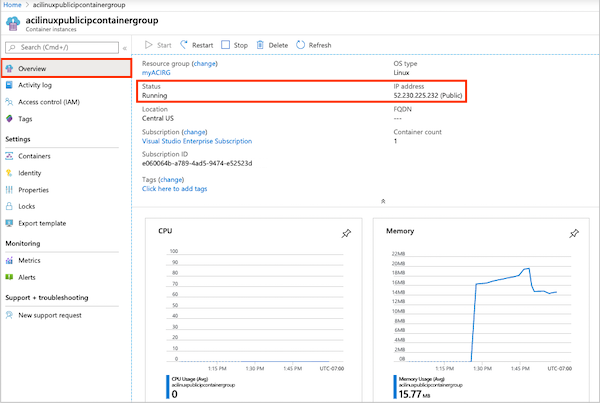
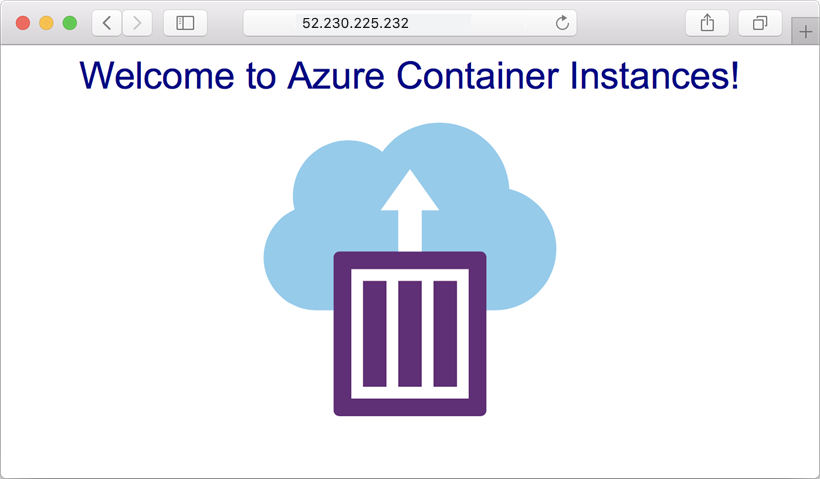
當其狀態成為「執行中」時,請在瀏覽器中瀏覽至 IP 位址。
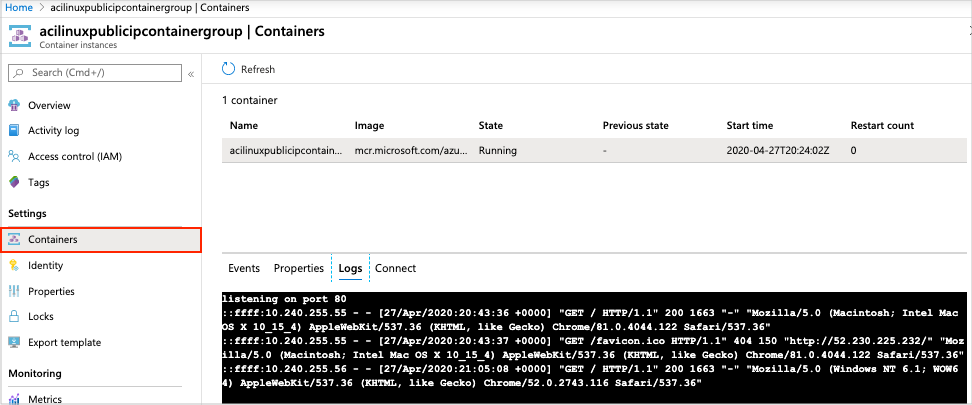
檢視容器記錄
在對您的容器或其執行的應用程式排解問題時,檢視的容器執行個體的記錄會很有幫助。
若要檢視容器的記錄,請在 [設定] 下選取 [容器]>[記錄]。 您應該會看到您在瀏覽器中檢視應用程式時產生的 HTTP GET 要求。
清除資源
完成容器的作業後,請在容器執行個體的概觀頁面選取 [刪除]。 出現提示時,確認刪除。
下一步
在本快速入門中,您已從公用 Microsoft 映像建立 Azure 容器執行個體。 如果您想要建置容器映像,並從私人的 Azure 容器登錄進行部署,請繼續進行 Azure Container Instances 教學課程。
如需逐步教學課程,以引導您完成建立範本的流程,請參閱:
意見反映
即將推出:我們會在 2024 年淘汰 GitHub 問題,並以全新的意見反應系統取代並作為內容意見反應的渠道。 如需更多資訊,請參閱:https://aka.ms/ContentUserFeedback。
提交及檢視以下的意見反映: